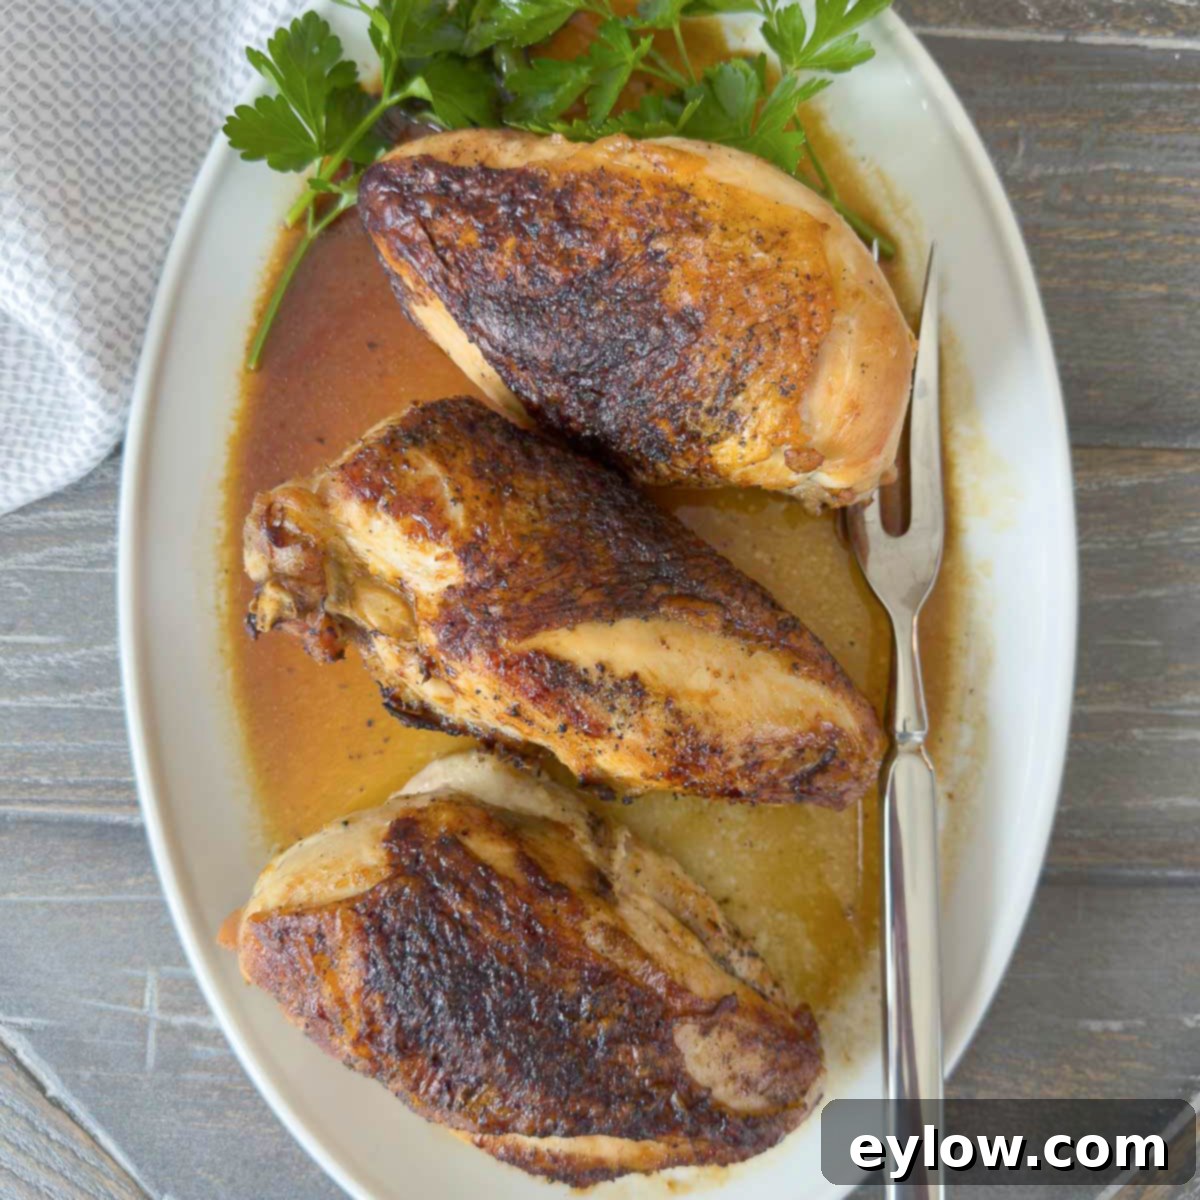
Perfectly Juicy & Crispy Roast Bone-In Split Chicken Breast: Your Ultimate Easy Weeknight Dinner
Discover the secret to perfectly cooked, irresistibly juicy, and crispy roast split chicken breast every single time. This recipe is more than just a meal; it’s a culinary revelation that will simplify your dinner routine and delight your taste buds. With a foolproof method designed for success, you’ll achieve succulent chicken packed with incredible flavor, making it an instant family favorite. Whether you’re a seasoned chef or a kitchen novice, this straightforward approach guarantees delicious results. Plus, making a few extra means you’ll have versatile leftovers ready for quick lunches or additional easy dinners like vibrant chicken salads, comforting soups, or hearty sandwiches. Embrace this recipe for bone-in roast chicken breast, and watch it become an indispensable staple on your weekly menu!
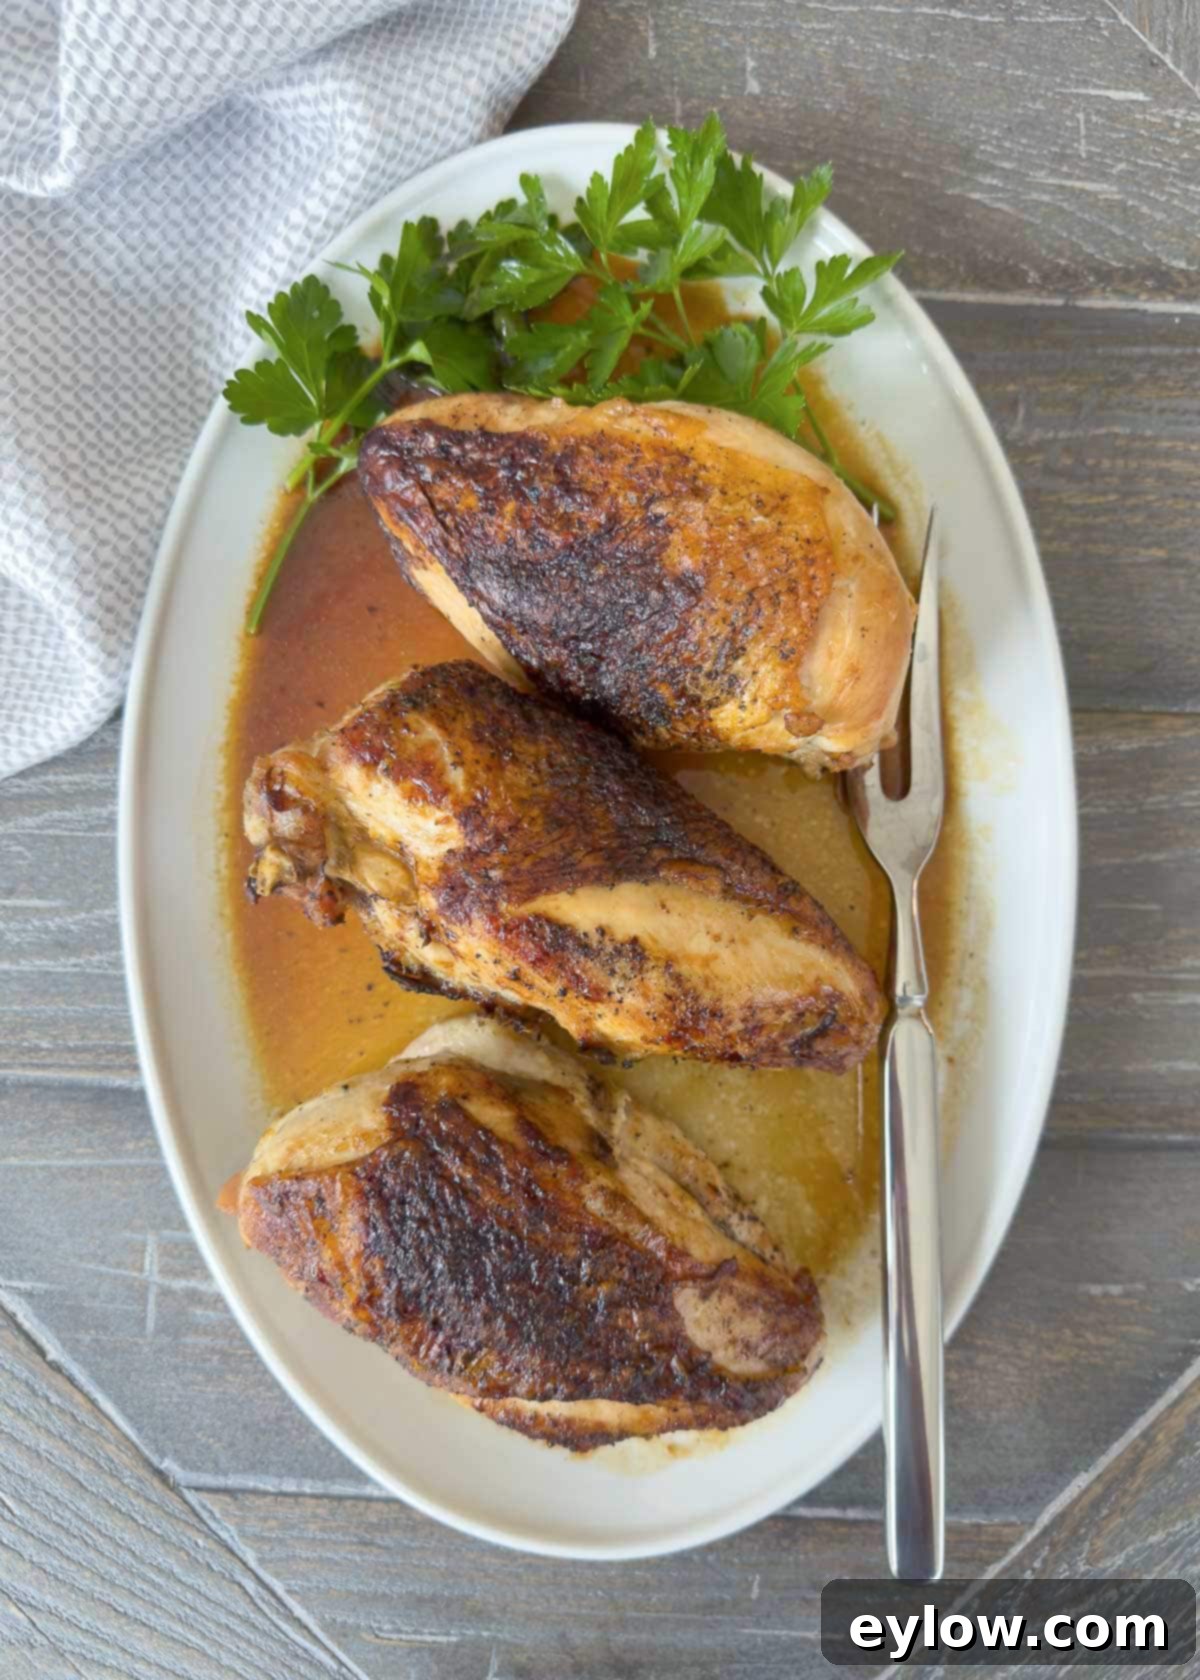
If the thought of cooking bone-in chicken breast has ever intimidated you, prepare to have your culinary world transformed. This recipe isn’t just easy; it’s a foundational skill that will empower you in the kitchen. Bone-in, skin-on chicken breasts offer superior flavor and moisture retention compared to their boneless, skinless counterparts, and they are often a more economical choice. Once you’ve made this incredibly simple dish a couple of times, you’ll likely commit the method to memory, freeing you from constant recipe checks. It’s a testament to how effortless gourmet-quality home cooking can be.
[feast_advanced_jump_to]
Why This Roast Chicken Breast Recipe Belongs in Your Kitchen
This roast split chicken breast recipe is more than just a meal idea; it’s a culinary cornerstone offering numerous advantages. Here’s why it should be your next go-to dinner:
- Budget-Friendly Protein: Bone-in, skin-on chicken breasts are often significantly more economical than boneless, skinless cuts. This allows you to enjoy high-quality protein without breaking the bank, making healthy eating accessible and sustainable.
- Effortless Mastery: Once you’ve prepared this dish a few times, the simple steps become intuitive. You’ll gain confidence in your cooking abilities and eventually won’t even need to consult the recipe, making weeknight dinners stress-free.
- Unrivaled Juiciness and Flavor: Say goodbye to dry, bland chicken! The bone helps conduct heat evenly and adds depth of flavor, while the skin protects the meat and crisps up beautifully, sealing in moisture. The result is consistently juicy, incredibly flavorful, and truly delicious chicken every time.
- Sophisticated Simplicity: Despite its ease, this recipe delivers a satisfyingly rich flavor profile that feels far from boring. It’s the perfect balance of simplicity and gourmet appeal, suitable for both casual family dinners and more special occasions.
- Your New Weeknight Hero: This method is designed for busy evenings. With minimal prep and active cooking time, it quickly becomes a reliable, go-to recipe for an easy dinner that never fails to impress.
- Maximized Leftover Potential: Cook a couple of extra chicken breasts to unlock a world of effortless future meals. Leftovers transform into delicious ingredients for chicken soup or chili, flavorful chicken tacos or quesadillas, and classic chicken salads, saving you time and effort later in the week.
While your chicken breasts are roasting to golden perfection, you’ll have ample time to prepare your favorite complementary side dishes, such as roasted vegetables or creamy mashed potatoes, and toss a fresh, crisp salad. This allows for a complete and wholesome meal with minimal fuss.
Essential Ingredients for Perfect Roast Chicken Breast
One of the beauties of this oven-baked bone-in chicken breast recipe lies in its simplicity. You only need a handful of basic ingredients to create a truly spectacular meal. The core components are simply chicken, salt, and pepper – but the right choices make all the difference.
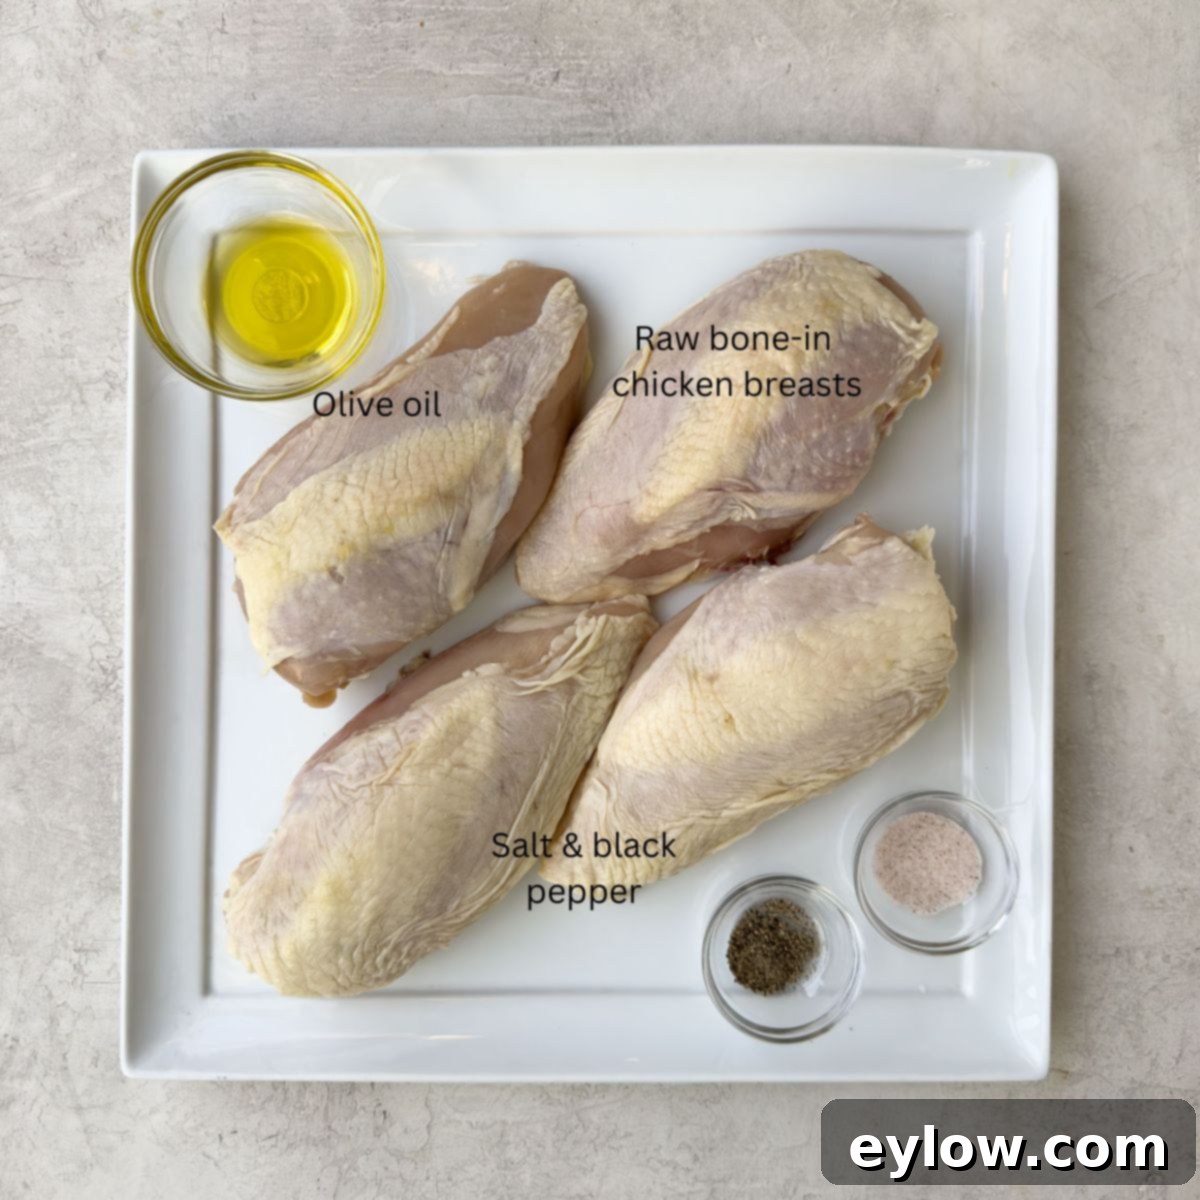
- Bone-In, Skin-On Chicken Breast: This is the star of our dish. Opt for bone-in chicken breasts with the skin intact. They consistently deliver more flavor and retain moisture better than boneless, skinless varieties. You might find them labeled as “split chicken breasts,” which refers to individual halves of a whole chicken breast that were once connected. You can easily split a whole chicken breast yourself with a sharp knife, or ask your butcher to do it for you. The skin is crucial for that desirable golden, crispy texture.
- High-Quality Oil: For searing and seasoning, use a healthy, high-smoke-point oil. Excellent choices include extra virgin olive oil or avocado oil. These oils add subtle flavor and perform well under heat. What to avoid? Standard industrial vegetable oils like canola, corn, or soybean oil, which are often highly processed and less beneficial for health.
- Simple Seasoning: A classic pairing of sea salt or kosher salt and freshly ground black pepper is all you truly need. These fundamental seasonings enhance the chicken’s natural flavors without overpowering them. Feel free to experiment with other spices later, but master the basics first.
- Deglazing Liquid (Optional but Recommended): A splash of liquid is used to deglaze the pan after searing, capturing all the delicious browned bits (fond) and creating a quick, flavorful pan sauce. Dry white wine, such as Chardonnay or Sauvignon Blanc, is an excellent choice. If you prefer not to use alcohol, unsalted chicken broth or vegetable broth works beautifully.
- Unsalted Butter (Optional): A small pat of unsalted butter added towards the end of roasting melts over the chicken, contributing to an even crispier skin and richer pan juices. Using unsalted butter gives you complete control over the overall saltiness of your dish.
Consider preparing an extra chicken breast or two! The cooked chicken is fantastic for making a hearty and flavorful turkey and wild mushroom soup (simply substitute the chicken for turkey) or any other recipe calling for cooked chicken. It’s the ultimate ingredient for quick meal transformations.
Chef’s Tip on Cooking Oil: Reconsider the oils in your pantry. Many standard “vegetable oils” are industrially produced using harsh chemicals, often from genetically modified crops, and are not ideal for your health. If you have any, it might be time to replace them with healthier alternatives. For a comprehensive understanding, here’s a great article that explains why. While some myths suggest olive oil isn’t suitable for cooking at higher temperatures, this is largely untrue. You can cook with olive oil; just avoid heating it to its smoke point, which is true for any oil. Other excellent and healthy options include avocado oil, grapeseed oil, or innovative new vegetable oil replacements that offer superior nutrition and cooking properties.
Unlock More Flavor: Substitutions and Creative Variations
This roast chicken breast recipe is wonderfully adaptable, allowing you to customize flavors to your preference or what you have on hand.
- Enhance with Butter: Adding a small amount of unsalted butter during baking or just before roasting isn’t just for richness; it helps create even more luscious pan juices. These juices are liquid gold, perfect for spooning over the finished chicken and accompanying side dishes. I always recommend and exclusively buy unsalted butter to maintain precise control over the salt content in my recipes. If you’re using salted butter, remember to adjust the amount of additional salt you season the chicken with.
- Deglazing the Pan for a Deeper Sauce: While dry white wine is my go-to for deglazing, several excellent alternatives can achieve similar delicious results. Chicken broth or vegetable broth works beautifully, either alone or brightened with a squeeze of fresh lemon juice. Another sophisticated option is French dry white vermouth, which is a white wine infused with aromatic herbs and often available in convenient smaller bottles at many liquor or grocery stores. If you don’t have any liquids on hand, you can skip this step entirely; the chicken will still be flavorful, though you’ll miss out on the rich pan sauce.
- Elevate with Compound Butter: For an extra layer of gourmet flavor, place thin slices of herbed compound butter on top of each chicken breast before it goes into the oven. A simple compound butter can be made by mixing softened unsalted butter with fresh herbs like rosemary, thyme, parsley, minced garlic, and a pinch of salt and pepper.
- Spice It Up: Beyond salt and pepper, consider a dry rub. Paprika adds color and a smoky note, garlic powder and onion powder provide savory depth, while a sprinkle of dried Italian herbs or herbs de Provence can transport your dish to the Mediterranean. For a kick, a pinch of cayenne pepper or chili powder works wonders.
- Roast with Vegetables: For a complete one-pan meal, add robust vegetables like chopped carrots, potatoes, onions, or Brussels sprouts to the baking sheet during the last 20-30 minutes of roasting. Toss them with a little olive oil, salt, and pepper first.
If you’re seeking a different take on baked chicken with a southern flair, you might enjoy this crispy southern baked chicken thighs recipe from my friend Lori.
Chef’s Tip for Cooking with Wine: There’s no need to open a full-sized bottle of wine if you only need a small amount for deglazing. Many grocery store wine departments now carry mini, airline-sized bottles (typically 187ml) of Chardonnay or Sauvignon Blanc. They are an inexpensive and convenient solution, ensuring you don’t waste an entire bottle for a recipe that calls for just a third of a cup.
Step-by-Step Instructions for Flawless Roast Chicken Breast
Achieving a golden-brown, crispy skin and incredibly juicy meat starts with proper preparation. Follow these simple steps for a perfect roast chicken breast every time.
Pre-Cook Prep: Remove your chicken pieces from the refrigerator 45-60 minutes before you plan to start cooking. Allowing them to come closer to room temperature ensures more even cooking and better results than cooking very cold chicken. Rest assured, this is perfectly food safe for this duration.
Pre-heat your oven to 375°F (190°C). Prepare a rimmed baking sheet by lining it with either aluminum foil or a piece of baking parchment paper. This makes cleanup significantly easier.
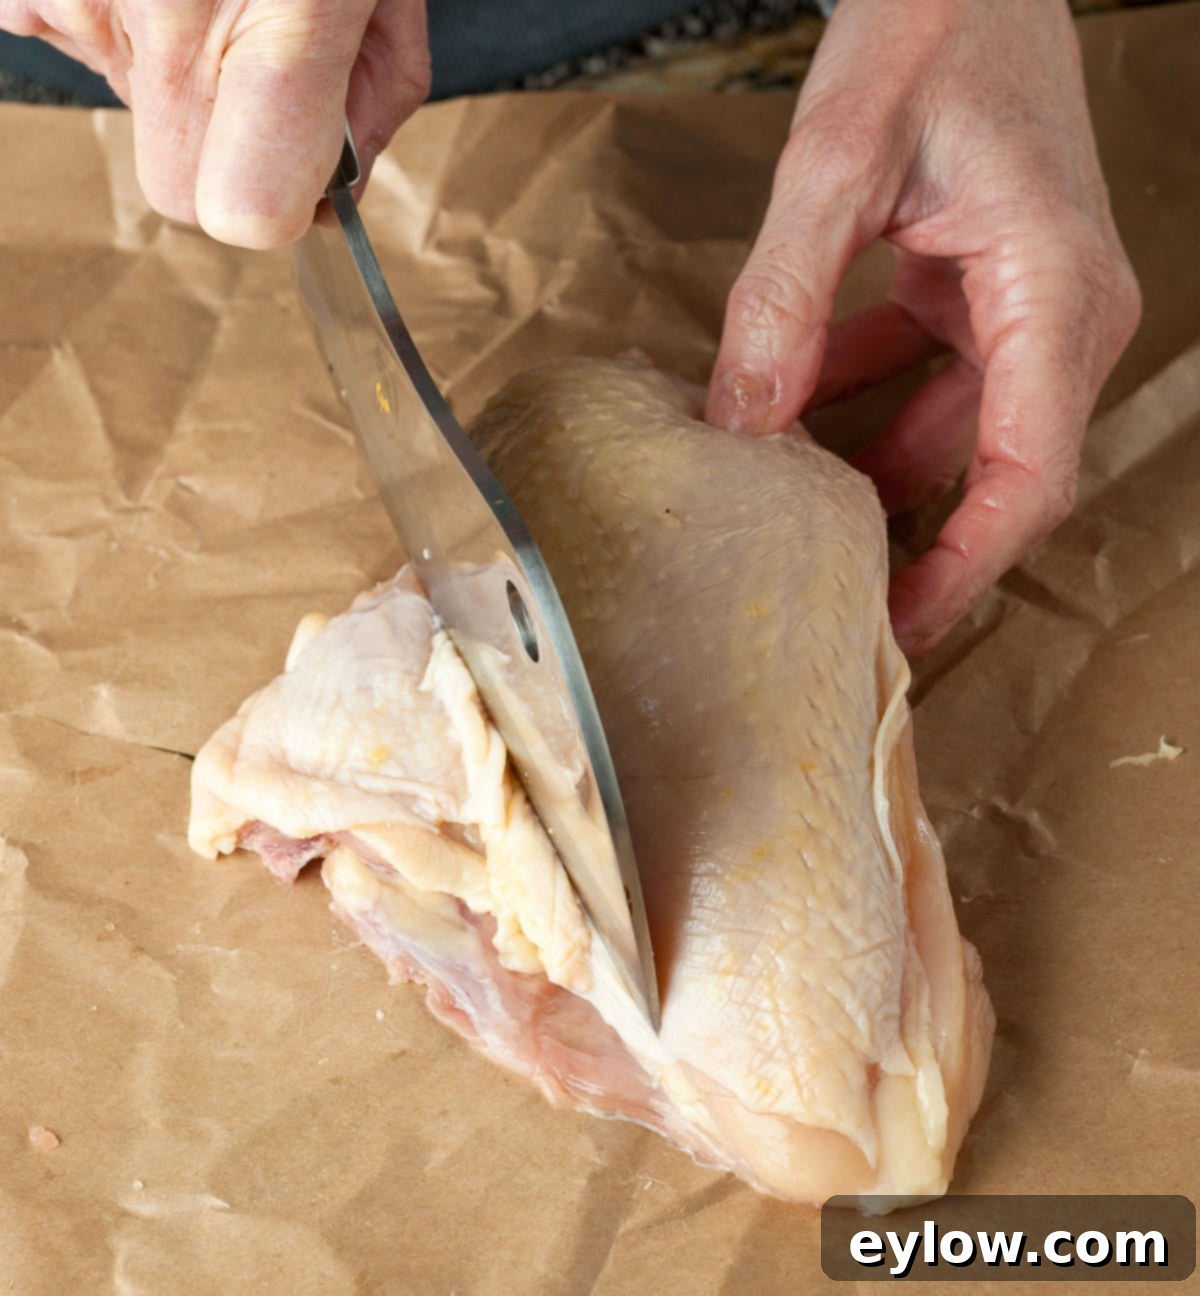
Step 1: Trim for Perfection (Optional but Recommended)
Inspect your bone-in chicken breasts. If they still have small side ribs attached, gently trim them off. You can use a large, heavy chef’s knife, a cleaver, or for greater precision, poultry shears. There’s very little meat on these rib bones, so you’re not wasting anything by removing them. Also, trim away any excessive fat from the top end of the breast. This trimming not only improves presentation but also allows the chicken to sit more evenly in your pan and on the baking sheet for consistent cooking.
Chef’s Tip: Why Trim the Side Bones? Removing these small rib bones makes a noticeable difference. Firstly, the chicken breasts will fit more easily and snugly into your fry pan or skillet for searing, and then onto your baking sheet for roasting. Secondly, it significantly improves the final presentation, making the chicken look more polished and appetizing. Lastly, and perhaps most importantly, it makes the chicken much easier to eat as guests won’t have to navigate around tiny bones. If you don’t mind them, you can certainly leave them on; it’s a matter of preference.
Step 2: Season Generously
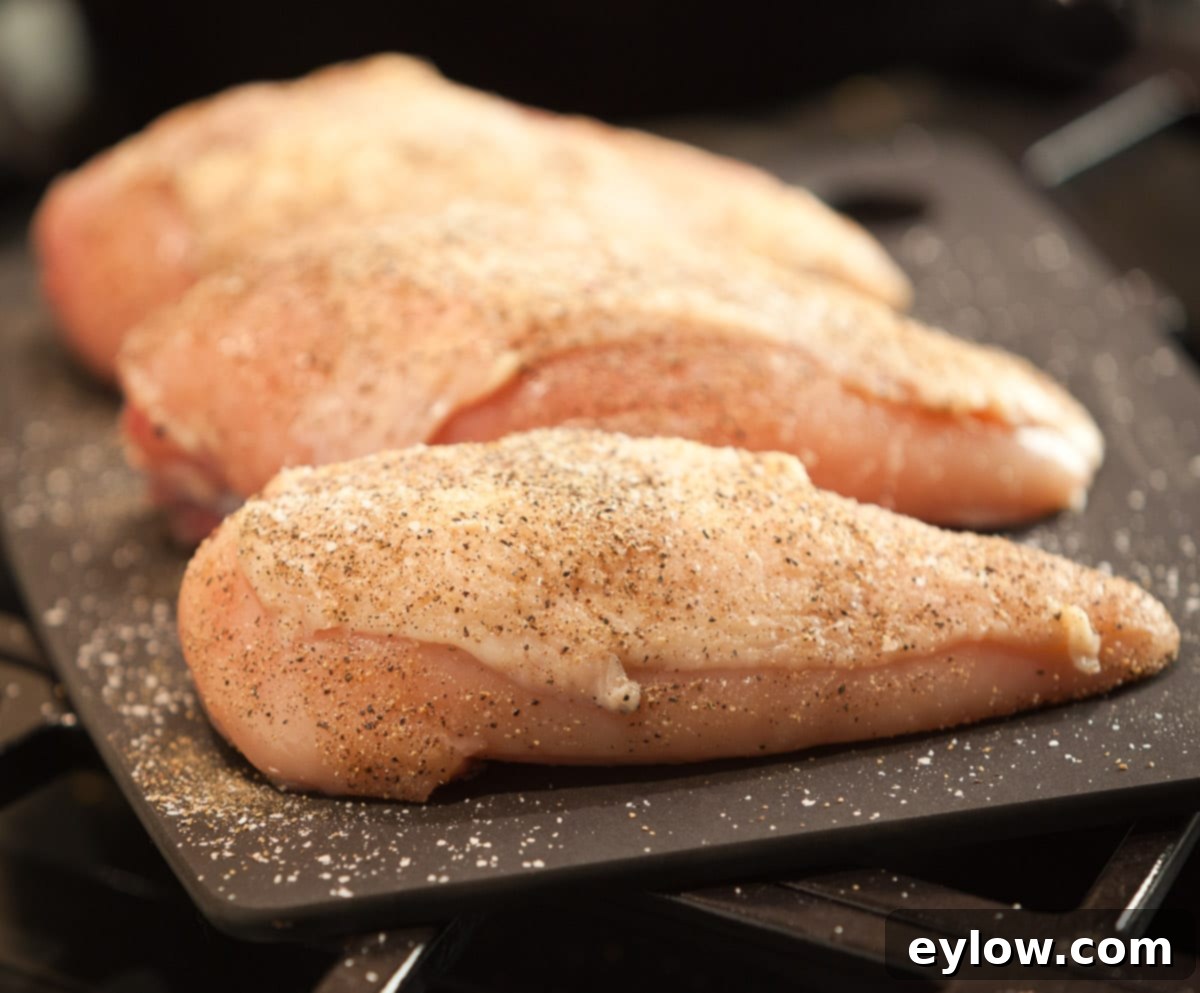
Lightly drizzle the bone-in chicken breasts with about ½ tablespoon of olive oil. Using your hands, gently rub the oil over the entire surface of the chicken, ensuring an even coating. Then, season generously with sea salt (or kosher salt) and freshly ground black pepper. Make sure to season both sides, and if you’re feeling adventurous, you can even gently lift the skin and season the meat directly underneath for an extra layer of flavor. This initial seasoning is key to building flavor from the start.
Step 3: Achieve Golden, Crispy Skin through Searing
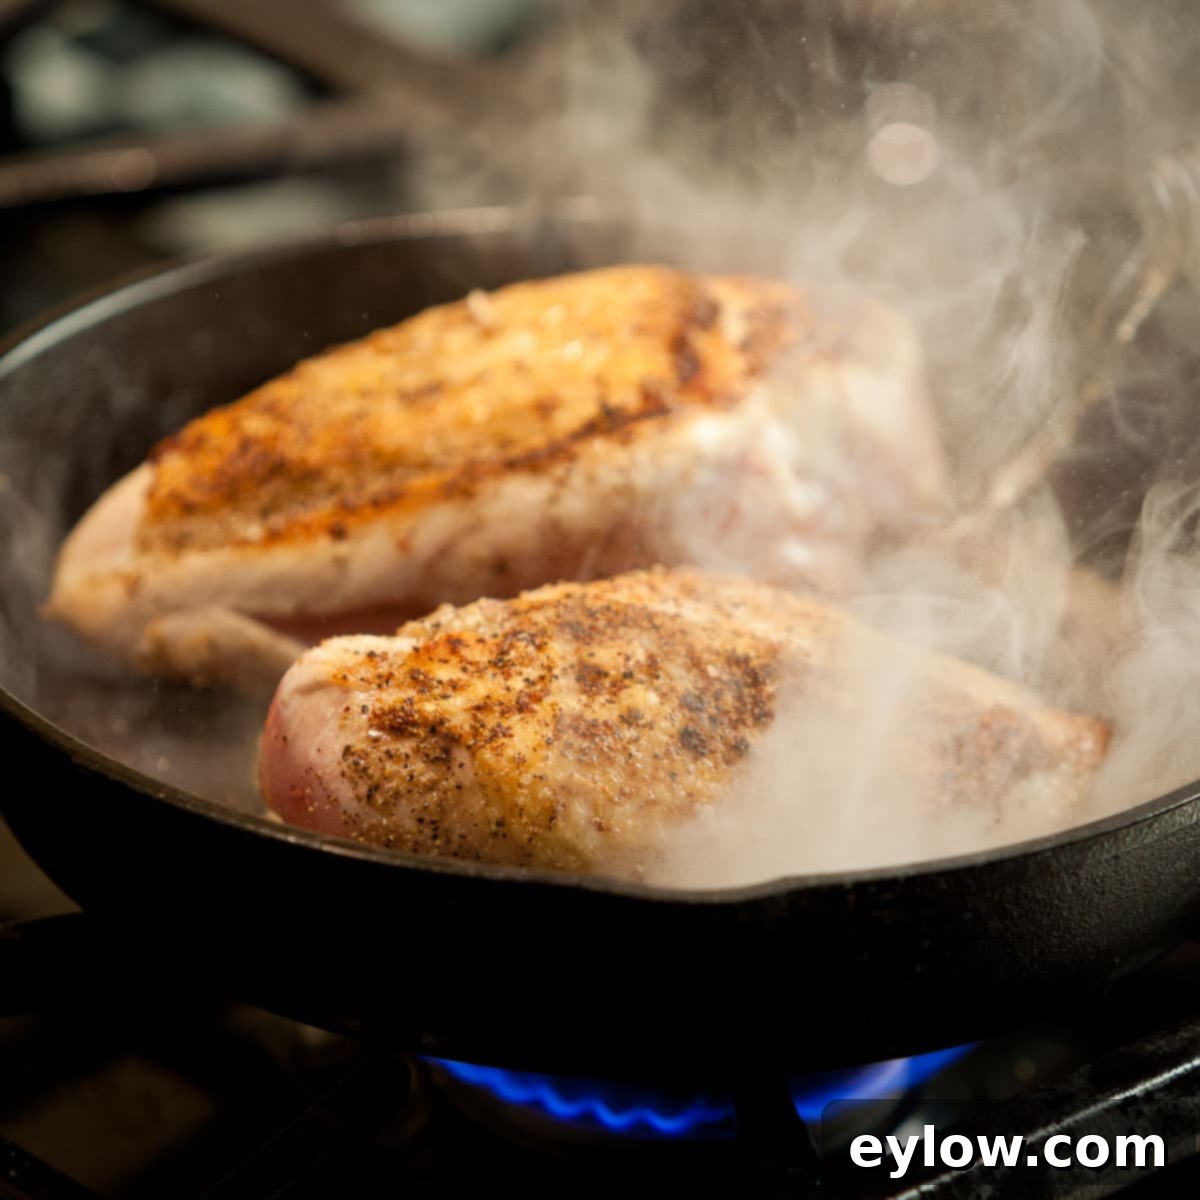
Heat a heavy-bottomed pan—such as a cast iron skillet, stainless steel sauté pan, or other oven-safe fry pan—over medium-high heat. Add the remaining 1 tablespoon of olive oil. Once the oil is hot and shimmering (it should move easily around the pan), carefully place the chicken breasts, skin-side down, into the hot pan. You should hear an immediate sizzle. This is crucial for developing that desirable crispy skin. Let the chicken sear undisturbed for about 5-7 minutes, or until the skin is beautifully golden brown and crisp. Resist the urge to move or peek too early, as this prevents proper browning. Once golden, use tongs to carefully turn the chicken breasts over to the bone side and cook for just another minute or two. This brief sear on the second side helps to develop more flavor.
Step 4: Deglaze and Transfer
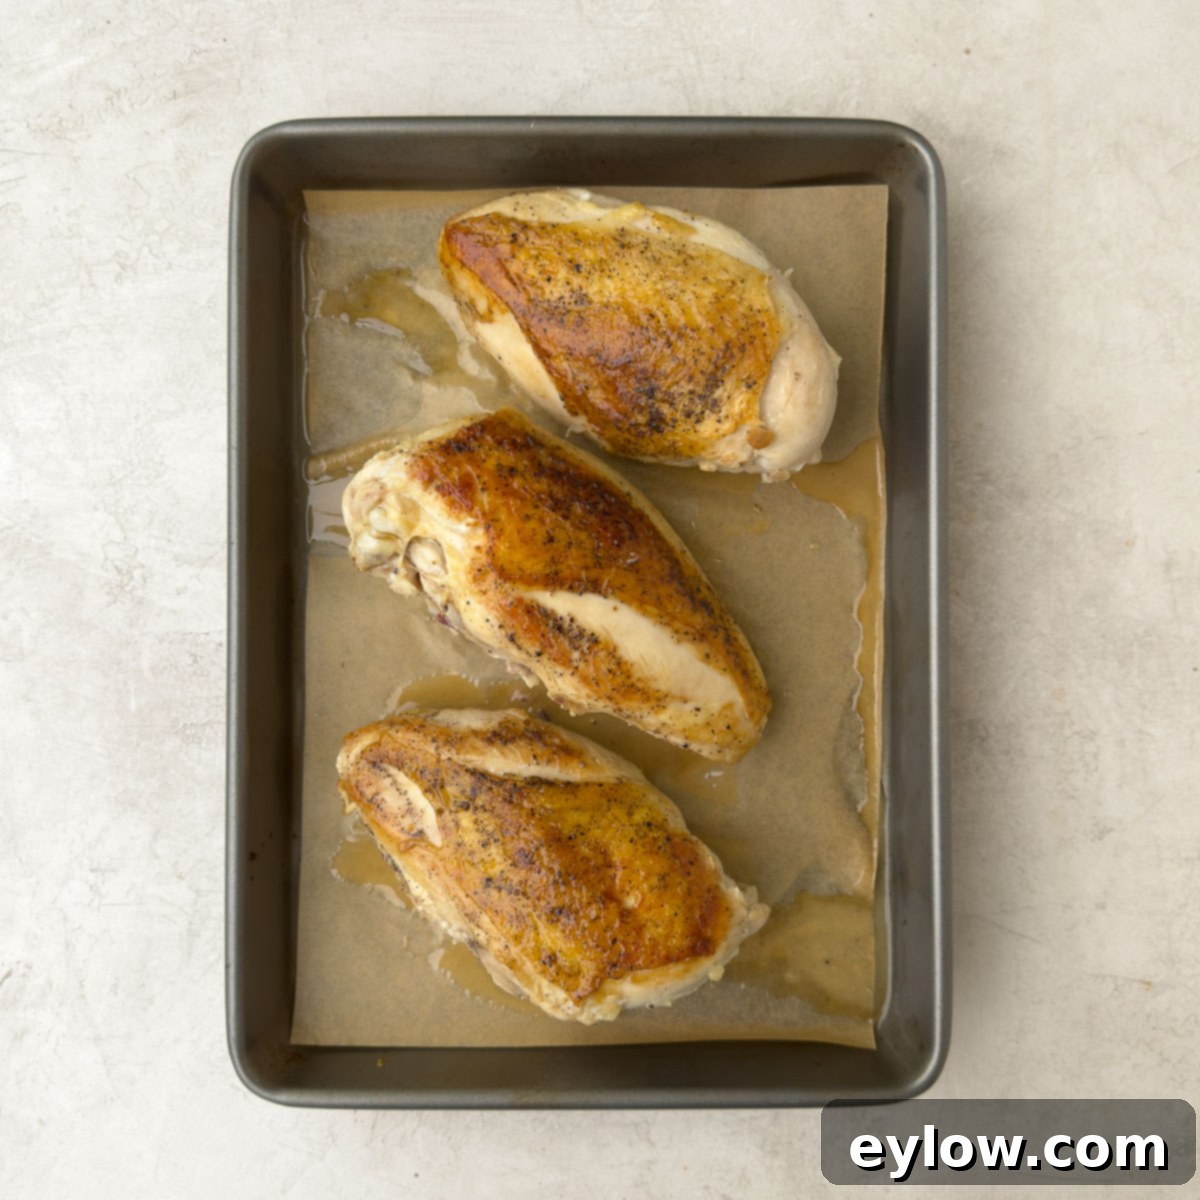
If you’re using white wine or broth, carefully pour it into the hot pan after flipping the chicken. Immediately scrape up all the delicious browned bits (the “fond”) from the bottom of the pan with a wooden spoon or spatula. Turn on your kitchen’s vent system, as the liquid will sizzle and produce steam; this is normal. Allow the liquid to cook down and reduce for about one minute, concentrating its flavors. Then, carefully transfer the seared chicken breasts to your prepared rimmed baking sheet (lined with parchment paper or aluminum foil), ensuring the skin side is facing up. Pour all the flavorful pan juices from the skillet directly over the chicken breasts. If using, place a thin slice of unsalted butter on top of each chicken breast for extra richness and browning.
Step 5: Roast to Perfection and Rest
Place the baking sheet with the chicken breasts into the preheated oven. Roast until the internal temperature reaches 160°F (71°C) when measured with an instant-read thermometer. Insert the thermometer into the thickest part of the breast meat, being careful not to touch the bone, as the bone will give a falsely high reading. This usually takes about 25-35 minutes, depending on the size of your chicken breasts and your oven’s calibration. Remember that the chicken’s internal temperature will continue to rise a few degrees (known as carryover cooking) while it rests.
Once the desired temperature is reached, remove the chicken from the oven and allow it to rest on the baking sheet for at least 5-10 minutes before slicing or serving. Resting is crucial; it allows the juices to redistribute throughout the meat, ensuring every bite is incredibly tender and moist. Just before serving, spoon the flavorful pan juices from the baking sheet over the top of the chicken like a natural, savory sauce. Enjoy!
Delicious Serving Suggestions for Your Roast Chicken Breast
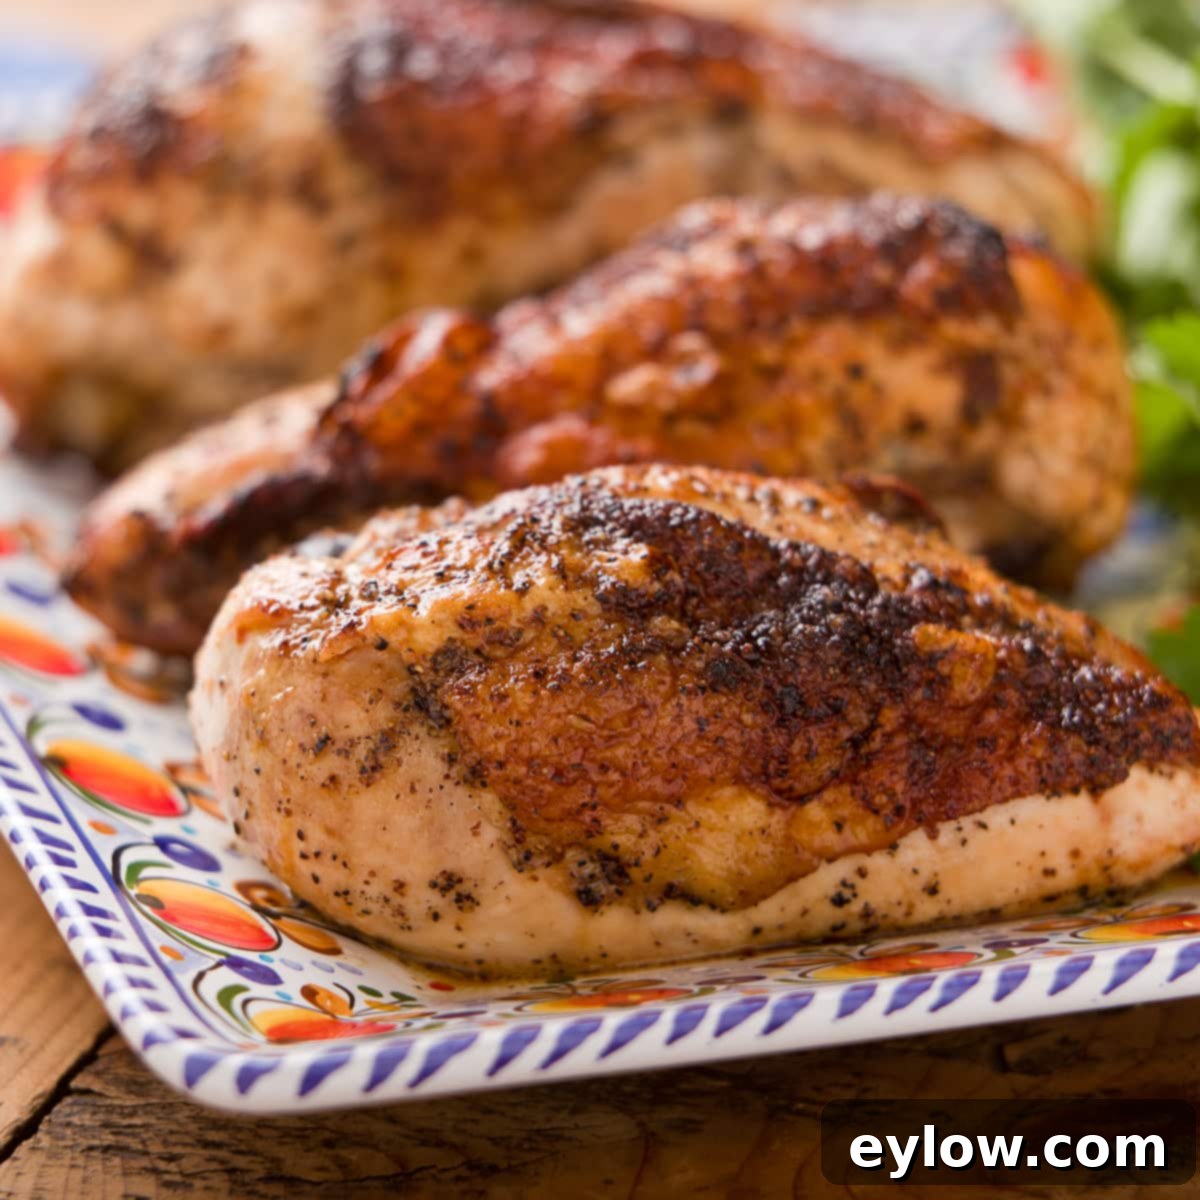
This perfectly roasted chicken breast is a versatile main course that pairs beautifully with a wide variety of side dishes. Here are some ideas to complete your meal:
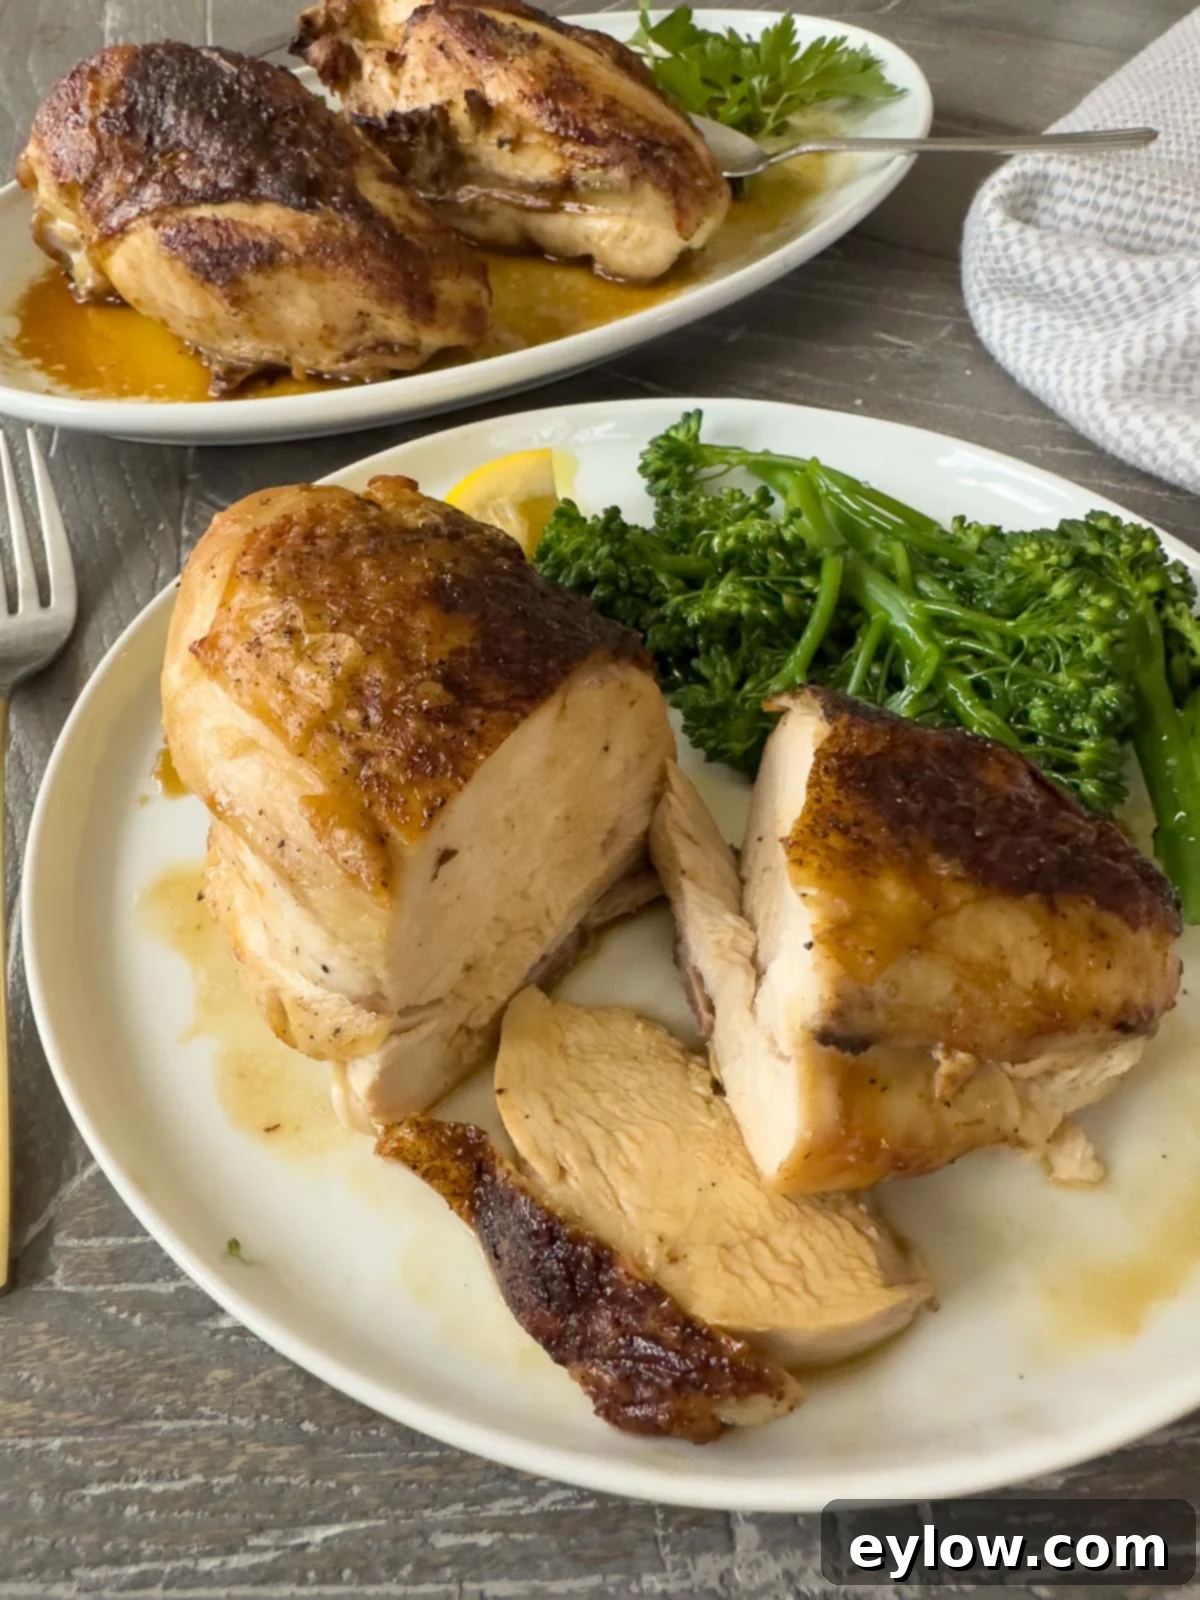
Depending on their size, you can cut the chicken breasts crosswise in half before serving, or leave them whole. Serve alongside:
- Fresh Greens: A simple yet elegant green vegetable always complements chicken. Consider basic broccolini, delicate five-minute green beans sautéed with garlic, or sweet roasted carrots with fresh thyme.
- Hearty Potatoes: Potatoes are a classic and comforting partner for roast chicken. Options include crispy roasted red potatoes with rosemary, creamy and subtly sweet mashed sweet potatoes with rosemary, or luxuriously smooth riced mashed potatoes. For a lighter touch, a fluffy baked potato is always a winner.
- Grains and Pilafs: A simple rice pilaf, quinoa, or couscous can absorb the delicious pan juices, making for a satisfying accompaniment.
- Garden Salads: A vibrant mixed green salad with a light vinaigrette provides a refreshing contrast to the richness of the chicken.
- Roasted Root Vegetables: Beyond carrots and potatoes, consider parsnips, turnips, or butternut squash roasted alongside the chicken for a rustic and flavorful side.
Storing and Creative Leftover Ideas
Proper storage is key to enjoying your delicious roast chicken for days to come, and the versatility of the leftovers is one of the best parts of this recipe!
Once the chicken has cooled completely to room temperature (this is important to prevent condensation and bacterial growth), transfer it to an airtight container. Make sure to label and date the container for food safety. Leftover roast chicken breast will keep well in the refrigerator for 3-4 days.
For longer storage, especially if you’ve cooked extra chicken, consider preparing it for the freezer. Slice, dice, or shred the cooked chicken meat, then portion it into freezer-safe bags or containers. Label with the date. Frozen chicken can be stored for up to 3 months and is incredibly convenient for quick meals. Thaw overnight in the refrigerator before use.
Transforming Leftovers into New Meals:
- Quick Lunches: Shredded chicken makes fantastic chicken salad sandwiches (try this curried chicken salad or avocado chicken salad) or wraps.
- Hearty Soups: Add diced chicken to your favorite chicken noodle soup, a spicy chicken tortilla soup, or a creamy chicken and wild rice soup.
- Tacos and Quesadillas: Shredded or diced chicken is perfect for quick chicken tacos, burritos, or cheesy quesadillas.
- Pasta Dishes: Stir into a creamy Alfredo, a hearty pasta bake, or a lighter lemon-herb pasta.
- Casseroles and Bakes: Use in chicken pot pie, a comforting chicken and rice casserole, or enchiladas.
- Salads: Beyond traditional chicken salad, add slices or chunks to a Cobb salad, Caesar salad, or a vibrant grain bowl.
Always remember to label and date your frozen packages to ensure you use them within their optimal timeframe.
Frequently Asked Questions About Roast Chicken Breast
Generally, cooking a bone-in chicken breast takes about 30-45 minutes. However, this timeframe can vary based on several factors: the initial size and thickness of the chicken breast, how cold it was when it came out of the refrigerator, the precise calibration of your individual oven, and whether you sear it on the stovetop first (as recommended in this recipe). For the most consistent and best results, always aim to get the chicken out of the refrigerator approximately 45 minutes before baking or roasting to allow it to temper and cook more evenly.
For juicy and delicious bone-in chicken breasts, I highly recommend baking them at 375°F (190°C) after an initial sear. This method, as outlined in my recipe, ensures a perfectly crispy skin and moist interior, typically achieved in about 30 minutes. Baking at a slightly lower temperature like 350°F will take a few minutes longer and might result in slightly less crispy skin, while a higher temperature like 400°F will cook faster but requires more careful monitoring to prevent drying out.
The USDA guidelines state that all poultry must be cooked to an internal temperature of 165°F (74°C) to be safely consumed. The only reliable way to confirm this temperature is by using a digital kitchen thermometer. Insert the probe into the thickest part of the chicken breast, ensuring it does not touch the bone, as the bone’s temperature can be misleadingly higher. Remember that the chicken will experience carryover cooking after removal from the oven, so aiming for 160°F (71°C) at the thickest part before resting often leads to a perfect 165°F (74°C) final temperature.
Bone-in, skin-on chicken breasts offer several advantages. The bone helps regulate temperature, leading to more even cooking and acting as a natural insulator to keep the meat moist. The skin crisps up beautifully, creating a delicious protective layer that locks in juices and adds a rich flavor and texture that is unmatched by skinless chicken. Additionally, bone-in chicken is often more affordable per pound.
Achieving crispy skin is a key element of this recipe! The most important step is the initial stovetop sear. Ensure your pan is hot with oil before adding the chicken, and place the chicken skin-side down. Allow it to cook undisturbed for 5-7 minutes until deeply golden brown. This direct heat renders the fat and creates that irresistible crispy texture. Don’t crowd the pan, as this can lower the temperature and steam the skin instead of crisping it. A final pat of butter before roasting also aids in browning and crispness.
While this recipe is optimized for bone-in, skin-on chicken breasts to maximize flavor and juiciness, you can adapt it for boneless, skinless breasts. However, you’ll need to adjust cooking times significantly. Boneless, skinless breasts will cook much faster, typically requiring only about 15-20 minutes in the oven after searing. Be extra vigilant with your meat thermometer to avoid overcooking, as they are prone to drying out. The skin’s crispiness and the bone’s flavor contribution will, of course, be absent.
Explore More Delicious Chicken Recipes
Chicken is truly one of the most versatile proteins, offering endless culinary possibilities! If you’ve enjoyed this bone-in chicken breast recipe and are eager to explore more, try the aromatic Thai lemongrass chicken for an exotic twist, or the comforting braised chicken with cashew gravy. For those who prefer chicken thighs, this savory recipe for bone-in thighs is a must-try. Each recipe offers a unique flavor journey, proving that chicken never has to be boring.
- Creamy Chicken with Gravy
- One-Pan Mediterranean Chicken Thighs
- Thai Lemongrass Chicken
- Easy Salsa Verde Chicken (Green Salsa Chicken)
⭐️Did You Make This Recipe?
If you’ve tried these perfectly roasted bone-in chicken breasts, I would absolutely love to hear from you! Please take a moment to leave a comment below and share your experience. And if you loved this recipe as much as I do, please consider giving it a 5-star rating! Your feedback and ratings are incredibly helpful to other home cooks looking for delicious and reliable recipes.
📖 Recipe: Easy Roast Split Chicken Breast

Roast Split Chicken Breast
Sally Cameron
Prevent your screen from going dark
Pin Recipe
Equipment
-
Fry pan, skillet or cast iron pan
-
Instant-read meat thermometer
-
Rimmed baking sheet
Ingredients
- 3-4 pounds bone-in chicken breasts, skin on (4 individual chicken breasts or 2 whole chicken breasts, to split)
- 1 ½ tablespoons olive oil (or avocado oil)
- ¾ teaspoon sea salt (or kosher salt)
- ½ teaspoon ground black pepper
- ⅓ cup dry white wine or chicken broth (or dry white French vermouth)
- 2 tablespoons unsalted butter optional
Instructions
Prep & Season
-
If the chicken breasts are refrigerated, allow them to sit on the counter for approximately 45-60 minutes to bring them closer to room temperature. This tempering process ensures more even and consistent baking results.
-
Preheat your oven to 375°F (190°C). Prepare a rimmed baking sheet by lining it with either aluminum foil or parchment paper; set aside. Use a sharp, heavy knife or poultry shears to trim off any small side rib bones and excess fat from the chicken breasts, ensuring the skin remains attached to the top. Lightly drizzle the chicken with ½ tablespoon of olive oil, then season generously with sea salt and freshly ground black pepper on both sides.
Sear on Stovetop
-
Heat a cast iron skillet, stainless steel sauté pan, or another oven-safe fry pan over medium-high heat. Add the remaining 1 tablespoon of olive oil. Once the oil is hot and shimmering, carefully place the chicken breasts skin-side down in the pan. The chicken should sizzle immediately. Allow the chicken to cook undisturbed for about 5-7 minutes, or until a beautiful, crisp, golden-brown crust forms on the skin.
Carefully peek underneath to confirm the golden-brown color, then use tongs to turn the chicken breasts over to the bone side and cook for another 1-2 minutes. If using, pour in the white wine or broth (ensure your kitchen’s vent system is on for steam). It will sizzle up vigorously, so do not be alarmed. Allow the liquid to cook down for about one minute, scraping up any browned bits from the bottom of the pan.
Finish in Oven & Rest
-
Carefully move the seared chicken breasts to the prepared baking sheet, skin-side up. Pour any remaining liquid and pan juices from the skillet over the top of the chicken. If using, top each chicken breast with a thin slice of unsalted butter. Place the baking sheet in the preheated oven and roast for approximately 25-35 minutes, or until an instant-read thermometer inserted into the thickest part of the breast (without touching the bone) reads 160°F (71°C).
Remove the chicken from the oven and allow it to rest on the baking sheet for 5-10 minutes. During this resting period, the internal temperature will rise to the perfect and safe 165°F (74°C), and the juices will redistribute, ensuring incredibly tender and moist meat. Serve immediately, spooning any accumulated pan juices over the top for extra flavor.
As soon as any extra chicken has cooled completely, refrigerate it in an airtight container for 3-4 days, or shred/chop the meat and freeze for up to 3 months for future easy meals.
Notes
- This recipe easily adjusts to the number of servings you need. Plan for one chicken breast per person, or perhaps half a breast for children or those with smaller appetites, especially if the breasts are large.
- For cooking with wine, consider using mini (airline-sized) bottles of dry white wine like Chardonnay or Sauvignon Blanc. They are incredibly convenient when you only need a small amount for a recipe and don’t want to open a full bottle.
- To accurately measure the internal temperature of your chicken and ensure it’s cooked to a safe and juicy perfection, always use a reliable digital kitchen thermometer.
- Chef’s Tip! For even crispier skin and richer pan drippings, place a small pat of unsalted butter (about ½ tablespoon) on top of each chicken breast before putting them into the oven for baking.
Nutrition
Carbohydrates: 1g
Protein: 57g
Fat: 29g
Saturated Fat: 8g
Polyunsaturated Fat: 6g
Monounsaturated Fat: 13g
Trans Fat: 0.3g
Cholesterol: 174mg
Sodium: 754mg
Potassium: 621mg
Fiber: 0.1g
Sugar: 0.2g
Vitamin A: 227IU
Vitamin C: 0.01mg
Calcium: 34mg
Iron: 2mg
Tried this recipe?Let us know how it was with a comment and leave a star rating!
