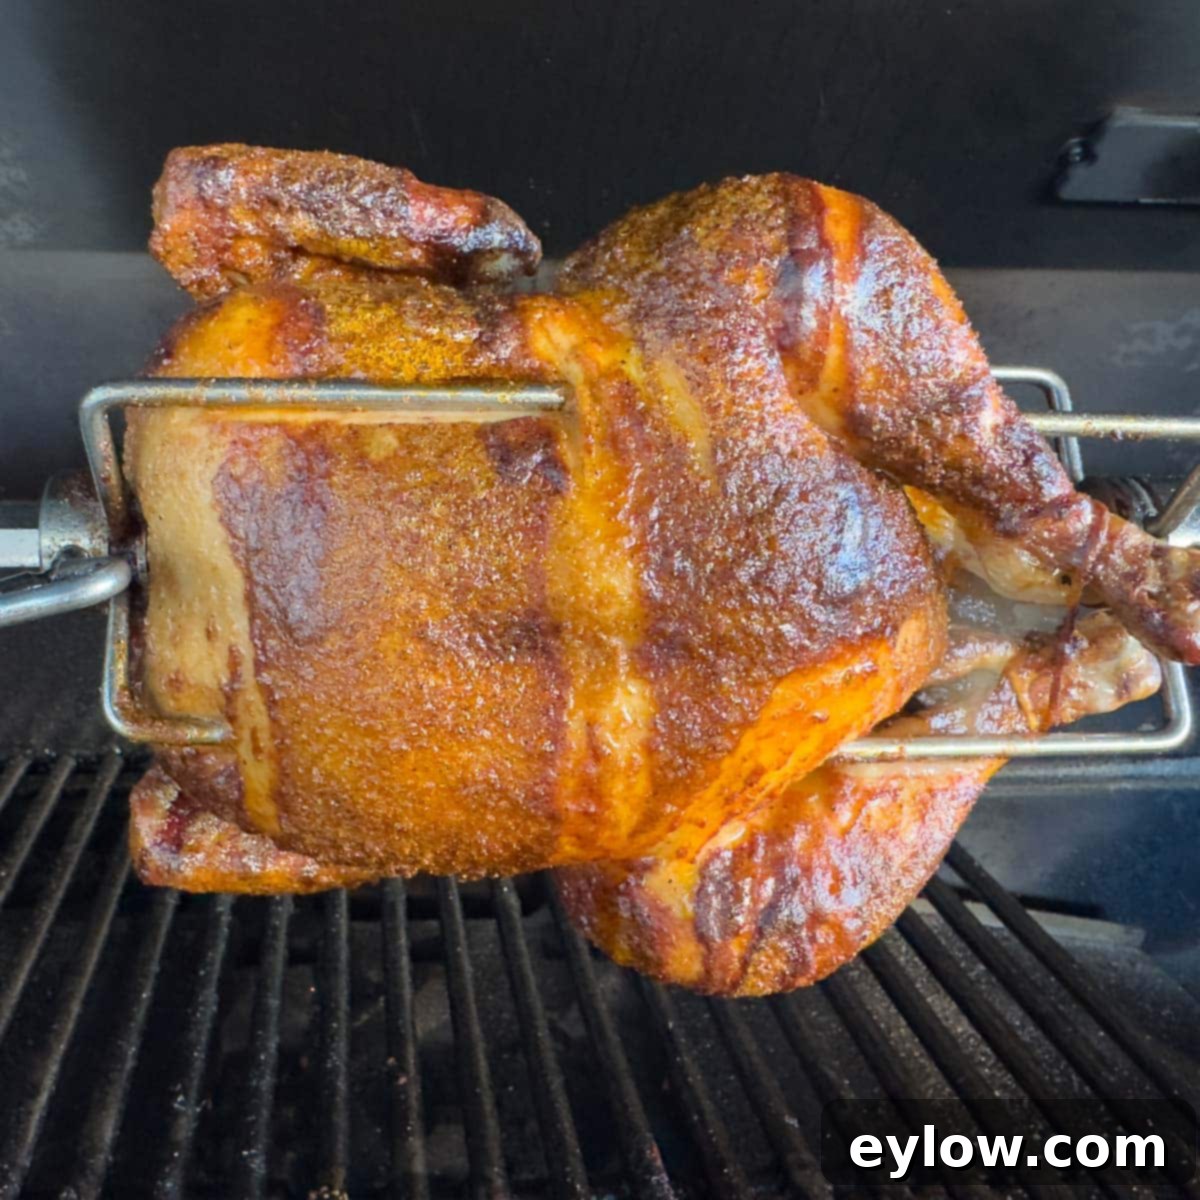
Mastering Homemade Rotisserie Chicken on Your Grill: The Ultimate Guide to Juicy & Crispy Perfection
Have you ever yearned for that perfectly golden, incredibly juicy rotisserie chicken, but wished you could make it fresh at home? You’re in luck! This comprehensive guide will show you exactly how to achieve sensational rotisserie chicken on your grill, delivering flavors and textures far superior to anything store-bought. With the right setup, a few key techniques, and a touch of patience, you can master this impressive yet surprisingly simple cooking method. I’ve been perfecting this technique for over two decades, utilizing both gas and pellet grills, and it remains one of my absolute favorite ways to prepare a whole bird. The secret lies in proper seasoning, stuffing the cavity with aromatic ingredients like lemon, onion, garlic, and bay leaf, and then securely trussing the chicken. Once it’s spinning on the spit, your grill takes over, working its magic to create an unforgettable meal.
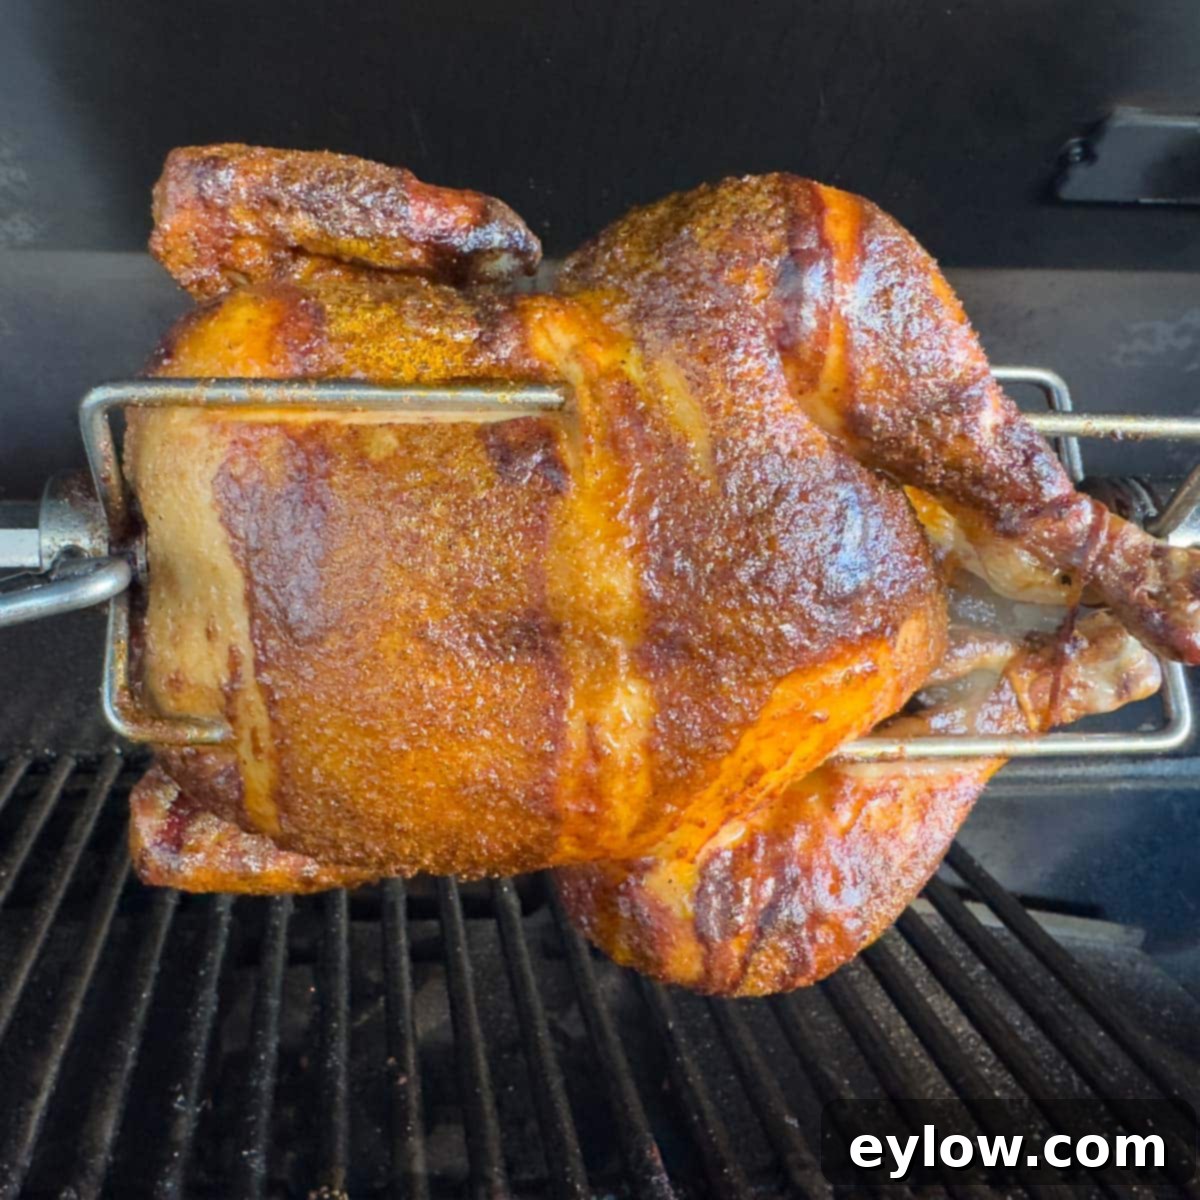
While the convenience of a grocery store rotisserie chicken is undeniable, preparing your own at home offers a multitude of benefits. Beyond the immense satisfaction of cooking a perfect meal, homemade rotisserie chicken is inherently healthier, significantly fresher, and bursting with far more flavor. You gain complete control over every ingredient, starting with selecting a high-quality bird, such as an organic, air-chilled chicken, which ensures superior taste and avoids common industrial practices like chlorine rinses. Furthermore, you can confidently skip the preservatives, artificial additives, and excessive plastic packaging often found with pre-cooked options. Simply put, homemade is always better. As an added bonus, a larger bird will yield plenty of succulent, shredded chicken leftovers, perfect for transforming into quick and easy meals like tacos, vibrant salads, hearty soups, or savory sandwiches throughout the week. This versatility makes rotisserie chicken a true meal prep hero.
Why You’ll Love This Homemade Rotisserie Chicken Recipe
This isn’t just another chicken recipe; it’s an experience that delivers incredible results with minimal fuss. Here’s why you’ll want to make this rotisserie chicken a staple in your cooking repertoire:
- Unbeatable Flavor Profile: Prepare for a culinary delight! This homemade rotisserie chicken boasts incredibly juicy meat, enveloped in a beautifully golden, ultra-crispy skin, all deeply infused with your chosen seasonings. It’s a flavor sensation that will impress every time.
- Effortless Setup and Operation: Whether you’re using a grill with a dedicated rotisserie attachment or a compact countertop rotisserie oven, the setup is straightforward. Both options perform beautifully, transforming a simple chicken into a culinary masterpiece with ease.
- Automatic Self-Basting for Perfection: The magic of rotisserie cooking is its continuous rotation. As the chicken slowly spins, its own juices and rendered fat naturally baste the exterior, leading to extraordinarily moist meat and that coveted, evenly browned, crackling-crisp skin.
- Ideal for Meal Prep: If you’re lucky enough to have any leftovers (it’s a big “if”!), they are pure gold for future meals. Shredded rotisserie chicken is perfect for effortlessly enhancing salads, filling tacos, adding richness to soups, or creating easy, delicious lunches all week long.
- Healthier & Fresher: By making it yourself, you choose fresh, high-quality ingredients, avoiding unnecessary additives and preservatives often found in store-bought options.
For another fantastic foundational chicken recipe, be sure to try these simple roast split chicken breasts. They’re another weekly favorite in my kitchen, often alongside this delicious rotisserie chicken.
Essential Ingredients for Your Rotisserie Chicken
Creating a truly exceptional rotisserie chicken starts with selecting the right ingredients. Here’s a breakdown of what you’ll need to achieve maximum flavor and tenderness:
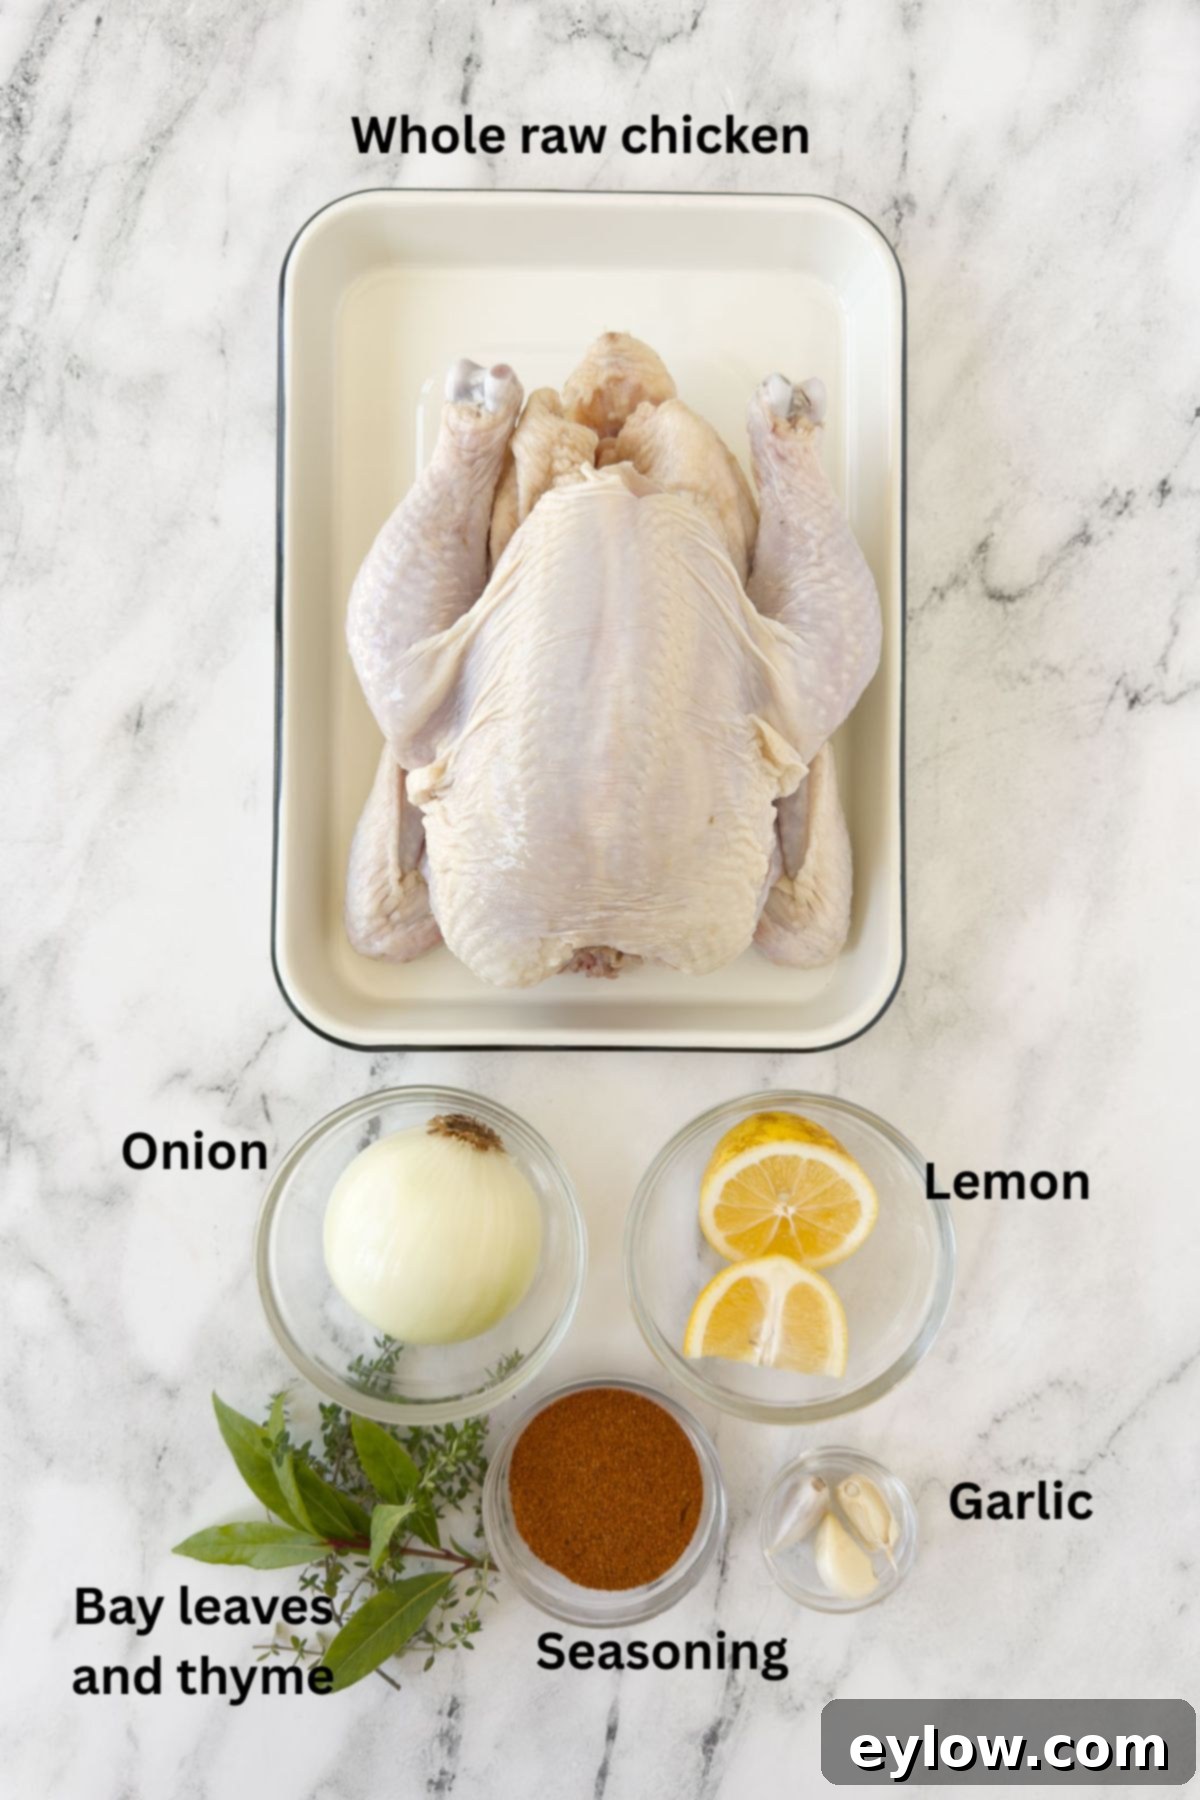
- Whole Chicken: Opt for a fresh, generously sized whole chicken, typically between 3.5 to 5 pounds. A larger bird ensures you’ll have plenty of delicious leftovers. For the best quality and taste, I highly recommend choosing an organic and air-chilled chicken whenever possible. Air-chilling helps maintain the chicken’s natural flavor and texture, avoiding the watery, chlorine-bathed results common with water-chilled poultry.
- Oil or Binder: This crucial step helps your seasonings adhere to the chicken skin and promotes beautiful browning.
- For Gas Grills: A light brush of good quality olive oil works perfectly, ensuring an even coat for your seasoning.
- For Pellet Grills: I’ve found that a thin layer of mayonnaise is surprisingly effective. It not only helps the seasoning stick but also aids in creating a wonderfully crispy, deeply browned crust. Don’t worry, the mayo flavor dissipates completely during cooking!
- Seasoning: The seasoning is where you can truly personalize your rotisserie chicken.
- Keep it Simple: A generous application of coarse salt and freshly ground black pepper is always a classic and delicious choice.
- My Go-To Rub: For an incredible boost of flavor, I swear by my homemade BBQ dry rub. It delivers a complex, savory, and slightly sweet profile that’s simply irresistible.
- Other Options: Experiment with your favorite poultry seasoning blends, garlic powder, onion powder, paprika, or a lemon-herb mix.
- Aromatic Cavity Stuffing (Optional, but Recommended): While not strictly necessary, stuffing the chicken’s cavity with aromatics adds a subtle, fragrant depth of flavor to the meat and helps keep it exceptionally juicy from the inside out. This quick extra step is absolutely worth the minimal effort. Consider using:
- Half an onion, roughly chopped
- A few cloves of garlic, peeled and lightly crushed
- One or two bay leaves
- A quartered lemon or orange wedge, which adds bright, zesty notes.
Substitutions and Creative Variations
One of the joys of cooking is experimentation! Don’t hesitate to customize your rotisserie chicken to suit your taste preferences or whatever ingredients you have on hand. Here are some ideas:
- Diverse Dry Rubs and Seasonings: The easiest and most impactful way to alter the flavor profile of your chicken is by changing your dry rub. Explore different cuisines and flavor combinations:
- Classic BBQ Rub: Sweet, smoky, and a little spicy.
- Lemon Pepper: Zesty and bright, perfect for a lighter taste.
- Smoky Paprika Blend: Adds deep, earthy, and smoky notes.
- Herbal Poultry Seasoning: A traditional blend with sage, thyme, and rosemary.
- Spicy Cajun or Jerk Rub: For those who love a kick.
- Mediterranean Herb Mix: Oregano, marjoram, and garlic.
- Infuse with Fresh Herbs: Elevate the aroma and taste by adding fresh herb sprigs directly into the cavity. A few sprigs of thyme, rosemary, or sage will impart a wonderful herbaceous finish to the chicken as it cooks. You can also tuck them under the skin of the breast for extra flavor penetration.
- Alternative Oils and Binders: If olive oil (for gas grills) or mayonnaise (for pellet grills) aren’t your preference, there are other excellent options:
- Avocado Oil: A neutral-flavored oil with a high smoke point, ideal for grilling.
- Melted Butter: For an extra rich and golden crust.
- Neutral Healthy Oils: Consider options like Zero Acre oil or grapeseed oil, which are designed for high-heat cooking and won’t impart strong flavors.
- Mustard: A thin layer of Dijon or yellow mustard can also act as an excellent binder, adding a subtle tang that complements chicken beautifully.
Step-by-Step: How to Rotisserie a Whole Chicken
Follow these detailed steps to prepare your chicken for rotisserie perfection. Careful preparation ensures an evenly cooked, delicious bird.
Prep the Chicken for Rotisserie
Begin by removing the whole chicken from the refrigerator at least 1 hour before you plan to cook. This allows the bird to come closer to room temperature, promoting more even cooking. Discard any small bag of giblets or innards found inside the cavity. Pat the chicken thoroughly dry, both inside and out, with paper towels; a dry surface is crucial for crispy skin. If you’re using a pellet grill, now is also a good time to ensure your hopper is full of high-quality hardwood pellets, as consistent fuel is key to maintaining temperature.

- Carefully trim any excess fat found around the neck cavity and at the tail end of the chicken. This prevents unwanted flare-ups on the grill and helps the chicken cook more evenly.
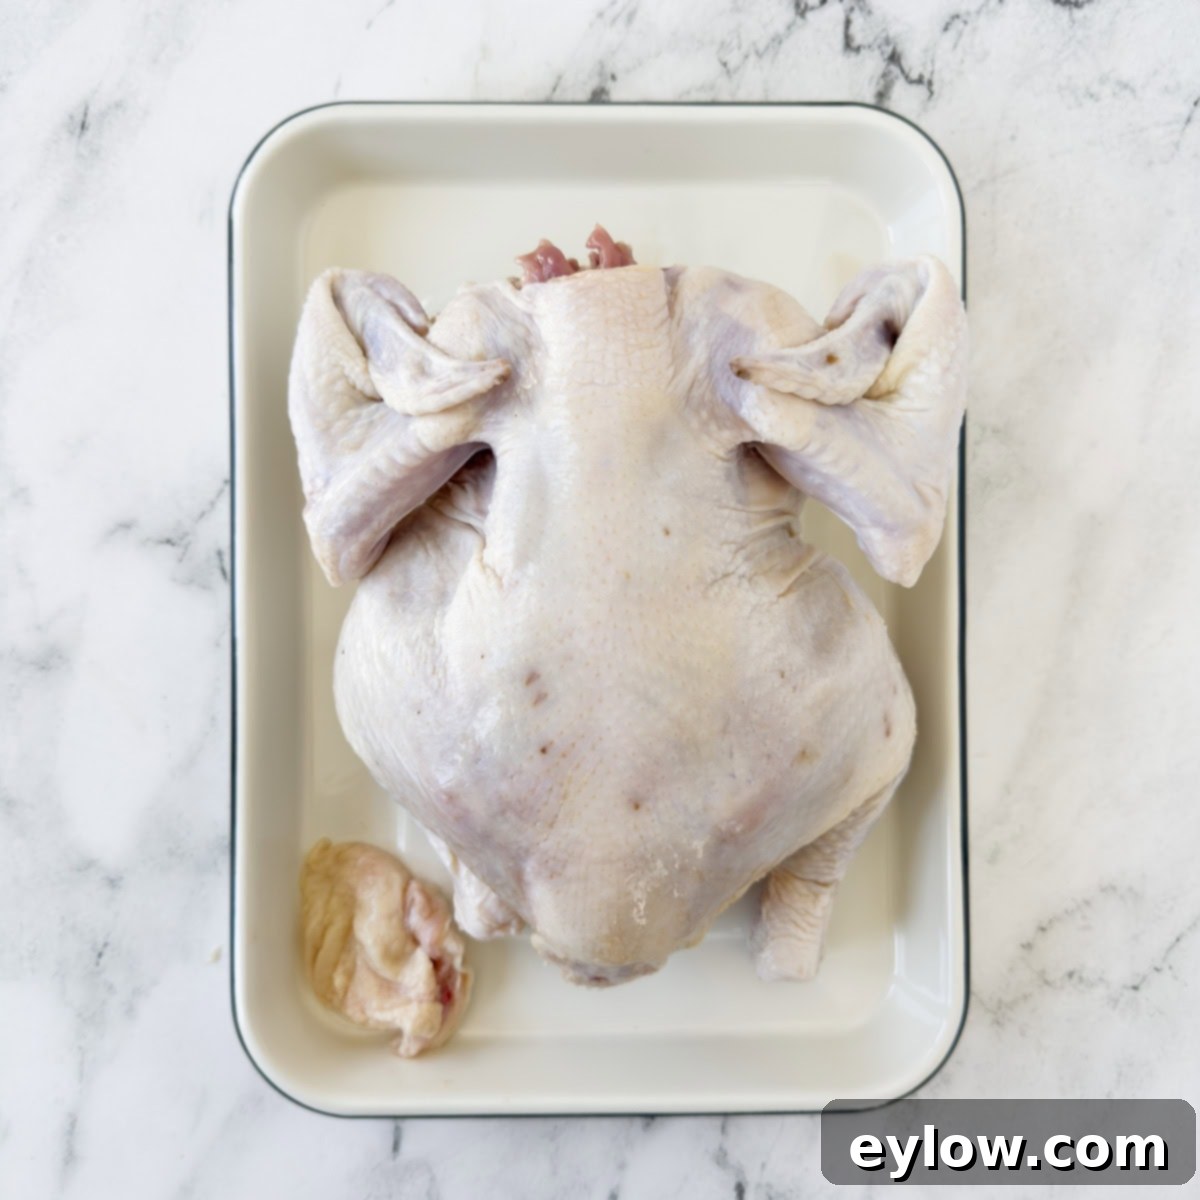
- Turn the bird over onto its breast side and neatly bend the wing tips back, tucking them flat against the chicken’s body. This prevents the delicate wing tips from flapping around and burning during the rotisserie process.
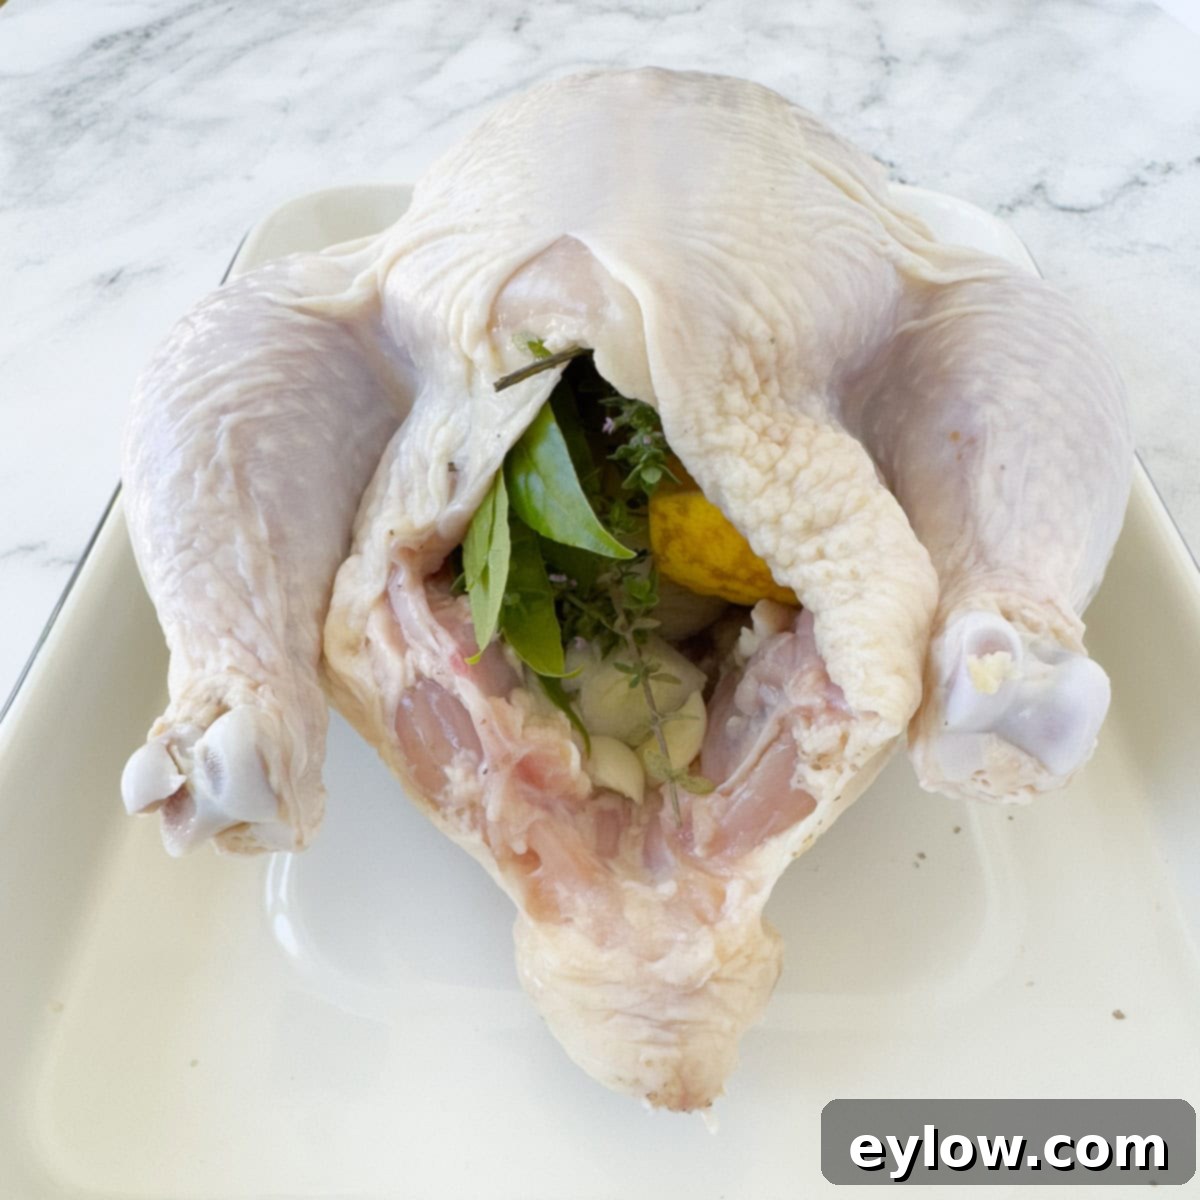
- Season the inside cavity of the bird generously with salt. If you’re using them, now is the time to stuff the cavity with your chosen aromatics and citrus (e.g., onion, garlic, bay leaves, lemon/orange wedges). This step infuses the meat with incredible flavor from within.

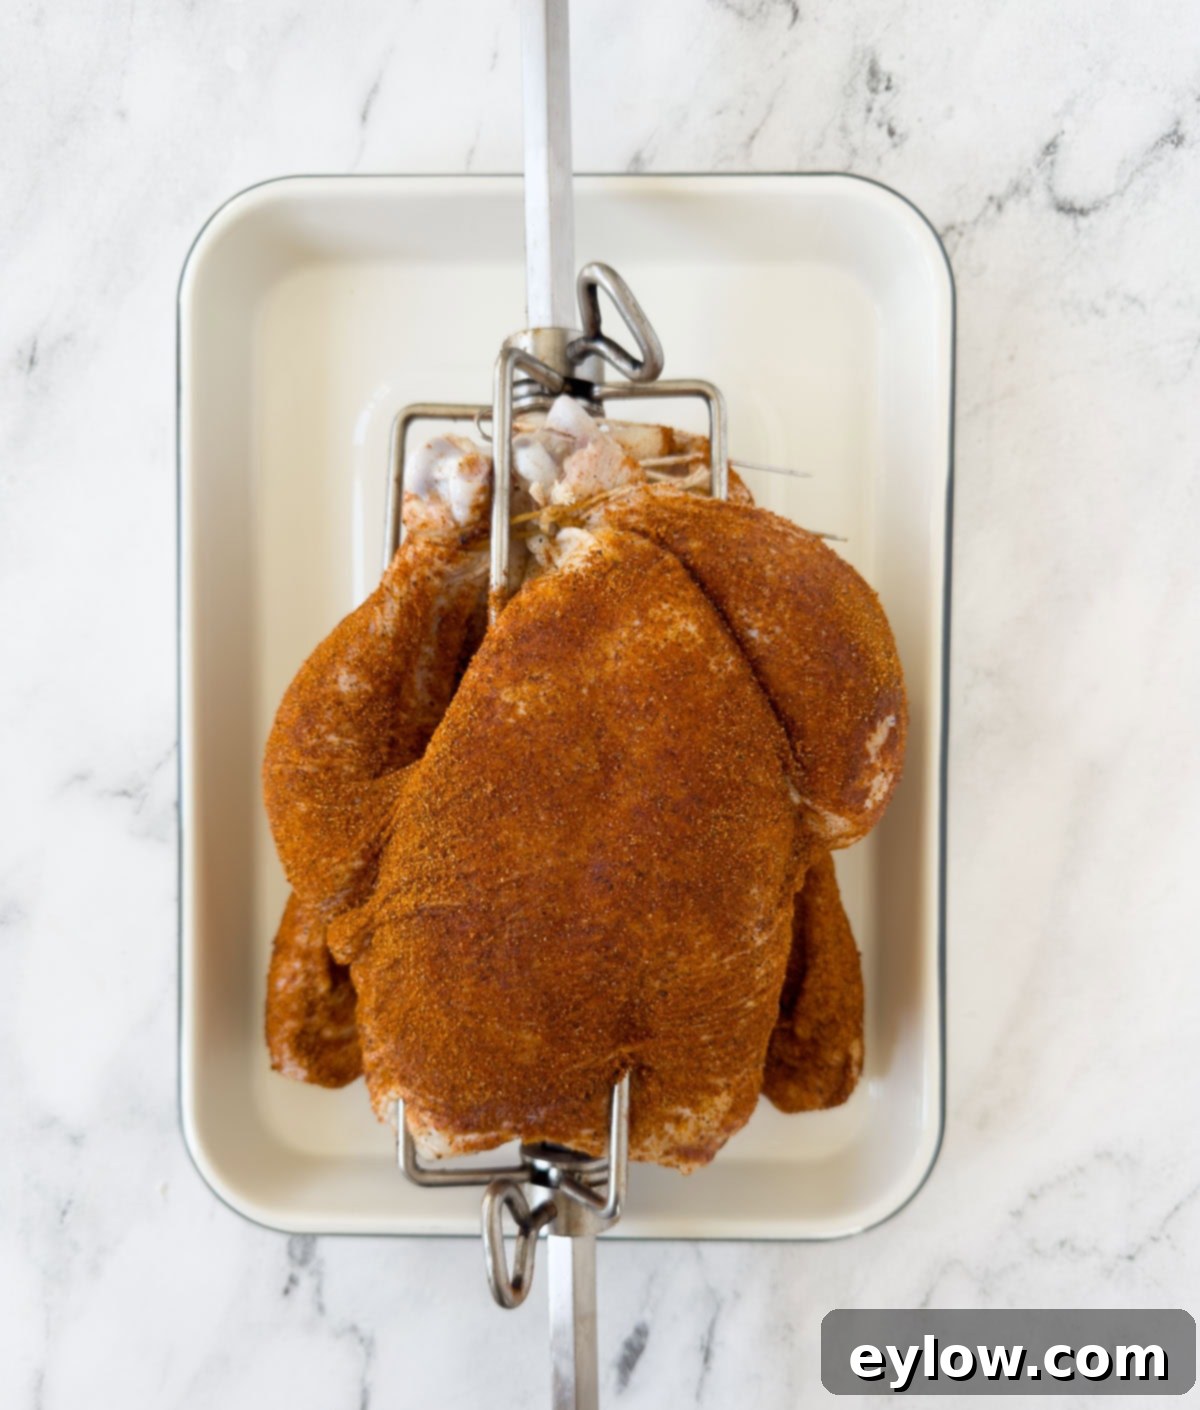
- Truss the bird. This is a crucial step for rotisserie cooking. Tie the legs together with kitchen twine, then use poultry lacers or additional twine to close the cavity firmly. Trussing ensures the chicken maintains a compact, aerodynamic shape as it spins, preventing parts from dangling or cooking unevenly. It also keeps all those delicious aromatics securely inside.
Securing the Chicken on the Rotisserie Spit
Properly securing your chicken on the rotisserie rod is vital for successful, even cooking. Follow these steps carefully:
- Begin by centering the chicken on the rotisserie rod (the spit). It’s important to ensure the weight of the bird is as evenly distributed as possible to prevent wobbling during rotation. Slide one of the meat forks onto one side of the rod, pushing the prongs deeply into the chicken to secure it. Repeat with the second meat fork on the other side, ensuring it firmly holds the chicken in place. Once the bird is centered and impaled, tighten the screws on both meat forks very, very tightly. A good tip is to do this process over a rimmed baking sheet. This catches any raw juices, keeps your workspace clean, and makes for easy, mess-free transport to the grill.
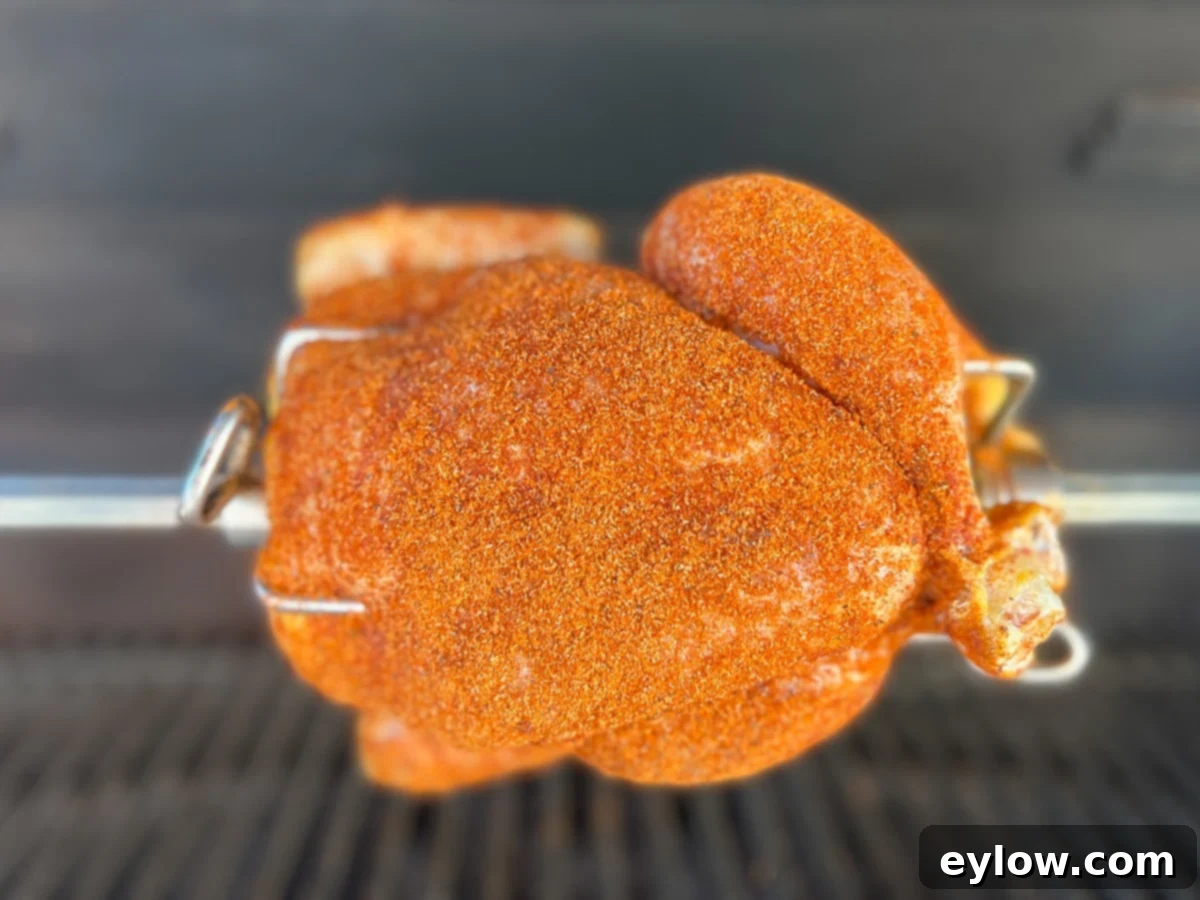
- Carefully place the rotisserie rod, with the secured chicken, into the rotisserie brackets on your grill. Turn on the rotisserie motor to confirm that the chicken is spinning smoothly and evenly. If you notice any bare spots after initial seasoning, add a little extra rub while it’s rotating for full coverage.
Chef’s Tip for Rotisserie Success: The most critical step in rotisserie cooking is ensuring the chicken is absolutely secure and tightly fastened to the spit. If the meat forks come loose during cooking, the chicken will stop rotating effectively, getting stuck in one position. This can lead to uneven cooking, and potentially burning on one side while the other remains undercooked. Periodically check on your rotisserie chicken to confirm it’s turning smoothly and uniformly throughout the cooking process. A well-secured bird ensures a perfect, golden-brown crust and juicy interior.
Optimal Temperature and Timing for Rotisserie Chicken
Achieving a perfectly cooked rotisserie chicken involves consistent temperature and knowing when it’s truly done. Here’s what you need to know:
For gas grills, the temperature controls might not be as precise as an oven. If your grill has temperature settings, aim for a consistent range of 350°F – 375°F (175°C – 190°C), similar to what you would use for a pellet grill. If your gas grill doesn’t show precise temperatures, use an oven thermometer placed inside the grill to monitor. For pellet grills, set your desired temperature directly.
Roast the chicken for approximately 1 ½ to 2 hours. However, remember that time is merely a guideline. The chicken is truly done when its internal temperature, measured in the thickest part of the inner thigh (without touching the bone), reaches 175ºF (79.4°C) using a reliable digital thermometer. At this point, the chicken should have developed a rich, deep golden-brown color and an irresistibly crispy skin. It’s a good practice to occasionally peek into your grill to ensure the rotisserie is continuously turning without issue. Factors like the specific grill model, outside weather conditions (especially on outdoor grills), and the size of your chicken can all affect the total cooking time, so always rely on temperature, not just time. Once the chicken reaches its target temperature, remove it carefully from the rotisserie spit and allow it to rest, tented loosely with foil, for about 10-15 minutes before carving. This crucial resting period allows the juices to redistribute throughout the meat, ensuring every bite is incredibly tender and moist.
Delicious Serving Suggestions for Your Rotisserie Chicken
One of the best things about rotisserie chicken is its incredible versatility. It’s a crowd-pleaser that pairs wonderfully with a wide array of side dishes. Here are some ideas to complete your meal:
- Potatoes, Glorious Potatoes: Few things complement roasted chicken better than potatoes.
- Serve with light and creamy mashed potatoes for a comforting classic.
- For a sweeter, nutrient-rich option, try fluffy whipped sweet potatoes.
- In warmer months, a bright and tangy French potato salad offers a delightful summery twist.
- Fresh and Flavorful Vegetables: Round out your meal with vibrant vegetable dishes.
- Crispy balsamic Brussels sprouts offer a perfect balance of sweet and savory.
- A colorful sweet corn succotash adds freshness and texture.
- For a crunchy, creamy side, try a refreshing broccoli slaw tossed in a creamy apple cider dressing.
- Roasted asparagus or green beans are always a simple and elegant choice.
- Light and Satisfying Salads: Salads can provide a wonderful counterpoint to the rich chicken.
- A hearty broccoli salad with crispy bacon is always a hit.
- A simple, easy coleslaw provides a tangy, crunchy element.
- For a delightful twist, a lemony pasta salad offers brightness and a satisfying carb component.
- A classic garden salad with your favorite vinaigrette is always a good option.
Creative Recipes for Leftover Rotisserie Chicken
Leftover rotisserie chicken is a gift that keeps on giving! Its tender, pre-cooked meat is a fantastic shortcut for countless delicious meals. Don’t let a single shred go to waste with these inspiring ideas:
- Whip up a vibrant Chinese chicken salad, tossed with a zesty ginger vinaigrette and crunchy noodles.
- Create a comforting and flavorful Mexican chicken tortilla soup, complete with crispy tortilla strips and fresh avocado.
- Transform it into a refreshing grilled chicken salad, perhaps with a sweet and tangy blueberry balsamic dressing.
- It’s perfect for quick and easy weeknight meals like savory tacos or cheesy quesadillas – just shred and heat!
- Upgrade your pasta night with a hearty Caesar pasta salad with chicken, combining fresh greens, pasta, and creamy dressing.
- Build a soul-warming chicken vegetable soup, ideal for chilly evenings or when you need a comforting meal.
- Layer it into sandwiches, wraps, or sliders for quick lunches.
- Add it to omelets, frittatas, or quiches for a protein-packed breakfast or brunch.
- Stir it into creamy chicken pot pies or casseroles for a comforting family dinner.
Rotisserie Chicken Recipe FAQs
Absolutely, you can freeze rotisserie chicken, and it’s an excellent way to preserve leftovers for future meals! However, freezing the entire cooked bird isn’t usually recommended as it can lead to uneven thawing and a decline in texture. For best results, I recommend cutting the chicken into major pieces (breasts, thighs, drumsticks) before freezing. Even better, strip all the meat from the bones and shred or chop it. This way, it’s ready to use in recipes like soups, salads, or casseroles directly from the freezer. Ensure you place the chicken in an airtight container or a vacuum-sealed bag to prevent freezer burn. Don’t forget to label and date the container; properly stored, frozen rotisserie chicken will maintain its quality for up to 3-4 months.
Leftover rotisserie chicken is truly a culinary treasure, offering endless possibilities for quick and delicious meals! Its pre-cooked tenderness makes it incredibly versatile. You can easily chop it for a creamy chicken salad, perfect for sandwiches or lettuce wraps. Shred it for authentic rotisserie chicken tacos, savory enchiladas, or hearty burritos. It’s the perfect base for a comforting chicken tortilla soup. Use it to top fresh salad greens for a satisfying lunch or dinner, or create a classic Cobb Salad. For something different, build a chicken tostada with crisp shells and your favorite toppings. From quick stir-fries to adding protein to pasta dishes, having leftover rotisserie chicken on hand is always a welcome convenience in the kitchen.
The cooking time for a rotisserie chicken can vary significantly depending on several factors, including the type of rotisserie setup you’re using and the size of your bird. There are outdoor gas grill and pellet grill rotisserie setups, indoor countertop kitchen rotisseries, and even air fryer oven rotisseries, each with different heating characteristics. Here are several essential tips to guide you:
The first few times you rotisserie a chicken, pay close attention to its progress. When done, it should be a rich, deep golden-brown and emit an undeniably delicious aroma. Second, always consult your specific rotisserie brand’s manual and website for their recommended cooking times and temperature guidelines, as they are often tailored to their equipment.
Most importantly, always use a good quality digital kitchen thermometer to test the internal temperature. Insert the probe into the thickest part of the inner thigh, ensuring it doesn’t touch the bone. The chicken is safely cooked when the temperature reaches 170°F (77°C). I’ve primarily used an outdoor grill setup, and it typically takes anywhere from an hour and a half to two hours to rotisserie a medium-sized chicken (around 4-5 pounds). Timing also heavily depends on how hot your rotisserie runs and if you can precisely control the cooking temperature. External factors like ambient weather conditions (wind, cold) can also influence the total cooking time, so always prioritize the internal temperature over a strict time estimate.
There are numerous effective ways to infuse your rotisserie chicken with incredible flavor, ensuring every bite is rich and delicious:
1. Use a Binder and Dry Rub: Start by brushing the chicken with a binder such as olive oil, mayonnaise, or even a thin layer of mustard. This not only helps your chosen dry rub adhere better but also contributes to a crispy, golden skin. Then, apply a generous amount of your favorite dry rub. This could be a classic BBQ rub, a smoky paprika blend, lemon pepper, or a simple mix of salt, pepper, and garlic powder.
2. Marinate or Brine: For deep flavor penetration and extra juiciness, consider marinating the whole chicken for a few hours (or even overnight) before cooking. A brine, a salt-and-sugar solution, is another excellent option to enhance moisture and season the meat from within.
3. Stuff the Cavity with Aromatics: This is a simple yet highly effective method. Fill the internal cavity of the chicken with flavorful ingredients such as quartered lemon or orange wedges, chunks of onion, fresh sprigs of thyme, rosemary, and bay leaf, and several crushed fresh garlic cloves. As the chicken cooks, these aromatics release their essences, perfuming the meat from the inside.
4. Season the Cavity: Beyond stuffing, remember to generously salt the internal cavity of the chicken itself. This ensures the inside of the bird is just as flavorful as the outside.
5. Salt Appropriately: If your chosen dry rub is salt-free, make sure to apply salt to the outside of the chicken separately before applying the rub. This layering of seasoning builds complex flavor. By combining these techniques, you can achieve a rotisserie chicken that’s bursting with flavor from crust to core.
More Delicious Chicken Recipes to Explore
Craving more chicken inspiration? We’ve got you covered! Here are a few more fantastic chicken recipes, and don’t forget to visit our comprehensive chicken recipes index page for an abundance of ideas to elevate your poultry cooking!
- Easy Blender Lemon Mint Chicken Marinade
- Easy Smoked Chicken Breast
- Perfect Roast Split Chicken Breast
- Grilled Hoisin Chicken Skewers
Did You Master This Rotisserie Chicken Recipe?
If you’ve followed this guide and made your own delicious rotisserie chicken on the grill, I would absolutely love to hear from you! Please share your experience and add your comments below. Your feedback is invaluable, and I truly enjoy hearing about your cooking triumphs. Do you have any questions about the process, or perhaps a tip to share? Let me know! And if you loved this recipe and achieved that perfect juicy, crispy bird, please consider giving it a 5-star rating. Your ratings genuinely help other home cooks discover and enjoy this fantastic recipe.
📖 Recipe: Grilled Rotisserie Chicken
Rotisserie Chicken on a Grill
Sally Cameron
Pin Recipe
Equipment
-
Rotisserie attachment for outdoor grill
-
Rimmed baking sheet
-
Kitchen twine
-
Digital thermometer
Ingredients
Basic Rotisserie Chicken
- 4 ½ pound whole organic chicken
- 2 teaspoons olive oil OR mayo for pellet grill
- seasonings of choice see notes below
Options for Stuffing the Chicken
- ½ small onion, quartered
- 3 sprigs fresh thyme
- 2 sprigs fresh rosemary
- 2 garlic cloves, peeled and crushed
- 1 bay leaf
- ½ small lemon, quartered
Instructions
-
Remove the whole chicken from the refrigerator 1 hour prior to cooking to allow it to temper. Remove and discard any bag of innards or giblets. Rinse the bird thoroughly inside and out under cold water, then pat it completely dry with paper towels—this is key for crispy skin! Trim any excess fat around the neck cavity and the tail end. Finally, bend the wing tips back and tuck them underneath the chicken’s body to prevent them from burning and to help the bird maintain its shape.
-
Next, rub the entire exterior of the bird with olive oil (if using a gas grill) or mayonnaise (if using a pellet grill) to act as a binder. Season the inside cavity generously with a sprinkle of salt and your chosen seasoning. If you’re using aromatics, stuff them into the cavity now. Finally, tie the chicken’s legs together securely with kitchen twine and optionally use poultry lacers to close the cavity. This trussing ensures the chicken holds a compact, even shape, which is essential for uniform roasting and rotation on the spit.
-
Prepare the rotisserie spit: slide one pronged meat fork onto the steel rod, with the prongs facing inwards. Carefully skewer the chicken through its cavity, entering from the neck end and exiting through the tail end. Add the second pronged holder to the other side of the bird and push its prongs firmly into the chicken, ensuring the bird is centered and held tightly between both sets of prongs. It’s crucial that the chicken is very secure; use pliers to tighten the screws on the forks if necessary. Perform this step over a rimmed baking sheet to catch any raw juices and keep your workspace clean.
-
Place the rotisserie rod with the chicken securely into the rotisserie brackets on your grill. Turn on the motor to confirm that the chicken is spinning smoothly and evenly. While it rotates, generously season the entire outside of the chicken with your chosen dry rub. You can also do this in the kitchen before placing it on the grill, but seasoning as it turns on the spit can help achieve an even coating.
-
Preheat your grill to a consistent temperature between 350°F and 375°F (175°C – 190°C). Roast the chicken for approximately 1 ½ to 2 hours. However, the definitive indicator of doneness is the internal temperature, not time. Insert a digital thermometer into the thickest part of the inner thigh (avoiding the bone); the chicken is fully cooked when it reaches 165°F (74°C) for food safety, though many prefer to cook to 170°F-175°F (77-79°C) for optimal texture. The chicken should boast a deep golden-brown, crispy skin. Periodically check on the rotisserie to ensure it continues to turn evenly throughout the cooking process.
-
Once cooked, carefully remove the chicken from the rotisserie spit. Transfer it to a cutting board and allow it to rest, tented loosely with foil, for about 15 minutes before carving. This resting period is crucial for the juices to redistribute, ensuring a tender, succulent bird.
Notes
- A simple yet classic combination of salt, freshly ground black pepper, and granulated garlic.
- For a flavorful kick, try a Southwestern taco seasoning blend.
- My personal favorite, an versatile all-purpose dry rub that enhances any grilled poultry.
- A zesty lemon pepper seasoning for a bright, citrusy flavor.
Important Note: If you opt to use my all-purpose dry rub recipe, please be aware that it is salt-free. Therefore, ensure you generously salt your chicken first before applying the rub. This is an excellent option for those on a sodium-restricted diet, giving you control over the salt content.
Nutrition
