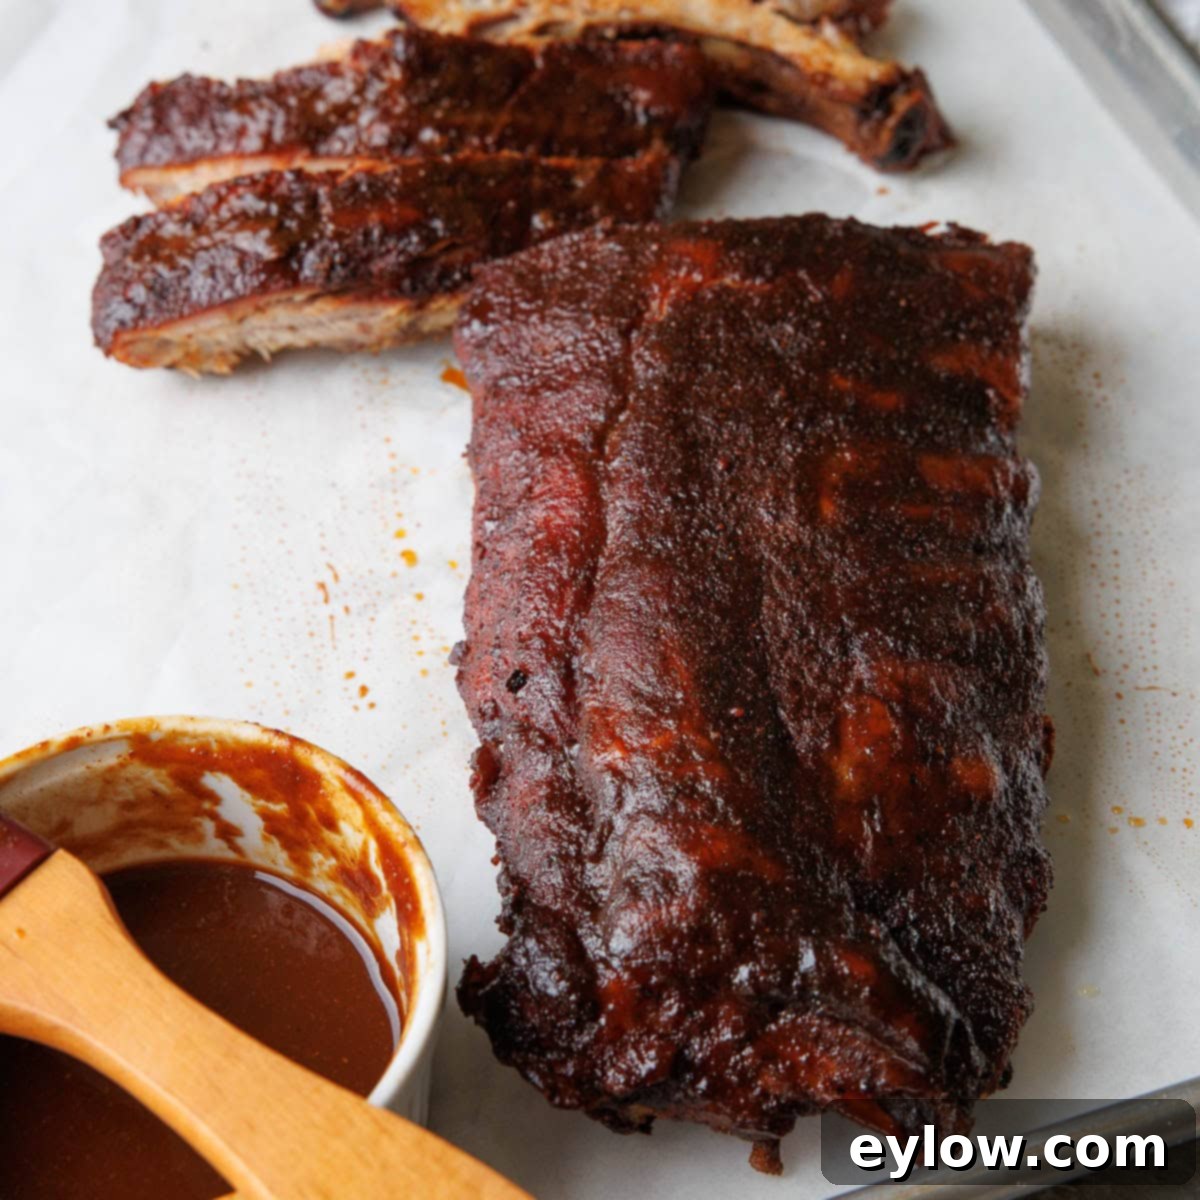
Mastering 3-2-1 Smoked Baby Back Ribs: Your Ultimate Guide to Fall-Off-The-Bone Perfection
If you’re searching for consistently tender, fall-off-the-bone smoked ribs that are guaranteed to impress, the renowned 3-2-1 ribs method is your ultimate secret weapon. This comprehensive guide will walk you through crafting exquisite smoked baby back ribs, generously coated with a homemade spice blend, lovingly spritzed for moisture, tightly wrapped to perfection, and finished with a rich, flavorful BBQ glaze. Whether you’re a novice stepping into the world of smoking or a seasoned pitmaster looking for a reliable, crowd-pleasing recipe, this straightforward technique ensures consistently delicious results every time.
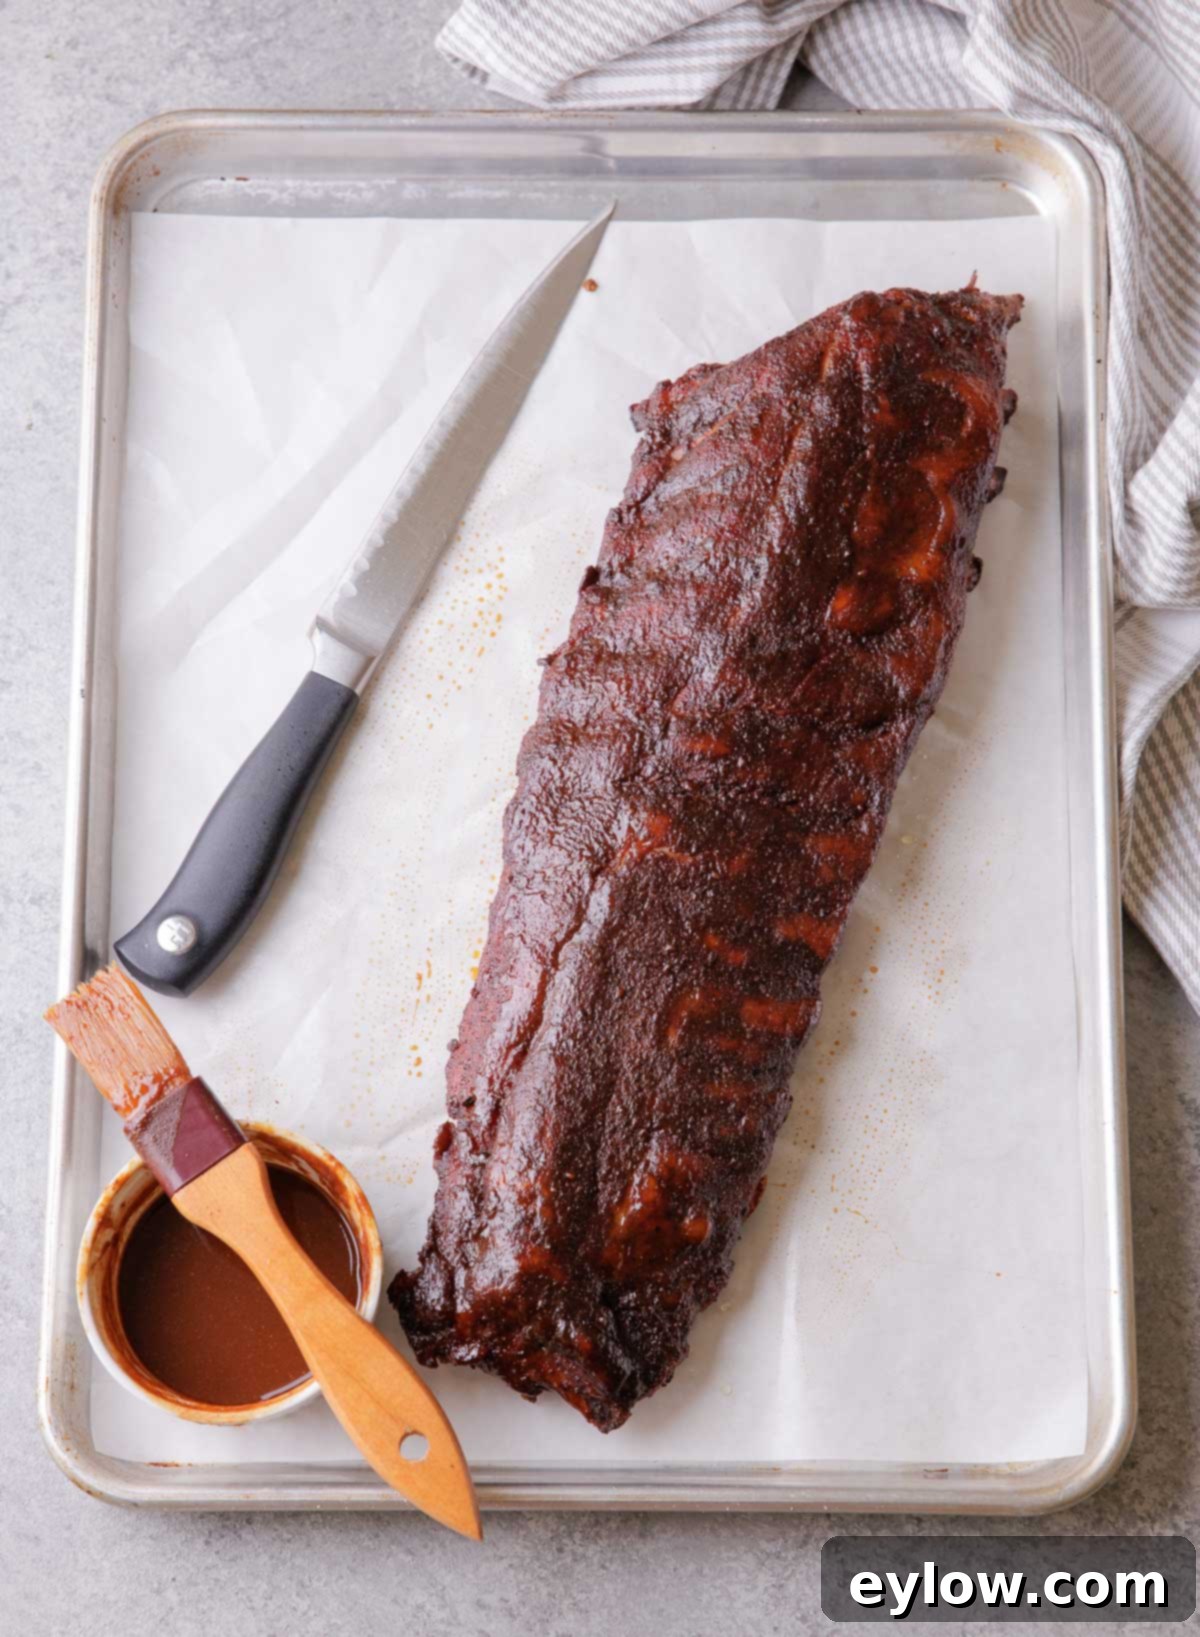
Having perfected this recipe over countless sessions, these 3-2-1 smoked baby back ribs remain a top choice in my rotation, especially when barbecue season arrives. The beauty of the 3-2-1 method lies in its simple yet effective structure: 3 hours dedicated to infusing deep smoky flavor, 2 hours wrapped for intensive tenderization, and 1 hour for developing that irresistible glazed finish. This method not only simplifies the smoking process but consistently produces ribs with a beautiful bark, rich smoky depth, and meat that practically melts in your mouth. Ideal for lively backyard gatherings, festive holiday cookouts, or simply elevating your weekend meal, these ribs are a guaranteed hit. In this detailed post, I’ll guide you through each critical step, sharing invaluable tips and insights I’ve gathered to make your smoking experience effortless and rewarding.
[feast_advanced_jump_to]
Why You’ll Love These 3-2-1 Smoked Ribs
- Perfect Bark and Tender Texture – Achieve the coveted balance of a crisp, flavorful bark on the outside and incredibly tender, fall-off-the-bone meat within. The 3-2-1 method masterfully creates this contrast, ensuring every bite is a delightful experience. The initial smoke phase builds the bark, while the wrapped phase ensures maximum moisture and tenderness.
- Foolproof and Simple Method – The 3-2-1 technique is renowned for its straightforward approach. By breaking the lengthy smoking process into three distinct, easy-to-manage phases, it removes the guesswork, making it accessible even if you’re a beginner to smoking ribs or using a pellet grill for the first time. Each step has a clear purpose, guiding you to success.
- Balanced, Not Overly Sweet Flavor – Unlike many commercial or overly sugared rib recipes, my version focuses on a harmonious flavor profile. We avoid making them a “sugar bomb” by balancing just enough sweetness to complement the profound smoky depth, the bold notes of our carefully selected seasoning, and the rich, savory finish of the glaze. This allows the natural pork flavor and aromatic smoke to shine.
What You’ll Need to Make Perfect 3-2-1 Ribs
- Ribs – For optimal results with the 3-2-1 method, it’s crucial to select baby back ribs. These are smaller, leaner, and cook more consistently to that desired fall-off-the-bone texture. Avoid St. Louis ribs or spare ribs for this specific method, as they may require significant adjustments to cooking times due to their size and fat content. Look for packages labeled “baby back ribs” or “loin ribs.”
- Rib Rub – I highly recommend using my homemade BBQ dry rub. Its primary advantage is that it contains no added salt, giving you precise control over the seasoning process. This allows you to salt the ribs separately, ensuring deep flavor penetration without over-salting. However, feel free to use your favorite high-quality dry rub. Just remember to adjust your initial salting if your chosen rub already contains salt.
- Barbecue Sauce – The final hour is dedicated to glazing your ribs. For this, a thin layer of your preferred BBQ sauce works wonders. You can use my homemade BBQ sauce, or any commercial brand you love. The key is to thin it slightly with a touch of water or apple cider vinegar to achieve a glaze-like consistency, which helps it adhere better and prevents burning during the final phase.
- Spritz – This essential moisture-adding liquid for the wrapped phase is a simple blend. A mix of pineapple juice, orange juice, or apple juice combined with apple cider vinegar. This spritz not only keeps the ribs moist during the critical braising stage but also adds subtle fruity notes and a touch of tanginess, enhancing the overall flavor profile. It prevents the ribs from drying out and helps the rub adhere.
For precise measurements of ingredients, including salt and pepper, please refer to the detailed recipe card below.
Essential Tools – To execute this method flawlessly, you’ll need a few key pieces of equipment: a small spray bottle for the spritz, a reliable pastry brush for glazing, large rolls of heavy-duty aluminum foil for wrapping, and half sheet pans for easy transport and preparation. Parchment sheets can also be quite handy for minimizing cleanup.
Choosing the Right Cut for 3-2-1 Ribs
Understanding the different cuts of pork ribs is crucial, as their characteristics directly impact cooking times and optimal methods. The 3-2-1 method, in particular, is perfectly tailored for baby back ribs. Here’s a quick overview of common cuts and why baby backs are often preferred for this technique:
- Baby Back Ribs – These ribs are harvested from the top of the rib cage, nestled close to the spine, below the loin muscle. They are typically shorter, leaner, and boast a gentle curve, earning them the moniker “loin ribs.” Their inherent tenderness and lower fat content mean they cook faster and are ideal for achieving that coveted fall-off-the-bone texture characteristic of the 3-2-1 method. This is the recommended cut for this recipe, ensuring consistent and delicious results. When shopping, look for labels explicitly stating “baby back ribs” or “loin ribs.”
- St. Louis Ribs – Cut from the belly section of the pig, these ribs are essentially spare ribs that have been trimmed to create a flatter, more uniform, and rectangular shape. They are meatier and contain more fat than baby backs, which contributes to a rich flavor. While excellent for smoking, they possess more connective tissue and fat, and their larger size means they may require a slightly longer cooking time, or a small adjustment to the wrapping phase, compared to baby back ribs using the 3-2-1 method.
- Spare Ribs – The largest and least trimmed cut, spare ribs originate from the bottom portion of the rib cage, extending towards the breastbone. They are characterized by more connective tissue, cartilage, and fat, making them incredibly flavorful but also demanding a longer, slower cook to achieve tenderness. While you *can* adapt spare ribs to the 3-2-1 method, be prepared for potential adjustments, especially needing a longer cook to fully render the fat and break down the connective tissue. A reliable indicator of doneness for spare ribs is the “bend test,” where they should bend significantly without breaking when lifted from one end.
Substitutions and Variations for Your Ribs
While the classic 3-2-1 method for baby back ribs is undeniably delicious, don’t hesitate to experiment with these simple substitutions and variations to tailor the flavor to your liking:
- Add a Splash of Bourbon to the Spritz – For an extra layer of complexity and depth, a couple of teaspoons of good quality bourbon can be added to your spritz mixture. This optional addition introduces subtle caramel and oak notes that beautifully complement the smoky pork. While it enhances the flavor, rest assured your ribs will still be fantastic without it if you prefer to omit alcohol.
- Experiment with Bottled BBQ Sauces – The final glazing stage is an opportunity to personalize your ribs. Feel free to use your favorite store-bought BBQ sauce as the glaze. However, exercise caution with commercial sauces, as many are high in sugar content. High sugar levels can cause the sauce to burn easily at the higher temperatures often present during the final glazing hour. If using a sweet sauce, consider thinning it slightly more and applying it in multiple thin layers, monitoring it closely to prevent charring.
- Try a Hoisin-Glazed Finish – For an exciting departure from traditional barbecue flavors, consider brushing the ribs with my homemade hoisin sauce during the final hour of cooking. This Asian-inspired glaze delivers a unique sweet, salty, and umami profile, creating a rich, sticky-sweet coating that is always a surprising and delightful hit with guests.
Chef’s Tip: Why I don’t use a binder on ribs: Many recipes suggest using a binder like mustard or oil before applying the rub to help it stick. However, for ribs—especially when you follow the crucial steps of salting first and allowing the seasoned ribs to rest overnight in the refrigerator—a binder is simply not necessary. The natural moisture that the salt draws out from the meat, combined with the overnight rest, creates a perfectly tacky surface for the dry rub to adhere to and penetrate deeply. This method still yields a beautiful, well-developed bark and profound flavor without the added step. If you’re keen to try one, a thin layer of classic yellow mustard remains a popular and excellent choice among many pit masters, adding a slight tang that some appreciate.
How to Make 3-2-1 Smoked Baby Back Ribs
Prep the Ribs for Maximum Flavor
For the absolute best results, begin preparing your ribs the night before you plan to smoke them. This extended resting time allows the flavors to truly penetrate the meat. If you happen to forget, don’t worry—your ribs will still turn out wonderfully!
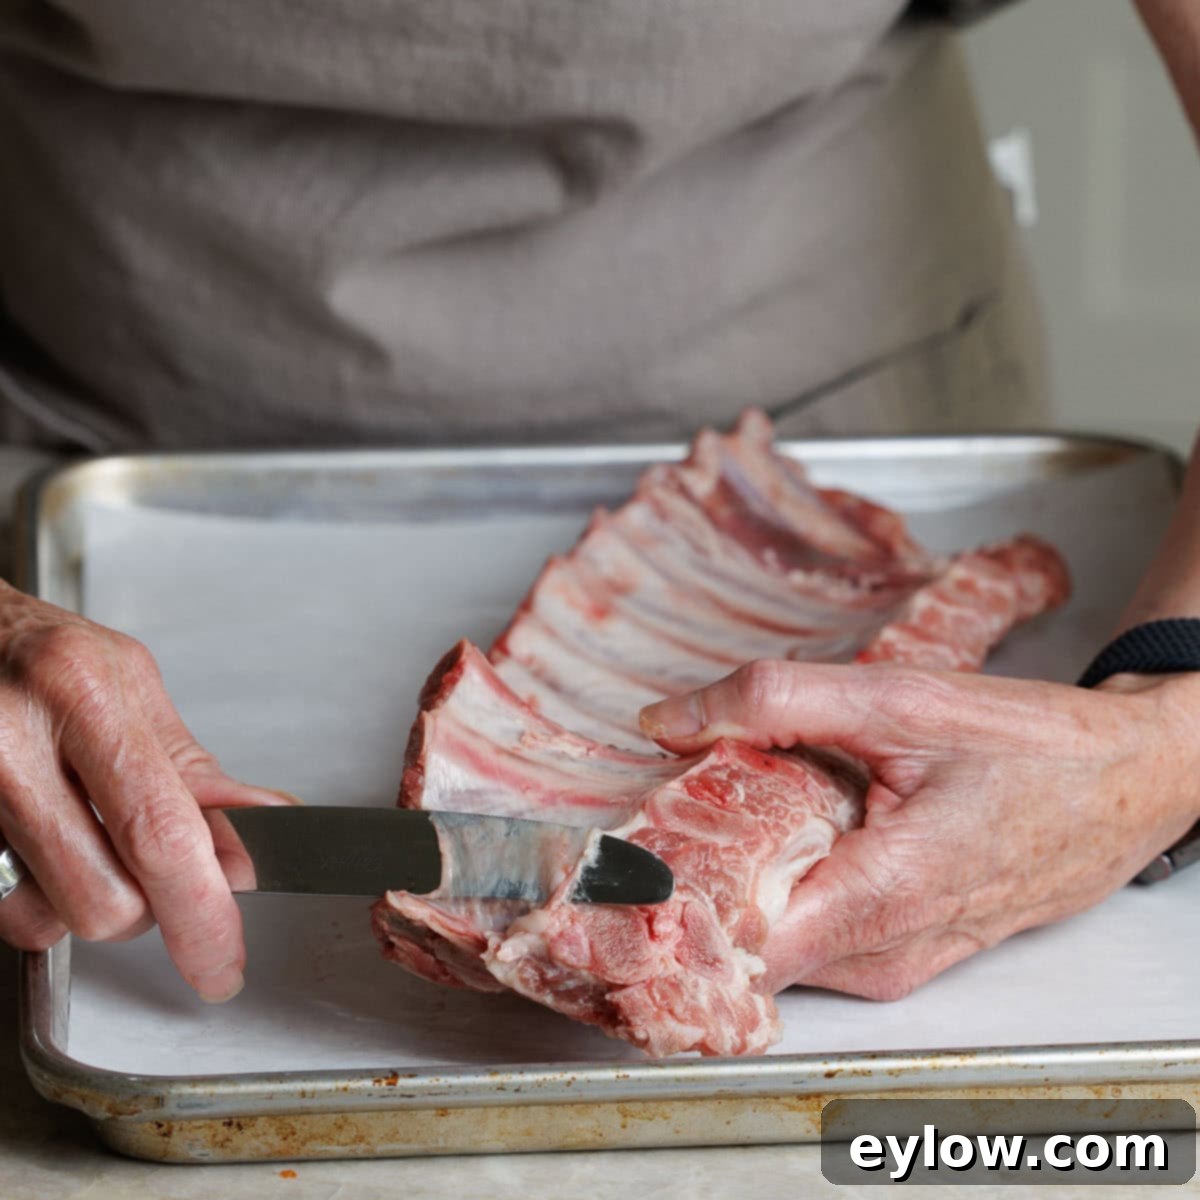
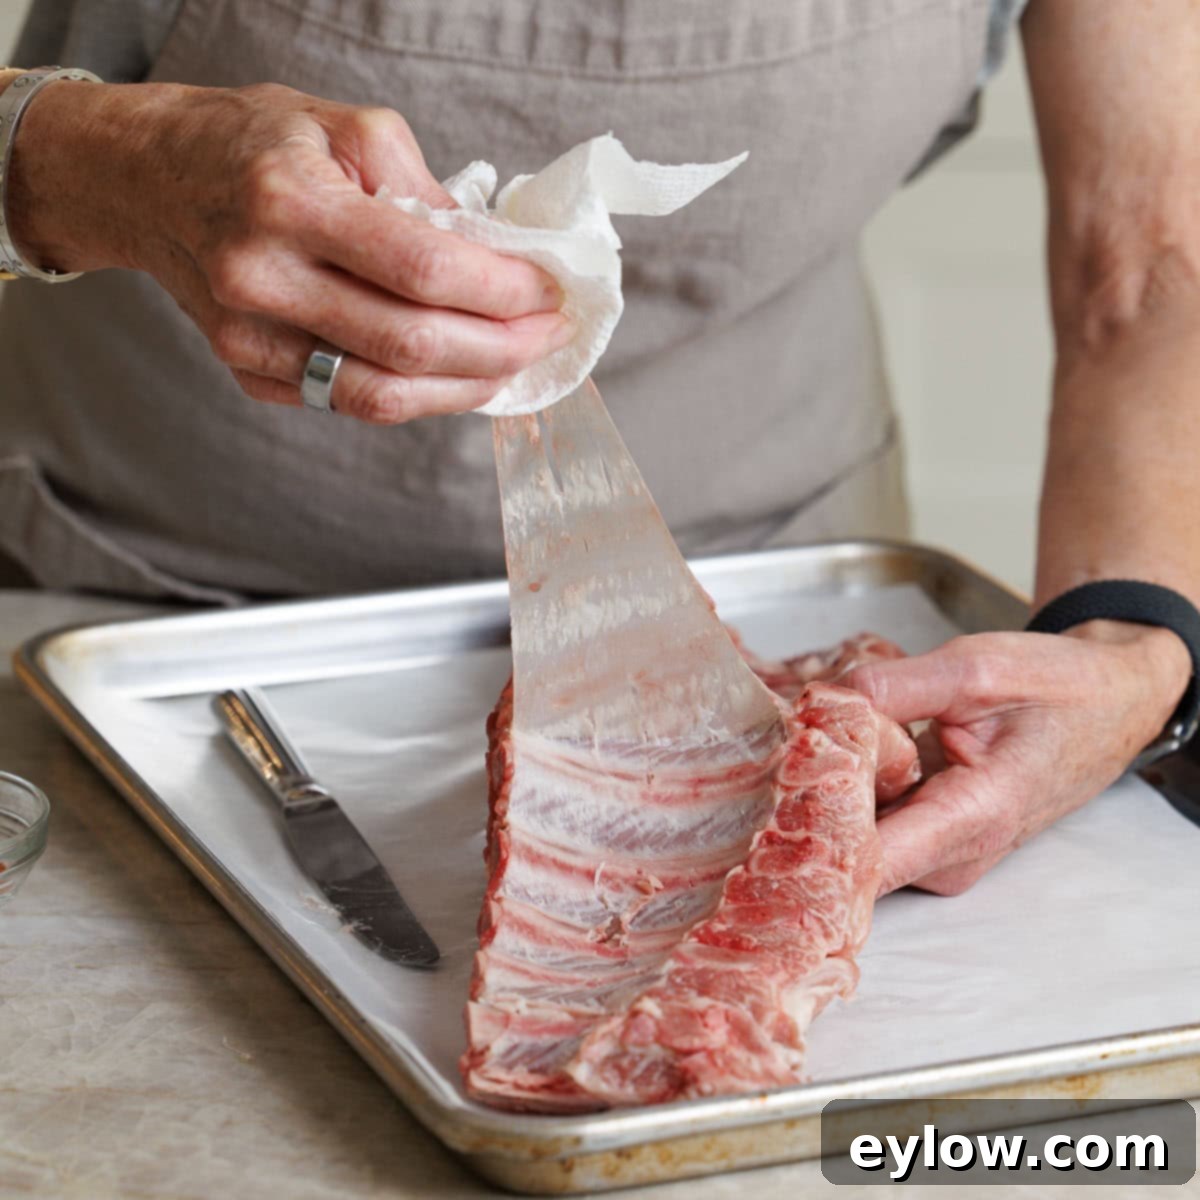
Step 1. Begin by removing the silver skin (membrane). This thin, tough, silvery membrane is found on the bone side (underside) of the ribs. It’s crucial to remove it because it doesn’t break down during cooking, resulting in a chewy texture, and it acts as a barrier, preventing your delicious rub and smoke flavors from fully penetrating the meat. To remove it, use a blunt object like a table knife or the handle of a spoon. Carefully slide it under the membrane at the smaller end of the rack, wiggling it gently to separate a small section. Once you have a loose flap, grab it firmly with a paper towel (this provides a better grip) and slowly pull the entire length of the membrane off the ribs. If it tears, simply re-grip and continue pulling until it’s completely gone. Patience is key here!
Step 2. Season the ribs generously. Because my recommended dry rub recipe is salt-free, I always sprinkle the ribs with a fine layer of sea salt or smoked salt first. This allows me to control the salinity precisely, ensuring the meat is perfectly seasoned without becoming overly salty. After salting, liberally apply your chosen spice blend to both sides of the ribs, gently rubbing it in to ensure an even and thorough coating. If you’re using a commercial rub that already contains salt, omit the separate salting step to prevent over-seasoning.
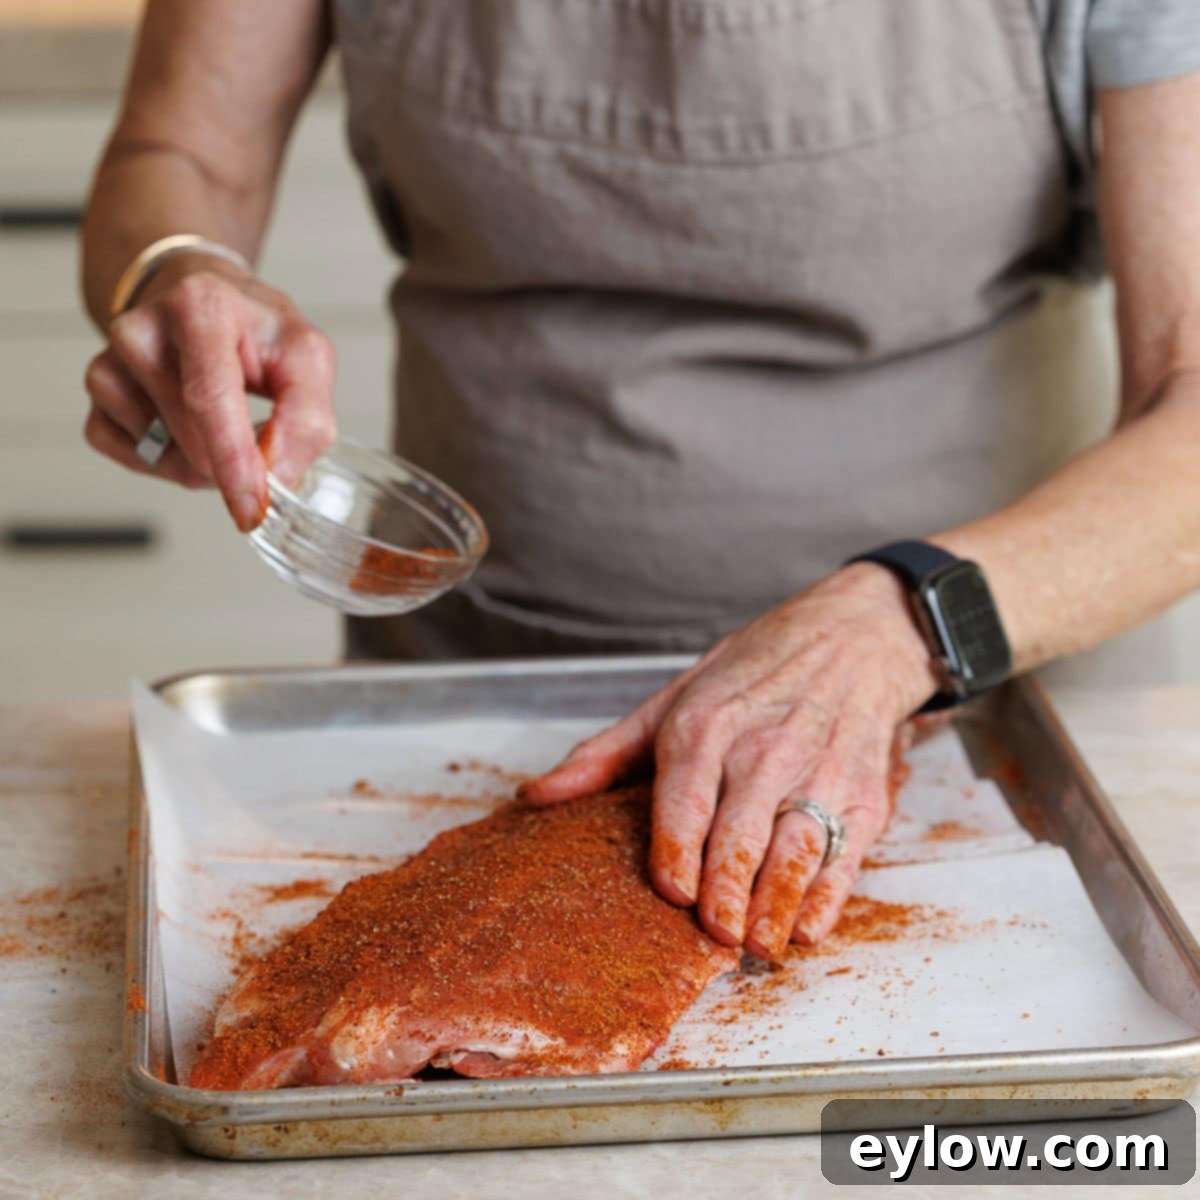
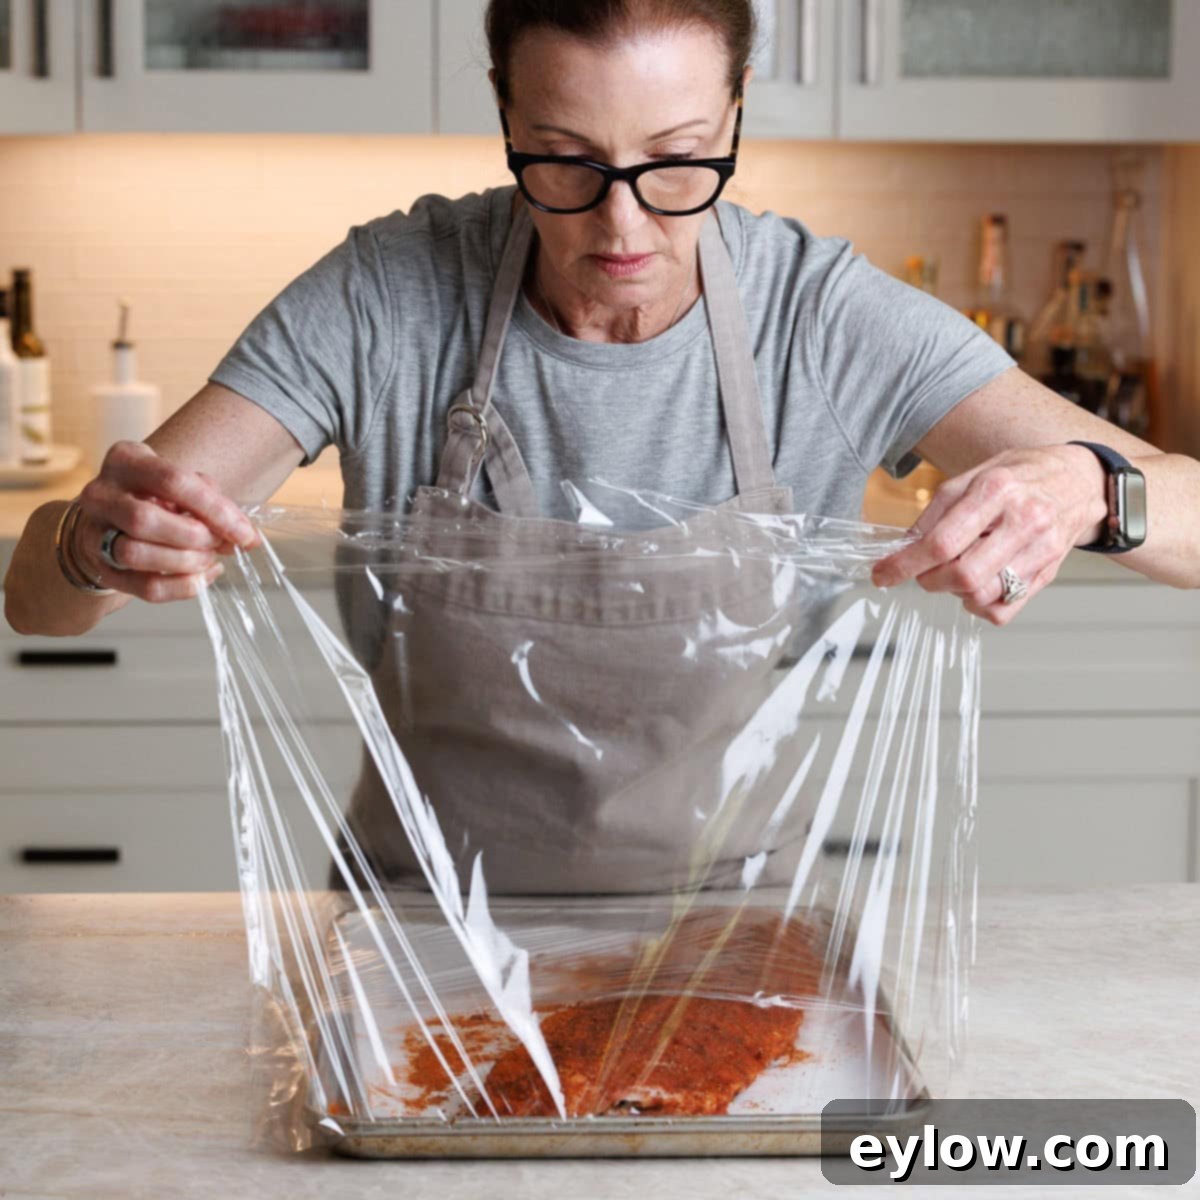
Step 3. Wrap and rest the seasoned ribs. Once seasoned, place each rack of ribs on a half sheet tray. Tightly wrap the trays with plastic wrap, ensuring a good seal, and then transfer them to the refrigerator. Allow them to rest overnight, ideally for 8-12 hours. This crucial resting period allows the salt and spices to penetrate deeply into the meat, effectively dry-brining the ribs and building a much richer, more complex flavor profile before they even touch the smoker. It also helps in forming a better bark later.
Smoking Ribs: The 6-Hour Journey to Perfection
Set your pellet grill temperature to 225°F (107°C). This low-and-slow temperature is fundamental to tender, smoky ribs. If your smoker has a “Super Smoke” setting, engage it for maximum flavor infusion; this setting allows for denser smoke production at lower temperatures. Before starting, ensure your pellet hopper is completely full with your preferred wood pellets – I typically use a blend of fruit woods (like apple or cherry) and hardwoods (like hickory or oak) for a balanced, aromatic smoke. Also, make sure your grill grates are clean to prevent sticking and ensure even cooking. Unwrap the seasoned ribs from the plastic wrap and let them sit at room temperature for approximately 1 hour before placing them on the smoker. This step helps to take the chill off the meat, promoting more even cooking and better smoke adhesion.
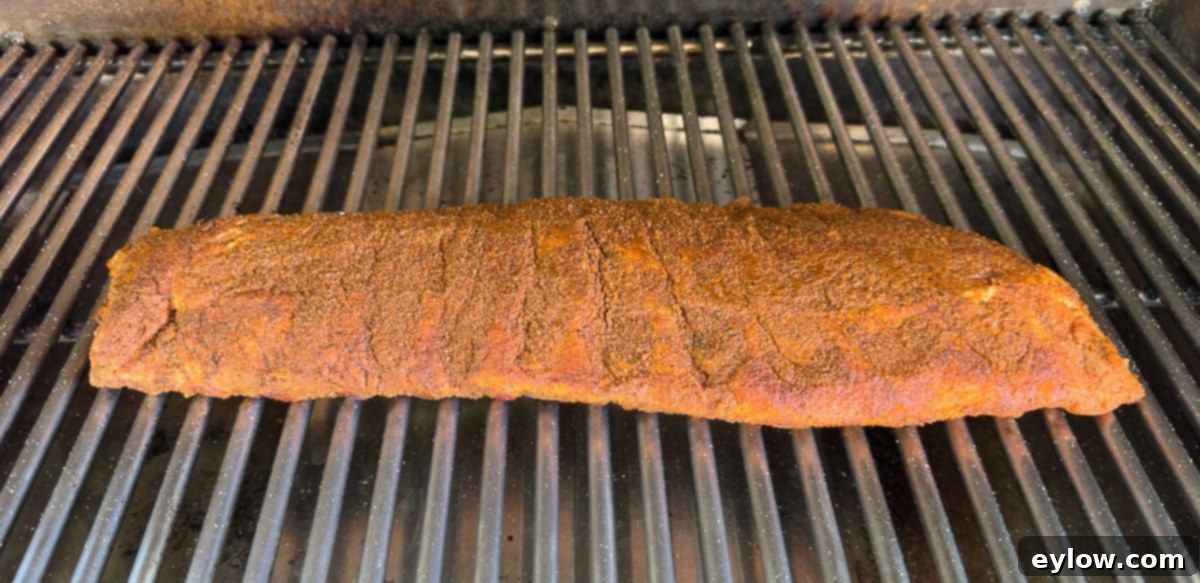
Phase 1: Deep Smoke Infusion (3 Hours)
With your smoker preheated and ribs at room temperature, it’s time for the first crucial phase. Carefully place the ribs directly onto the grill grates, bone side down. This orientation helps protect the meat from drying out and allows the smoke to circulate evenly around the top surface. Close the smoker lid and let them smoke undisturbed for 3 hours at 225°F. During this initial period, the magic of smoke penetration occurs, forming a beautiful exterior “bark” and infusing the meat with that signature smoky flavor. Resist the urge to open the lid frequently, as “if you’re lookin’, you ain’t cookin'”. Use this time efficiently to prepare for the next phase: tear off sheets of heavy-duty aluminum foil that are slightly longer than each rack of ribs, ready for wrapping.
Chef’s tip: Foil vs Pink Butcher Paper for Ribs. When it comes to the crucial wrapped phase of smoking ribs, the choice between foil and pink butcher paper depends on your desired outcome. For the 3-2-1 method, especially with baby back ribs, I advocate for heavy-duty aluminum foil. Foil creates a tightly sealed environment that traps steam and moisture, effectively braising the ribs and significantly speeding up the tenderizing process to achieve that ultimate fall-off-the-bone texture. This “Texas crutch” helps break down connective tissues quickly. Pink butcher paper, on the other hand, is an excellent alternative if your preference leans towards a slightly firmer texture and a more pronounced, drier bark. Butcher paper is breathable, allowing some moisture to escape while still protecting the ribs. This means the ribs won’t be quite as fall-apart soft as foil-wrapped ribs, and they may require a slightly longer cooking time in this phase. Consider your texture preference when making this choice.
Phase 2: The Tenderizing Wrap (2 Hours)
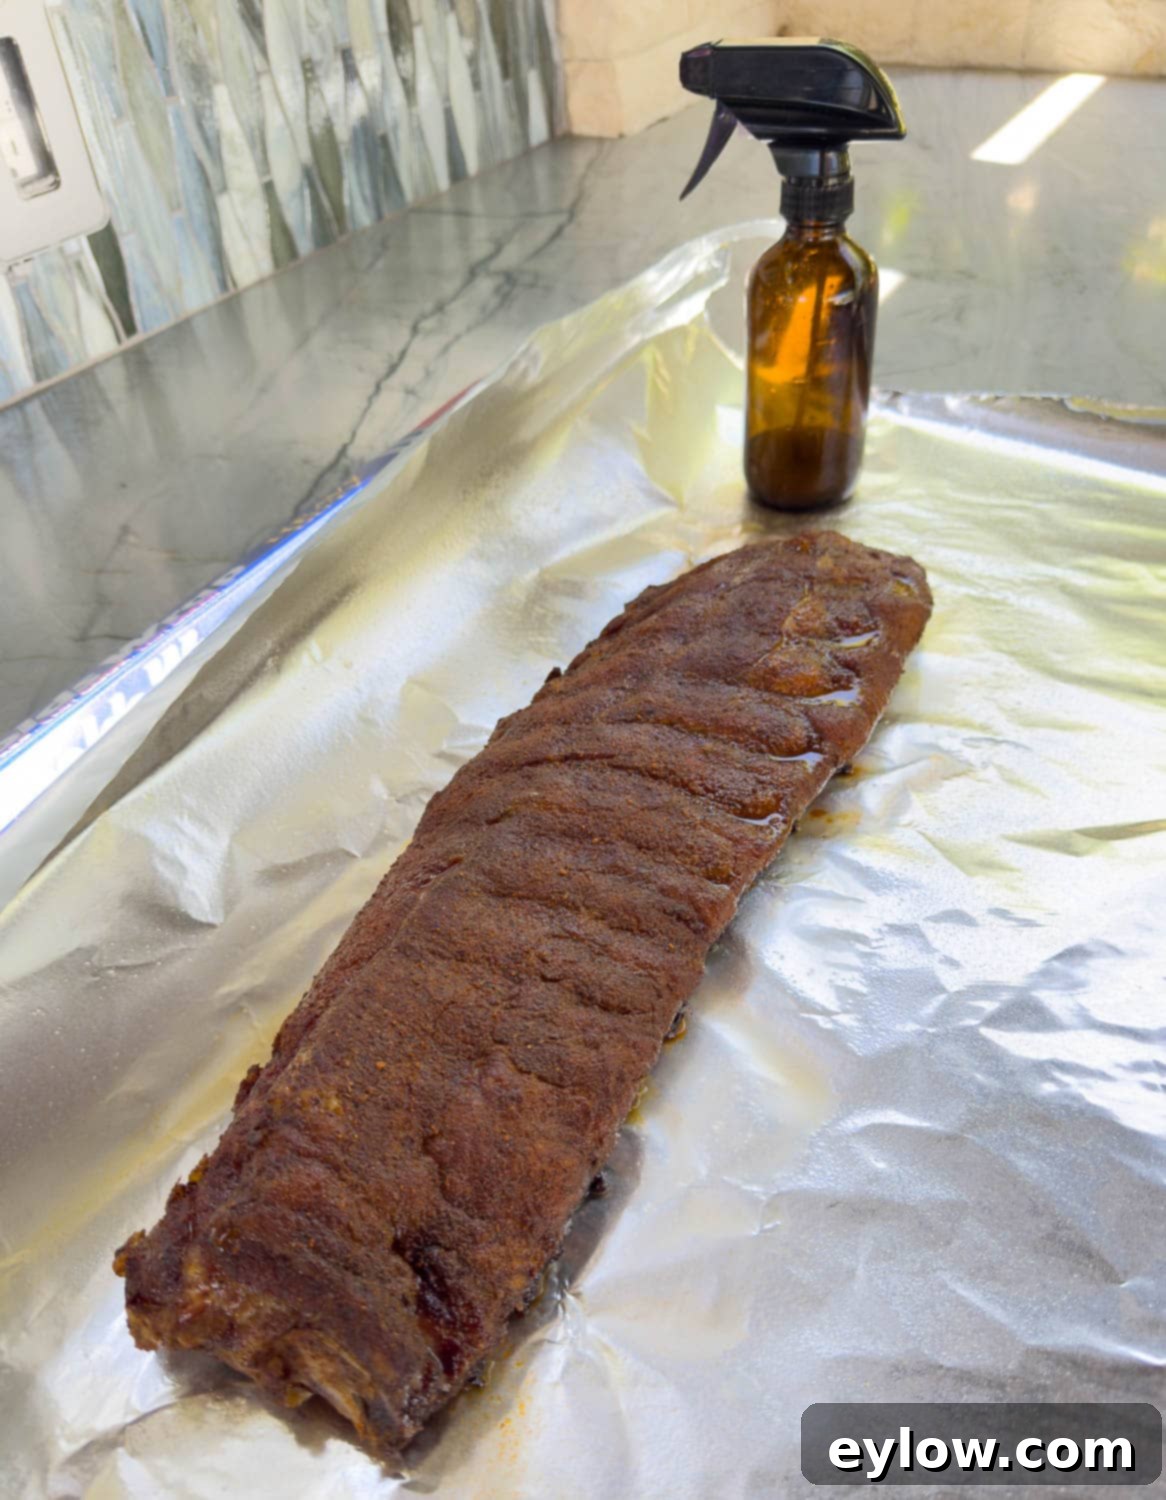
After 3 hours of initial smoking, carefully remove the ribs from the smoker. Place each rack onto its prepared double layer of heavy-duty aluminum foil. Now, it’s time to apply your rib spritz liberally. This mixture of fruit juice and apple cider vinegar not only adds moisture but also subtle flavor and helps to dissolve some of the bark, which will be reabsorbed during the braising process. After spritzing, meticulously fold the foil around the ribs, creating a tightly sealed packet. It’s important to crimp the edges thoroughly to prevent any steam or liquids from leaking out, but avoid wrapping the ribs too tightly; leave a little room inside the packet for the steam to circulate freely. Return these foil-wrapped ribs to the smoker, maintaining the 225°F temperature, and continue cooking for an additional 2 hours. This phase is where the magic of tenderization happens, as the ribs essentially braise in their own juices and the spritz, breaking down connective tissues and making them incredibly succulent.
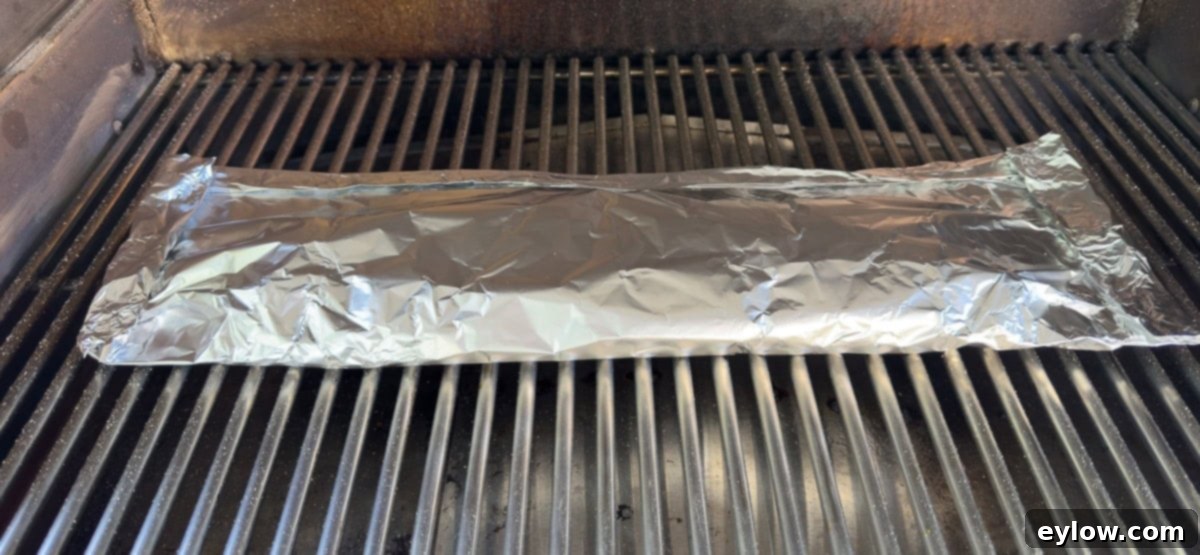
Phase 3: Glaze & Finish (1 Hour)
You’re almost there! For the final hour of cooking, carefully remove the foil-wrapped ribs from the smoker. Gently unwrap the foil packets, peeling back the top layer to expose the ribs while keeping them cradled in the foil to catch any delicious juices. Before glazing, ensure your BBQ sauce is thinned slightly to a glaze-like consistency; this prevents it from burning too quickly and ensures an even, shiny coating. Using your pastry brush, generously brush the ribs with the thinned BBQ glaze. Return the now-exposed, glazed ribs to the smoker, leaving the foil open (or remove them from the foil entirely if you prefer, placing them directly on the grates for a crispier bottom). Continue cooking for the last hour. For an extra layer of flavor and shine, brush with more glaze during the final 15 minutes of this phase. This allows the sauce to caramelize and set, forming that irresistible sticky finish.
How to Know When Your 3-2-1 Ribs are Perfectly Done
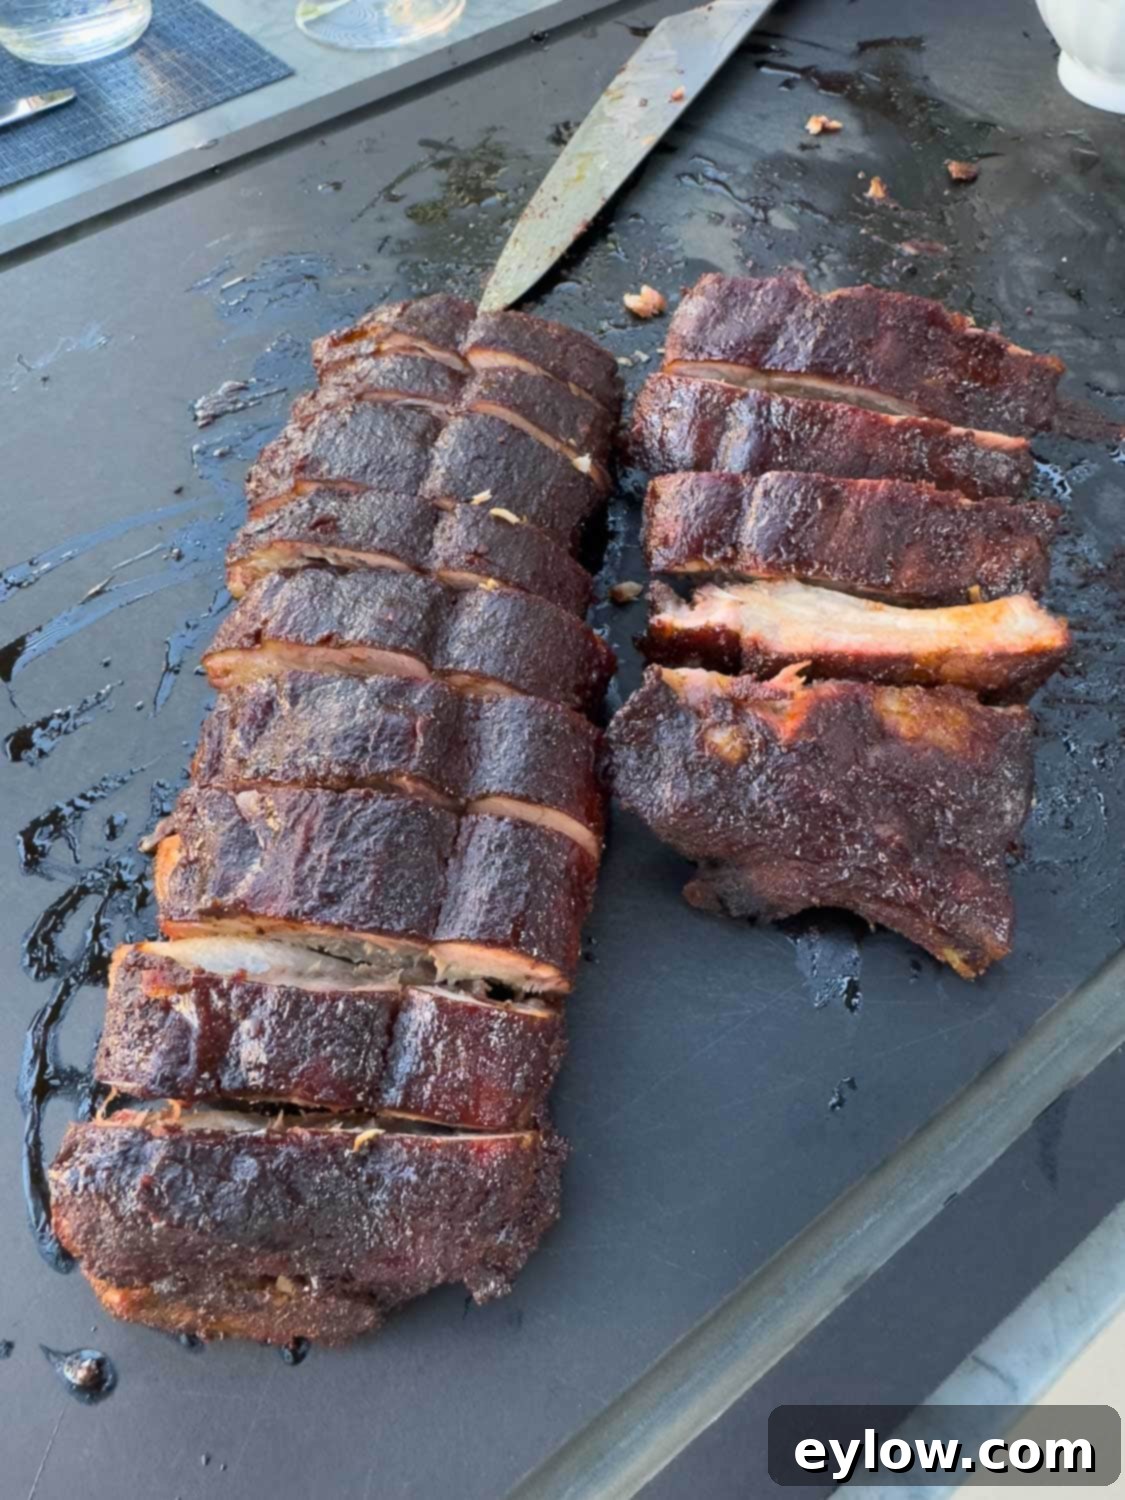
Determining doneness for ribs isn’t just about internal temperature (though that’s a good guide, aiming for 195-203°F/90-95°C for fall-off-the-bone texture). The most reliable indicator for perfectly tender, fall-off-the-bone ribs is the “bend test.” Carefully lift a rack of ribs from one end with tongs. If they are done, the rack will bend significantly into a gentle arc, and the meat will show signs of tearing away from the bone at the top. The bones should also wiggle loosely when twisted. Once done, remove the ribs from the smoker and let them rest for 10-15 minutes before slicing. This brief rest allows the juices to redistribute, resulting in more succulent meat. To slice, flip the ribs over (bone side up) to easily identify where to cut between the bones with a sharp knife. Serve immediately with any extra BBQ sauce on the side for dipping.
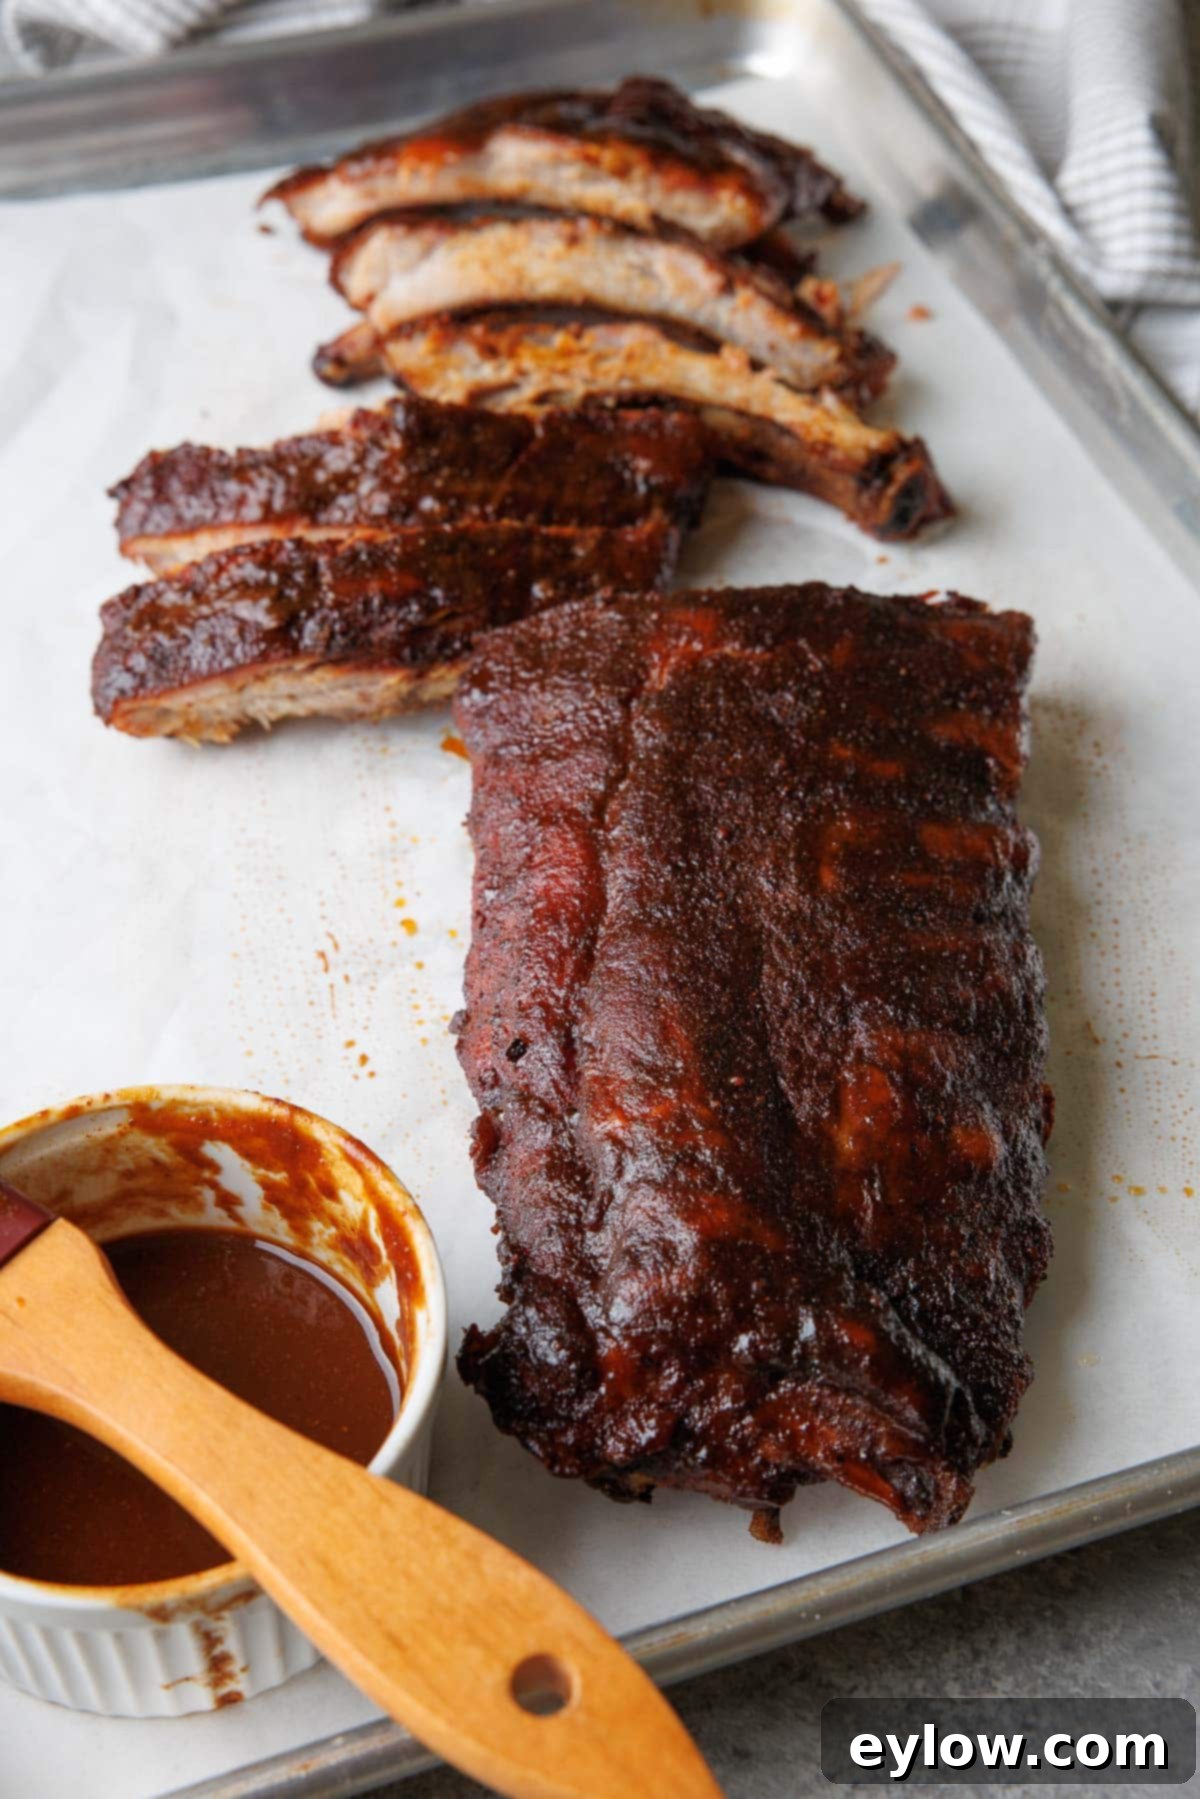
Serving Suggestions for Your Smoked Ribs
These tender, smoky 3-2-1 ribs are the quintessential centerpiece for any summer gathering and pair beautifully with a wide array of classic barbecue side dishes. Here are some of my favorite accompaniments to serve alongside these delectable ribs, offering a perfect balance of flavors and textures:
- Classic Coleslaw – The crisp, refreshing crunch and tangy dressing of a classic coleslaw provide a perfect counterpoint to the rich, fatty, and smoky flavors of the ribs. It’s a palate cleanser that never disappoints.
- Sweet Corn Succotash – A vibrant and flavorful side, my sweet corn succotash is a personal favorite to prepare alongside smoked ribs. Its medley of fresh vegetables, often including lima beans and bell peppers, adds sweetness and textural variety.
- French Potato Salad – Hearty, satisfying, and incredibly popular, this make-ahead friendly potato salad with its bright vinaigrette (instead of heavy mayo) offers a delightful contrast to the ribs. It’s perfect for feeding a crowd.
- Cornbread (Gluten-Free) – Warm, slightly sweet cornbread is an absolute must-have. Its crumbly texture is fantastic for soaking up any extra barbecue sauce and rich meat drippings, making it the perfect mop for every last drop of flavor.
- Baked Beans – A truly iconic side dish for ribs. Whether you choose to make them from scratch with a robust ginger-molasses flavor or opt for a quick shortcut using canned beans, baked beans add a sweet, savory, and hearty element to your barbecue spread.
- Peach Burrata Salad – For a touch of elegance and fresh sweetness, a burrata and peach salad is surprisingly compatible. The creamy burrata and juicy peaches offer a refreshing, light contrast to the rich ribs (you can easily skip the prosciutto if desired).
- Watermelon Salad – A wonderfully refreshing and hydrating side, this salad combines cool cucumber, aromatic basil, and salty feta cheese. It’s a bright and unexpected pairing that cleanses the palate beautifully after rich barbecue.
- Pound Cake (Gluten-Free) – Finish your meal on a high note with a perfect gluten-free pound cake. So moist and flavorful, no one will even guess it’s GF! Serve it simply with fresh berries, a scoop of vanilla ice cream, or a dollop of whipped cream for a delightful dessert.
Beyond specific side dishes, remember that these perfectly smoked ribs are ideal for celebrating holidays like the 4th of July, Father’s Day, Labor Day, or any warm summer weekend when you want to truly wow your friends and family with exceptional barbecue.
Leftovers and Storage for Smoked Ribs
While freshly smoked ribs are always best, you can certainly enjoy any delicious leftovers for days to come. Proper storage and reheating will ensure they remain flavorful and moist:
- Refrigerator Storage – Smoked ribs, whether left whole or cut into individual portions, will keep beautifully in an airtight container in the refrigerator for up to 4 days. Ensure they are completely cooled before storing to prevent condensation buildup.
- Gentle Reheating is Key – To preserve their tenderness and moisture, avoid harsh reheating methods. The best way to reheat ribs is gently in a low oven (around 250°F / 120°C), covered tightly with aluminum foil to trap moisture. You can also reheat them on a grill over indirect, low heat. A quick re-glaze with extra BBQ sauce can bring them back to life.
- Repurpose the Meat for New Meals – Don’t let any leftover rib meat go to waste! If you have only a small amount or prefer a different meal, strip the meat off the bones. This versatile smoked pork can be transformed into incredible tacos, added to salads for a smoky protein boost, or used to make fantastic sandwiches and sliders.
- Freezer-Friendly (Optional) – While whole racks of ribs aren’t ideal for freezing due to potential texture changes, the cooked meat itself can be frozen. Strip the meat off the bones, shred or chop it, and store it in an airtight freezer-safe bag or container for up to 2-3 months. Thaw overnight in the refrigerator and reheat gently for future use in various dishes.
Recipe FAQs for 3-2-1 Smoked Ribs
The 3-2-1 method is a time-tested technique that refers to the three distinct phases of smoking ribs, typically baby back ribs, over a total of six hours. The “3” signifies the first 3 hours where the ribs are smoked unwrapped directly on the grill grates, allowing them to absorb deep smoke flavor and develop a savory bark. The “2” represents the next 2 hours, during which the ribs are tightly wrapped in foil (often with a spritz of liquid) and returned to the smoker. This phase creates a moist, steamy environment that tenderizes the meat, breaking down connective tissue. Finally, the “1” stands for the last hour, where the ribs are unwrapped, brushed with BBQ sauce, and returned to the smoker to caramelize the glaze and firm up the bark. It’s a highly effective and popular method for achieving perfectly tender, smoky results.
Yes, the 3-2-1 method can be adapted for St. Louis or spare ribs, but you will almost certainly need to adjust the cooking times. These cuts are larger, meatier, and contain more fat and connective tissue than baby back ribs, which are leaner and cook faster. For St. Louis or spare ribs, you might find that you need to extend the “2” (wrapped) phase by an extra hour, making it a 3-3-1 method, or even extend the final “1” (unwrapped and glazed) phase to ensure they are fully tenderized and the fat has rendered properly. Always perform the “bend test” to gauge doneness, as timing can vary based on the specific rack.
While foil is generally recommended for the 3-2-1 method to guarantee that signature fall-off-the-bone tenderness, it’s not the only option. Foil is ideal because it creates a steamy, braising environment that rapidly breaks down tough connective tissues. However, if you prefer a firmer texture and a more robust, crispier bark, you can use pink butcher paper instead. Butcher paper is semi-permeable, allowing some moisture to escape while still protecting the ribs from excessive smoke and heat. Keep in mind that ribs wrapped in butcher paper may take a little longer to become fully tender compared to those wrapped in foil, so you might need to extend the “2” hour phase slightly.
In my experience, a binder like mustard or mayonnaise is generally not necessary for ribs, especially if you follow the crucial step of salting the ribs first and allowing them to rest overnight. The natural moisture that the salt draws out from the meat creates a perfectly tacky surface for the dry rub to adhere to and penetrate deeply. This method ensures a beautiful bark and rich flavor without an extra layer. However, if you prefer to use one, yellow mustard is a classic choice among many pit masters. It adds a slight tang and helps the rub stick, but it won’t drastically change the final flavor profile.
Yes, you absolutely can make excellent 3-2-1 ribs on a gas grill with some modifications. The key is setting up your grill for indirect heat and maintaining a consistent low temperature (225°F-250°F / 107°C-120°C). If your grill has multiple burners, turn on one or two burners on one side to low, and place the ribs on the opposite side, away from direct heat. For that essential smoky flavor, use a smoker box or a foil packet filled with soaked wood chips or pellets placed directly over the lit burner. Ensure the wood smolders and produces smoke, rather than igniting into flames. You’ll need to monitor the grill temperature closely using an external thermometer and rotate the ribs occasionally for even cooking. If maintaining a consistent low temperature for the full 6 hours is challenging, you can smoke the ribs on the grill for the initial 3-hour phase, and then transfer them to a preheated oven at 225°F (107°C) to complete the wrapped and glazed phases. This hybrid method still yields fantastic, tender, and flavorful results.
More Delicious Recipes From the Pellet Grill
Once you’ve mastered these incredible 3-2-1 ribs, you’ll be eager to explore more pellet grill possibilities. Stay tuned for even more fantastic smoker recipes coming soon! In the meantime, here are some other savory dishes you can prepare on your pellet grill:
- Easy Smoked Chicken Breast
- Smoked Chicken Legs Recipe
- Easy Smoked Salsa (pellet grill recipe)
- Smoked Queso Dip with Real Cheese
⭐️Did You Make This Recipe?
If you embark on the journey of making these delicious 3-2-1 smoked ribs, I would absolutely love to hear about your experience! Please take a moment to add your comment below. Your feedback is incredibly valuable, and I truly enjoy hearing from you. If you loved these ribs as much as I do, please consider leaving a 5-star rating! Your ratings and reviews not only help me improve but also assist other readers in finding and trusting this fantastic recipe.
📖 Recipe
3-2-1 Rib (smoked baby back ribs)
Sally Cameron
Pin Recipe
Equipment
-
Small spray bottle
-
Half sheet trays
-
Large rolls heavy duty foil
-
Pastry brush
Ingredients
- 3 pounds baby back ribs about 2 racks
- 4-6 tablespoons BBQ dry rub my recipe or your own, note below.
- ½ cup Bbq sauce or hoisin
- sea salt or smoked salt if your rub does not contain salt
Rib spritz
- ½ cup juice pineapple, apple, or orange
- 2 teaspoon bourbon optional but good!
- 1 ½ teaspoons apple cider vinegar
Instructions
Prep the ribs
-
Start by removing the silver skin. This tough membrane is on the bone side of the ribs and can prevent flavor penetration and make ribs chewy. Use a table knife or spoon handle to wiggle under the membrane at the smaller end. Grab the loosened flap with a paper towel for grip, and pull it firmly along the length of the ribs until it comes off completely.
-
Season the ribs with a dry rub. If your chosen dry rub (like my homemade version) does not contain salt, sprinkle both sides of the ribs with sea salt first to control salinity. Then, generously apply the spice blend over both sides of the ribs, gently rubbing it into the meat to ensure an even and thorough coating. If your rub already contains salt, skip the initial salting step.
-
Wrap and rest the ribs. Place each seasoned rack of ribs on a half sheet tray. Tightly wrap the trays with plastic wrap, ensuring a good seal, and then place them in the refrigerator overnight (ideally 8-12 hours). This allows the seasoning to deeply penetrate the meat and helps build flavor before smoking.
Get ready to smoke
-
About 1 hour before you plan to start smoking, remove the ribs from the refrigerator and unwrap them. Let them sit at room temperature to take the chill off, which promotes more even cooking. Check the hopper of your pellet grill to ensure it’s full of your chosen wood pellets (e.g., fruit wood blend) and that the grill grates are clean. Approximately 20 minutes before you’re ready to cook, set the smoker temperature to 225°F (107°C) and allow it to preheat fully, engaging the Super Smoke setting if available.
Smoking ribs: Phase 1 – 3 hours (Smoke & Bark)
-
Carefully place the ribs directly on the grill grates, with the curved (meat) side facing up. Close the smoker lid and smoke for 3 hours at 225°F (107°C) on the smoke or super smoke setting. During this time, the ribs will absorb significant smoky flavor and begin to form a beautiful, flavorful bark. Avoid opening the smoker lid frequently. Near the end of this phase, prepare your heavy-duty foil for the next step by tearing pieces slightly longer than each rack of ribs. Also, prepare your rib spritz mixture.
Smoking ribs: Phase 2 – 2 hours wrapped (Tenderization)
-
After 3 hours, carefully remove the ribs from the smoker. Place each rack onto a double layer of the prepared heavy-duty foil. Liberally spray the ribs with your prepared spritz mixture (you don’t need to drench them, just moisten evenly). Carefully wrap each rack of ribs into a tightly sealed foil packet, crimping all edges well to prevent any steam from escaping. Return the foil-wrapped ribs to the smoker and continue cooking for 2 more hours at 225°F (107°C). This steamy environment within the foil will tenderize the ribs, making them incredibly succulent.
Smoking ribs: Phase 3 – 1 hour unwrapped (Glaze & Finish)
-
A few minutes before this final phase, thin your BBQ sauce with a little water or apple cider vinegar to achieve a glaze-like consistency. After the 2-hour wrapped phase, carefully open the foil packets, peeling back the top layer to expose the ribs (you can remove them from the foil and place them directly on the grates if you prefer a crispier bottom). Brush the ribs generously with the thinned BBQ glaze using a pastry brush. Return the ribs to the smoker for the final hour. For an extra sticky and flavorful finish, brush with more glaze about 15 minutes before serving.
Ribs are done when they pass the “bend test”: gently pick up a rack by one end with tongs, and it should bend significantly into a gentle arc, with the meat tearing away from the bone slightly. Once done, let them rest for 10-15 minutes. To slice, turn them bone-side up to easily see where to cut between the bones with a sharp knife. Serve immediately with extra sauce, if desired.
Notes
Dry Rub Note:
For these ribs, I use my homemade dry rub—savory, smoky, and not overly sweet. Here’s a scaled-down version that makes about 8 tablespoons, perfect for 2 racks of ribs:
- 2 tablespoons smoked paprika
- 1½ tablespoons granulated garlic or ¾ tablespoon garlic powder
- 1 tablespoon brown sugar
- 2 teaspoons ground cumin
- 2 teaspoons ground coriander
- 1 ½ teaspoons ancho chili powder
- 1 ½ teaspoons ground black pepper or smoked black pepper
- ½ teaspoon onion powder
- ⅛-¼ teaspoon chipotle powder or cayenne (optional, for heat)
Prefer sweeter ribs? Add 1 to 2 more tablespoons of brown sugar to the mix before using.
