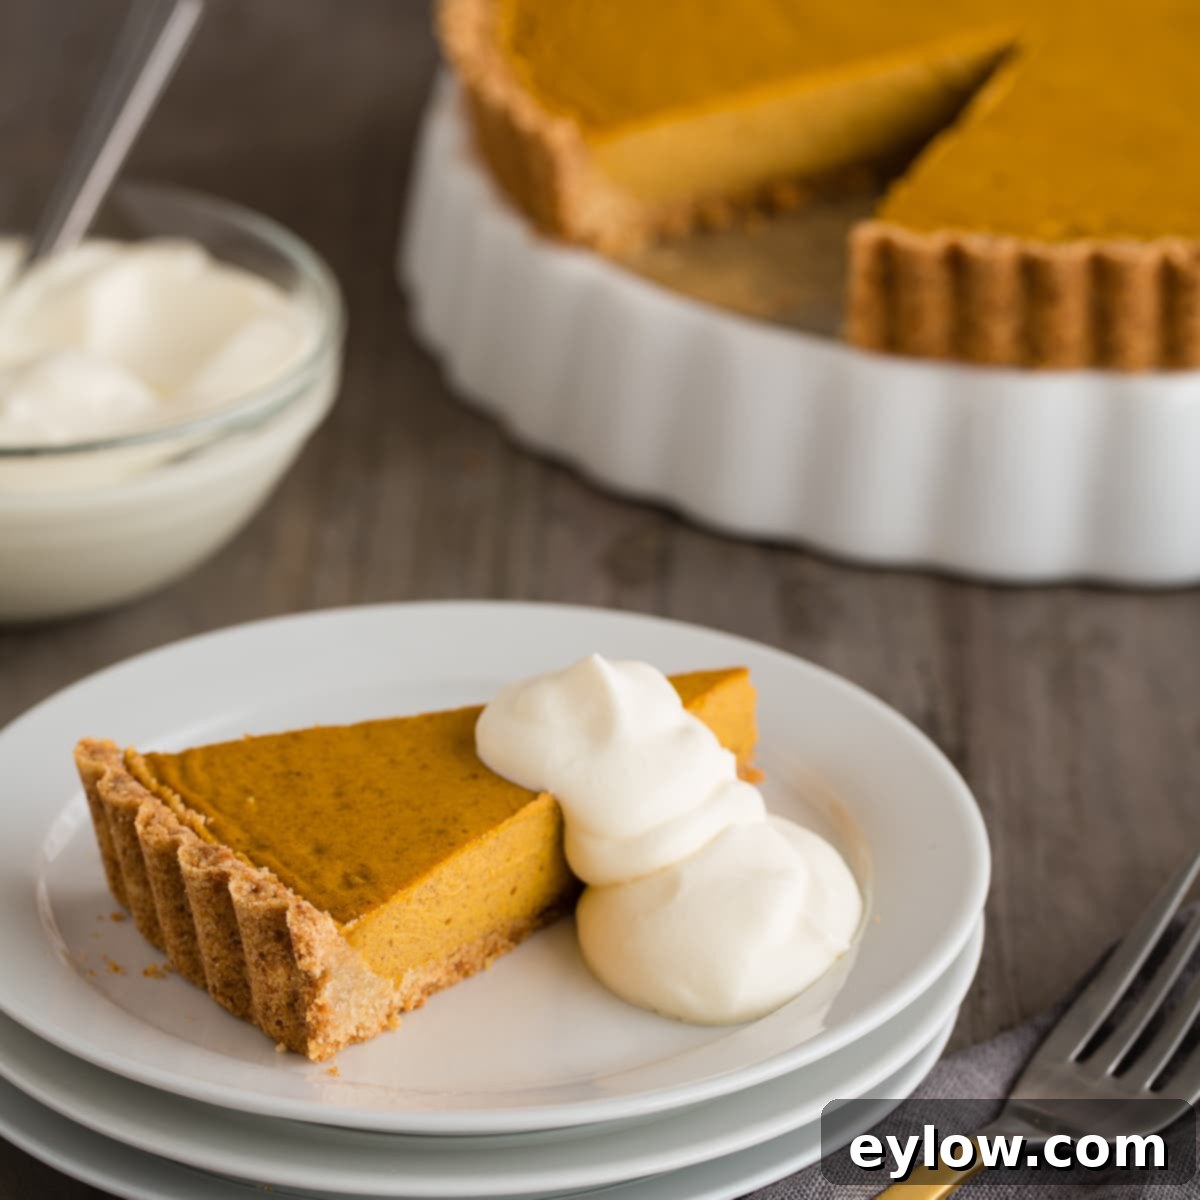
Easy Gluten-Free Pumpkin Tart: The Ultimate Grain-Free Holiday Dessert Recipe
Discover the delightful ease and exquisite flavor of this Pumpkin Tart, a perfect stress-free alternative to traditional pumpkin pie. Infused with warm, aromatic spices, a hint of vanilla, and a luxuriously creamy pumpkin filling, this recipe promises a dessert experience that is both elegant and incredibly simple to prepare. What makes it truly stand out is its naturally gluten-free and grain-free crust, crafted from a clever blend of almond flour and coconut flour – absolutely no rolling dough required! This means less time fussing in the kitchen and more time enjoying the festive season. Ideal for Thanksgiving gatherings or any fall celebration, this pumpkin tart can even be made a day in advance, giving you one less thing to worry about during the holiday rush. It’s a testament that delicious, wholesome desserts can be both effortless and impressive.
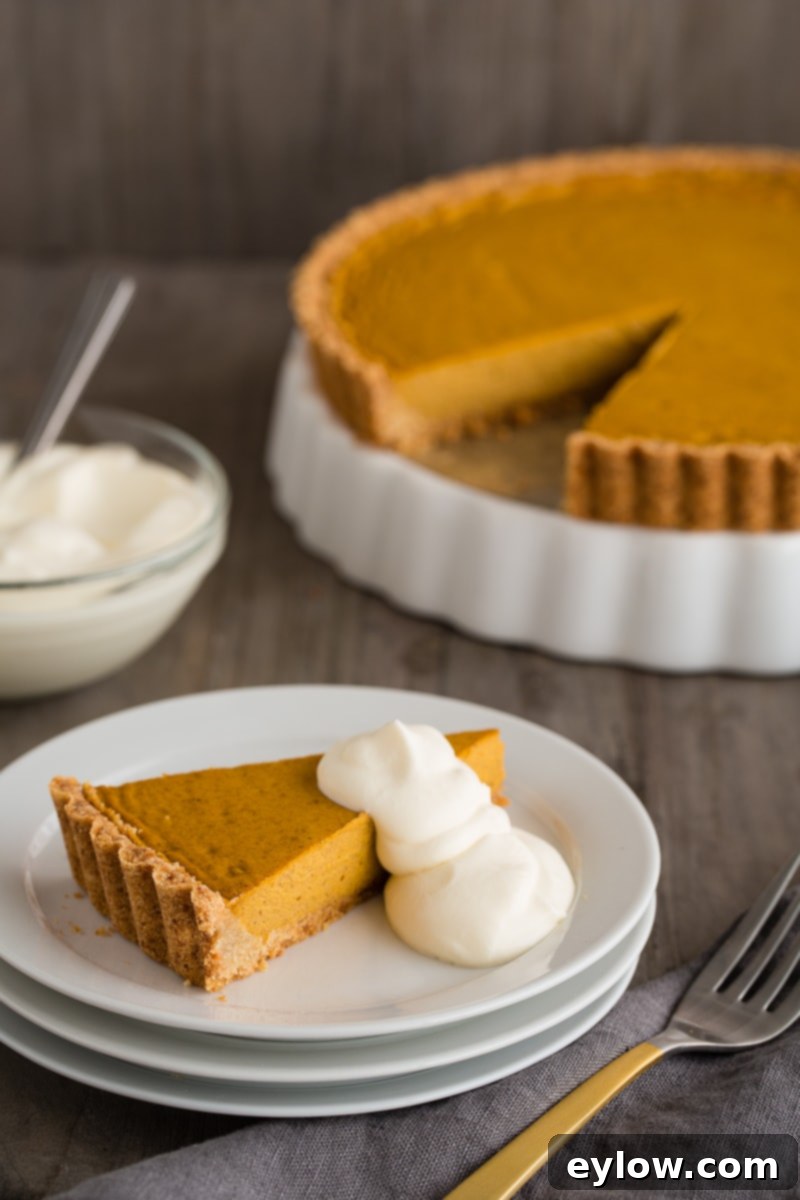
The true genius of this pumpkin tart lies in its innovative crust. Unlike the often-temperamental traditional pastry crusts, this version boasts a delightful, cookie-like texture that’s incredibly forgiving and easy to work with. It’s a “press-in” style crust, where a simple mixture of finely ground almond flour and absorbent coconut flour is shaped directly into the tart pan with just your fingers. Forget the rolling pins and the endless struggle of sticky dough – this method is pure bliss! After a quick pre-bake, the golden crust is ready to cradle the luscious, creamy pumpkin filling. The tart is then baked to perfection, cooled, and chilled, transforming into an elegant, naturally gluten-free dessert that’s not only a feast for the eyes but also a joy for the palate. It’s so easy and delicious, you’ll wonder why you ever bothered with traditional pie.
[feast_advanced_jump_to]
Why This Gluten-Free Pumpkin Tart Will Become Your Favorite
This isn’t just another pumpkin dessert; it’s a game-changer for anyone seeking a delicious, convenient, and dietary-friendly option. Here’s why this particular pumpkin tart recipe is bound to win your heart:
- Effortless, No-Roll Dough Crust: Say goodbye to the frustrations of traditional pie crusts. Our unique press-in crust eliminates the need for any rolling pins or complicated pastry techniques. You simply mix, press, and bake, saving you valuable time and effort, especially during busy holiday preparations.
- Naturally Gluten-Free and Grain-Free: Crafted with nutrient-rich almond flour and coconut flour, this tart offers a wholesome dessert option without compromising on taste or texture. Even the most discerning eaters won’t guess it’s gluten-free, making it perfect for accommodating various dietary needs.
- Perfect for Make-Ahead Preparation: Planning for holidays or special events can be hectic. This pumpkin tart is incredibly make-ahead friendly. Prepare it a day in advance, and let it chill in the refrigerator, ready to be served when you are. This flexibility means a more relaxed and enjoyable celebration for you.
- Rich, Creamy, and Perfectly Spiced Filling: The pumpkin filling is a harmonious blend of creamy pumpkin purée, tangy cream cheese, and a thoughtfully selected array of warm autumn spices. Each bite is a velvety smooth explosion of flavor that captures the essence of fall.
- Elegant Presentation: Tarts inherently possess an air of sophistication. With its fluted edges and beautiful golden-orange hue, this pumpkin tart presents gorgeously on any dessert table, requiring minimal extra garnishing to impress.
Essential Ingredients for Your Perfect Pumpkin Tart
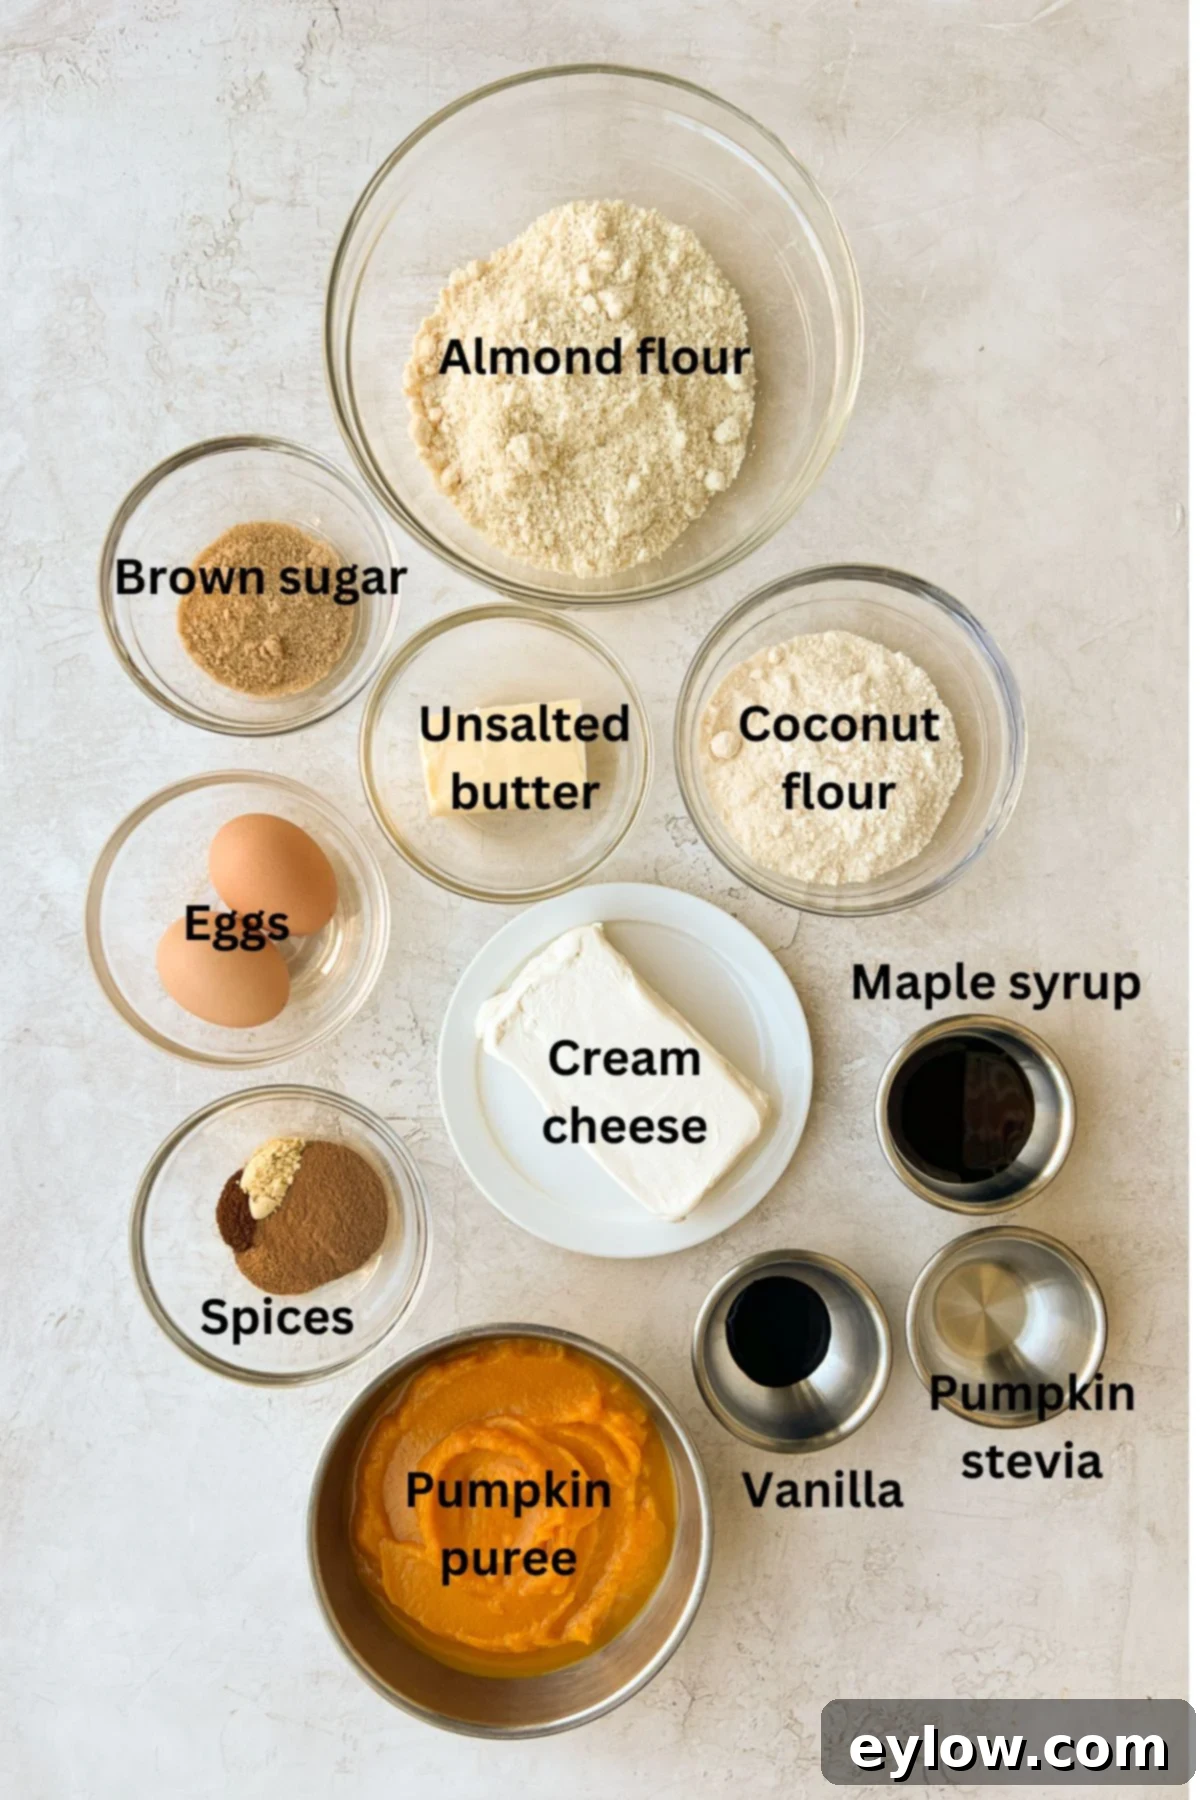
Crafting this exceptional pumpkin tart requires a selection of quality ingredients, each playing a vital role in achieving its renowned flavor and texture. Pay close attention to the specific types and forms of ingredients, as they make a significant difference in the final outcome. Here’s what you’ll need to gather:
For the Irresistible Gluten-Free Tart Crust
- Almond Flour: It’s crucial to use finely ground almond flour, not the coarser almond meal. Almond flour provides a delicate, tender, and cookie-like texture to the crust, contributing to its melt-in-your-mouth quality. Almond meal, being less refined, would result in a grittier and less cohesive crust.
- Coconut Flour: This remarkable gluten-free flour adds a subtle natural sweetness and contributes significantly to the grain-free nature of the crust. Its high absorbency is key to balancing the oiliness of almond flour, creating a perfectly balanced and sturdy crust that holds together beautifully. The synergy between these two flours is what makes this crust so uniquely successful.
- Sugar: You have a choice between light brown sugar or coconut sugar. Both impart a lovely caramel-like depth and sweetness to the crust, enhancing its cookie-like flavor. I’ve personally experimented with both and found them to yield equally fantastic results, so choose based on your preference or what you have on hand.
- Unsalted Butter: Always opt for unsalted (often called “sweet”) butter when baking. This allows you complete control over the salt content in your recipe. Melted butter is essential for binding the flours and sugar into the press-in dough, ensuring a rich and flavorful base.
For the Velvety Smooth Pumpkin Filling
- Pumpkin Purée: This is the heart of your tart, so ensure you purchase pure pumpkin purée. It’s vital to avoid pumpkin pie filling, which often contains added sugars, spices, and various additives like dextrose and “natural” flavors that you don’t want or need in this recipe, as we’ll be adding our own blend of fresh spices and sweeteners.
- Cream Cheese: For the best texture and richness, use block-style cream cheese. Tub cream cheese, which is typically whipped and airy, has a higher moisture content and a different consistency that won’t give the tart the desired smooth, dense, and luxurious custard-like filling. Make sure it’s at room temperature for easy blending.
- Eggs: Eggs are critical for structure and emulsification in the filling. They help to bind the ingredients, creating a rich, custard-like consistency that sets beautifully during baking and chilling. Without them, the filling would not solidify properly.
- Maple Syrup: Insist on real maple syrup. Its distinct, complex flavor is far superior to artificial corn syrup blends and provides a natural sweetness that complements the pumpkin and spices perfectly. Dark maple syrup is my personal preference for its robust, bold flavor profile.
- Vanilla Extract: Use a high-quality vanilla extract or vanilla paste. Vanilla is a subtle but essential flavor enhancer, adding warmth and depth that rounds out the overall taste of the tart.
- Cinnamon: The cornerstone of warm pumpkin spice, cinnamon brings classic comfort and aroma. While Cassia cinnamon is common, I highly recommend Ceylon cinnamon for its lighter, sweeter, and more delicate flavor, which truly elevates the tart.
- Additional Spices: Ground ginger, nutmeg, and clove are traditional companions to cinnamon in pumpkin desserts, providing that quintessential autumnal flavor blend. For an extra layer of warmth and complexity, allspice makes a wonderful optional addition. Ensure all your spices are fresh for maximum impact.
- Sweetener: This recipe offers flexibility. I initially developed it using pumpkin spice liquid stevia to manage sugar content, but granulated monk fruit or regular sugar also work exceptionally well. Refer to the detailed recipe card below for specific quantity recommendations and options to suit your sweetness preference and dietary needs.
Please note that precise quantities for all ingredients are provided in the comprehensive recipe card located further down the page. To ensure optimal results, you will need a 9 ½-inch tart pan with a removable bottom, which is essential for easy serving and maintaining the tart’s elegant shape, along with a reliable food processor to create that perfectly smooth filling.
Customizing Your Pumpkin Tart: Substitutions & Variations
One of the joys of baking is the ability to adapt recipes to suit your taste, pantry, or dietary requirements. This pumpkin tart recipe is quite versatile, allowing for several easy substitutions and variations:
- Spice Blend Convenience: If you prefer to simplify your spice cabinet, you can easily substitute the individual cinnamon, ginger, nutmeg, and clove with a pre-mixed pumpkin pie spice blend. Just use the same total quantity specified in the recipe card for the individual spices to ensure a balanced flavor profile. This is a great shortcut for busy bakers.
- Zero-Sugar Maple Syrup Option: For those looking to significantly reduce the sugar content, you can swap out part or all of the real maple syrup with a maple-flavored, monk fruit-sweetened syrup. Be sure to taste the filling as you blend to adjust sweetness to your preference, as the intensity of artificial sweeteners can vary.
- Dairy-Free Cream Cheese: While not explicitly tested, many dairy-free cream cheese alternatives are now widely available. If you’re looking to make this tart completely dairy-free, try using a block-style dairy-free cream cheese alternative at room temperature. The texture might vary slightly, but it should still yield a delicious result.
- Nut-Free Crust: For a nut-free version of the crust, you would need a different base entirely, as almond flour is central to this recipe. However, many gluten-free shortbread-style crusts can be adapted. This would require a separate recipe search.
Chef’s tip on spices: The freshness of your spices is paramount for the best flavor. Ground spices lose their potency over time, often becoming dull and less aromatic. If you’ve had your ground cinnamon, ginger, nutmeg, or clove since last Thanksgiving (or even longer), it’s highly recommended to toss them and invest in fresh ones. When stored properly in a cool, dark place (away from the heat of your stove), ground spices typically last 6-12 months at best. Fresh spices will truly make your pumpkin tart sing with vibrant, warm flavors.
Step-by-Step Guide: How to Make This Easy Pumpkin Tart
Creating this delicious pumpkin tart is divided into two main stages: preparing the simple press-in crust and then blending and baking the creamy pumpkin filling. The beauty of this recipe is that you can even prepare the crust a day ahead, allowing for even greater flexibility and less stress on the day you plan to serve it.
Advance Preparation (Optional):
First, focus on the tart crust. Once baked and cooled, you can store it wrapped tightly in plastic wrap at room temperature on your counter or in the refrigerator overnight. This clever trick breaks up the preparation, making the final assembly a breeze.
Tart Crust Instructions: Achieving Perfection Without a Rolling Pin
This “press-in” crust is designed for ease and a wonderfully crumbly, cookie-like texture. Follow these steps carefully to build a sturdy and delicious foundation for your tart:
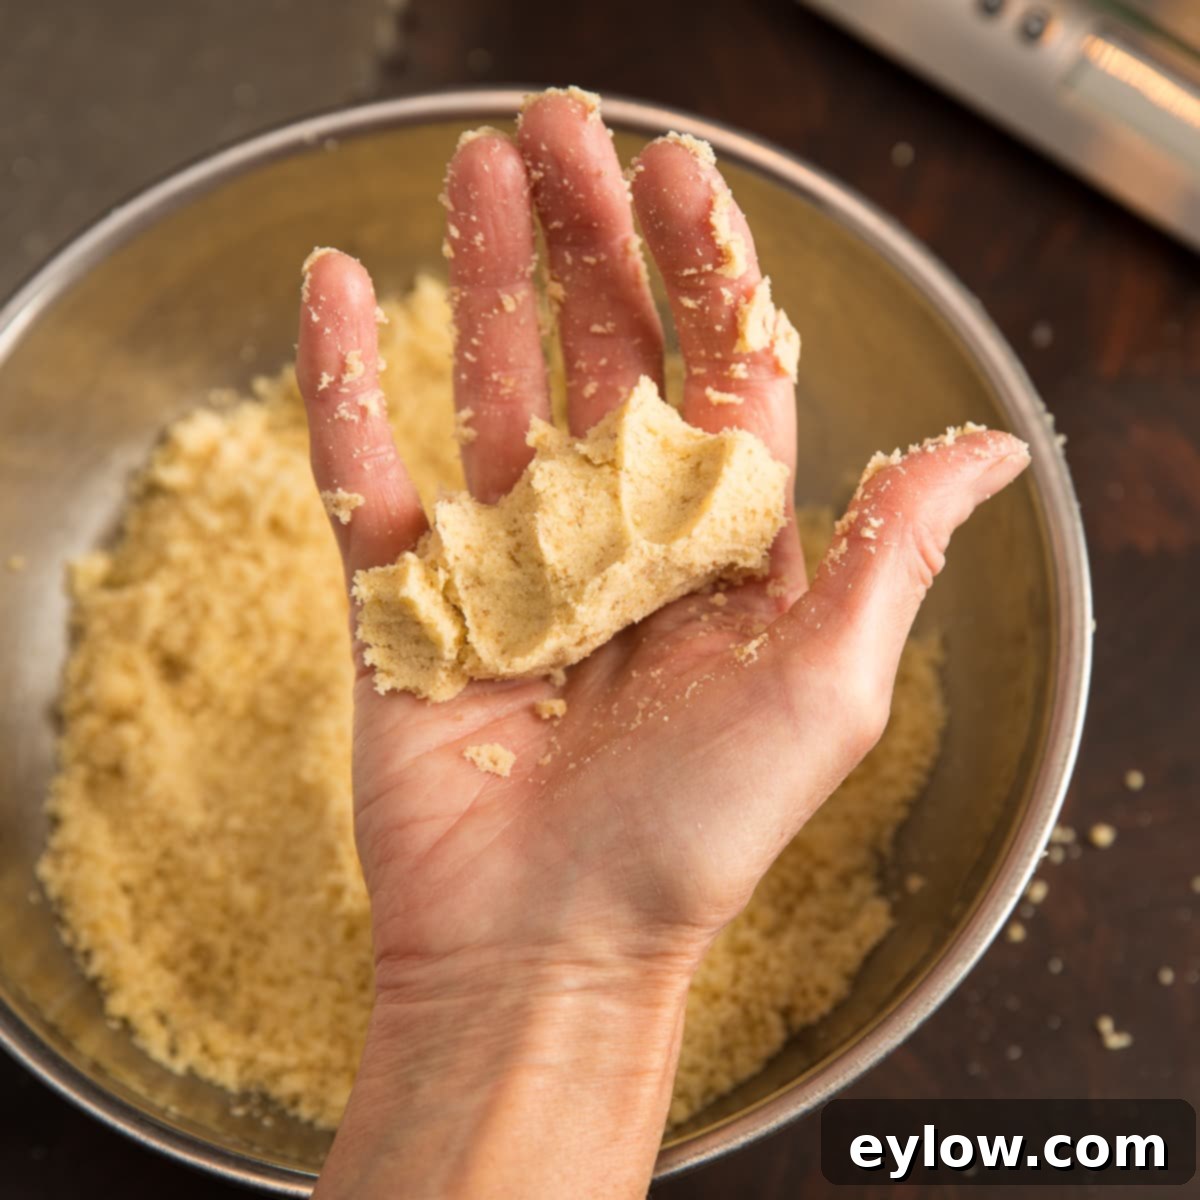
Step 1: Combine Dry and Wet Ingredients. In a medium-sized mixing bowl, thoroughly combine the almond flour, coconut flour, and sugar using a fork. Ensure all dry ingredients are evenly distributed. Next, add the melted unsalted butter. Mix with the fork, and then switch to your hands, combining until the mixture looks uniformly moistened and feels heavy and cohesive. To test for the correct consistency, squeeze a handful of the mixture together. It should be moist enough to hold its shape firmly, much like wet sand that compacts, as shown in the accompanying photo.
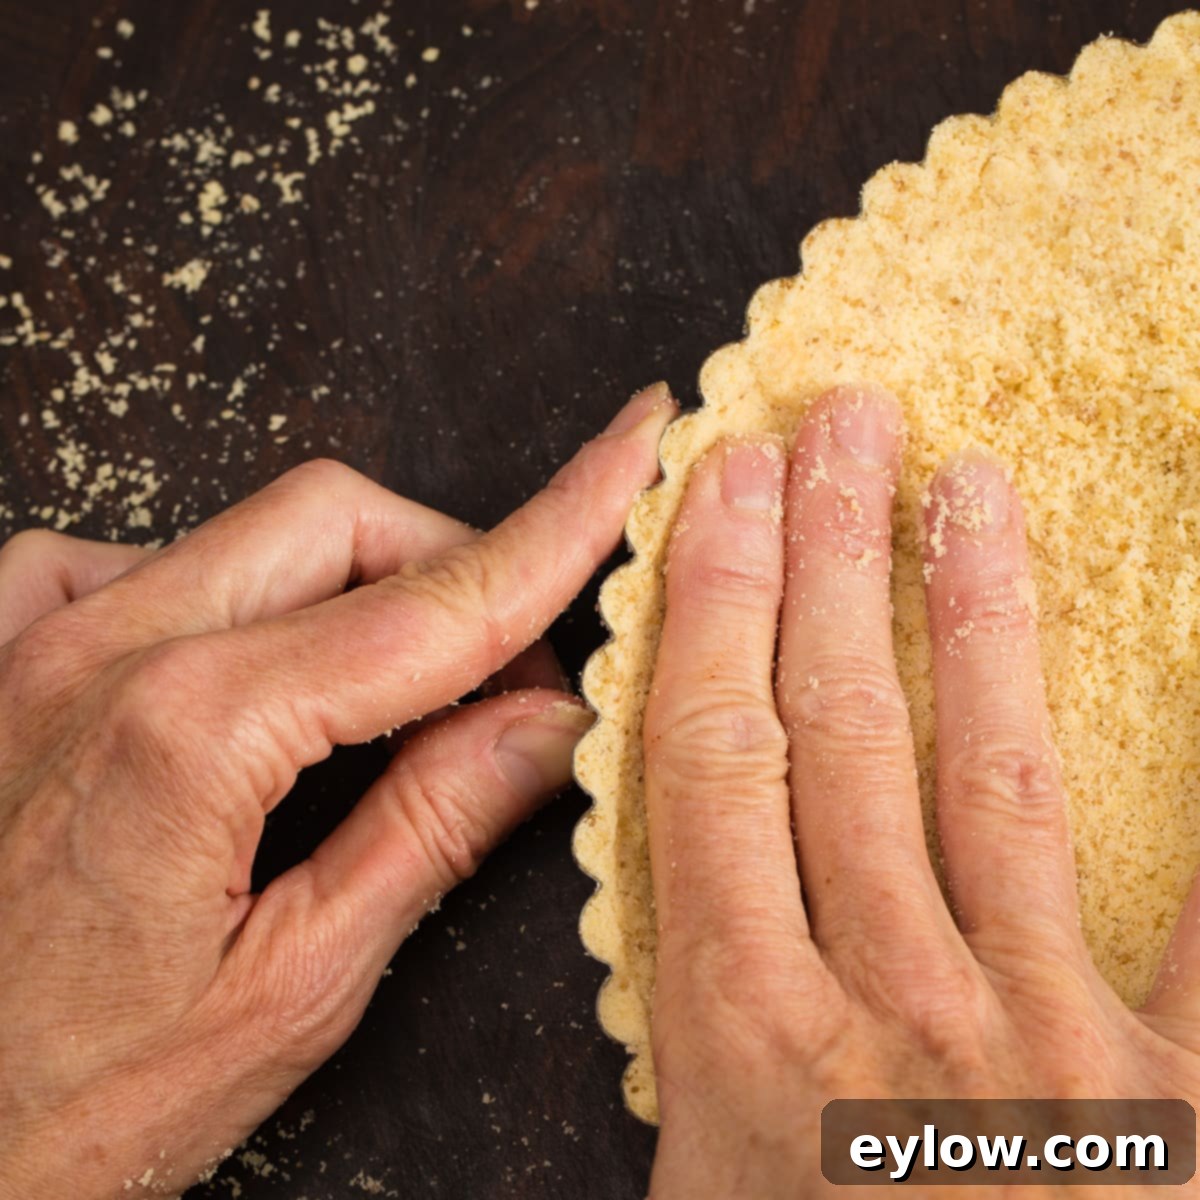
Step 2: Press the Crust into the Tart Pan. Pour the prepared crust mixture into your 9 ½-inch tart pan with a removable bottom. Start by distributing the mixture evenly across the bottom of the pan. Then, using your fingers, begin to build a strong, even edge. Work your way around the fluted perimeter of the pan, pressing the dough firmly between your fingers to shape and build the sides. As a right-handed baker, I find it easiest to use my left thumb on the inside and my right middle and ring fingers on the outside. This technique helps create a defined, sturdy rim.
This process takes a little patience but is surprisingly simple. Work to build up the edge in layers, continuously moving around the tart pan to ensure even thickness and strength. A well-formed, sturdy edge is crucial as it will provide structural integrity to your pumpkin tart when you slice and serve it. Having made this many times, I can assure you it’s an easy process that typically takes about 15 minutes to perfect. The result is a beautiful, rustic, and robust crust.
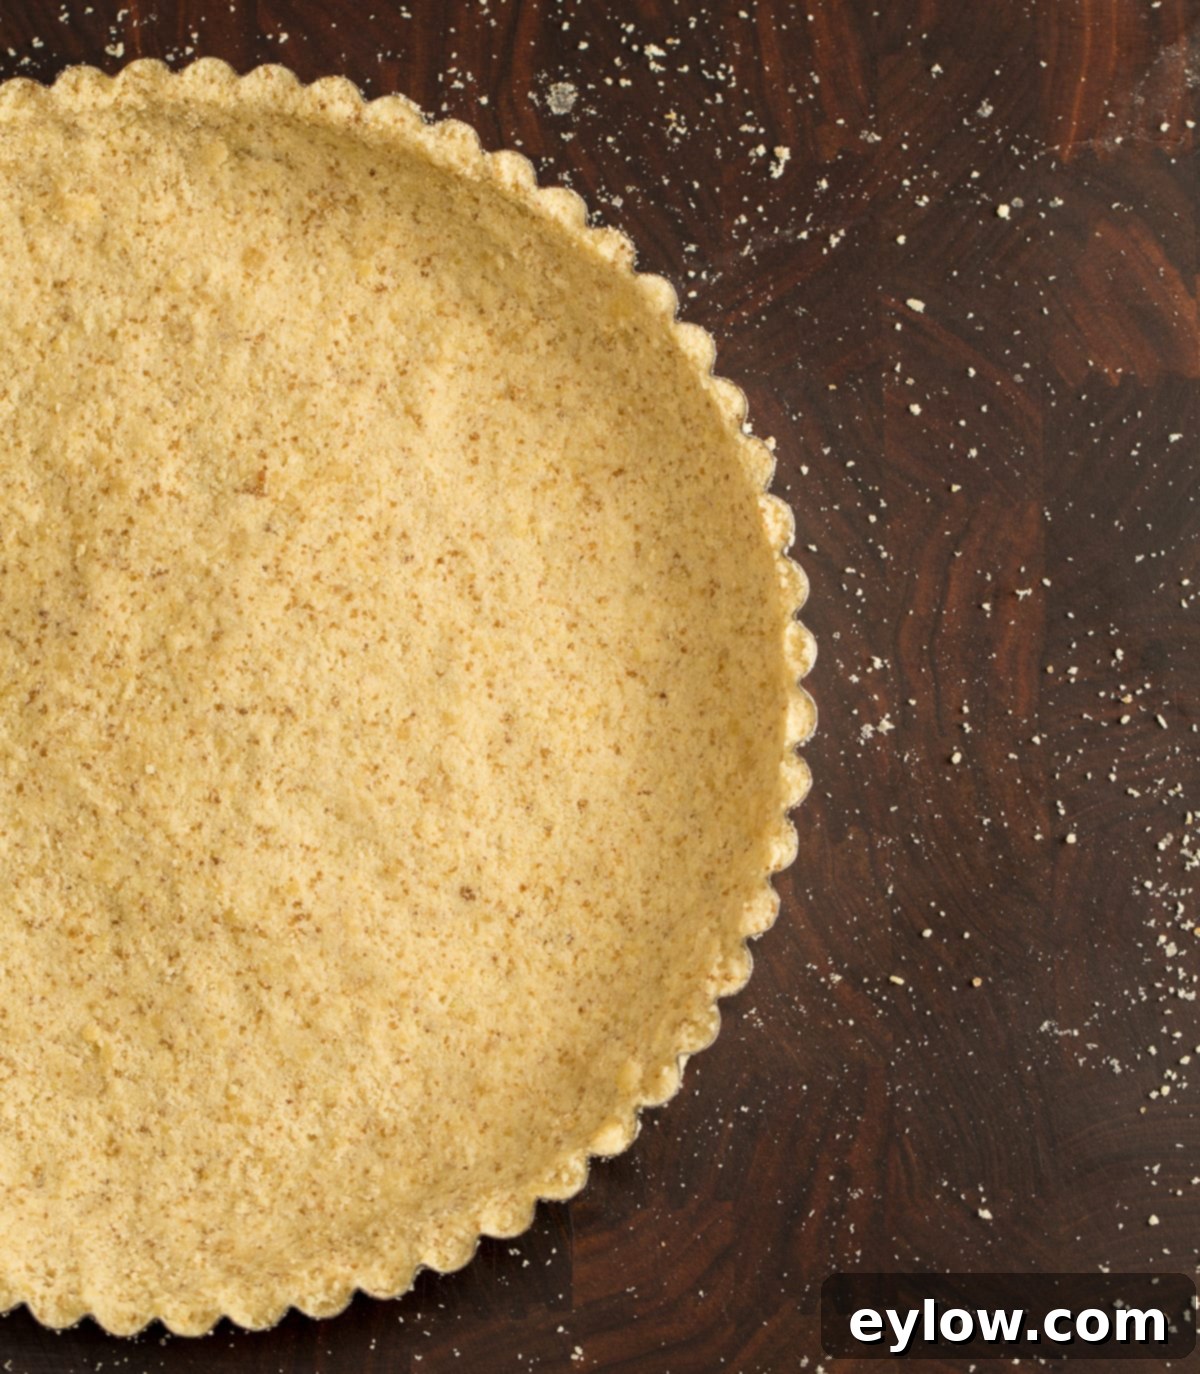
Step 3: Firm the Base of the Crust. Once you’ve established a nice, strong, and even edge around the entire tart pan, firmly pat the remaining dough into the bottom of the pan to create a solid base. Ensure it’s compact and smooth – resist the urge to poke holes! You can use the palm of your hand or the flat bottom of a glass or metal measuring cup to achieve a very firm and even foundation. This compact base will prevent the filling from seeping through and ensure a perfect slice every time.
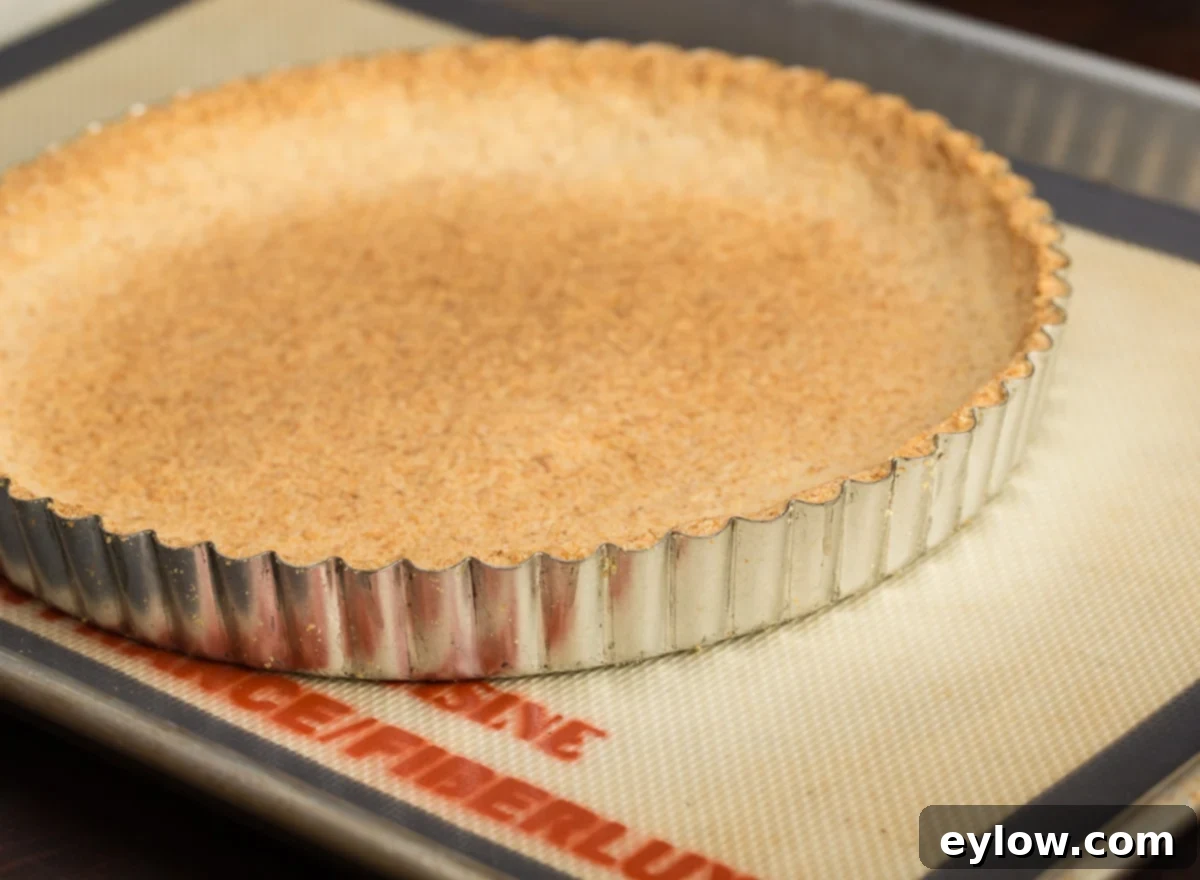
Step 4: Pre-bake and Cool the Crust. Finish preparing the crust by pre-baking it, a process often referred to as “blind baking.” Place the tart pan on a baking sheet (a silpat or similar non-stick mat on the baking sheet is highly recommended to prevent the tart pan from sliding around and for easy handling). Bake the crust at an oven temperature of 350°F (175°C) until it turns a beautiful golden brown. This pre-baking step ensures the crust is firm and slightly crispy before the wet filling is added, preventing a soggy bottom. Once baked, remove the crust from the oven and allow it to cool completely on a wire rack. This cooling process is essential for the crust to fully set and achieve its optimal texture.
For detailed visual guides, specific measurements, and additional tips for perfecting this amazing gluten-free almond and coconut tart crust, please refer to our dedicated tart crust post.
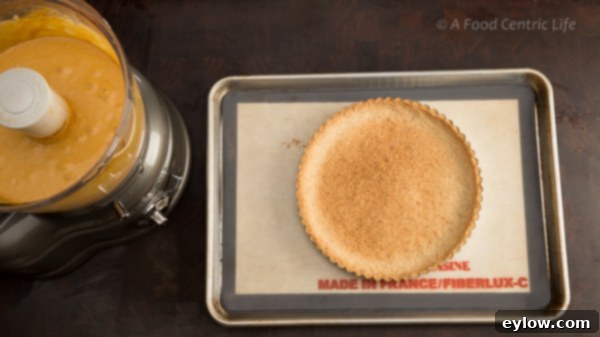
Pumpkin Filling Instructions: Silky Smooth Perfection
Once your crust is cool and ready, preparing the pumpkin filling is remarkably simple, thanks to the power of your food processor:
To create the smooth, rich pumpkin tart filling, simply combine all of the pumpkin filling ingredients (pumpkin purée, room temperature cream cheese, sweetener, eggs, maple syrup, vanilla, cinnamon, ginger, clove, and nutmeg) in a food processor. The key here is to ensure your block-style cream cheese is at room temperature and very soft, as this allows it to blend seamlessly into a creamy, lump-free mixture. Process until the mixture is completely smooth and thoroughly combined, scraping down the sides of the bowl as needed to ensure everything is incorporated.
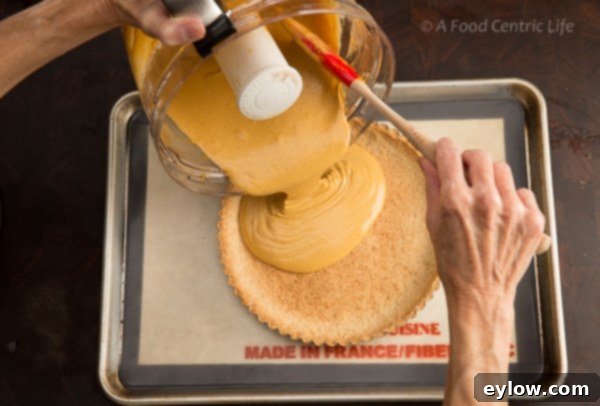
Carefully pour the pureed pumpkin mixture into your pre-baked and cooled tart crust. Fill the crust almost to the top, leaving a small edge of the golden crust showing to create a beautiful frame for your filling. Don’t worry if the pumpkin mixture appears quite fluid at this stage; it will set beautifully during the baking, cooling, and chilling process. Bake the tart on the middle rack of your oven. The precise timing will vary depending on your oven (convection vs. conventional), but generally, it bakes until the edges are set and the center is just barely jiggly. I typically prefer baking this tart without the convection setting if possible, as it helps prevent excessive puffing and cracking.
Once baked, remove the tart from the oven and allow it to cool completely on a wire rack for at least 1 hour. After it has cooled to room temperature, cover the tart gently with plastic wrap (you can place a piece of parchment paper directly on the filling first to prevent sticking) and transfer it to the refrigerator. Chill for several hours, or ideally overnight, to allow the filling to fully set and firm up into that perfect custard-like consistency. Slice and serve, marveling at its smooth texture and rich flavor.
Chef’s Note on convection ovens: Convection ovens can sometimes cause the tart filling to puff up a bit more than in a conventional oven. Don’t be alarmed if this happens; the filling will settle and become flat as it cools. This is completely normal. Furthermore, if any small cracks appear on the surface of your tart (which can happen with rapid cooling or oven variations), they can be easily masked and adorned with a generous topping of whipped cream or other garnishes, making your tart look absolutely perfect.
Elegant Serving Suggestions: Garnishes & Toppings
While this pumpkin tart is undeniably delicious on its own, a thoughtful garnish can elevate it to an even more impressive dessert. Here are some delectable serving suggestions and topping ideas:
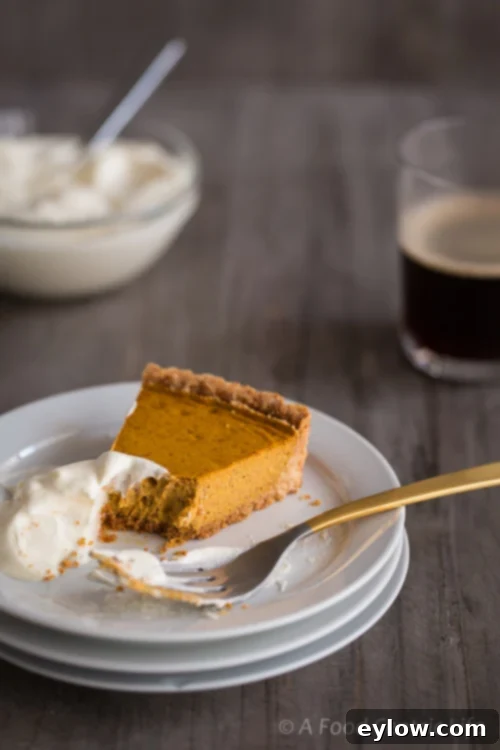
- Classic Vanilla Whipped Cream: This is a timeless pairing. Whip heavy cream to stiff peaks with a splash of high-quality vanilla extract and your preferred sweetener. Options include granulated sugar, powdered monk fruit sweetener for a keto-friendly version, a drizzle of honey, maple syrup, or agave nectar. For small batches, a hand mixer works well, but for larger quantities or entertaining, a stand mixer with the whisk attachment is ideal. For a fun, fast, and incredibly airy whipped cream, I often use a Thermo-whipper with N₂O chargers – it creates a professional-quality topping in seconds.
- Dressed-Up & Decadent Options: For a truly show-stopping dessert, consider drizzling the chilled tart with a fine stream of melted white chocolate. Then, sprinkle generously with finely chopped toasted pecans for added crunch and nutty flavor. Alternatively, pipe elegant rosettes of whipped cream around the edge of the tart and lightly drizzle with extra maple syrup for a touch of rustic sophistication. A final dusting of cinnamon, applied through a small strainer, adds a cozy and visually appealing finish.
- Tangy Counterpart: To introduce a lovely contrast to the sweet, creamy filling, consider a dollop of whipped sour cream or crème fraîche. Simply whip it with vanilla and a touch of sweetener until soft peaks form. Its slight tanginess beautifully cuts through the richness of the pumpkin, offering a refreshing counterpoint.
Common Questions About Pumpkin Tarts (Recipe FAQs)
Here are some frequently asked questions to help you master this delicious pumpkin tart:
Unlike many commercially produced pies and tarts that contain preservatives, homemade pumpkin tarts, especially those with a creamy filling like this one, must be stored in the refrigerator to maintain their freshness and safety. Once completely cooled, cover it gently.
Any leftover pumpkin tart will remain fresh and delicious for approximately 2 to 3 days when stored properly in the refrigerator. To prevent the top of the tart from getting messy or sticking to plastic wrap, it’s a good practice to place a piece of parchment paper or waxed paper directly on the surface of the filling before covering the entire tart tightly with plastic wrap.
The term “tart” is a French culinary term generally referring to a shallow, open-faced baked dessert. Tarts are distinguished from pies by their specific structure: they typically have short sides, often with decorative fluted edges, and are filled with either sweet or savory ingredients. Crucially, a traditional tart does not have a top crust, leaving the filling beautifully exposed and often adorned with fruits, whipped cream, or other decorative garnishes. This open presentation is a hallmark of tarts, whether they are sweet desserts or savory main courses.
Yes, you can freeze a baked pumpkin tart. Once the tart is completely cooled and chilled, wrap it tightly in several layers of plastic wrap, then an additional layer of aluminum foil. This helps prevent freezer burn. It can be frozen for up to 1-2 months. To serve, thaw overnight in the refrigerator before bringing to room temperature or gently warming.
No, this specific recipe is not suitable for individuals with nut allergies as the crust relies heavily on almond flour. For a nut-free, gluten-free option, you would need to source a different crust recipe, perhaps one based on gluten-free oats or other alternative flours, but the texture and flavor profile would be different from this recipe.
Explore More Delicious Pumpkin Recipes
Fall simply wouldn’t be complete without the warm, comforting flavors of pumpkin! This versatile ingredient shines in everything from decadent cakes to light mousses, hearty breads, and savory soups. If you’ve enjoyed this pumpkin tart, you’re sure to love these other delightful pumpkin-centric creations. Embrace the season and discover the many delicious ways to incorporate pumpkin into your cooking and baking:
- Pumpkin Chocolate Chip Cake
- Pumpkin Mousse (Easy No-Bake Dessert)
- Easy Gluten-Free Pumpkin Bread Recipe
- Creamy Black Bean Pumpkin Soup
Did You Make This Delicious Pumpkin Tart?
If you take the plunge and bake this incredible gluten-free and grain-free pumpkin tart, I would absolutely love to hear from you! Please share your experience by leaving a comment below. Your feedback means the world and helps other aspiring bakers. And if you loved it as much as I think you will, please consider giving it a 5-star rating! Your ratings are invaluable and truly help more readers discover and enjoy this wonderful recipe. Happy baking!
📖 Recipe
Pumpkin Tart (Gluten-Free, Grain-Free)
Sally Cameron
Pin Recipe
Equipment
-
9 ½-inch tart pan with a removable bottom
-
Food Processor
-
Half sheet size rimmed baking sheet
-
Silpat or similar liner optionals
Ingredients
Tart Crust (See separate post for detailed directions on shaping and pre-baking)
- 1 ½ cups almond flour (finely ground, not almond meal; 5 ½ ounces or 160 grams)
- ½ cup organic coconut flour (2 ¼ ounces or 60 grams)
- 2 tablespoons raw light brown sugar or raw coconut sugar
- 6 tablespoons unsalted butter (melted)
Pumpkin Filling
- 15 ounce can pumpkin puree (ensure it’s pure pumpkin, not pie mix)
- 8 ounces package block cream cheese (full fat, room temperature for best blending)
- ⅓ cup granular monk fruit or sugar (or substitute 25-30 drops of pumpkin flavored stevia for lower sugar)
- 2 large eggs
- 2 tablespoons maple syrup (real maple syrup, dark for robust flavor)
- 2 teaspoons vanilla extract (or vanilla paste)
- 2 teaspoons cinnamon (preferably Ceylon cinnamon for milder flavor)
- ¼ teaspoon ground ginger
- ⅛ teaspoon ground clove
- ⅛ teaspoon ground nutmeg (allspice makes a nice optional addition for extra warmth)
Optional Garnish (for serving)
- 1 pint heavy whipping cream
- ½ teaspoon vanilla extract or vanilla paste
- sweetener of choice (e.g., maple syrup, honey, raw sugar, or keto-friendly syrup)
Instructions
Tart Crust Preparation
-
Follow our detailed instructions for creating the perfect gluten-free almond and coconut flour tart crust. You can find comprehensive directions, tips, and photos in our separate tart crust post here. This involves mixing the ingredients, pressing the crust into a 9 ½-inch tart pan with a removable bottom, and pre-baking it until golden brown. Allow the crust to cool completely before proceeding.
Pumpkin Filling & Baking
-
Pre-heat your oven to 350°F (177°C). Place your completely pre-baked and cooled almond-coconut tart crust onto a rimmed baking sheet. If you have one, a silpat or other non-slip liner on the baking sheet can help prevent the tart pan from shifting.
-
In a food processor, combine all the pumpkin filling ingredients: pumpkin purée, room temperature block cream cheese, granular monk fruit/sugar (or stevia drops), eggs, maple syrup, vanilla extract, cinnamon, ground ginger, ground clove, and ground nutmeg. Puree until the mixture is completely smooth and uniform. The filling will appear quite fluid, but it will thicken as it bakes and chills. Taste the mixture and adjust spices or sweetener if desired to suit your preference. Carefully pour the pureed pumpkin filling into the pre-baked tart crust, filling it almost to the top but leaving a small, visible edge of the crust. You might have a tiny bit of extra filling depending on the exact depth of your tart pan.
-
Bake the tart on the middle rack of your preheated oven for approximately 30 minutes. The tart is done when the edges are set and the center is just barely jiggly when gently nudged. Avoid overbaking, as this can lead to cracks. Remove the tart from the oven and transfer it to a wire rack to cool completely for at least 1 hour. Once cooled to room temperature, cover the tart (you can place a piece of parchment paper on the filling first) and chill it in the refrigerator for a minimum of a few hours, or ideally overnight, to allow the filling to fully set into a firm, sliceable consistency. Once thoroughly chilled, slice and serve.
Optional Garnish Preparation
-
For an elegant garnish, whip the heavy cream with vanilla and your sweetener of choice until soft peaks form. Serve alongside each slice of tart or pipe it decoratively on top just before serving.
Notes
Cream cheese considerations: For the ideal smooth and rich texture, always use block-style cream cheese, not the aerated cream cheese found in tubs. These two forms have different compositions and moisture levels that will impact your final tart. Additionally, be aware that baking times can vary slightly if you are using a regular oven versus a convection oven.
Convection oven note: If you choose to bake this tart using a convection setting, the filling may puff up a bit during baking. This is a common occurrence with convection heat. Rest assured, it will settle back down as the tart cools. If any minor cracks develop on the surface (which can be a natural outcome of baking and cooling), they are easily hidden and can be beautifully covered with whipped cream or your chosen garnish, ensuring a perfect presentation.
Please note that the optional whipped cream garnish calories and nutrition calculations are not included in the nutritional information provided for the tart itself.
Click here for the detailed instructions on making the almond-coconut tart crust. This separate post provides in-depth guidance and visuals for mastering the crust.
Nutrition
