Timeless Sand Tart Cookies: Your Guide to Pennsylvania Dutch Holiday Baking Tradition
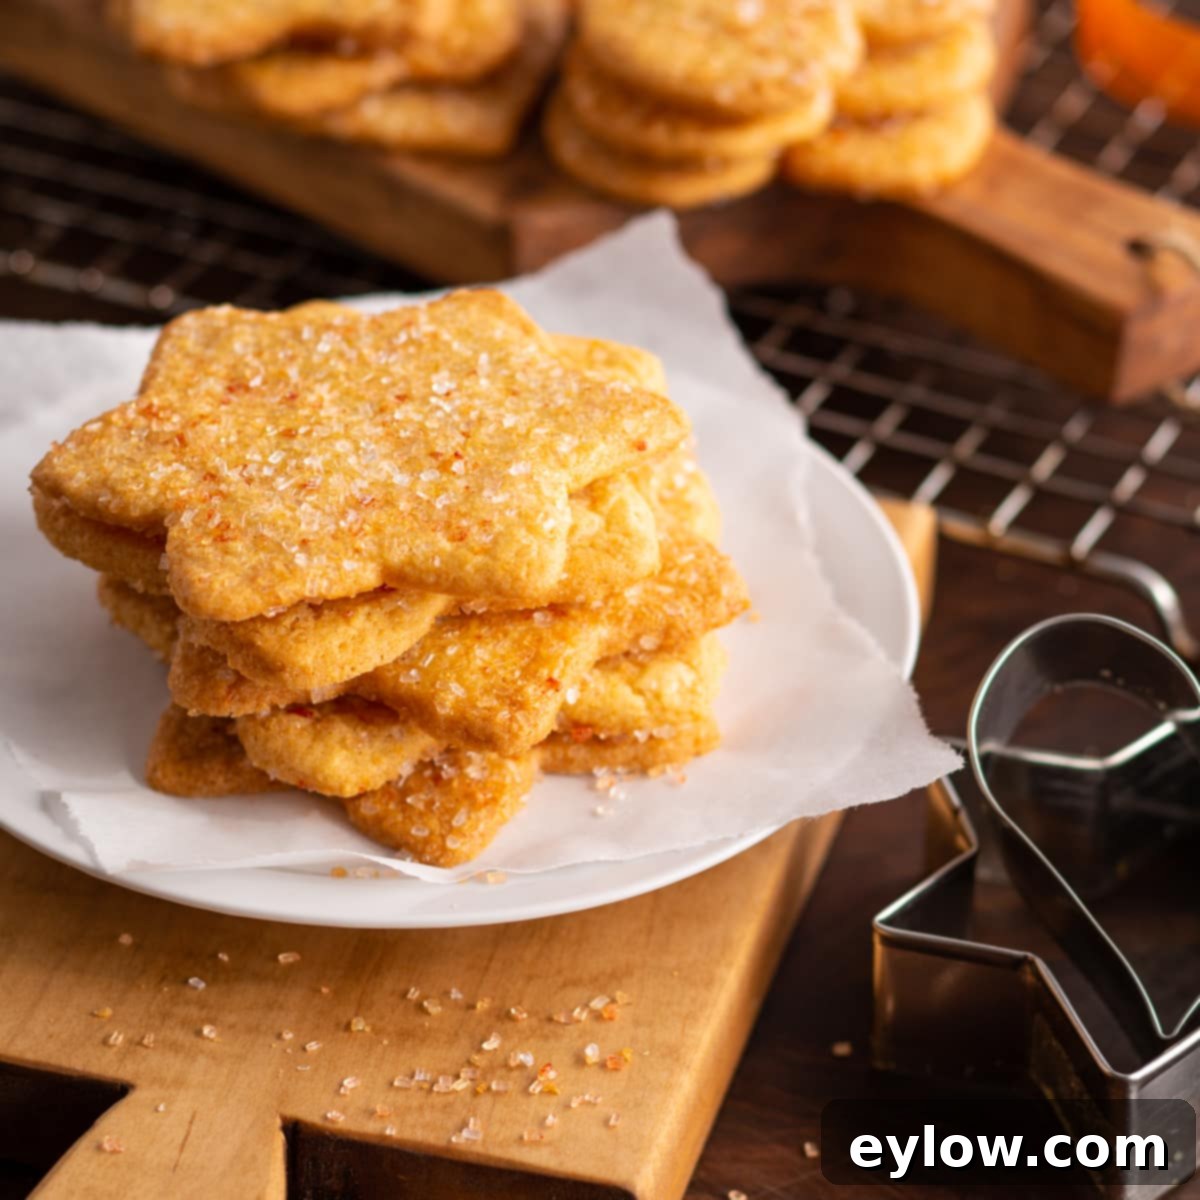
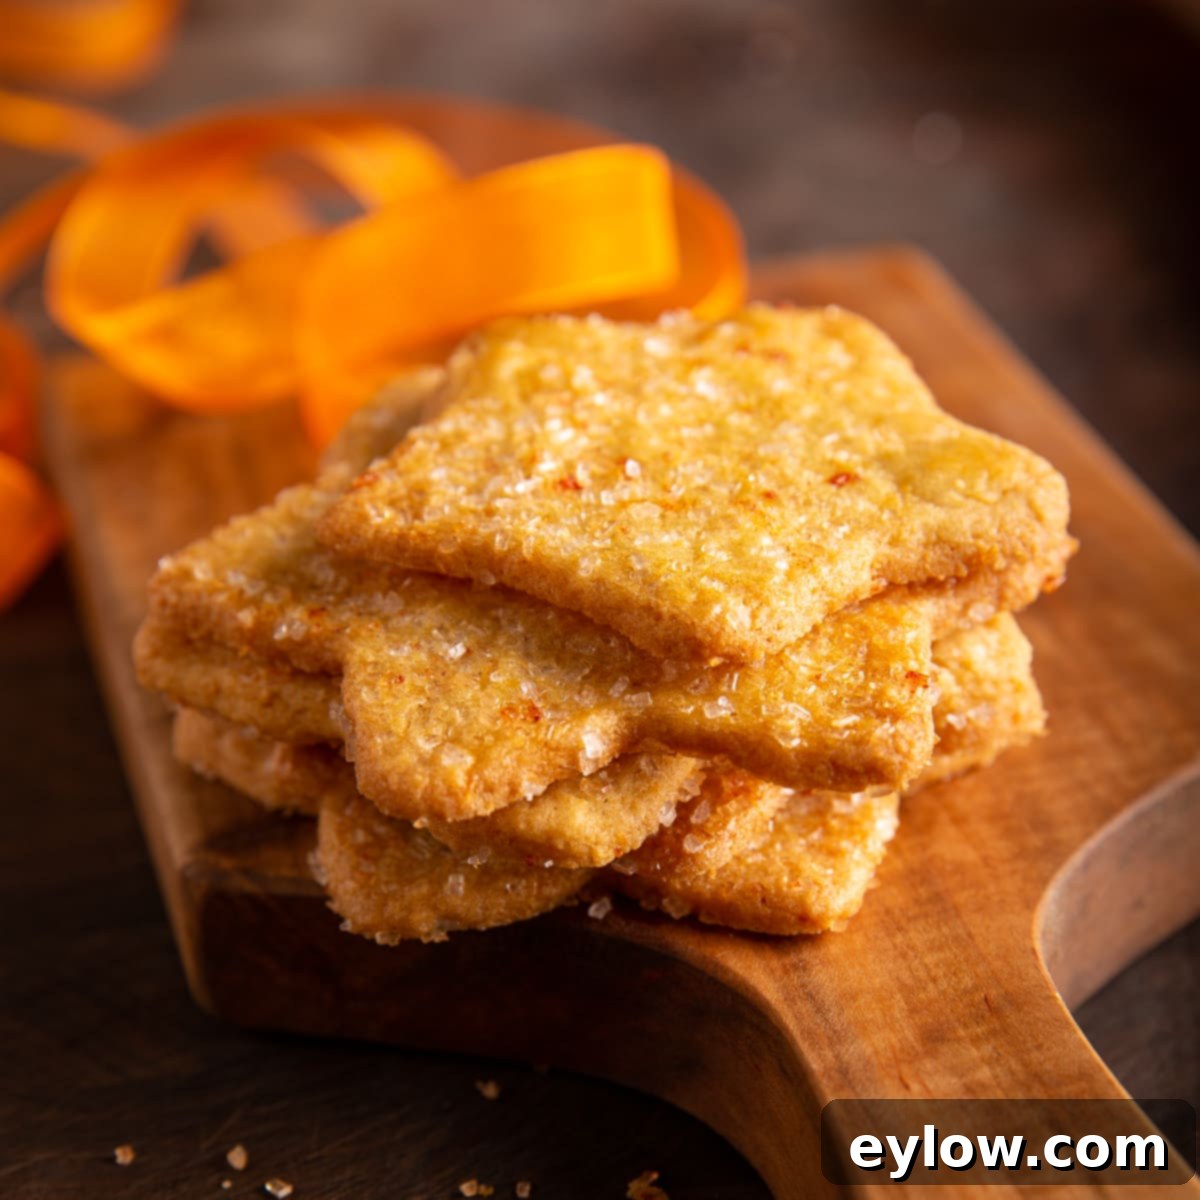
There’s something truly special about recipes passed down through generations, and these old-fashioned sand tart cookies are a perfect example. For countless families, including mine, baking these thin, crispy Pennsylvania Dutch sugar cookies has been a beloved Christmas tradition for decades. Each delicate, orange-kissed bite brings back a flood of warm memories, especially those cherished moments spent baking with my mom during the festive holiday season. If you’re searching for that quintessential holiday cookie to add to your collection, look no further. This recipe promises sweet, crunchy perfection, easily cut into delightful shapes and adorned with vibrant colored sugar sprinkles, making them an irresistible centerpiece on any holiday platter.
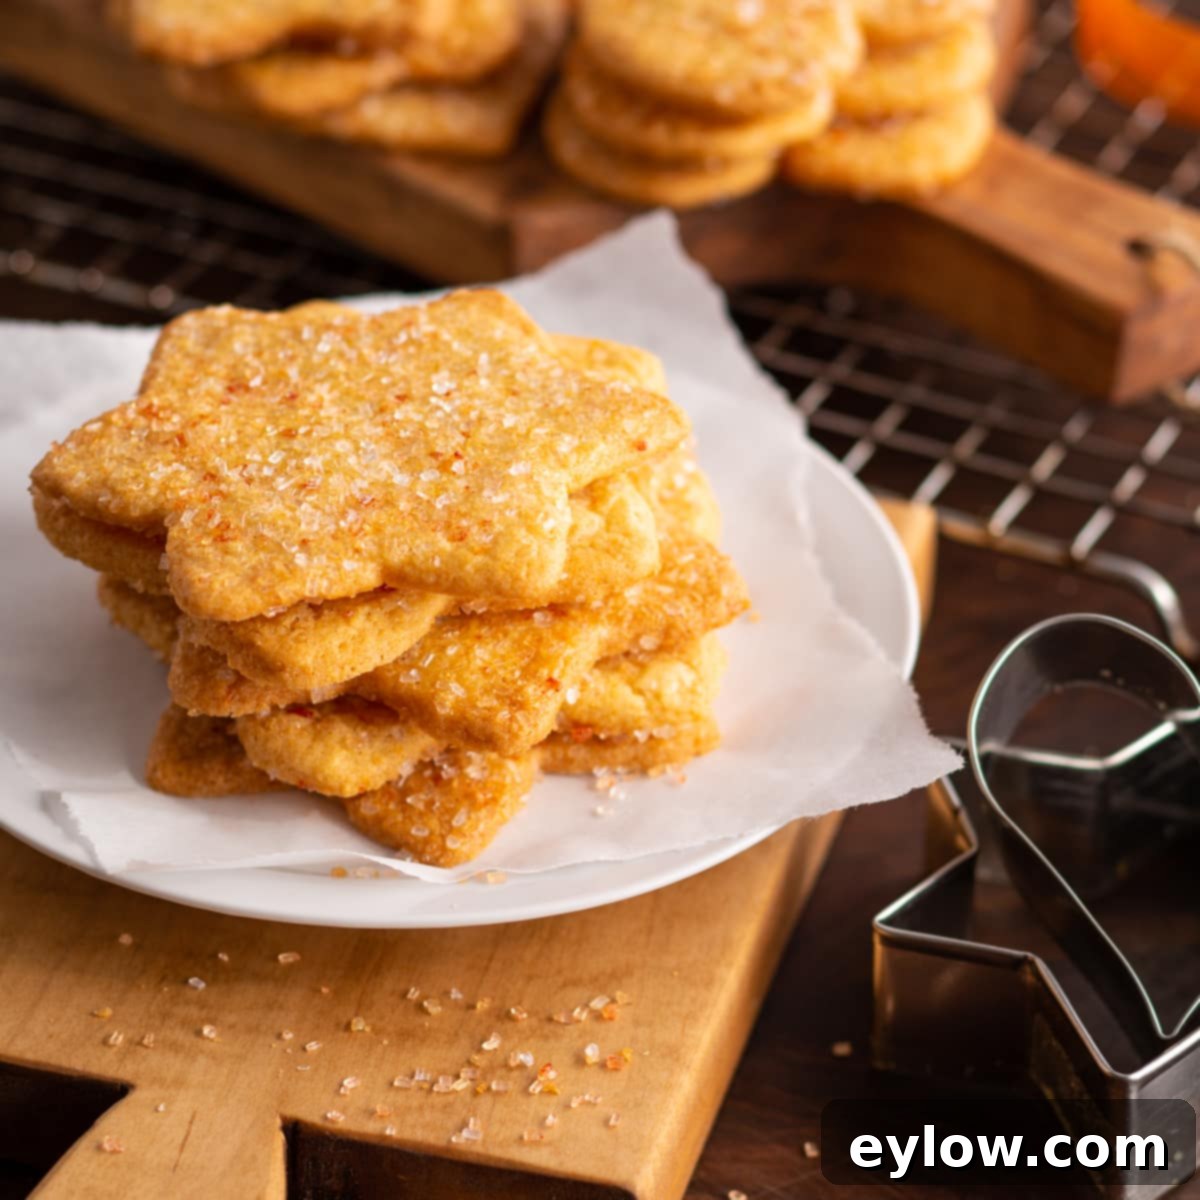
Often known simply as Pennsylvania Dutch sand tarts, these meticulously rolled and cut cookies were an indispensable part of our holiday cookie platters. While the classic recipe is wonderful on its own, our family added a unique twist: a generous amount of fresh orange zest. This simple addition infuses the cookies with a bright, citrusy flavor that elevates them from simply delicious to truly unforgettable. This article will guide you through creating these exquisite sand tarts, sharing tips and tricks to ensure your baking experience is as joyful and memorable as the cookies themselves.
Why You’ll Love Baking This Classic Recipe
There are many reasons why these sand tart cookies have endured as a holiday favorite, and why they’re sure to become a cherished part of your own festive traditions:
- A Beloved Old-Fashioned Classic: This isn’t just a cookie; it’s a taste of nostalgia. Sand tarts are a testament to simpler times, offering the comforting flavor and satisfying crunch of a truly classic sugar cookie. They evoke memories of grandmothers’ kitchens and holiday gatherings from years gone by.
- Perfect for Family & Friends: Baking these cookies is more than just making a dessert; it’s an experience. The process of rolling out dough, cutting shapes, and decorating provides a wonderful opportunity to gather loved ones. It’s an ideal activity for creating new memories with friends and family during the holiday season, fostering connection and shared joy.
- Simple, Accessible Ingredients: Despite their elegant appearance, sand tarts are made with straightforward, common pantry staples. You won’t need to hunt for obscure items, making this recipe accessible to every home baker, regardless of their experience level.
- A Delicious Blank Canvas for Creativity: Their simple base flavor makes them incredibly versatile. While we adore the orange zest, you can experiment with other flavorings or decorations to truly make them your own.
- Crispy Texture Perfection: Unlike many soft sugar cookies, sand tarts are celebrated for their distinctive thin and crispy texture, offering a satisfying snap with every bite. This unique quality sets them apart and makes them particularly addictive.
We’re also actively working on developing a delicious gluten-free version of this recipe, so stay tuned for updates!
Essential Recipe Ingredients for Perfect Sand Tarts
While my mom’s original recipe, like many from the 1940s, relied on ingredients like partially hydrogenated shortening (Crisco), white flour, and refined white sugar, I’ve lovingly adapted it over the years. My goal was to create a slightly more modern, perhaps a touch healthier, and certainly more flavorful version without losing any of its classic charm. Here are the key ingredients and insights into our choices:
- All-Purpose Flour: We use standard unbleached all-purpose white flour. Sifting it is crucial for a light, airy cookie texture, as it refines the flour and removes any clumps.
- Baking Powder: Essential for a subtle lift, ensuring your cookies aren’t too dense. Always opt for aluminum-free baking powder if possible, and double-check its expiration date for optimal leavening power. Expired baking powder can lead to flat, hard cookies.
- Unsalted Butter: This is where our modern twist truly shines. We’ve swapped out the traditional shortening for unsalted butter. Butter not only offers a richer, more nuanced flavor but also provides a superior texture. If you can find an 85% fat butter, often labeled “European style,” it’s highly recommended. Standard American butter typically contains 80% fat, and the higher fat content in European butter contributes to a tenderer crumb and richer taste in baked goods. Ensure your butter is at perfect room temperature for creaming, which is vital for the dough’s consistency.
- Sugar: While white sugar works perfectly fine, we often prefer natural cane sugar for a slightly deeper flavor profile. Superfine sugar is also an excellent choice as its finer granules dissolve more easily, contributing to an even smoother dough and a more delicate texture in the final cookie.
- Eggs: Large eggs serve a dual purpose in this recipe. They are integral to the cookie dough itself, binding ingredients and contributing to the texture. Additionally, an extra egg is used to create an egg wash, which helps the decorative sugar sprinkles adhere beautifully and gives the cookies a lovely golden sheen.
- Fresh Oranges: This is our family’s signature touch! While not a traditional element in every sand tart recipe, adding plenty of fresh orange zest provides a vibrant, zesty citrus flavor that beautifully complements the sweet cookie. It adds a delightful brightness, making these cookies truly stand out. We recommend using one large orange to yield the 2-3 teaspoons of zest needed.
- Colored Sugar Sprinkles: These festive sprinkles are key to transforming simple sugar cookies into dazzling holiday treats. If you’re aiming for a more natural approach, look for naturally colored sugar sprinkles. While their hues might be slightly less vibrant than those made with synthetic dyes, they are still wonderfully beautiful and come from natural sources like fruits and vegetables.
For precise measurements of all ingredients, please refer to the comprehensive recipe card below.
Chef’s Note: I am diligently working on a gluten-free adaptation of these beloved sand tart cookies. My tests, primarily using King Arthur Measure for Measure flour blend, are showing promising results. I will be sure to add specific notes and instructions for a successful gluten-free version as soon as my testing is complete!
Essential Tools for Your Sand Tart Baking Adventure
Having the right tools can make all the difference in your baking process, making it more efficient and enjoyable. To create these delectable sand tarts, you’ll need a few key items:
- Rimmed Baking Sheets or Cookie Sheets: Rimmed baking sheets are excellent as they prevent any accidental spills and provide even heat distribution for consistent baking.
- Rolling Pin: Absolutely essential for achieving that characteristic thinness of sand tart cookies.
- Wax Paper or Parchment Paper: A baker’s best friend! I highly recommend parchment paper. It ensures your dough doesn’t stick to your work surface, makes cleanup a breeze, and helps prevent your cookies from spreading too much during baking.
- Hand Mixer: Perfect for creaming together butter and sugar until light and fluffy, an essential step for the dough’s texture.
- A Sifter or Fine Sieve: Crucial for sifting your dry ingredients to eliminate clumps and aerate the flour, resulting in a lighter cookie. You can find a good sifter here.
- Medium-Sized, Simple Shaped Metal Cookie Cutters: While plastic cutters exist, metal ones offer cleaner, sharper cuts and are generally more durable. Simple shapes like stars, circles, or hearts tend to hold their form best during baking.
- Pastry Brush: Indispensable for applying the egg wash evenly over your cut cookies, which acts as a “glue” for the sugar sprinkles.
- Metal Spatula: A thin, sturdy metal spatula (like a pancake turner) is perfect for gently transferring the delicate baked cookies from the hot baking sheet to a cooling rack.
Crafting Your Sand Tarts: A Step-by-Step Guide
Making sand tarts is a rewarding process that yields truly delightful results. Follow these steps carefully to ensure your cookies are perfect:
- Prepare Dry Ingredients: Begin by placing a large sheet of wax paper or parchment paper on your clean work surface. Position a sifter or fine sieve in the center. Carefully measure your flour and baking powder into the sifter. Sift these dry ingredients directly onto the parchment paper. This vital step refines the flours, removing any lumps and incorporating air, which contributes to a light, tender cookie.
- Cream Butter and Sugar: In a medium-sized mixing bowl, using a hand electric mixer, cream together the room-temperature butter and sugar. “Creaming” means beating them together until the mixture becomes light, fluffy, and noticeably pale yellow in color. It will develop a somewhat sandy, yet soft and aerated, texture. This process incorporates air into the butter, which is critical for the cookie’s final texture and slight rise.
- Incorporate Wet Ingredients: Once the butter and sugar are perfectly creamed, slowly add the well-beaten egg and the finely grated fresh orange zest. Continue blending on a low speed until everything is just combined. For the finest orange zest that truly infuses flavor, a microplane zester is an excellent tool.
- Form the Dough: Gradually add the sifted flour mixture to the wet ingredients, mixing on the lowest speed until the dough comes together and is smooth. Be careful not to overmix, as this can develop the gluten too much and result in tough cookies. At first, the dough will be quite stiff, but as it continues to mix, it will soften slightly.
- Chill the Dough: Divide the cookie dough into two equal portions. Gently flatten each portion into a disk shape. Wrap each disk tightly in plastic wrap, ensuring it’s completely sealed. Refrigerate the dough for a minimum of 2 hours, or ideally, overnight. This chilling period is crucial: it allows the butter to firm up, preventing the cookies from spreading excessively during baking, and also allows the flavors to meld beautifully.
- Prepare for Rolling: When you’re ready to bake, remove the chilled dough from the refrigerator and let it stand at room temperature for about 30 to 60 minutes. You want the dough to be soft enough to roll easily without cracking, but still cool enough to maintain its structure. While the dough is resting, preheat your oven to 325°F (160°C) and gather all your necessary baking tools.
- Roll, Cut, Decorate, and Bake: Now comes the fun part! Follow the detailed steps below to roll out your dough, cut your desired shapes, decorate them, and finally, bake them to golden perfection.
Mastering the Art of Rolling Out Cookie Dough
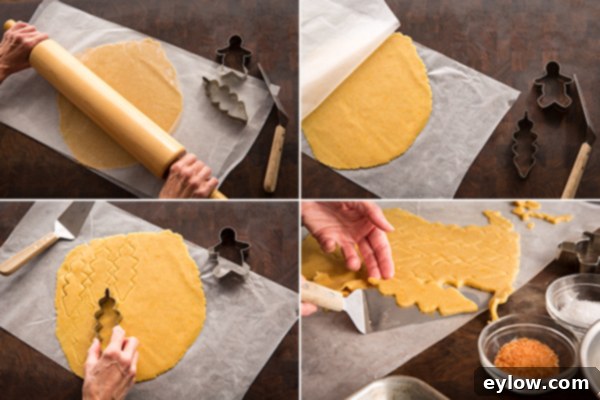
While rolling and cutting cookies may require a bit more effort than simply dropping spoonfuls of dough onto a sheet, the beautiful, uniform results are undeniably worth it. My mother taught me the traditional method of rolling dough on a floured pastry cloth, a technique still favored by many. However, over the years, I’ve discovered a method that’s less messy and equally effective, if not more so:
Today, I prefer to roll the cookie dough between two sheets of wax paper or parchment paper. This technique offers several distinct advantages:
- Less Mess: It contains the flour and dough, keeping your countertop much cleaner.
- No Extra Flour Needed: By rolling between paper, you eliminate the need to constantly flour your work surface and rolling pin. This is important because adding too much extra flour to your dough can inadvertently toughen the cookies, altering their delicate, crispy texture.
- Easier Handling: If the dough becomes too warm and soft during the rolling process (which can happen, especially in a warm kitchen), you can simply place the entire paper-enclosed dough back into the refrigerator for a few minutes to firm up. This makes it much easier to handle and prevents sticking.
When rolling, start from the center of the dough disk and roll outwards in all directions, aiming for an even thickness of about ⅛ inch. Precision here helps ensure all cookies bake uniformly. Once rolled, if your dough feels warm, a quick 10-minute chill in the refrigerator before cutting will make the cutting process much smoother.
Choosing Your Colored Sugar Sprinkles
Colored sugar, often referred to as sanding sugar, is what gives these sand tarts their festive holiday appeal. However, it’s worth noting the differences in available options:
- Traditional Sugars: Most brightly colored sugars found in supermarkets are made with synthetic food dyes, artificial ingredients, and sometimes preservatives. While they provide vibrant colors, some bakers prefer to avoid these additives.
- Naturally Colored Sprinkles: A fantastic alternative is to seek out naturally colored sugar sprinkles. These gain their hues from natural sources like fruits, vegetables, and plant extracts. While the colors might be slightly more subdued or “earthy” compared to their artificially dyed counterparts, they are still beautiful and offer a more wholesome decorating option. They allow you to maintain the festive look without the synthetic ingredients.
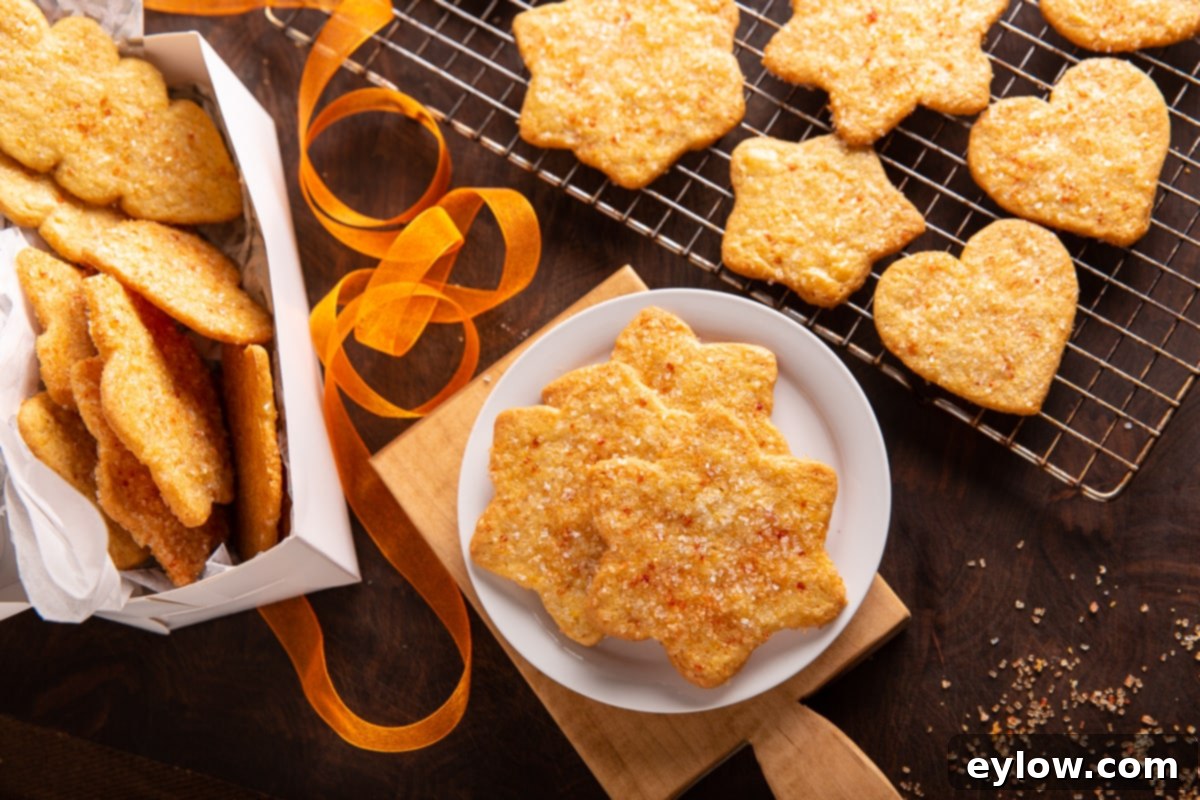
Check your local market’s baking aisle or specialty food stores for naturally colored options. Many excellent choices are also available online. For instance, this Amazon link provides a great source for naturally colored sugars in a variety of lovely shades. For Christmas, classic red and green are perfect, but a beautiful orange sugar was used for this batch, adding to the citrus theme. Consider blue for Hanukkah or pink and red for Valentine’s Day cookies, showcasing the versatility of these decorations.
Another wonderful decorating option, either as an alternative or in addition to colored sanding sugar, is a simple cinnamon sugar mixture. It adds a warm, spicy note that perfectly complements the orange zest and offers a beautiful, rustic finish.
Key Tips for Cookie Baking Success
Achieving perfect sand tart cookies requires attention to a few critical details. Keep these tips in mind for consistently delicious results:
- Room Temperature Butter is Non-Negotiable: For proper creaming, your butter absolutely must be at room temperature. Cold butter won’t incorporate sugar and air effectively, leading to a denser dough. Butter that’s too soft or melted will result in greasy, flat cookies. Aim for butter that gives slightly when pressed but still holds its shape.
- Thorough Chilling of the Dough: This is arguably the most crucial step for a successful rolled cookie, especially when using all butter. Chilled dough prevents excessive spreading in the oven, ensuring your cookies maintain their delicate shapes and signature crispness. Don’t rush this step!
- Prevent Cookie Cutters from Sticking: To ensure clean cuts and easy release, lightly dip the edges of your cookie cutters in a small bowl of flour, then tap off any excess, before pressing them into the dough. This simple trick makes a big difference.
- Efficient Cutting to Minimize Waste: When cutting shapes, try to place your cookie cutters as close together as possible without overlapping. This maximizes the number of cookies you get from the first roll of dough. Any leftover dough can be gently gathered, re-formed into a disk, lightly chilled if it’s too warm, and re-rolled. Be careful not to overwork the dough during re-rolling.
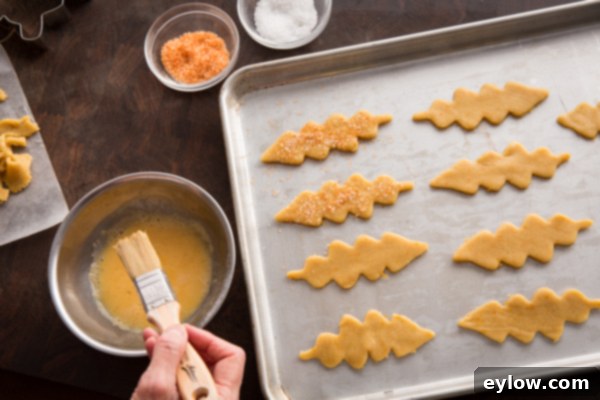
- The Magic of Egg Wash: Before baking, brush your cut cookies on the baking sheet with a light coat of beaten egg (or just egg yolk mixed with a touch of water). This “egg wash” acts as a fantastic adhesive, ensuring your colored sugar sprinkles stick perfectly to the cookie surface. It also gives the baked cookies a beautiful, golden-brown sheen.
Choosing the Right Cookie Cutters for Sand Tarts
The type of cookie cutter you choose can influence the final appearance of your sand tarts. Here are some tips to guide your selection:
- Simple Shapes Work Best: Sand tarts are thin cookies that can spread slightly during baking. Because of this, anything with very intricate or fancy edges might lose some of its definition in the oven. Don’t worry if this happens occasionally – it’s part of the charm of home baking! However, for the cleanest, most recognizable shapes, opt for simpler designs like circles, squares, stars, hearts, or classic holiday shapes.
- Parchment Paper Helps: Baking your cookies on parchment-lined sheets can help to lessen the spread a bit, assisting in maintaining those beautiful shapes.
- Be Creative: Despite the recommendation for simpler shapes, feel free to experiment! Over the years, I’ve successfully made angels, Christmas trees, candy canes, and even snowmen. The key is to embrace the process and enjoy the outcome, regardless of minor imperfections. The joy is in the creation and sharing.
Preparing Your Dough in Advance
One of the many benefits of this sand tart recipe is how well the dough prepares ahead of time, making your holiday baking less stressful. You can easily make the cookie dough a day or two in advance. Simply wrap the flattened dough disks tightly in plastic wrap and store them in the refrigerator.
When you’re ready to bake, remember to remove the dough from the refrigerator and let it sit at room temperature for about an hour. This allows the butter to soften slightly, making the dough pliable and easier to roll without cracking. If, while you’re cutting out your cookies, the dough starts to become too soft and difficult to handle, don’t hesitate to place it back in the refrigerator for 10-15 minutes. A brief chill will firm it up, allowing for much easier and cleaner cuts.
Storing Your Delicious Sand Tart Cookies
Once your sand tart cookies are baked and completely cooled, proper storage is key to maintaining their delightful crispness. Place them in an airtight container and store them at room temperature on your kitchen counter. They will remain wonderfully fresh for up to a week.
However, based on personal experience, I can confidently say they rarely last that long! Their irresistible, delicate flavor and satisfying crunch make them a highly sought-after treat, often disappearing within a few days. For longer storage, you can also freeze the baked cookies in an airtight container for up to 2-3 months. Thaw at room temperature before serving.
A Glimpse into History and Cherished Tradition
The story behind these sand tart cookies is deeply rooted in my family’s heritage, tracing back to the industrious and devout Amish and Mennonite communities of Lancaster County, Pennsylvania. This rich cultural backdrop is where the recipe’s origins lie, stemming from a time when home baking was an art form and a necessity.
Our particular family favorite Christmas cookie recipe is an adaptation from a genuine culinary treasure: the 1940s Woman’s Home Companion Cookbook. I am incredibly fortunate to still possess my mom’s original, historic, and wonderfully tattered copy of this cookbook. It’s more than just a collection of recipes; it’s a tangible link to our past, holding the authentic blueprint for these very sand tart cookies. The pages, worn from decades of loving use, whisper stories of countless holiday seasons and family gatherings.
This history reminds us that food is not just sustenance; it’s a powerful vehicle for culture, memory, and connection. Baking these cookies is a way to honor that legacy and keep a cherished tradition alive. I wholeheartedly encourage you to gather your children, family, friends, or neighbors and embark on your own baking tradition. There’s immense joy to be found in the shared experience of creating something delicious in the kitchen, fostering bonds, and crafting memories that will truly last forever. From my kitchen to yours, happy baking and Merry Christmas!
📖 Recipe

Old Fashioned Sand Tart Cookies Recipe
By Sally Cameron
Adapted from the 1940’s Woman’s Home Companion Cookbook, this thin, crisp cookie scented with fresh orange zest is our favorite family baking tradition at Christmas. The dough can be made a day or two ahead. The yield depends on the size of the cookie cutter used. Cookies keep on the counter in an airtight container for up to a week. This recipe typically makes about 3 dozen cookies.
Average rating: 5 from 1 vote
Print Recipe
Pin Recipe
⏱️ Time
Prep Time: 30 mins
Cook Time: 30 mins
Chill Time for Dough: 2 hrs
Total Time: 3 hrs
Category & Cuisine
Course: Cookies
Cuisine: American (Pennsylvania Dutch)
Yield & Nutrition
Servings: 18 (Yields approximately 3 dozen cookies)
Calories: 133 kcal (per 2 cookies)
Equipment
- Parchment or waxed paper
- Fine sieve or sifter
- Baking sheets
- Hand mixer
- Rolling pin
- Pastry brush
- Wire cooling rack
- Metal spatula
Ingredients
Cookie Dough
- 1 ¾ cup all-purpose unbleached white flour
- 1 teaspoon baking powder (aluminum free)
- ½ cup unsalted butter, at room temperature (1 stick)
- 1 cup sugar
- 2-3 teaspoons fresh orange zest (from 1 large orange)
- 1 large egg, well beaten
- ½ teaspoon salt
Cookie Topping
- 1 large egg (for egg wash)
- 1 tablespoon water (for egg wash)
- Colored sugar sprinkles (to decorate)
Instructions
- Place a sheet of wax paper or parchment on a flat surface. Position a sifter or fine sieve in the center. Measure the flour and baking powder into the sifter and sift onto the paper.
- In a medium bowl, use a hand mixer to cream together the butter and sugar on medium speed until the mixture is sandy and fluffy. Slowly add the well-beaten egg and orange zest, blending until just combined. Gradually add the sifted flour mixture on the lowest speed (or mix by hand) until a smooth dough forms. The dough will be stiff at first, then soften. Split the dough into two portions, form each into a flattened disk, wrap well in plastic wrap, and refrigerate for about 2 hours or overnight. When ready to bake, remove the dough from the refrigerator and let it stand at room temperature for 30-60 minutes. You want the dough soft enough to roll but still chilled.
- Pre-heat your oven to 325°F (160°C). To roll out your cookies, place each dough disk between two sheets of wax paper or parchment paper. Using a rolling pin, roll from the center outwards in all directions until the dough is approximately ⅛-inch thick. If the dough feels too soft, place the rolled dough (still between the paper) back in the refrigerator for 10 minutes to firm up. Remove from the refrigerator and use cookie cutters to cut out desired shapes. Carefully place the cut cookies onto a baking sheet lined with parchment paper. (Alternatively, you can bake cookies directly on a lightly sprayed and wiped cookie sheet, though they may spread a bit more.)
- Whisk together the additional large egg with 1 tablespoon of water to create an egg wash. This wash helps your decorations adhere. Using a pastry brush, lightly brush the tops of the cut cookies with the egg wash, then sprinkle generously with colored sugars. Bake at 325°F (160°C) for approximately 8-10 minutes, or until the edges are lightly golden brown. Baking time may vary depending on your oven and cookie thickness. Allow cookies to cool on the baking sheet for a minute before carefully transferring them with a metal spatula to a wire cooling rack to cool completely. Store cooled cookies in an airtight container.
Notes
This recipe is adapted from my mom’s treasured 1940’s Woman’s Home Companion Cookbook, a true family heirloom!
For a wide selection of naturally colored sugar sprinkles, check out this Amazon link for beautiful options.
Nutrition
Serving: 2 cookies
Calories: 133 kcal
Carbohydrates: 20g
Protein: 2g
Fat: 6g
Saturated Fat: 3g
Polyunsaturated Fat: 0.4g
Monounsaturated Fat: 2g
Trans Fat: 0.2g
Cholesterol: 34mg
Sodium: 32mg
Potassium: 39mg
Fiber: 1g
Sugar: 11g
Vitamin A: 189IU
Vitamin C: 0.5mg
Calcium: 21mg
Iron: 1mg
Let us know how it was with a comment and leave a star rating!
