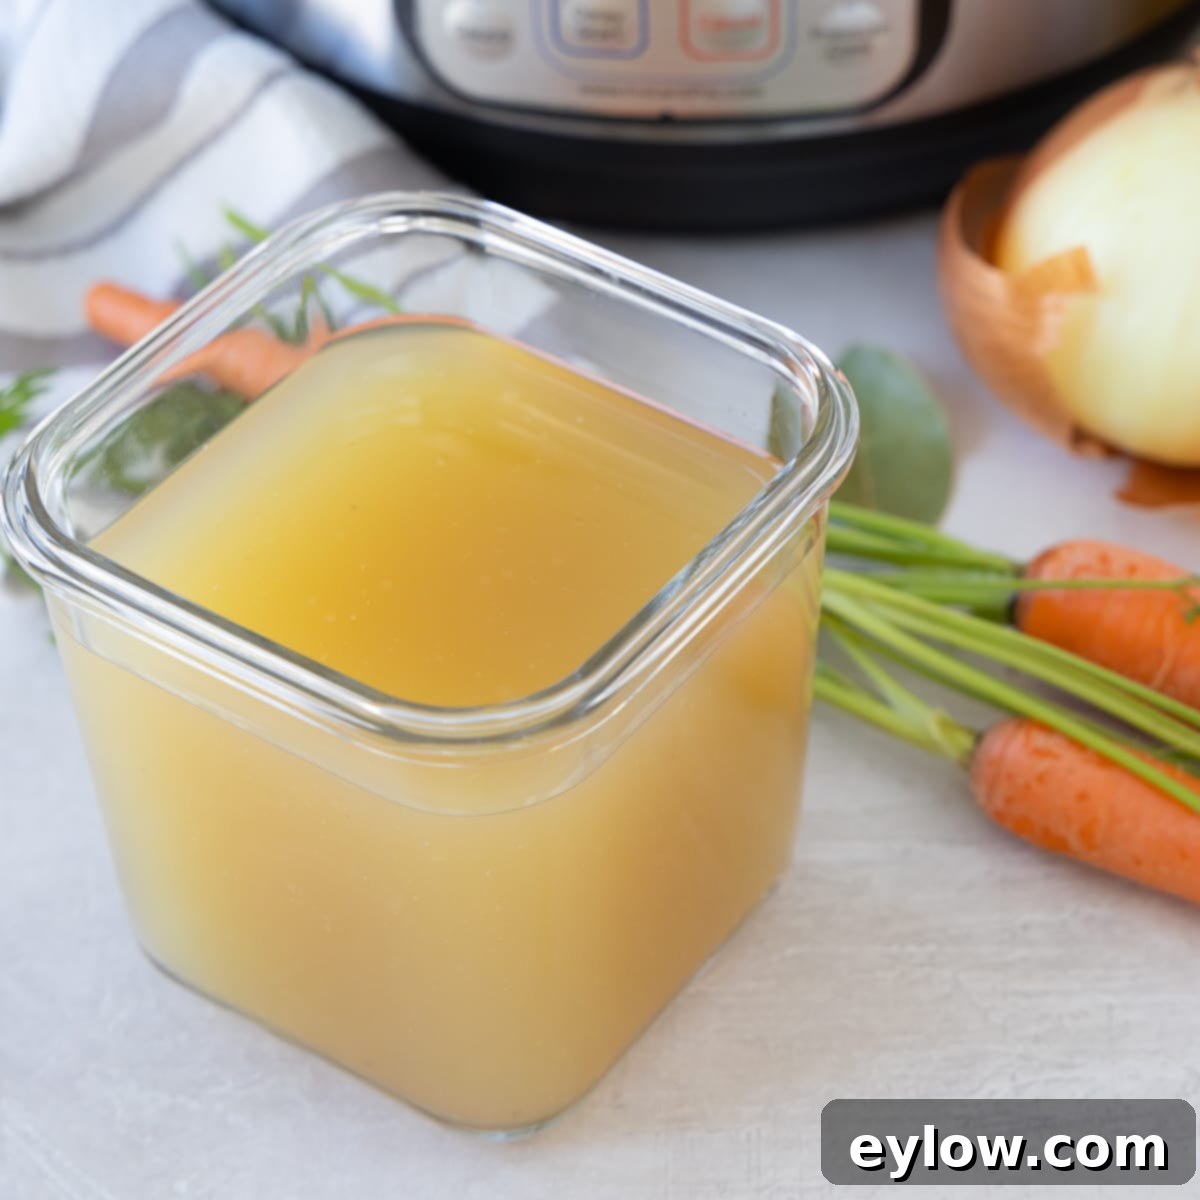
Easy & Nourishing Instant Pot Chicken Broth: Your Ultimate Guide to Homemade Liquid Gold
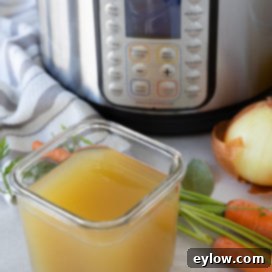
Making homemade Instant Pot chicken broth is truly a game-changer for any kitchen. Forget the days of endless simmering; this pressure cooking method delivers the same deeply rich, golden, and incredibly flavorful results as traditional bone broth, but in a mere 3 hours instead of a full day. It’s not just faster; it’s a healthier, more flavorful, and significantly more economical alternative to any store-bought carton or can. Once you experience the superior taste and ease of this Instant Pot method, you might never return to the stovetop version. The best part? You can easily make large batches and freeze them, ensuring a steady supply of this culinary “liquid gold” for all your cooking needs.
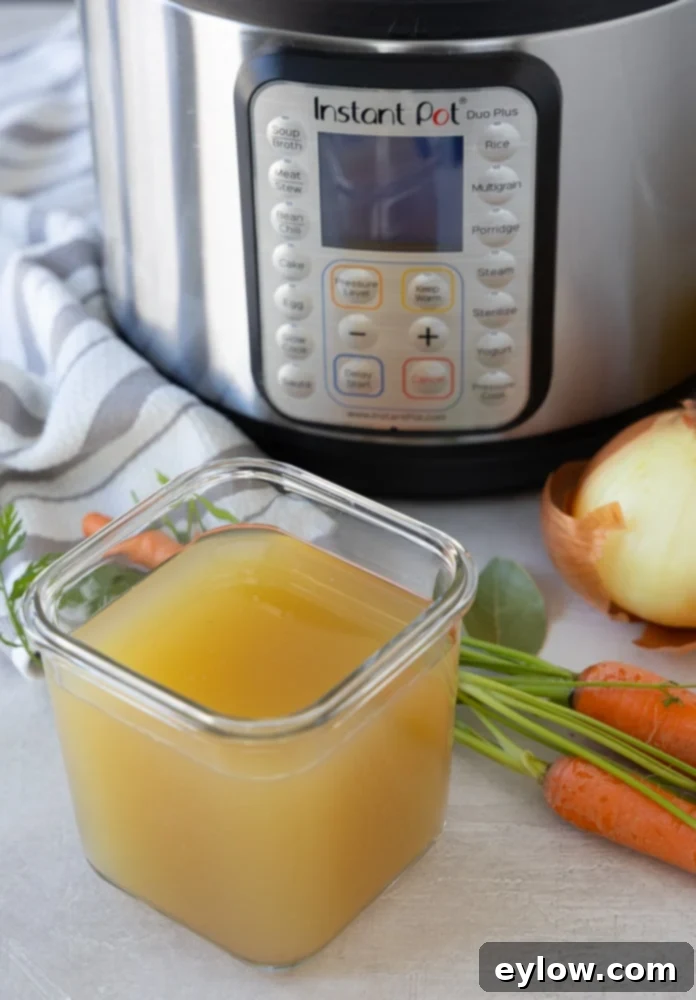
I initially turned to pressure cooking homemade chicken broth out of a sheer need for speed and convenience, but it quickly became my absolute favorite method because the results are consistently phenomenal. The Instant Pot efficiently extracts deep, savory flavor and a wealth of nutrients from the ingredients without requiring the constant attention or prolonged simmering that traditional chicken broth demands. It’s a hands-off, fuss-free approach that reliably yields a clear, beautifully golden, and incredibly nourishing broth every single time. This guide will walk you through everything you need to know to master homemade chicken broth in your Instant Pot.
Why You’ll Love Making Chicken Broth in Your Instant Pot
Discover the compelling reasons why Instant Pot chicken broth is a must-have in your culinary repertoire:
- Significantly Faster than Traditional Broth: The Instant Pot slashes cooking time dramatically. What would typically take 12-24 hours on the stovetop is ready in just a few hours. This means you can enjoy fresh, homemade broth even on a busy weeknight or without extensive planning. The pressure accelerates the extraction of flavors and nutrients, delivering delicious results in a fraction of the time.
- Rich, Concentrated Flavor from Pressure Cooking: Pressure cooking creates an environment where ingredients are cooked under high pressure and steam. This intense process extracts maximum flavor from the chicken and vegetables, resulting in a deeply savory, golden broth with an incredibly concentrated taste. It’s a flavor profile that’s hard to replicate with conventional methods.
- Incredibly Versatile for Various Uses: Homemade chicken broth is a kitchen staple. It’s perfect for sipping on its own as a comforting, warm beverage, or as a fundamental base for countless recipes. Use it in soups, stews, gravies, risottos, sauces, or to cook grains like rice and quinoa. Its rich flavor elevates any dish.
- A Gentler, Lower Histamine Option: For individuals sensitive to histamines, shorter cooking times are often beneficial. The Instant Pot’s rapid cooking process helps to minimize histamine formation compared to broths simmered for many hours, making it a potentially gentler and more digestible option for sensitive eaters.
- Superior to Store-Bought Alternatives: When you make chicken broth at home, you have complete control over the ingredients. This allows you to choose high-quality organic chicken and fresh vegetables, avoiding the excessive sodium, preservatives, and artificial flavors often found in commercial broths. The difference in taste and nutritional value is undeniable.
- Cost-Effective and Reduces Waste: Making your own broth utilizes leftover chicken bones and vegetable scraps, transforming them into a valuable, nutrient-dense ingredient. This reduces food waste and is significantly cheaper than consistently buying premium store-bought broths, saving you money in the long run.
Essential Ingredients for Your Perfect Instant Pot Chicken Broth
Crafting a flavorful and nutritious chicken broth starts with high-quality ingredients. Here’s what you’ll need:
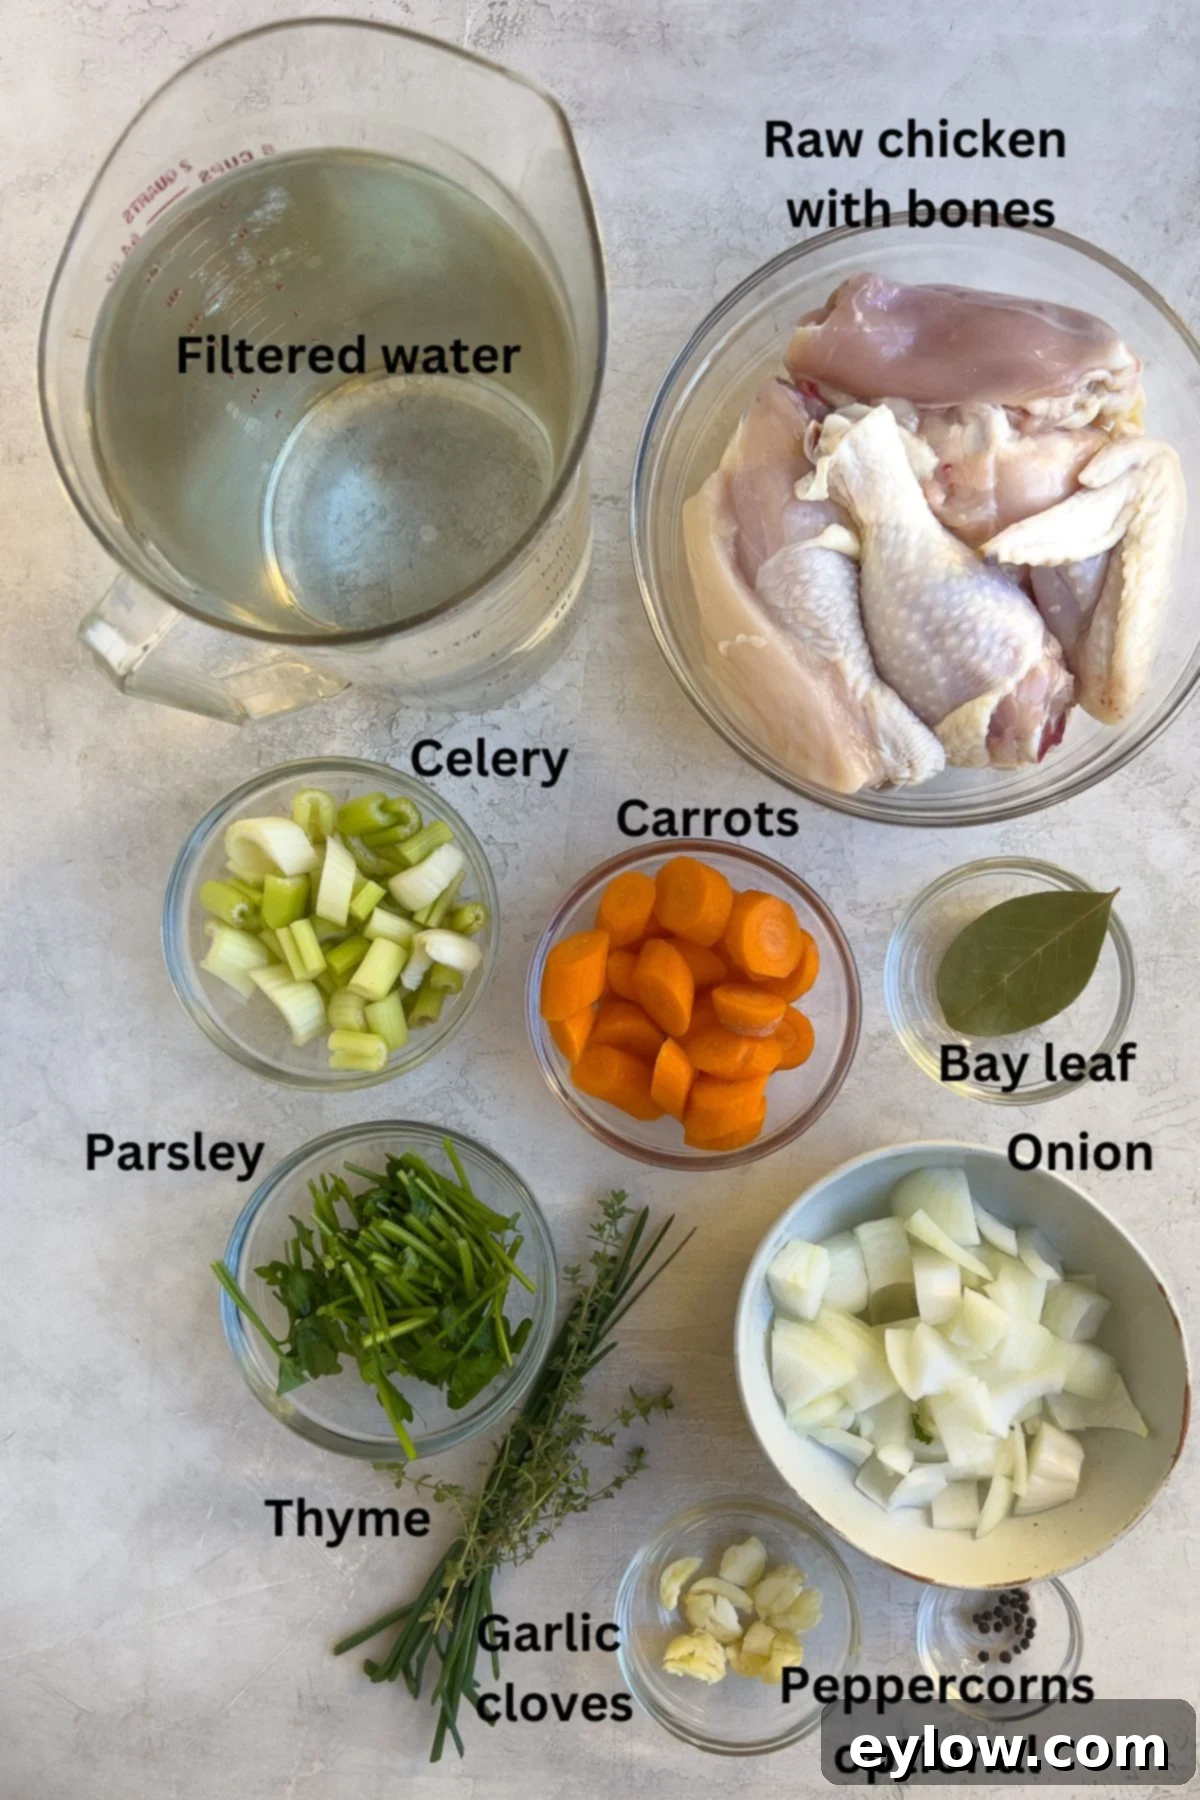
- Chicken: For the best body and flavor, opt for meaty, bone-in chicken pieces. Whole chicken legs, thighs, or even a whole chicken cut into parts work wonderfully. The bones are crucial for releasing collagen, which gives the broth its rich mouthfeel and nutritional benefits. Whenever possible, choose organic, pasture-raised chicken for superior flavor and health benefits. Don’t hesitate to ask your butcher to cut a whole bird for you, or save money by learning to do it yourself – it’s a valuable kitchen skill! Remember to remove as much skin as possible to prevent your broth from becoming too greasy.
- Onion: A fundamental aromatic that forms the savory base of your broth. White, yellow, brown, or sweet onions are all excellent choices, contributing a foundational sweetness and depth.
- Carrot: Essential to the classic French flavor base, mirepoix (a blend of onion, carrot, and celery). Carrots lend a subtle natural sweetness and a beautiful golden hue to the finished broth.
- Celery: The third component of mirepoix, celery adds a refreshing balance to the flavors and contributes delicate herbal notes that round out the broth’s profile.
- Leek (Optional): If you have one on hand, adding a leek introduces a gentle, layered onion-like flavor that enhances the broth’s complexity. Be sure to thoroughly rinse leeks, as they can hide sand and dirt.
- Garlic: A few cloves of garlic significantly boost the savory flavor and are renowned for their immune-supporting properties, making your broth even more wholesome.
- Herbs: Fresh herbs are key to a vibrant broth. Include a few sprigs of fresh thyme, some fresh parsley (stems and all), and a bay leaf (fresh or dried). If available, fresh chives can add another layer of delicate onion flavor. These herbs infuse a wonderful, aromatic quality into the broth.
- Filtered Water: The quality of your water directly impacts the taste of your broth. Always use clean, filtered water for the purest and best-tasting results. Avoid tap water if it has a strong chlorine taste.
- Black Peppercorns: These add a mild, earthy spice and depth to the broth. However, if you are histamine-sensitive, it’s advisable to skip them, as peppercorns can sometimes be a trigger.
For precise measurements of each ingredient, please refer to the detailed recipe card below.
Chef’s Tip for the Perfect Broth: NO SALT. It’s crucial not to salt your broth during the cooking process. Save the salt for when you use the finished broth in a recipe. This approach allows for greater control over the final dish’s seasoning, accommodating various dietary needs or individual salt sensitivities.
Substitution and Variations for Your Instant Pot Chicken Broth
Customize your homemade chicken broth with these helpful substitutions and variations:
- Garlic: If you or someone you’re cooking for has a garlic allergy or sensitivity, feel free to skip it entirely. The broth will still be delicious thanks to the other aromatics.
- Leek: For maximum flavor and minimal waste, use the dark green tops of the leek for your broth. These parts are often discarded but are packed with flavor. Reserve the lighter white and pale green parts for sautés, stir-fries, or other cooking where their delicate texture is desired.
- Thyme: Fresh sprigs of thyme impart the most aromatic and vibrant flavor to your broth. However, if fresh thyme isn’t available, dried thyme can be used as a substitute. Use about 1 teaspoon of dried thyme for every tablespoon of fresh thyme specified.
- Extra Richness and Gelatin: To create a more gelatinous, collagen-rich broth, consider adding a few chicken feet to the pot. While it might seem unusual at first, this is a classic chef’s trick that significantly enhances the body and nutritional value of the broth. The high collagen content in chicken feet breaks down into gelatin, resulting in a luscious, silky broth that often sets like jelly when chilled.
- Herbs & Spices: Experiment with other herbs like fresh rosemary or a small bunch of dill for different flavor profiles. A piece of fresh ginger can add a warm, slightly spicy note, particularly good if you’re making a broth for sipping when feeling under the weather.
- Vegetable Scraps: Don’t throw away clean vegetable scraps like onion peels, carrot tops, or celery ends! Keep a bag in your freezer and add them to your broth for extra depth of flavor and to reduce food waste.
Chef’s Note: Is it Stock or Broth? The Culinary Distinction
Traditionally, the terms “stock” and “broth” have distinct meanings, though today they are often used interchangeably. Technically, stock is made primarily from bones, cartilage, and connective tissues, often roasted beforehand, and typically simmered for a very long time to extract maximum gelatin. This results in a thicker, more viscous liquid that often gels when chilled. Broth, on the other hand, is generally made from meaty pieces of chicken (with bones), along with vegetables and aromatics, and is usually simmered for a shorter period. It tends to be lighter and more flavorful for sipping or as a direct base for soup. In this Instant Pot recipe, we utilize meaty, bone-in chicken pieces, producing a result that combines the best qualities of both – a flavorful, nourishing liquid with good body and gelatin thanks to the efficient pressure cooking process.
How to Make Chicken Broth in an Instant Pot: Step-by-Step Guide
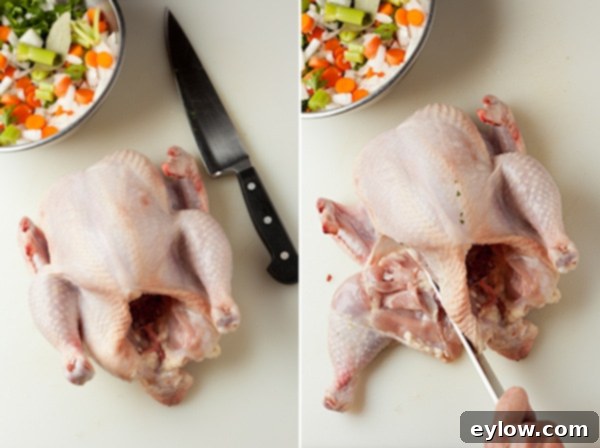
Making delicious homemade chicken broth in your Instant Pot is straightforward. If you’re starting with a whole chicken, begin with the “How to Cut Up a Whole Chicken” steps. If you have pre-cut chicken pieces, you can jump directly to the “Broth Instructions.” For cutting a whole chicken, a heavy chef’s knife is essential, and specialized poultry shears can be incredibly helpful and make the task much easier.
Mastering the Art of Cutting Up a Whole Chicken
Starting with a whole chicken can be more economical and ensures you have all the necessary bone-in, meaty pieces for the most flavorful broth. Here’s how to do it safely and efficiently:
Place the whole chicken rounded side (breast side) up on a sturdy, non-slip cutting board. Ensure your knife is sharp for clean cuts.


Instant Pot Broth Instructions
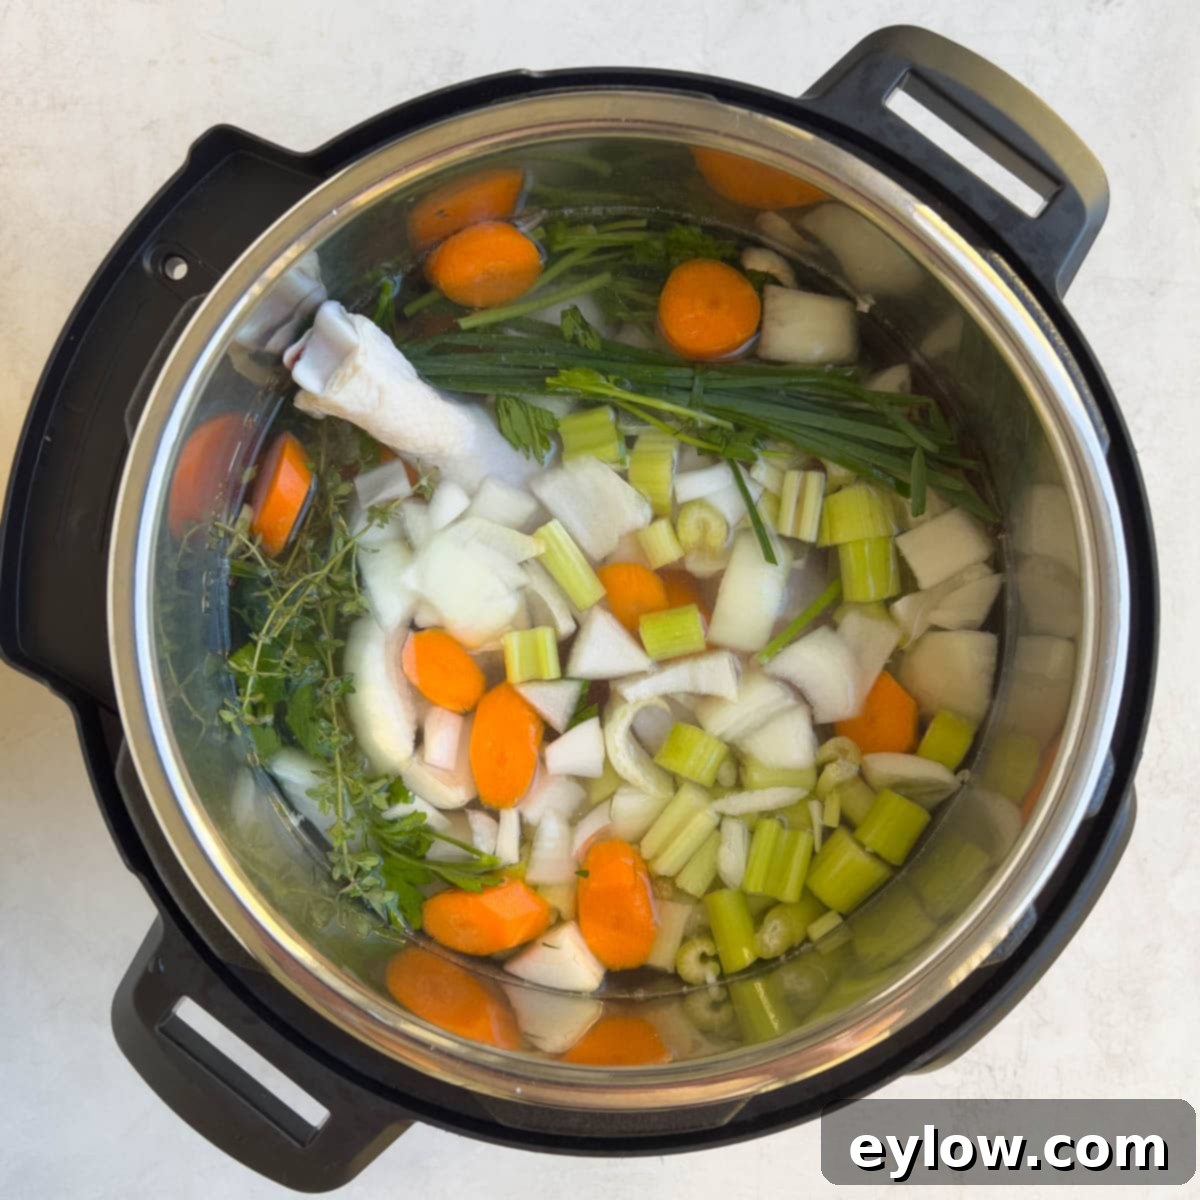
This is where the magic of pressure cooking truly shines, condensing hours of simmering into a fraction of the time.
First, carefully add all your prepared chicken pieces, chopped onion, carrots, celery, optional leek, smashed garlic cloves, fresh thyme sprigs, and the bay leaf into the inner pot of your Instant Pot. Ensure these ingredients are spread evenly.
Next, pour in the filtered water, making sure not to exceed the “PC MAX 2/3” fill line marked on the inside of the inner pot. Overfilling can be dangerous and prevent the Instant Pot from coming to pressure correctly. For a 6-quart Instant Pot, this usually means about 2 quarts (8 cups) of water, but adjust based on your pot size and ingredients.
Securely lock the lid onto your Instant Pot. Double-check that the steam release valve is turned to the “Sealing” position (or locked). Select the “Soup/Broth” function (or Manual/Pressure Cook) and set the timer for 2 hours on high pressure. The Instant Pot will take approximately 20-30 minutes to build pressure before the actual cooking countdown begins.
Once the 2-hour cooking cycle is complete, press the “Cancel” button to turn off the heating element. It is crucial to allow the pressure to release naturally for at least 20-30 minutes. Natural pressure release helps to keep the broth clear and prevents liquid from spurting out of the valve. After the natural release period, carefully turn the steam release valve to the “Venting” position to quick release any remaining pressure. The float valve will drop when it’s safe to open the lid. The total process, including pressure build-up and release, will take approximately 3 hours.
Straining and Chilling Your Instant Pot Chicken Broth for Optimal Flavor and Safety
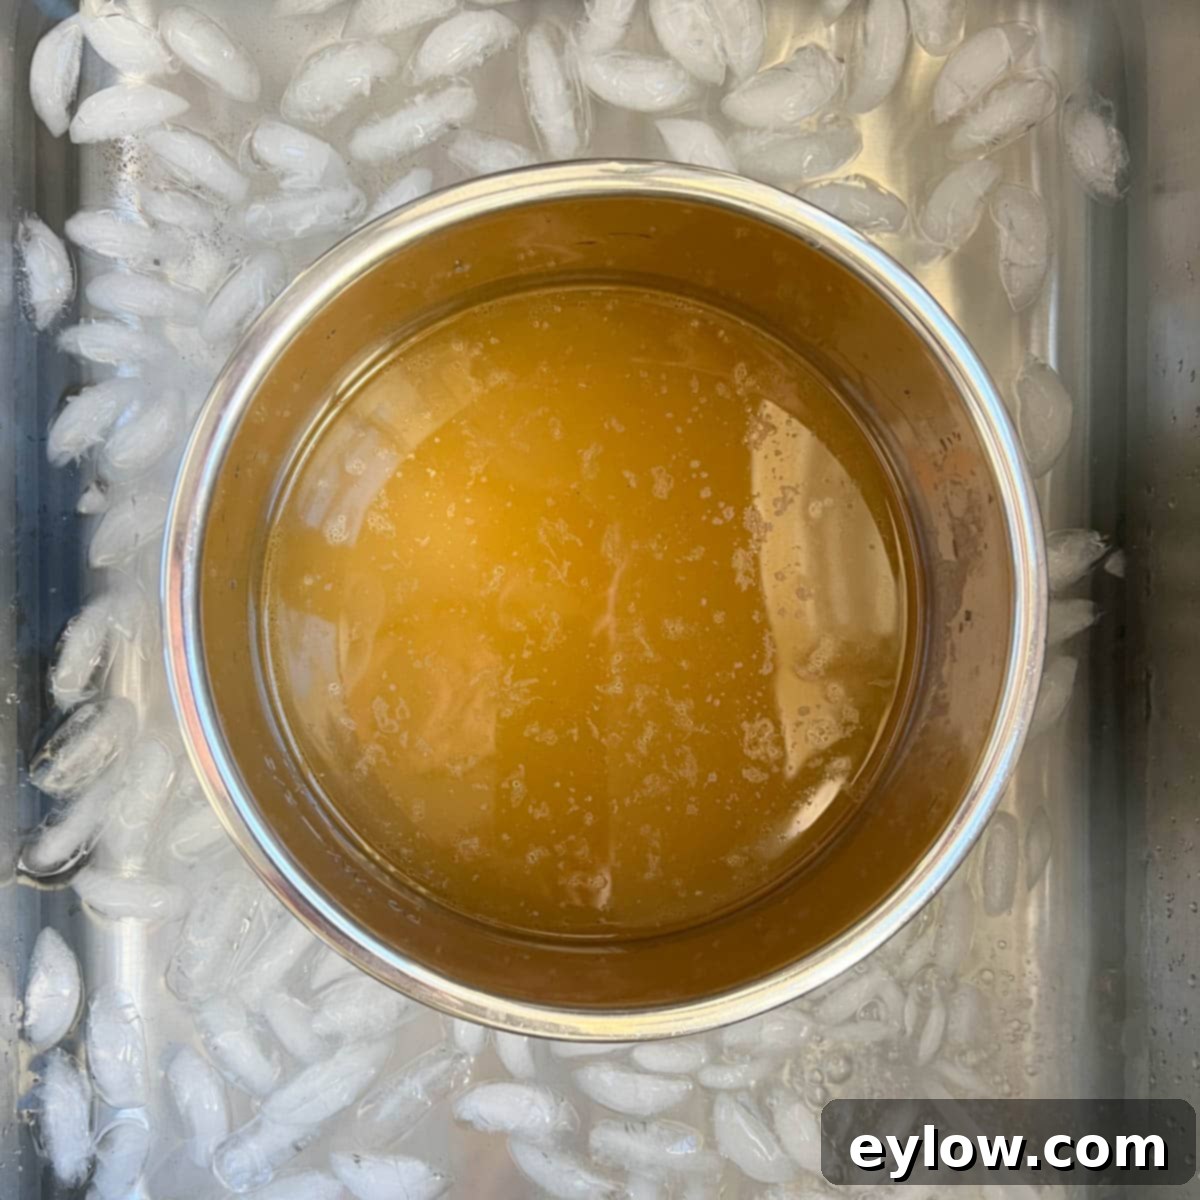
Once your broth is cooked, the next crucial steps are straining and chilling it properly to ensure clarity, flavor, and food safety.
Begin by carefully removing the inner pot from your Instant Pot. Using a large fine-mesh sieve or a colander lined with cheesecloth, strain the broth into another clean, heat-safe container. Discard all the spent chicken bones, vegetables, and herbs. The chicken meat can be salvaged for other dishes if you wish, or discarded if it’s too broken down. Wash the Instant Pot’s inner pot thoroughly, then pour the strained broth back into it for chilling.
To cool the broth quickly, prepare an ice bath. Fill a clean sink about halfway with ice and cold water. Carefully place the Instant Pot’s inner pot containing the hot broth directly into this ice bath. Stir the broth occasionally with a clean spoon to help it cool down more efficiently and evenly. This rapid cooling process, often taking about an hour (or less, depending on volume), is essential for food safety, as it minimizes the time the broth spends in the “danger zone” temperature range where bacteria can multiply rapidly.
For optimal refrigerator safety, ensure the chicken broth cools to at least 70°F (21°C) within two hours of cooking. Once it reaches this temperature, it can be safely transferred to the refrigerator for further chilling, ideally overnight. This allows any remaining fat to solidify at the top, making it easy to remove.
Chef’s Note: Pressure Cooker vs. Apple Cider Vinegar for Collagen Release
When making long-simmered bone broth on the stovetop, it’s common practice to add a small amount of apple cider vinegar. The acidity of the vinegar is believed to help extract more minerals and collagen from the bones into the broth. However, in a pressure cooker, this step is generally not necessary. The significantly higher temperatures and pressure achieved in an Instant Pot or electric pressure cooker are incredibly efficient at breaking down collagen into gelatin quickly. This means you’ll naturally achieve a wonderfully rich, gelatinous broth without the need for added vinegar. As mentioned earlier, including a few chicken feet will further guarantee that desirable jelly-like texture when chilled, due to their high collagen content.
Refrigerate Broth Overnight for Easy Fat Removal
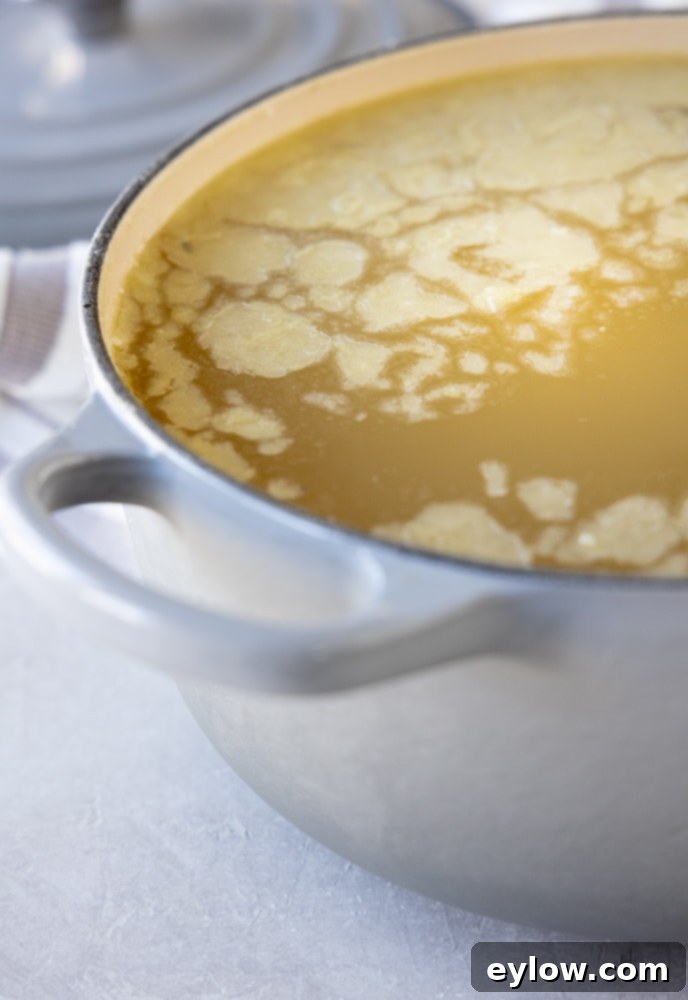
After the broth has cooled sufficiently in the ice bath, cover the pot securely and place it in the refrigerator. Allowing it to chill overnight is the ideal method, as this duration gives the fat ample time to rise to the surface and solidify.
In the morning, you’ll find a solid layer of congealed fat on top of your golden broth. This solidified fat is incredibly easy to skim off with a spoon or spatula. Removing the fat not only makes the broth lighter and clearer but also extends its shelf life, as fat can sometimes go rancid faster than the broth itself. Once the fat is removed, your pristine, nourishing broth is ready for portioning, labeling, and freezing for future use.
One additional tip for achieving an exceptionally clear broth: sometimes, even after initial straining, tiny vegetable bits or sediment might remain. You can strain the broth one more time through a very fine sieve or a cheesecloth-lined colander. This step is optional but highly recommended if you desire a perfectly clear broth. Alternatively, you can use a small, mini fine strainer as you portion the broth into your containers for freezing, catching any lingering particles as you go.
How to Freeze Chicken Broth for Long-Term Storage
Freezing homemade chicken broth is an excellent way to preserve its freshness and convenience, ensuring you always have a healthy base for your meals. I typically freeze broth in various portion sizes to suit different culinary needs: 1-cup and 3-cup portions are perfect for sipping, making larger soups, or cooking grains, while mini ½-cup portions are ideal for deglazing pans to create quick sauces, adding moisture to sautéed vegetables, or boosting flavor in smaller dishes.
When it comes to storage, there are several effective options:
- Mason Jars: Glass mason jars are a fantastic, reusable, and eco-friendly option. Make sure to use freezer-safe jars (like wide-mouth canning jars) and leave at least an inch of headspace at the top to allow for expansion as the broth freezes. Overfilling can cause the jars to crack.
- Freezer Bags: Heavy-duty freezer bags are convenient for flat storage, saving space in your freezer. Ensure the broth is completely chilled before pouring it into the bags to prevent freezer burn and ensure even freezing. Seal the bags well, removing as much air as possible, and lay them flat on a small rimmed baking sheet. This allows them to freeze solid in a uniform, stackable shape. Once frozen solid, you can remove the baking sheet. While convenient, this isn’t my personal favorite method due to the risk of bags getting nicked and leaking, and the environmental impact of plastic.
- Airtight Containers: Any freezer-safe, airtight container will work. Again, leave some headspace to account for expansion. BPA-free plastic containers are readily available, but glass is generally preferred for its non-reactive nature.
- Silicone Molds (e.g., Souper Cubes): These large silicone molds, such as Souper Cubes, are a revolutionary tool for freezing individual portions. They create perfectly sized blocks of frozen broth that are easy to pop out and store in freezer bags (once solid) or other containers. They are durable, reusable, and eliminate the risk of cracking glass jars. I absolutely love them for their convenience and efficiency!
Regardless of your chosen method, always remember to label and date your containers. This helps you keep track of your inventory and ensures you use the oldest broth first. Properly stored, homemade chicken broth can last for 2-3 months in the freezer.
Pressure Cooker vs. Slow Cooker for Chicken Broth: A Comparison
When it comes to making homemade chicken broth, I unequivocally recommend a pressure cooker, such as the Instant Pot, over a slow cooker. The difference in the cooking mechanism directly translates to superior results in terms of flavor, nutrition, and efficiency.
- Pressure Cooker (Instant Pot or Electric Pressure Cooker): Pressure cooking occurs in a sealed chamber, where steam and pressure build up, raising the boiling point of water. This creates an incredibly efficient cooking environment that extracts maximum flavor, gelatin, and nutrients from the chicken bones and vegetables in a fraction of the time. The high heat and pressure break down connective tissues more effectively, yielding a richer, more concentrated, and often gelatinous broth. I personally use a 6-quart Instant Pot Duo Plus, but any brand or size of electric pressure cooker will work. If you have a larger pot (8-quart or more), feel free to scale up the ingredients to make an even bigger batch; just be aware that the initial pressure build-up time might increase slightly. A stovetop pressure cooker works equally well if that’s what you own.
- Slow Cooker: While slow cookers offer convenience, they typically operate at much lower temperatures and without pressure. This means that while they can make broth, the flavor extraction is less efficient, and the resulting broth may not be as rich, concentrated, or gelatinous as one made in a pressure cooker. Most slow cooker models also have smaller capacities, limiting the batch size you can make. While a slow cooker can certainly produce a decent broth, I prefer the Instant Pot for its ability to create larger quantities of superior quality broth, perfect for freezing.
For the best homemade chicken broth, the speed, efficiency, and intense flavor extraction of an Instant Pot or pressure cooker are simply unmatched.
Four Easy Ways to Thaw and Reheat Your Frozen Broth
Having frozen chicken broth on hand is a lifesaver. Here are convenient ways to thaw and reheat it:
- Refrigerator Overnight: This is the simplest and most gentle method. Transfer your frozen broth container or bag to the refrigerator the night before you plan to use it. It will thaw slowly and safely. Once thawed, reheat gently in a small saucepan over low to medium heat until it reaches your desired temperature.
- Microwave + Stovetop Combination: If you’re short on time, you can start by loosening the frozen broth in the microwave. Place the frozen block or container (if microwave-safe) in the microwave and use a defrost setting or short bursts until it’s pliable enough to transfer to a saucepan. Finish thawing and heating it on the stove over low heat, stirring occasionally.
- Cold Water Bath: For a slightly faster thaw without using a microwave, place the frozen container or sealed freezer bag in a larger bowl or sink filled with cold water. Change the cold water every 30 minutes to ensure it remains cold and facilitates thawing. Continue until the broth is thawed enough to transfer to a pan for reheating. Avoid hot water, as it can thaw the outer layers too quickly and enter the food safety danger zone.
- Silicone Cube Method (Direct Heat): If you’ve frozen your broth in individual silicone Souper Cubes or ice cube trays, simply pop out the desired number of frozen cubes and place them directly into a saucepan. Cover the pan and melt them over low heat, stirring occasionally until fully liquid and hot. This method is incredibly convenient for small portions.
Important Tip: If you opt to thaw broth in a freezer bag, always place the bag in a large bowl. This acts as a safeguard in case the bag has a small hole or develops a leak during the thawing process, preventing a mess in your refrigerator.
Frequently Asked Questions About Instant Pot Chicken Broth
Making chicken broth in an Instant Pot is significantly faster than traditional methods, with a total estimated time of approximately 3 hours. This includes about 30 minutes for the Instant Pot to come up to full pressure, 2 hours of active cooking time under high pressure, and then roughly 20-30 minutes for a natural pressure release before you can safely strain and chill the broth. For those in a hurry, I have successfully made a quicker version with a cook time of 90 minutes instead of 2 hours, yielding good results, though the flavor might be slightly less concentrated.
Always use the high pressure setting on your Instant Pot or electric pressure cooker when making chicken broth. This ensures the rapid and efficient extraction of rich flavors and beneficial collagen from the chicken bones and vegetables, leading to a deeply flavorful and nutritious broth.
Proper storage is key to enjoying your homemade Instant Pot chicken broth. In the refrigerator, it will last for 3-4 days in an airtight container. For longer storage, homemade chicken broth freezes beautifully and will last for 2-3 months in appropriate freezer-safe containers (such as glass jars with headspace, heavy-duty freezer bags, or silicone molds like Souper Cubes). Always remember to label your containers with the date for easy tracking.
Explore More Nourishing Broth and Soup Recipes
If you’ve enjoyed making this Instant Pot chicken broth, you’ll love exploring these other wholesome recipes. Expand your homemade broth repertoire with my long-simmered traditional chicken bone broth (for when you have extra time), rich roasted turkey broth (perfect after holidays!), and versatile quick vegetable broth. And once you have your delicious broth ready, find an array of comforting and delicious chicken soup recipes here to put it to good use!
- Turkey Broth Recipe
- Low Sodium Vegetable Broth
- Homemade Chicken Bone Broth (step by step)
- Chicken Vegetable Soup Recipe
⭐️Did You Make This Recipe?
If you’ve tried your hand at making this amazing Instant Pot chicken broth, I would absolutely love to hear from you! Please take a moment to add your comment below. Your feedback is incredibly valuable to me, and I genuinely enjoy hearing about your experiences and successes. If you loved this recipe and found it helpful, please consider giving it a 5-star rating! Your ratings truly help other readers discover and enjoy this recipe too.
📖 Recipe
Easy Instant Pot Chicken Broth
Sally Cameron
Pin Recipe
Equipment
-
6 quart or larger Instant Pot or electric pressure cooker
Ingredients
- 4 pounds bone-in skinless chicken thighs and legs skinned as much as possible, see note below, or use a whole chicken cut into pieces
- ½ large onion chopped (yellow or white)
- 2 medium carrots chopped
- 1 large rib celery chopped
- ½ medium leek, rinsed thoroughly chopped, optional (use green tops for broth, save white for other cooking)
- 3 garlic cloves peeled and lightly smashed
- 2-3 fresh thyme sprigs
- 1 bay leaf (fresh or dried)
- 2 quarts filtered water (approximately 8 cups, or up to the PC MAX line)
Instructions
Prep the Chicken & Vegetables
-
If you are using a whole chicken, first cut it into smaller pieces and make sure to remove any extra fat and as much skin as possible. Refer to the photos and detailed instructions provided in the blog post above for guidance on how to cut up a whole chicken safely and efficiently. If you are starting with pre-cut chicken pieces, ensure they are bone-in and also trim off any excessive fat and skin. Once prepped, place all the chicken pieces into the inner pot of your Instant Pot. Add the chopped onions, carrots, celery, optional leek, smashed garlic, fresh thyme sprigs, and the bay leaf to the pot, distributing them around the chicken.
Pressure Cook the Broth
-
Pour the filtered water over the ingredients in the pot. Be careful not to fill the inner pot beyond the “PC MAX 2/3” fill line, as overfilling can be dangerous under pressure. Typically, this will be around 2 quarts (8 cups) of water for a 6-quart Instant Pot. Securely lock the lid onto your Instant Pot, ensuring the steam release valve is set to the “Sealing” position. Press the “Soup/Broth” button, or select “Manual” / “Pressure Cook” and set the timer for 2 hours on high pressure. The Instant Pot will then take some time (approx. 20-30 minutes) to build pressure before the actual cooking countdown begins.
Release Pressure and Strain Broth
-
Once the 2-hour cooking time has finished, press the “Cancel” button to turn off the heating element. Allow the pressure to release naturally for 20-30 minutes. This natural release is important for keeping the broth clear and preventing any sudden splashes. After this period, carefully turn the vent button to the “Venting” position to release any remaining pressure. Once the float valve drops, it’s safe to open the lid. Carefully strain the spent chicken, bones, and vegetables through a fine-mesh sieve or colander lined with cheesecloth into another clean, heat-safe container. Discard the solids. Wash the Instant Pot’s inner pot thoroughly, then pour the strained broth back into it for chilling.
Chill and Store Your Homemade Broth
-
To rapidly cool your broth and ensure food safety, prepare an ice bath: fill a sink halfway with ice and cold water. Place the Instant Pot’s inner pot, now holding the strained broth, into this ice bath. Stir the broth occasionally for about 1 hour, or until its temperature drops below 70°F (21°C). Once cooled, cover the pot and transfer it to the refrigerator to chill completely overnight. In the morning, a layer of solidified fat will have formed on the surface; skim this off using a spoon or spatula. Your golden, nourishing broth is now ready to be portioned into freezer-safe containers, labeled with the date, and frozen for future enjoyment.
Notes
Chicken note – It’s essential to use meaty pieces of chicken with bones for this recipe, such as bone-in thighs, legs, or a whole chicken cut into pieces. Avoid using boneless, skinless chicken breasts or thighs, as they lack the necessary bones to produce a rich and flavorful broth with good body.
Nutrition note – The provided nutrition information is specifically calculated for the strained chicken broth only. Please keep in mind that the exact nutritional values may vary depending on factors such as the amount of chicken and skin you use, and the specific brands of ingredients.
No Salt – Remember the chef’s tip: do not add salt to the broth during cooking. Season your dishes with the broth once it’s complete to better control the overall sodium content and cater to individual preferences.
