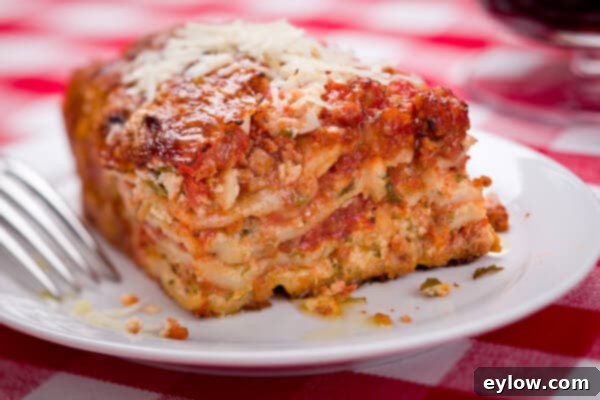
Delicious Gluten-Free Lasagna: An Easy No-Boil Recipe for Everyone
Gluten-free lasagna is the ultimate comfort food, offering layers of rich, savory sauce, creamy cheeses, and tender pasta baked until golden brown and gloriously bubbling. This beloved recipe simplifies the traditional process by utilizing innovative gluten-free no-boil noodles, eliminating the need for any precooking. My version features a deeply flavorful sauce made with lean ground chicken sausage, providing an extra boost of protein and a delightful depth of taste that truly satisfies. Whether you follow a gluten-free diet or not, this dish promises a cozy, family-friendly meal that is just as satisfying and robust as any classic lasagna. If gluten isn’t a concern for you, simply swap in traditional wheat no-boil noodles – the beauty of this recipe is that the method works flawlessly with either, and you’ll be hard-pressed to taste the difference!
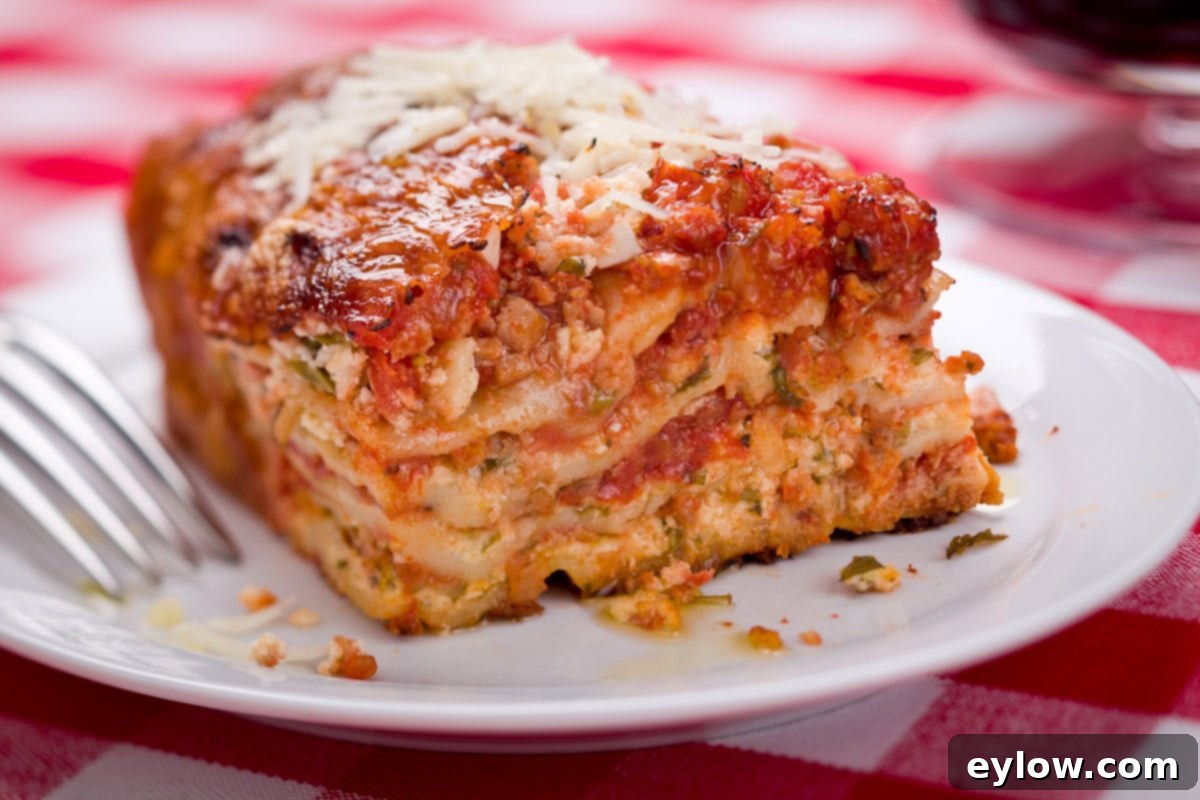
This particular lasagna recipe has been a steadfast favorite in my culinary repertoire for over 15 years. Its journey began with classic wheat no-boil noodles, offering a quicker and easier path to homemade lasagna. However, my own dietary shift to gluten-free meant temporarily setting aside this cherished dish. The culinary landscape thankfully evolved, and with the advent of high-quality gluten-free no-boil noodles, I was thrilled to bring back my easy, delicious lasagna exactly as I remembered it. The wonderful revelation? This recipe is incredibly versatile, working beautifully with both gluten-free and traditional wheat no-boil noodles. This means everyone at your table can enjoy this hearty, baked pasta masterpiece. Beyond dietary flexibility, the no-boil noodles are a game-changer, making preparation significantly lighter, faster, and remarkably simpler by cutting down on prep time and dirty dishes.
Why This Gluten-Free Lasagna Will Become Your New Favorite
There are countless reasons to adore this gluten-free lasagna recipe. It’s more than just a meal; it’s an experience – a warm, inviting dish that brings people together. Here’s why it stands out:
- Unmatched Versatility: Gluten-Free or Wheat, Your Choice – One of the greatest benefits of this recipe is its adaptability. It performs exceptionally well with both gluten-free no-boil noodles (also frequently referred to as oven-ready noodles) and conventional wheat no-boil lasagna noodles. This flexibility ensures that whether you’re catering to specific dietary needs or simply prefer traditional pasta, this recipe delivers consistent, delicious results every time.
- Effortless Preparation: Lighter and Easier Than Ever – Say goodbye to the cumbersome process of precooking lasagna noodles! The no-boil variety means you save significant time and effort, leading to fewer pots and pans to wash. This innovative approach not only simplifies the cooking process but also contributes to a noticeably lighter texture in the final dish, making it less dense and more enjoyable.
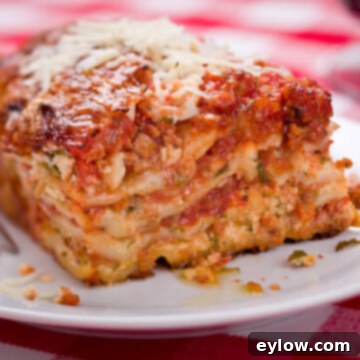
- Ultimate Comfort Food: Layers of Irresistible Flavor – Imagine rich layers of robust tomato sauce, creamy ricotta, gooey melted mozzarella, and tender pasta, all baked together until the top is bubbly and golden brown. This lasagna embodies everything you crave in comfort food – it’s hearty, satisfying, and deeply flavorful, evoking warmth and contentment with every bite.
- Perfect for Any Occasion: Feeds a Crowd with Ease – Whether it’s a cozy family dinner on a weeknight or a festive gathering with friends, this lasagna is a perfect choice. Its generous proportions make it ideal for feeding a crowd, and its impressive presentation is sure to delight your guests. It’s a dish that feels special without requiring complex culinary skills.
Chef’s Pro-Tip: Mastering Make-Ahead Gluten-Free Lasagna
One of the best aspects of this recipe is its make-ahead potential. You can assemble this entire lasagna in approximately one hour, allowing the oven to do the heavy lifting when it’s time to cook. For those busy days or when entertaining, simply prepare the lasagna in the morning, cover it tightly, and refrigerate it. When you’re ready to bake, follow the instructions for “Bake the Lasagna Later” to ensure a perfectly cooked dish with minimal fuss at mealtime. This makes it an ideal choice for planning ahead for parties or convenient weeknight dinners.
Essential Ingredients for Your Gluten-Free Lasagna
Crafting a truly memorable lasagna starts with high-quality ingredients. Here’s a breakdown of what you’ll need to create each delicious component of this gluten-free masterpiece:
For the Rich Lasagna Sauce
- Extra-Virgin Olive Oil – Used for sautéing the aromatics and building the foundational flavors of your sauce. Choose a good quality oil for the best taste.
- Onion – A crucial aromatic base. You can use yellow, white, or sweet onions, chopped to a medium consistency for flavor release.
- Fresh Garlic – Essential for its pungent and aromatic qualities. Freshly minced cloves will impart the best flavor.
- Pre-cooked Chicken Sausage – Adds a savory protein element and a fantastic depth of flavor without being too heavy. Feel free to substitute with your favorite Italian sausage (pork or turkey) if preferred, ensuring it’s pre-cooked or cooked thoroughly before adding.
- Ground Fennel Seed (or Wild Fennel Pollen) – This spice provides a subtle, warm, and slightly licorice-like note that is classic in Italian-American cuisine and pairs wonderfully with sausage. A pinch of wild fennel pollen offers an even more nuanced flavor.
- Dry Red Wine (Optional) – A splash of dry red wine, such as a Chianti or Merlot, can add a remarkable depth and complexity to the sauce as it simmers down. If you prefer to omit it, the sauce will still be delicious.
- Canned Crushed Tomatoes – The backbone of any great red sauce. Opt for good-quality organic crushed tomatoes for the freshest, most vibrant flavor profile.
For the Creamy Lasagna Filling
- Ricotta Cheese – Whole-milk ricotta is highly recommended for the richest, creamiest texture in your filling. However, low-fat ricotta can be used if you’re looking for a lighter option.
- Parmesan Cheese – Freshly grated Parmesan cheese is key here. Its sharp, salty, and umami-rich notes elevate the entire dish. Avoid pre-grated varieties which often contain anti-caking agents and lack true flavor.
- Fresh Basil – Fresh torn basil leaves offer the most vibrant, aromatic flavor. If fresh isn’t available, dried basil can be used, but adjust the quantity (typically 1/3 of fresh).
- Oregano – Use either fresh or dried oregano, to taste. Both contribute to the authentic Italian herbaceousness of the filling.
- Large Egg – The egg acts as a binder for the ricotta filling, ensuring it sets properly and holds its shape beautifully when the lasagna is sliced.
For the Noodles & Layering Cheese
- No-Boil Lasagna Noodles – These “oven-ready” noodles are the star of our easy lasagna. Choose gluten-free varieties for a celiac-friendly dish, or traditional wheat-based no-boil noodles if gluten is not an issue for you.
- Fresh Mozzarella – For that perfect melt and satisfying cheese pull, fresh-style mozzarella is superior. Avoid pre-shredded bagged cheeses, which contain starches that can hinder a smooth melt. Grate it yourself for optimal results.
- Parmesan (for Topping) – A final generous sprinkle of freshly grated Parmesan cheese on top creates a beautiful golden crust and adds an extra layer of savory depth to the baked lasagna.
You’ll find precise measurements for these ingredients, along with recommended amounts for kosher salt, black pepper, and optional red pepper flakes, in the detailed recipe card below.
How to Assemble Your Easy Gluten-Free Lasagna
Creating this delicious gluten-free lasagna is a straightforward process, especially with the magic of no-boil noodles. Remember, the sauce for this lasagna might seem a bit juicier than what you’re used to, but this is crucial! The no-boil noodles require ample liquid to properly rehydrate and become tender during baking. For the smoothest cooking experience, ensure all your “sub-recipes” (sauce and filling) and ingredient prep are complete before you begin layering. Choose an 8″x8″ or 9″x9″ casserole dish that is 2 ½ – 3 inches deep to accommodate all the delicious layers. A stoneware or glass baking dish works perfectly. Take a moment to review the step-by-step photos and read through the entire recipe before you start.
Step 1: Make the Flavorful Sauce
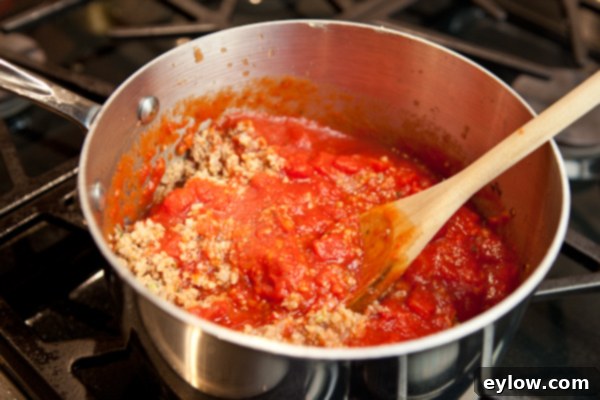
First, prepare your chicken sausage. If using whole links, chop the sausage into smaller chunks. Transfer these chunks to the bowl of a food processor and pulse until the sausage is fairly finely ground, usually about 10-12 pulses. Alternatively, you can finely chop the sausage by hand with a chef’s knife. Heat the olive oil in a large, heavy-bottomed saucepan (a 4-5 quart pot is ideal) over medium heat. Add the chopped onion and cook, stirring occasionally, until it softens and becomes translucent, about 5-7 minutes. Stir in the minced garlic and cook for another 30-60 seconds until fragrant, being careful not to burn it. Add the ground fennel seed (or fennel pollen), the ground chicken sausage, and the dry red wine (if using). Stir well and cook for a few minutes, allowing the wine to almost completely evaporate, intensifying the flavors. Next, pour in the crushed tomatoes, kosher salt, black pepper, and a pinch of red pepper flakes if desired. Swirl a small amount of water (about ¼ cup) into the tomato can to rinse out any remaining sauce and add it to the pan. Bring the sauce to a gentle simmer, then reduce the heat to low, cover, and let it cook for at least 30 minutes. This simmering time allows the flavors to meld beautifully. Once simmered, set the sauce aside to cool slightly before assembly.
Step 2: Prepare the Creamy Ricotta Filling
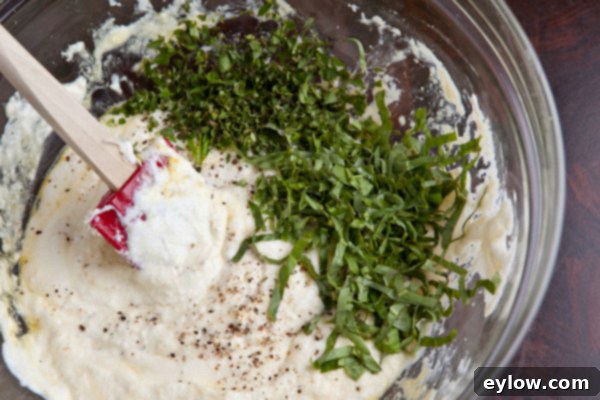
While your sauce is simmering, prepare the ricotta filling. In a large mixing bowl, combine the ricotta cheese, freshly grated Parmesan cheese, fresh (or dried) basil, fresh (or dried) oregano, the large egg, and season with kosher salt and ground black pepper to taste. Mix all ingredients thoroughly until they are well incorporated and smooth. This creates a rich and cohesive filling that will hold together beautifully in your lasagna layers. Set this mixture aside.
Step 3: Building the Lasagna Layers
The key to a perfectly layered lasagna is balance. For easy recall, remember the sequence: sauce, noodles, cheese. This recipe typically creates four distinct layers of filling. Begin by lightly spraying your 8×8 or 9×9 baking dish with avocado oil spray or another non-stick spray to prevent sticking and aid in cleanup.
- Spread approximately ½ cup of the prepared meat sauce evenly across the bottom of the baking dish. This initial layer of sauce prevents the first layer of noodles from sticking and ensures they have enough moisture to rehydrate.
- Place two gluten-free no-boil lasagna noodles directly over the sauce, arranging them to cover the bottom of the dish. If your noodles are slightly too long, you can break them to fit.
- Evenly spread about one-third of the creamy ricotta mixture over the noodles.
- Follow with a generous layer of one-third of the grated fresh mozzarella cheese.
- Top the mozzarella with another ½ cup of sauce.
- Repeat this sequence two more times: place two more noodles, followed by one-third of the ricotta mixture, one-third of the mozzarella, and another ½ cup of sauce. You will have used six noodles and two-thirds of the ricotta and mozzarella at this point.
- For the final, top layer: place the last two noodles over the previous sauce layer. Cover these noodles with all of the remaining sauce, spreading it to the edges. Finally, generously sprinkle the entire top with the remaining freshly grated Parmesan cheese. This will create a beautiful golden crust.
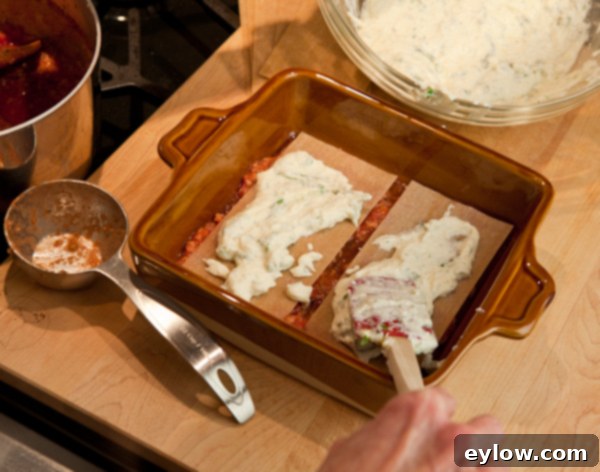
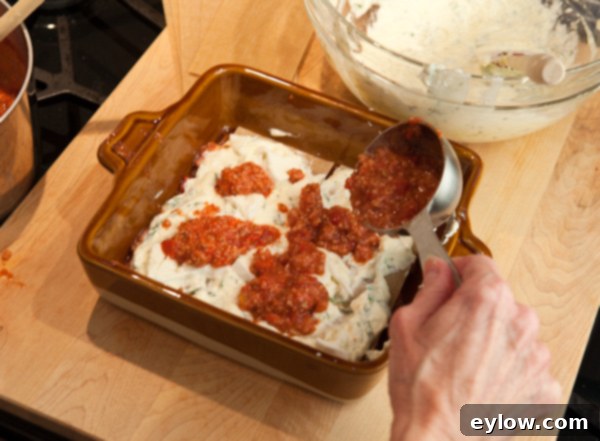
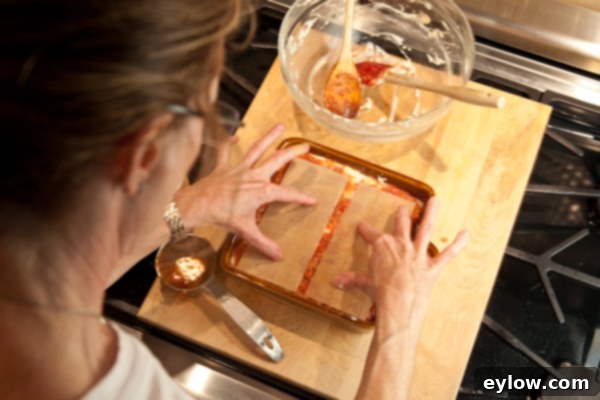
Step 4: Baking Your Lasagna Immediately
If you plan on serving the lasagna right away:
Pre-heat your oven to 400°F (200°C). Prepare a piece of aluminum foil by lightly spraying one side with a non-stick cooking spray. This prevents the cheese from sticking to the foil during baking. Cover the baking dish tightly with the foil, sprayed side down. Place the covered baking dish on a rimmed baking sheet; this catches any potential drips and makes it easier to transfer. Bake the lasagna in the preheated oven for 30 minutes. After 30 minutes, carefully remove the foil. Return the lasagna to the oven and bake for an additional 30 minutes, or until the top is golden brown and the cheese is bubbly and melted. Once baked, remove the lasagna from the oven and allow it to stand for at least 10 minutes before slicing and serving. This resting period is crucial as it allows the layers to set, making for cleaner, more defined slices.
Step 5: Baking Your Lasagna for a Later Meal
If you’ve opted to prepare your lasagna in advance, the baking process is still wonderfully simple:
Once assembled, prepare a piece of aluminum foil by spraying one side with non-stick spray. Cover the baking dish tightly with the foil, sprayed side down. Place the covered dish in the refrigerator for a few hours or even overnight until you are ready to bake. Approximately 60 minutes before you plan to bake, remove the dish from the refrigerator and let it sit at room temperature. This helps ensure more even cooking. While it’s coming to room temperature, pre-heat your oven to 400°F (200°C). Place the covered lasagna dish on a rimmed baking sheet and bake for 30 minutes covered with foil. Then, remove the foil and continue baking for another 30 minutes, or until the top is beautifully golden and bubbly. Just like immediate baking, allow the lasagna to stand for 10 minutes after baking before you slice and serve. This brief resting period is essential for the layers to firm up and make for easier, neater serving.
Any remaining portions of this delicious gluten-free lasagna can be frozen in single servings for future quick meals or stored in the refrigerator for enjoyment the next day. For another fantastic filled pasta recipe that offers less work, be sure to try these delightful stuffed pasta shells.
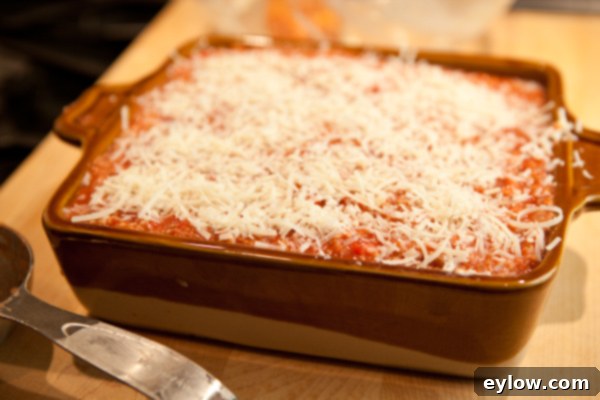
Complementary Serving Suggestions
This hearty gluten-free lasagna is a complete and satisfying meal all on its own, packed with protein, vegetables, and rich flavors. However, to truly elevate your dining experience and balance the richness of the pasta, consider pairing it with a few simple additions. A big, crisp tossed green salad with a light and refreshing simple balsamic vinaigrette provides a wonderful contrast. The fresh, zesty notes of the salad cut through the richness of the cheese and sauce beautifully. If you’re looking to round out your comfort-food dinner further, add a batch of homemade gluten-free garlic toast. The crunchy, savory bread is perfect for soaking up any extra sauce and completing this irresistible meal.
Storage and Freezing Instructions
Proper storage is key to enjoying your delicious gluten-free lasagna for days to come. When tightly covered with plastic wrap or aluminum foil, your baked gluten-free lasagna will keep beautifully in the refrigerator for up to 4 days. To reheat, place individual portions in the microwave until hot throughout. For larger portions or the entire dish, reheat in a 350°F (175°C) oven, covered with foil, until the center reaches an internal temperature of 165°F (74°C). This ensures it heats evenly without drying out.
This lasagna also freezes exceptionally well, making it perfect for meal prepping. You can freeze the entire baked lasagna or divide it into single portions for ultimate convenience, storing it in airtight containers or freezer-safe bags for up to 3 months. For the best possible results and most even cooking, I highly recommend thawing the frozen lasagna overnight in the refrigerator before reheating or baking. While some sources might suggest baking straight from frozen, it can take a significantly longer time to heat through, and you risk unevenly cooked spots. Thawing first ensures that your lasagna reheats perfectly, maintaining its delicious texture and flavor.
Common Questions About Gluten-Free Lasagna
Absolutely! Modern gluten-free no-boil noodles have come a long way in terms of quality and texture. They bake up beautifully, becoming perfectly tender and delicious, just like their traditional wheat counterparts. Their main advantage is eliminating the precooking step, which significantly speeds up the lasagna-making process and results in a lighter overall dish. Once you try them, you’ll likely find yourself reaching for them every time!
Yes, definitely! This recipe is incredibly well-suited for make-ahead preparation, making it a fantastic option for entertaining or busy weeknights. You can fully assemble the lasagna in the morning or even the day before, cover it tightly, and refrigerate until you’re ready to bake. If baking from a cold state directly from the fridge, you might need to add an extra 10-15 minutes to the covered baking time. For optimal results, allowing the lasagna to sit at room temperature for about an hour before baking can help ensure more even heating and a perfect outcome.
It freezes exceptionally well! You can choose to freeze the entire baked lasagna for a future family meal or divide it into individual portions, which is excellent for convenient grab-and-go lunches or dinners. It will maintain its quality in the freezer for up to 3 months. For the best reheating experience and to ensure the most even cooking, I strongly recommend thawing the lasagna overnight in the refrigerator before placing it in the oven. While some might suggest baking from frozen, it can take a very long time to heat through completely and consistently, potentially leading to a dry exterior and a cold interior. Thawing ensures a delicious, evenly heated result.
Share Your Gluten-Free Lasagna Experience!
If you take the plunge and make this delightful gluten-free lasagna, I would absolutely love to hear from you! Please let me know how it turned out and how much you and your loved ones enjoyed it. Your feedback is invaluable, not just to me, but also to other readers who are considering trying the recipe. Don’t forget to consider leaving a star rating—it truly helps! And as always, if you have any questions during your cooking process, I’m here to assist.
📖 Recipe
Gluten Free Lasagna
Sally Cameron
Pin Recipe
Equipment
-
8″x8″ or 9″x9″ casserole dish
-
Large pot to make sauce
-
Food Processor to grind sausage, or use a chefs knife and chop by hand
Ingredients
Sauce
- 1 tablespoon olive oil 15 ml
- ½ medium onion chopped
- 3 large garlic cloves chopped fine
- ¾ teaspoon ground fennel seed or wild fennel pollen
- 6 ounces pre-cooked chicken sausage usually 2 links
- ⅓ cup dry red wine optional
- 28 ounces organic crushed tomatoes
- ½ teaspoon kosher salt
- 1 pinch red pepper flakes optional
- ¼ teaspoon ground black pepper
Filling
- 15 ounces Ricotta cheese
- ¼ cup freshly grated Parmesan cheese
- ¼ cup fresh finely chopped basil leaves or 1 tablespoons dried
- 2 tablespoons fresh finely chopped oregano leaves or ½ tablespoons dried
- 1 large egg
- ½ teaspoon kosher salt
- ¼ teaspoon ground black pepper
Noodles and Cheese
- 8 ounces gluten-free no-boil lasagna noodles wheat works too
- 8 ounces fresh style mozzarella, grated
- ⅓ cup freshly grated Parmesan cheese
Instructions
Sauce
-
Chop the sausage into chunks. In the bowl of a food processor, pulse the sausage chunks until fairly finely, about 12 pulses.
-
Heat olive oil in a large saucepan (4-5 quarts) over medium heat. Add onion and cook until softened, stirring. Add garlic and cook 30-60 seconds, then add the fennel, sausage and red wine. Stir and cook a few minutes until the wine is almost gone, then add the tomatoes, salt and peppers. Swirl a little water in the tomato can to wash it out and pour into the pan. Simmer for 30 minutes. Set aside and cool.
Filling
-
In a large mixing bowl combine the ricotta, Parmesan, herbs egg and seasoning. Set aside.
Lasagna Assembly (4 layers)
-
If serving right away. Pre-heat the oven to 400 degrees. Place about ½ cup of the sauce in the bottom of an 8×8 stoneware or glass baking dish.
-
Place two noodles on the bottom. Top with ⅓ of the ricotta mixture. Layer on ⅓ of the mozzarella. Top with ½ cup of sauce. Next two layers, repeat with noodles, ricotta, mozzarella, and sauce. For the top layer, place the last two noodles, cover with the remaining sauce and top with Parmesan.
To Bake Now
-
Spray a piece of foil with non-stick spray and cover the baking dish. Place dish on a rimmed baking sheet and bake for 30 minutes covered. Then remove foil and bake another 30 minutes. Allow to stand for 10 minutes before slicing and serving.
To Bake for Later
-
Spray a piece of foil with non-stick spray and cover the baking dish. Place in the refrigerator for a few hours until ready to bake. Two hours before serving, remove the dish from the refrigerator and allow to come to room temperature. Pre-heat oven to 400 degrees. Bake 30 minutes covered with foil and 30 minutes without foil. Allow to stand 10 minutes, then slice and serve.
