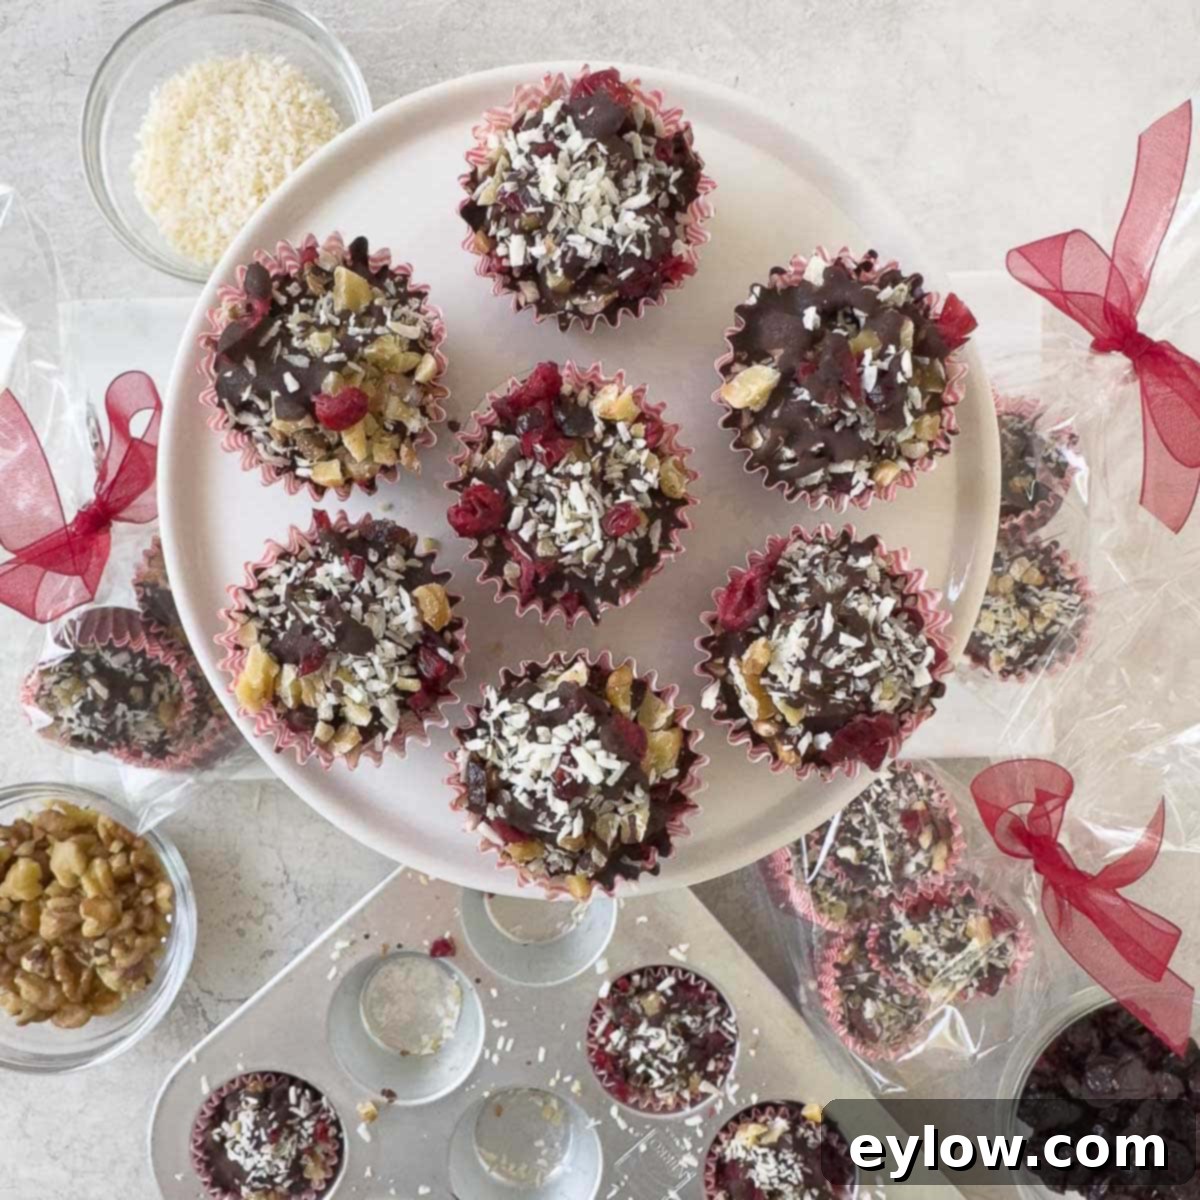
Delightful Dark Chocolate Bark Bites: Your Ultimate Guide to Easy, Homemade, Bite-Sized Treats
Prepare to embark on a sweet adventure with this incredibly simple and fun recipe for easy chocolate bark bites! Imagine all the rich flavors of classic chocolate bark – luxurious dark chocolate, crunchy nuts, tropical coconut, and tangy dried fruit – all perfectly contained in a single, convenient bite. Forget messy fingers and crumbling pieces; these charming chocolate bark bites are crafted in mini muffin pans, delivering a delightful “party in a bite” experience. This recipe is a dream come true for chocolate lovers seeking a straightforward yet impressive sweet treat that’s ideal for any occasion.
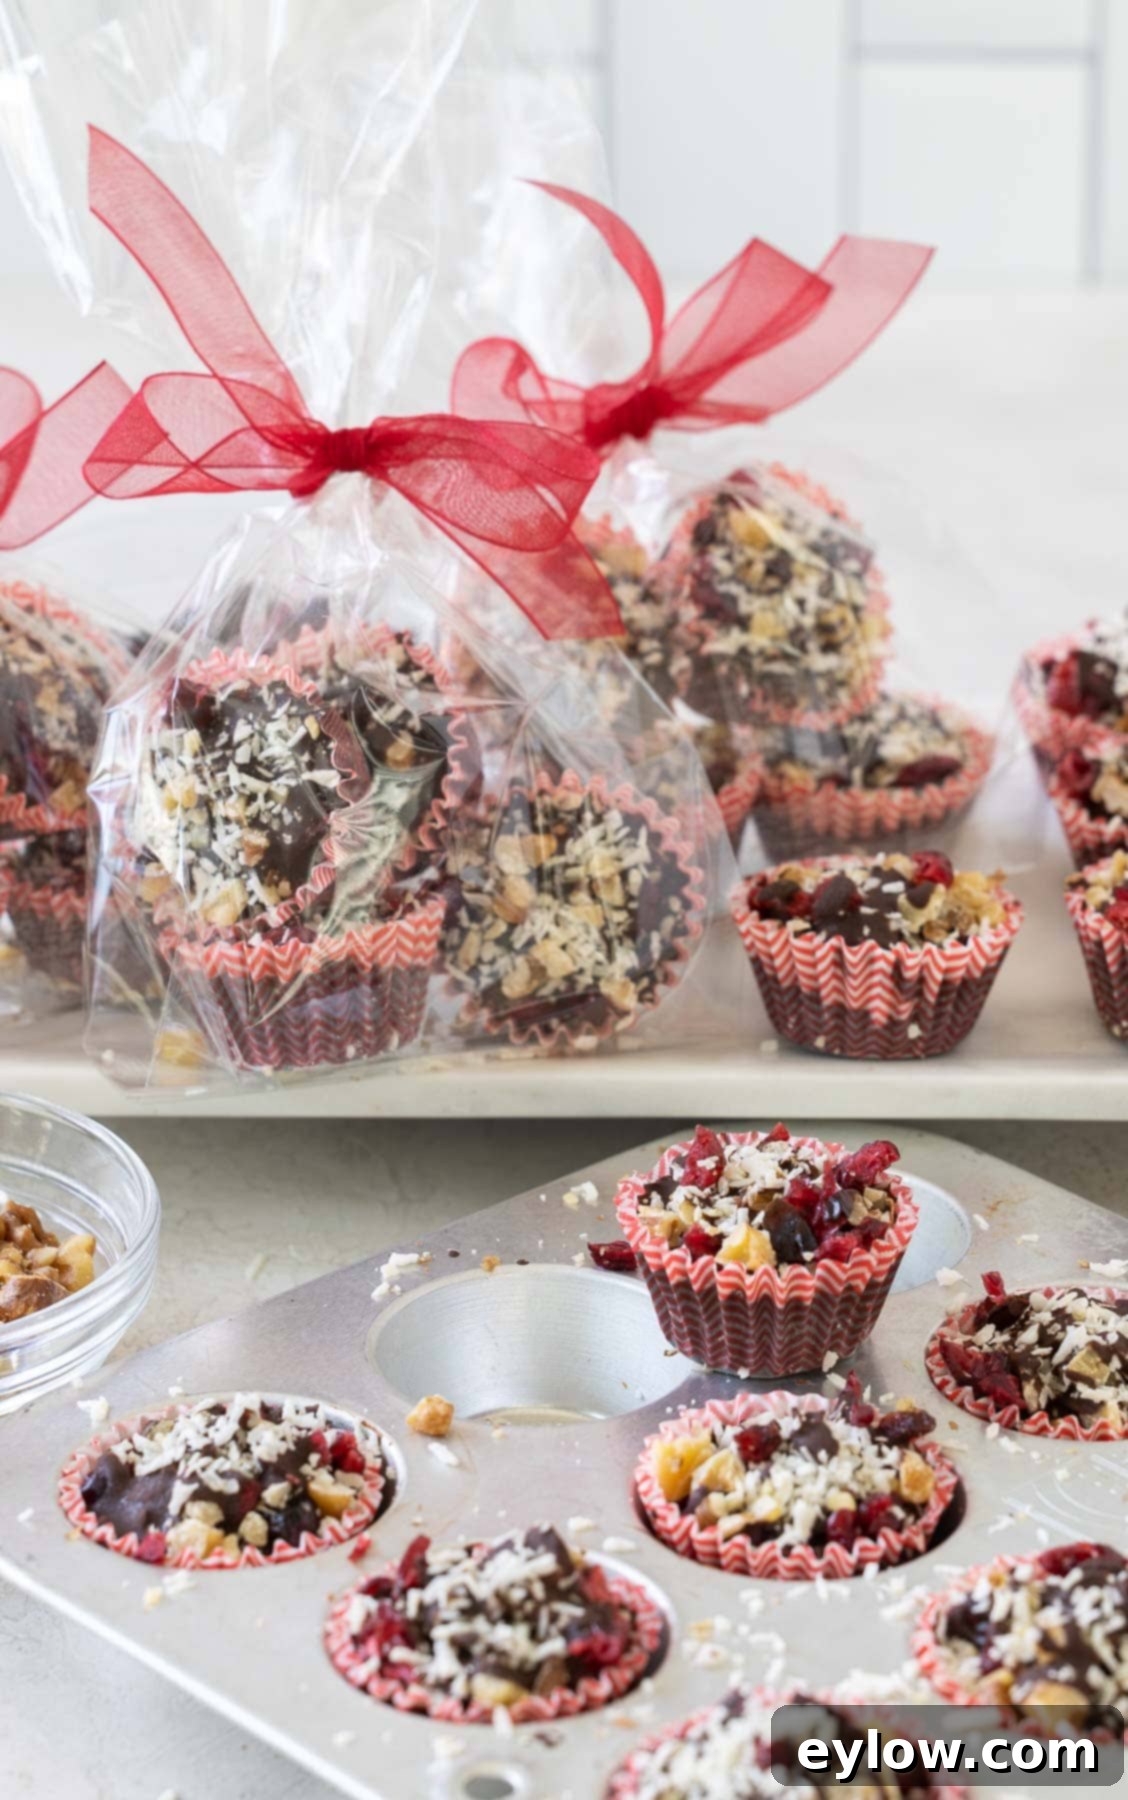
Why You’ll Absolutely Love These Chocolate Bark Bites
There are countless reasons why these individual chocolate bark treats will become a staple in your dessert repertoire:
- Convenient Bite-Sized Indulgence: Unlike traditional sheet-style chocolate bark that requires breaking, these are perfectly portioned. Each bite offers a harmonious blend of flavors and textures without any fuss or mess.
- Effortless Gifting & Party Favors: Their individual nature makes them incredibly easy to package. Create adorable little bags of homemade chocolate bark bites for thoughtful homemade gifts. They are perfect for Valentine’s Day chocolate treats, Easter baskets, holiday gift exchanges, baby shower favors, or even elegant wedding party take-homes. This recipe scales up beautifully, making it simple to double or triple batches for larger events.
- The Perfect Potluck & Picnic Dessert: Easy to transport and serve, these make an ideal contribution to any potluck, picnic, or gathering. They hold up well and are always a crowd-pleaser.
- Incredibly Fun to Make: The process is enjoyable and stress-free, making it a fantastic activity for all ages. There’s something wonderfully satisfying about creating these beautiful, layered treats.
- Customizable to Your Liking: With a vast array of potential toppings, you can personalize each batch to suit individual tastes or themed events, ensuring a unique experience every time.
If you’re a true chocolate aficionado, you might also enjoy a batch of these easy chocolate chip meringue cookies, affectionately known as Forgotten Cookies. Simply prepare the batter, and let them work their magic!
Essential Ingredients for Perfect Chocolate Bark Bites
Creating truly exceptional chocolate bark bites starts with high-quality ingredients. While the full quantities are detailed in the recipe card below, here’s a breakdown of the simple yet crucial components:
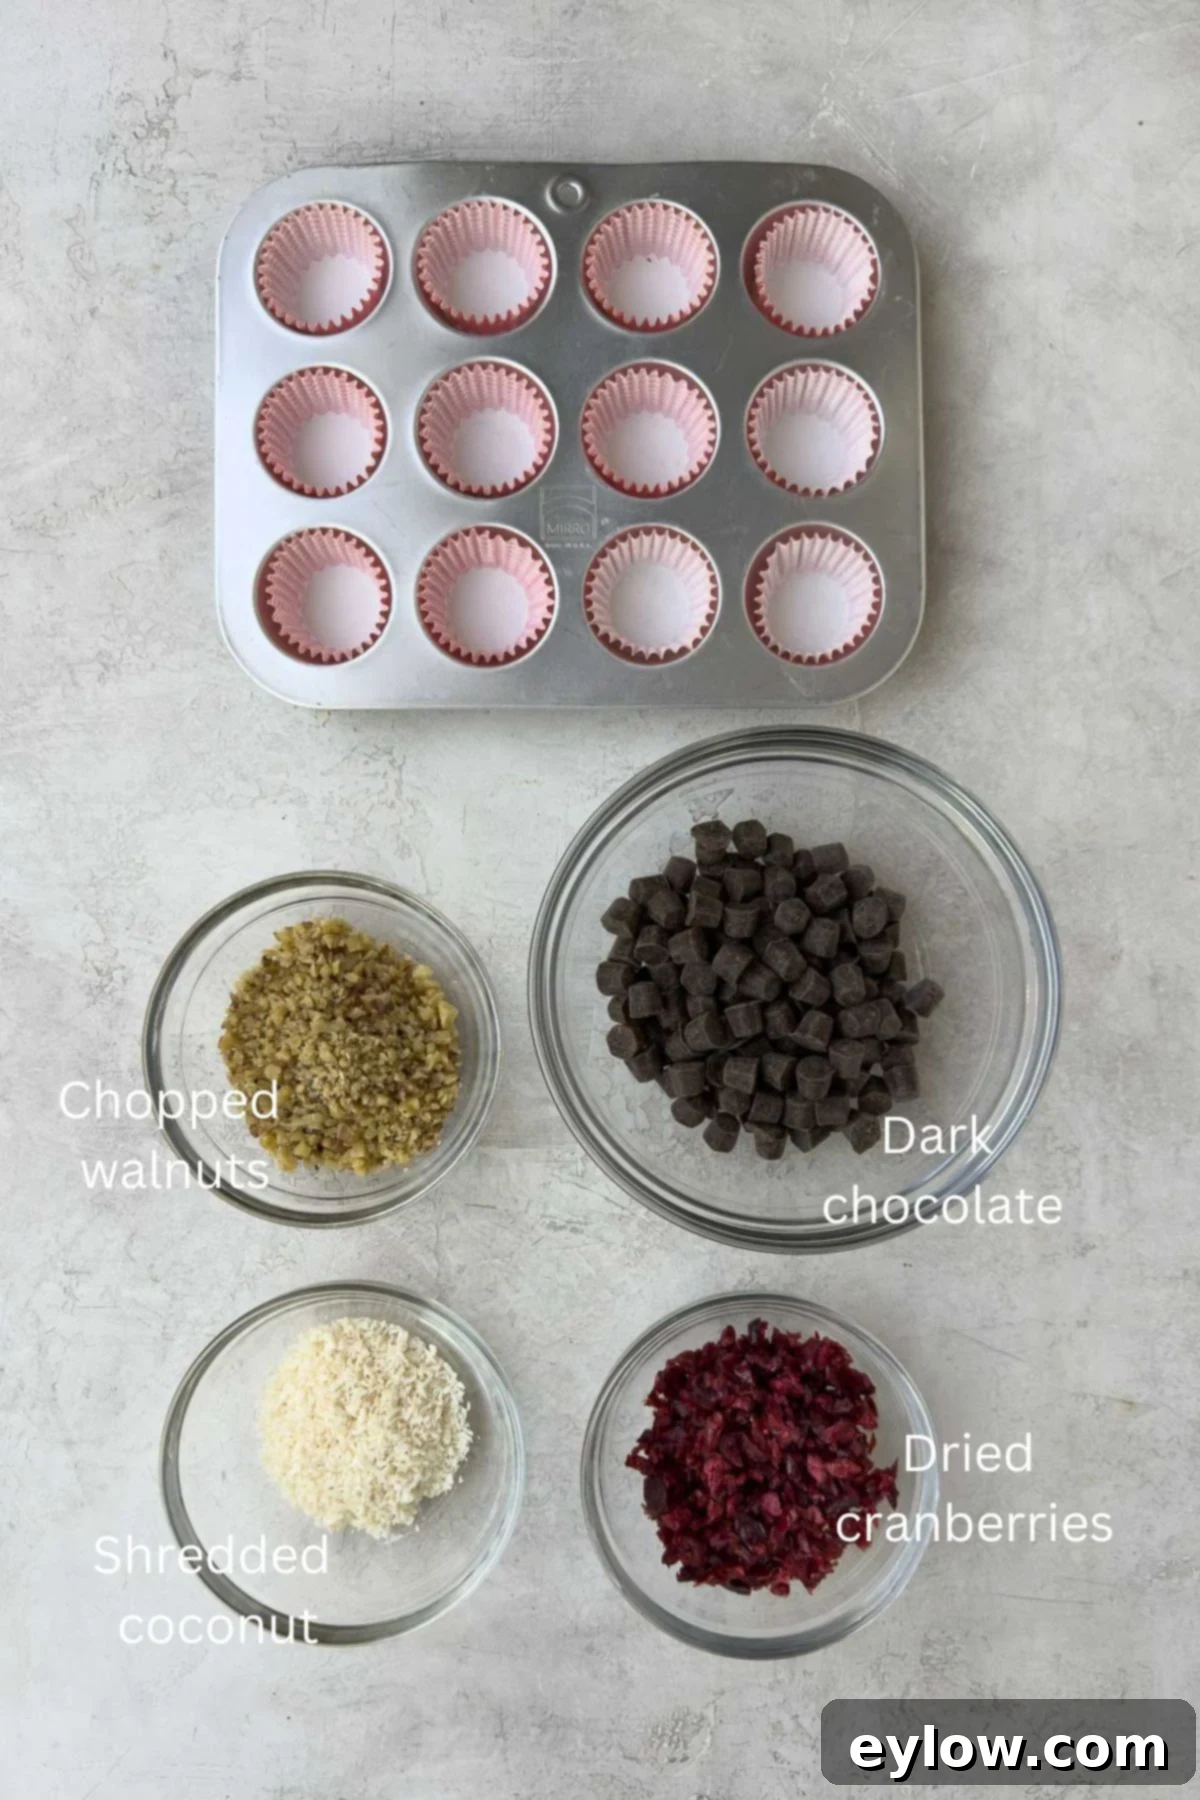
- High-Quality Chocolate: This is the star of the show. We highly recommend using dark chocolate with a cacao percentage of 72% or higher. The higher the percentage, the less sweet and more intense the chocolate flavor, which beautifully balances the other ingredients. While we haven’t tested this specific recipe with milk chocolate, its higher butterfat content means it should still melt and set well. However, for that classic, rich chocolate bark experience, dark chocolate is truly superior. For those passionate about chocolate, Chocosphere is an excellent resource to explore premium varieties.
- Walnuts: Provide a delightful crunch and earthy flavor. You can buy pre-chopped walnuts or walnut pieces and simply chop them finer. For an enhanced flavor, consider lightly toasting your walnuts before adding them – this brings out their natural oils and nutty aroma.
- Unsweetened Shredded Coconut: Opt for dry, unsweetened shredded coconut flakes. Avoid the overly sticky, sugary varieties often found in the baking aisle, as they can alter the texture and sweetness of the bark. Unsweetened coconut allows the chocolate and fruit flavors to shine.
- Dried Cranberries: These vibrant gems are crucial for adding a tart-sweet counterpoint to the rich dark chocolate, savory nuts, and subtle coconut. Their chewiness also adds another interesting texture. They truly complete the flavor profile.
Chef’s Tip: Effortless Chocolate Chopping. While chocolate chips work, using high-quality chocolate bars often yields a superior flavor and smoother melt. For bars, break them by hand or chop them into smaller, more uniform pieces using a serrated knife (your bread knife works wonderfully!) on a sturdy cutting board. This helps the chocolate melt more evenly and quickly. If you prefer to skip the chopping altogether, consider using chocolate chunks or baking gems designed for melting, like the ones used in the photos (Hu Kitchen Gems are a great option).
Creative Substitutions & Exciting Variations for Your Bark Bites
One of the best aspects of this recipe is its incredible adaptability. Feel free to unleash your creativity and customize these chocolate bark bites to your heart’s content:
- Nut Alternatives: Not a fan of walnuts? No problem! Swap them out for your favorite crunchy nuts. Excellent choices include finely chopped almonds, macadamia nuts, cashews, pistachios, or even pumpkin seeds for a nut-free option (always check for allergies).
- Dried Fruit Fantasia: The possibilities for dried fruit are endless. Instead of cranberries, try dried apricots (chopped), golden berries, dried cherries, blueberries, or even a mix of several. Ensure any larger dried fruits are chopped into small, bite-sized pieces for even distribution.
- Delightful Topping Additions: Elevate your bark bites with extra flair! Consider a sprinkle of sea salt to enhance the chocolate’s flavor, fancy sprinkles for a festive look, or crushed peppermint candy canes during the Christmas season for a classic peppermint bark twist. A drizzle of white chocolate or milk chocolate on top of the dark chocolate can also add visual appeal and a different layer of sweetness.
- Spice It Up: A tiny pinch of cayenne pepper in the melted chocolate can add a surprising and delightful warmth. Cinnamon or a hint of orange zest can also introduce intriguing flavor notes.
- Healthy Boost: Add chia seeds, flax seeds, or hemp hearts for an extra nutritional kick.
For more delicious bite-sized chocolate treats, consider making these elegant mini pots de creme or these stunning chocolate-dipped strawberries – another fun and beautiful project. If you’re looking for other popular homemade gift ideas, these sweet and spicy maple roasted cashews are always a huge hit.
Understanding Chocolate Bark: Bites vs. Traditional Slabs
While sharing a similar name and core ingredients, chocolate bark and chocolate bark bites offer distinct experiences:
Traditional Chocolate Bark: This classic confection involves melting chocolate and pouring it onto a sheet of parchment paper, typically spread thinly across a baking sheet. It’s then decorated with various toppings like nuts, dried fruits, and candies before being allowed to set. Once firm, the large sheet is broken into irregular, rustic pieces. The charm lies in its free-form nature and the delightful surprise of each unique chunk.
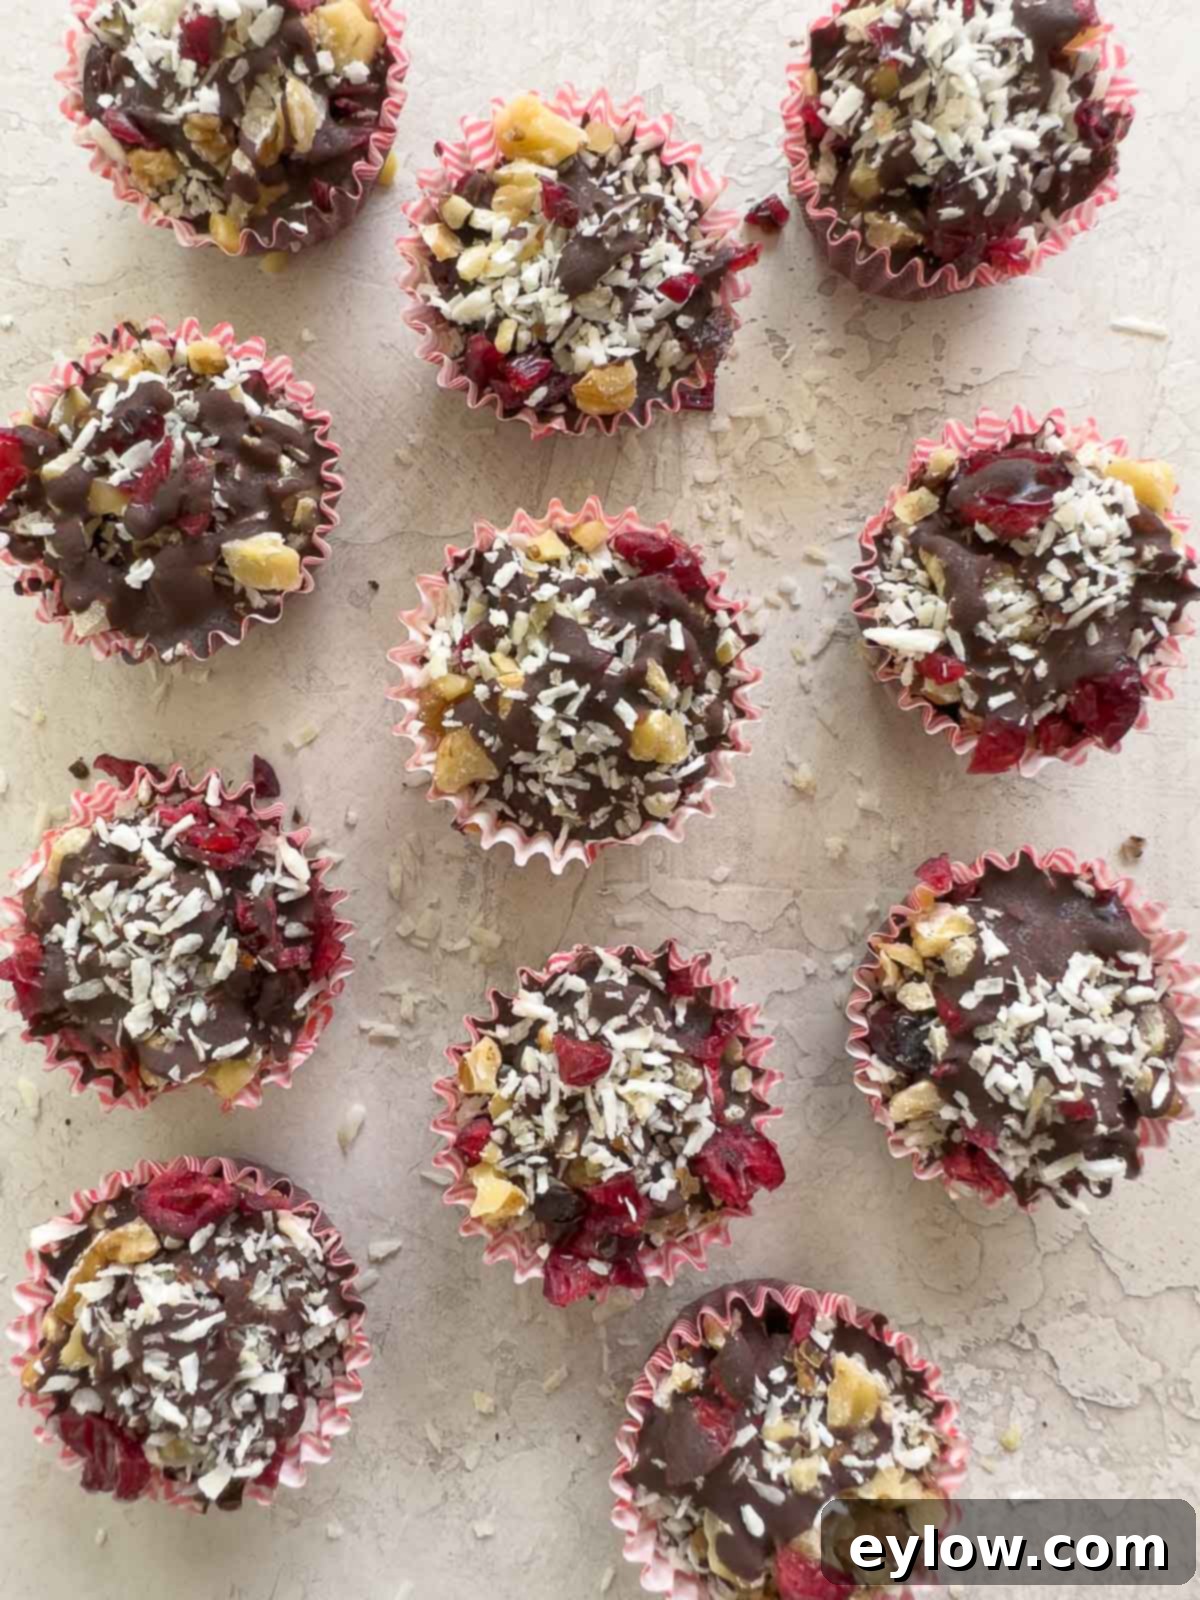
Chocolate Bark Bites: This variation takes the delicious concept of bark and transforms it into perfectly portioned, individual treats. Instead of pouring and breaking, melted chocolate is carefully drizzled or spooned into mini paper or silicone cups. Layers of dried fruit, nuts, and other toppings are added within these cups, creating a neat, contained, and easily managed single serving. The primary advantages of bark bites are their portion control, elegant presentation, and a cleaner eating experience – no more sticky fingers from handling large, irregular pieces!
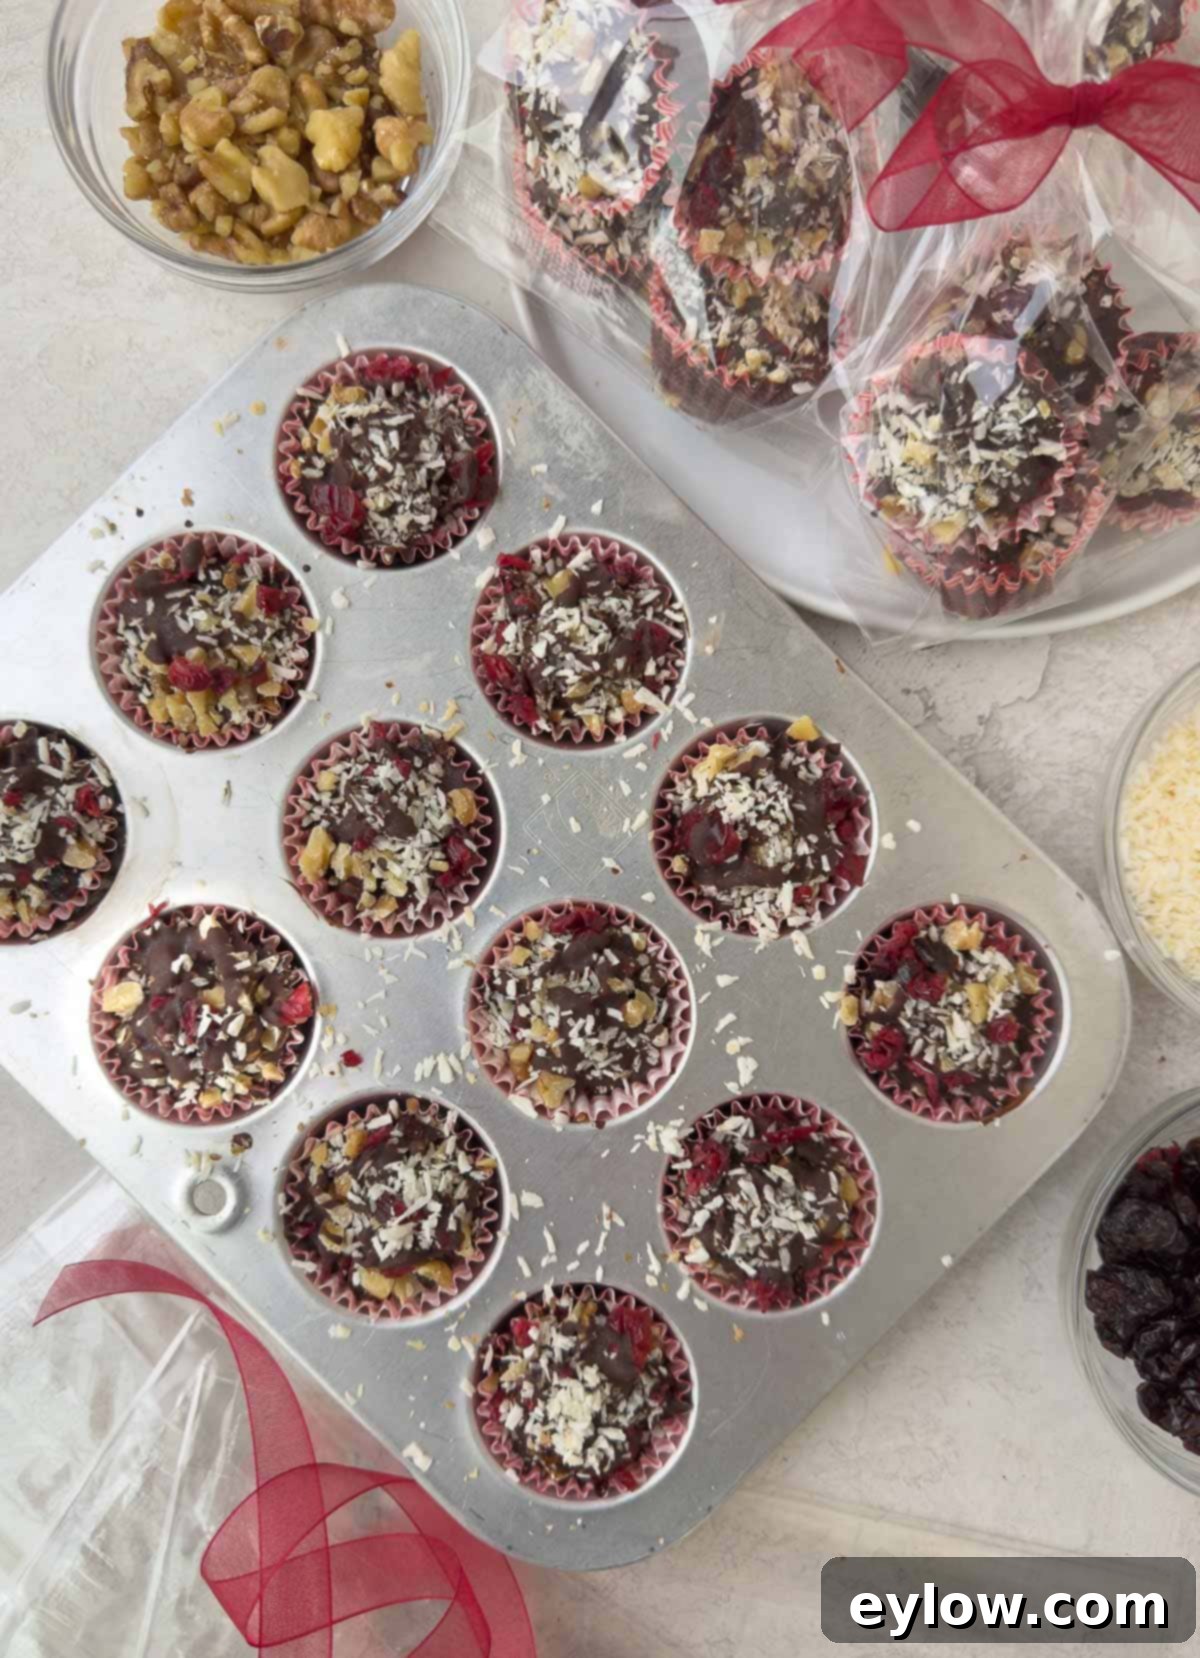
Essential Tools for Crafting Your Bark Bites
To create these beautifully uniform chocolate bark bites as pictured, a few specific tools will be incredibly helpful:
- Mini Muffin Pan: A 12-well mini muffin pan is essential for giving the bites their consistent shape. You can use either a metal pan or a silicone one. If opting for a flexible silicone pan, remember to place it on a sturdy metal baking tray underneath for support, especially when moving it to and from the refrigerator.
- Mini Paper Liners: These are placed inside the muffin pan wells. They not only help the bark bites retain their shape but also make for easy removal and neat presentation. Mini paper liners can vary slightly in size by brand, so your finished bark bites might have minor differences depending on your chosen liners. You can typically find them online, in specialty cooking and baking stores, or even in the baking aisle of larger grocery stores.
- Heat-Proof Bowl: Absolutely crucial for melting your chocolate, whether you choose the stovetop or microwave method. Glass or metal bowls work best for the double boiler, while a microwave-safe bowl is needed for that method.
- Spatula or Spoon: For stirring the melting chocolate and drizzling it into the paper liners. A small spoon or a piping bag (without a tip) can also be used for more precise drizzling.
Option: No Mini Muffin Pan? No Problem! If you don’t have a mini muffin pan, you can still make these delightful treats. Simply place double paper cups (to add stability) flat on a plate or a rimmed baking sheet before filling. The bites will spread a bit more without the confined sides of a muffin pan, but they will still be equally delicious and enjoyable.
Step-by-Step Instructions: Crafting Your Chocolate Bark Bites
Making these chocolate bark bites is a simple and rewarding process. Follow these steps for perfect results:
1. Prepare Your Ingredients: Begin by gathering all your ingredients. If you’re using chocolate bars, chop them into small, uniform pieces. This ensures faster and more even melting. Place your chopped walnuts, shredded coconut, and dried cranberries into separate small bowls, ready for layering. Set up your mini muffin pan with the paper liners, ensuring they are securely seated in each well.
2. Melt the Chocolate: This is a crucial step. You have two primary methods for melting chocolate:
Melting Chocolate: The Stovetop Double Boiler Method
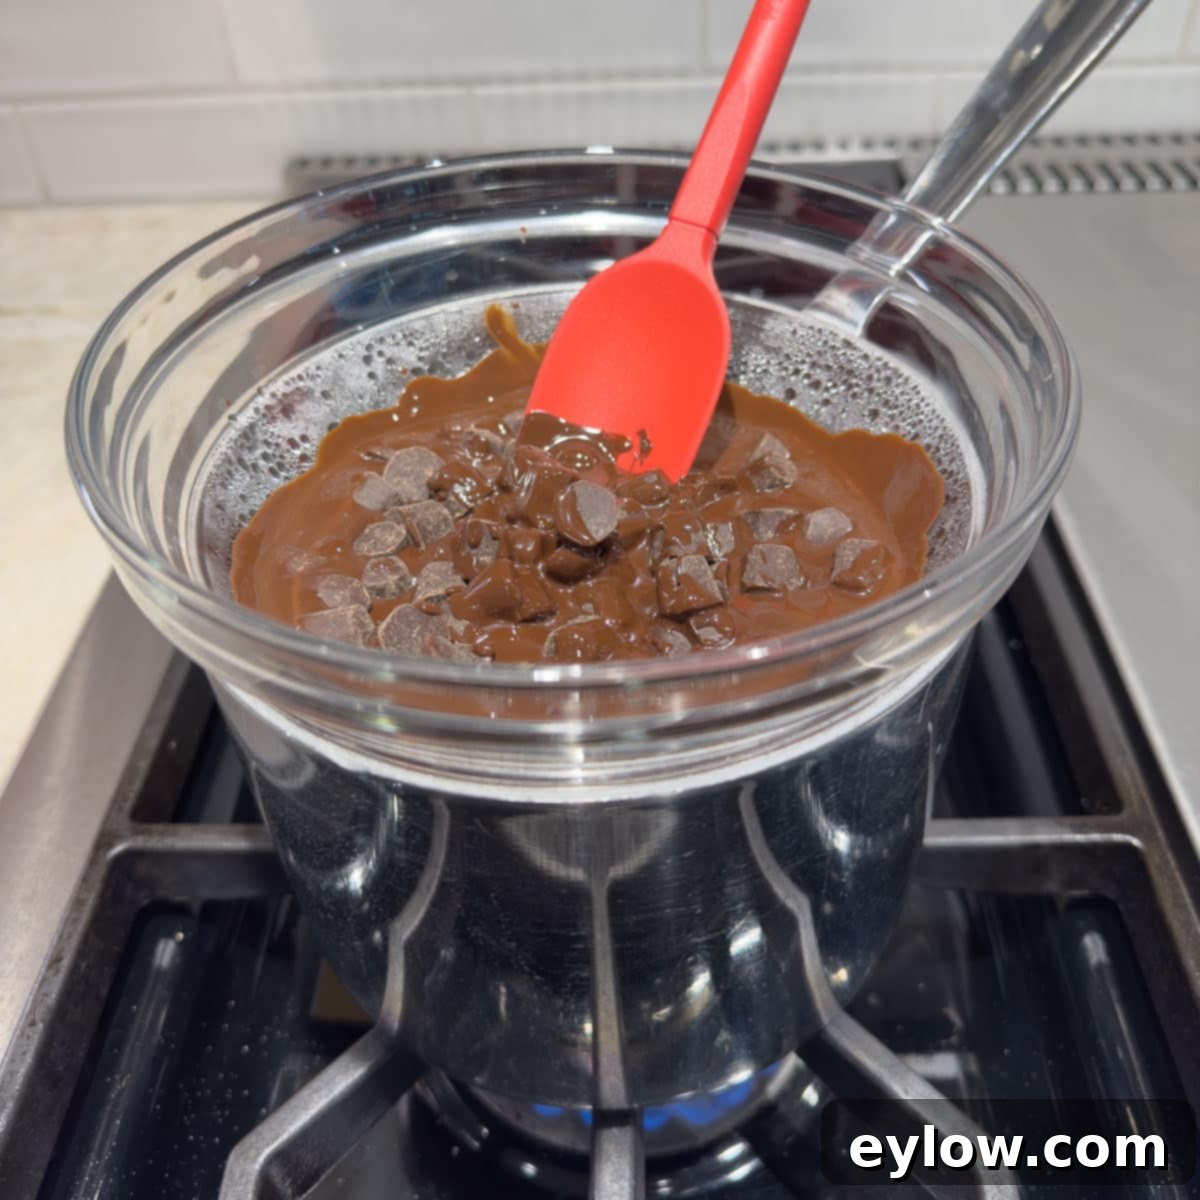
This is often considered the most controlled method, minimizing the risk of burning the chocolate. Set up a “bain marie” (water bath) by placing a couple of inches of water in a small saucepan. Bring the water to a gentle simmer over medium heat; do not let it boil vigorously. Reduce the heat to low, then place a heat-proof bowl (metal or glass) containing your chopped chocolate directly over the simmering water. Ensure the bottom of the bowl does not touch the hot water, as direct contact can scorch the chocolate. Stir the chocolate occasionally with a rubber spatula or spoon until it melts into a smooth, glossy consistency. The gentle, indirect heat allows for a slow and even melt, making it easy to monitor and prevent overheating. I personally prefer this method for its precise control.
Melting Chocolate: The Microwave Method
While quicker, this method requires more vigilance to prevent burning. Place your chopped chocolate in a microwave-safe bowl. Microwave on 50% power for 1 minute. Remove the bowl and stir the chocolate thoroughly, even if it doesn’t look melted. Return to the microwave and continue heating in 30-second increments, stirring well after each interval, until the chocolate is mostly melted. It’s ready when only a few small lumps remain; these will disappear as you continue stirring with the residual heat. The key here is to avoid overheating. Burnt chocolate becomes grainy and unusable, so always err on the side of caution and stir frequently.
Chef’s Tip: The Golden Rule of Chocolate Melting. Remember, chocolate and water do not mix! Even a tiny drop of water can cause chocolate to “seize,” transforming it from a fluid, smooth state into a stiff, grainy, and unworkable mess. Be extremely careful when using the stovetop method to ensure no moisture or steam gets into your melted chocolate, especially when removing the bowl from the pan.
3. Assemble Your Chocolate Bark Bites: Once your chocolate is perfectly melted and smooth, it’s time to assemble your bites. This is where the fun begins!
- First Layer: Drizzle approximately 1 teaspoon of melted chocolate into the bottom of each mini paper cup.
- First Topping: Immediately sprinkle a small amount of your chopped walnuts, shredded coconut, and dried cranberries over the chocolate.
- Second Layer: Add another teaspoon of melted chocolate over the toppings, gently spreading it if needed to cover.
- Second Topping: Sprinkle a bit more of the nuts and coconut. You can choose to add more fruit here as well.
- Third Layer & Final Topping: Drizzle with a third teaspoon of melted chocolate (this is the final top layer) and finish with a generous sprinkle of your chosen goodies. Aim to use about 1 tablespoon of melted chocolate in total for each bark bite, distributed across the layers.
4. Chill to Set: Once all your bark bites are assembled, carefully place the mini muffin pan (or plate with paper cups) into the refrigerator. Allow them to chill for approximately 30 minutes, or until the chocolate is completely hardened and firm to the touch. This ensures they maintain their shape and have a satisfying snap.
Storing Your Delicious Chocolate Bark Bites
Proper storage is key to maintaining the freshness and quality of your homemade chocolate bark bites:
- Room Temperature: If your kitchen is consistently cool (below 70°F or 21°C), you can store the chocolate bark bites in an airtight container on the counter. Keep them away from direct sunlight or heat sources, which can cause the chocolate to melt or bloom (develop a white film).
- Refrigeration: For longer storage or in warmer climates, store the bark bites in an airtight container in the refrigerator. This will keep them fresh for 2-3 weeks. However, in our experience, they rarely last that long!
- Freezing: For extended storage (up to 2-3 months), you can freeze the bark bites in a freezer-safe airtight container. Thaw them in the refrigerator for a few hours or at room temperature for about 30 minutes before enjoying.
Chef’s Tip: Making Sticky Dried Fruit Easier to Chop. Dried fruits like cranberries and apricots can be quite sticky, making them challenging to chop. To make the process smoother and prevent the fruit from clinging to your knife, lightly spray your knife blade with a non-stick cooking spray before chopping. This simple trick allows the blade to glide through the fruit much more easily and significantly reduces cleanup time.

How to Package Chocolate Bark Bites for Gifts and Party Favors
These individual chocolate bark bites are inherently charming, making them perfect candidates for homemade gifts and party favors. Their ease of preparation allows you to create large batches for various occasions:
- Elegant Packaging: Small, clear cello bags with twist ties are ideal for showcasing the beautiful layers of your bark bites.
- Personal Touches: Enhance the presentation with festive ribbons, custom tags, or small labels detailing the ingredients (especially helpful for allergy awareness).
- Occasion-Specific:
- Holidays: Use red and green ribbons for Christmas, pastel colors for Easter, or orange and black for Halloween.
- Hostess Gifts: A small collection of bark bites presented in a decorative tin or box makes a thoughtful and appreciated gesture.
- Baby Showers/Weddings: Match the ribbon colors to the event’s theme for personalized party favors.
- Quantity: The number of bark bites per package can vary. A small bag of 2-3 makes a lovely token, while larger quantities are perfect for a generous gift.
Frequently Asked Questions (FAQs) About Chocolate Bark Bites
For this particular recipe, tempering the chocolate is not strictly necessary. We’ve designed these chocolate bark bites to be a quick and easy treat, and skipping the tempering process simplifies the preparation without significantly compromising the final product’s enjoyment. Tempering chocolate gives it a super glossy finish and a crisp “snap” when broken, and it helps prevent blooming (the grayish streaks that can appear on untempered chocolate). This is more crucial when making large sheets of traditional chocolate bark or intricate chocolate candies. Since these are smaller, bite-sized pieces nestled in paper cups, the slight difference in snap or sheen is less noticeable. However, if you’re an experienced chocolatier or simply want to achieve the absolute best professional finish, you are certainly welcome to temper your chocolate. You can learn how to temper chocolate here.
When stored properly in an airtight container, your homemade chocolate bark bites will remain fresh and delicious for quite some time. At a cool room temperature (below 70°F or 21°C), they will last for about 1 week. If stored in the refrigerator, their shelf life extends considerably, keeping well for 2-3 weeks. For even longer enjoyment, these bark bites can be frozen for up to 2-3 months. Just make sure they are in a well-sealed, freezer-safe container to prevent freezer burn. Although, with how irresistible they are, we find they rarely last more than a few days!
While the recipe specifically calls for dark chocolate for its rich flavor and ideal setting properties, you can absolutely experiment with milk chocolate or white chocolate. If using milk chocolate, be aware that it will be sweeter and may have a softer texture when set due to its higher sugar and milk content. White chocolate, being a confection rather than true chocolate, also has a different fat and sugar profile. Both milk and white chocolate can be melted using the same double boiler or microwave methods outlined, but watch them even more carefully as they can scorch more easily. Consider pairing milk chocolate with ingredients like mini marshmallows or pretzels, and white chocolate with macadamia nuts and dried apricots for delightful variations. Always use good quality chocolate, regardless of the type, for the best results.
Explore More Irresistible Sweet Treats
If you loved making these chocolate bark bites, you’re in for a treat with these other delightful recipes perfect for gifting or simply indulging:
- Granola Bites With Chocolate Chips
- Maple Pecans (candied pecans)
- Cranberry Oatmeal Cookies Recipe
- Peanut Butter Oatmeal Protein Balls (no-bake)
⭐️ Did You Make This?
We absolutely love hearing from you! If you tried this easy chocolate bark bites recipe, please take a moment to leave a comment below and let us know how it turned out. If you enjoyed it as much as we do, please consider giving it a 5-star rating – your feedback genuinely helps other readers discover and enjoy this delicious treat. Have a question or a creative variation you’d like to share? Don’t hesitate to comment; we’re always happy to help!
📖 Recipe
Easy Chocolate Bark Bites (Bite-Sized)
Sally Cameron
Pin Recipe
Equipment
-
1 mini muffin pan
-
12 mini paper liners for muffin pan about 2″ size
Ingredients
- 7 ounces good quality semisweet or bittersweet chocolate or chocolate chips (70-85% cacao recommended)
- ¼ cup + 2 tablespoons finely chopped walnuts (or other nuts like almonds, pecans)
- ¼ cup + 2 tablespoons chopped dried cranberries (or dried cherries, apricots)
- 3 tablespoons unsweetened shredded coconut
Instructions
-
If using chocolate bars, chop them into small, uniform pieces to ensure quicker and more even melting. Then, proceed to melt your chocolate using either the microwave or the stovetop double boiler method as described below.
How to Melt Chocolate in the Microwave
-
Place chopped chocolate in a microwave-safe bowl. Microwave on 50% power for 1 minute. Remove and stir thoroughly, even if it doesn’t look fully melted. Continue microwaving in 30-second increments, stirring well after each, until the chocolate is mostly melted with only a few small lumps remaining. These lumps will smooth out as you continue to stir with residual heat. Be very careful not to overheat, as chocolate can burn quickly in the microwave.
How to Melt Chocolate on the Stovetop (Double Boiler Method)
-
To use a double boiler, place a small saucepan with a few inches of water over medium heat and bring to a gentle simmer (do not boil). Reduce heat to low, then place a heat-proof bowl containing your chopped chocolate over the hot water. Ensure the bottom of the bowl does not touch the water. Stir occasionally until the chocolate melts into a smooth, glossy consistency. This method offers excellent control and minimizes the risk of burning.
Assemble the Chocolate Bark Bites
-
Place 12 mini paper cups into a mini cupcake pan for support. Drizzle approximately 1 teaspoon of melted chocolate into the bottom of each cup. Immediately sprinkle with a small portion of your chopped walnuts, coconut, and a few dried cranberries. Drizzle another teaspoon of melted chocolate over these toppings, then sprinkle with more nuts and coconut. Finish with a third teaspoon of melted chocolate on top and a final decorative sprinkle of all your goodies. Once assembled, place the pan in the refrigerator for about 30 minutes, or until the chocolate is completely firm.
Notes
If you don’t have a mini muffin pan, you can still make these treats! Simply arrange the mini muffin papers (doubled for stability) on a flat plate or a rimmed baking sheet. While they might spread slightly more without the pan’s support, they will still be equally delicious.
For precise measurements of loose ingredients like chocolate pieces or nuts, a digital kitchen scale is an inexpensive yet incredibly useful tool for any home cook.
Always use good quality chocolate (70-85% cacao is recommended) for the best flavor profile. If walnuts aren’t your preference, feel free to substitute with another nut variety like almonds or pecans. These delightful bark bites are fantastic for hostess gifts and holiday presents!
