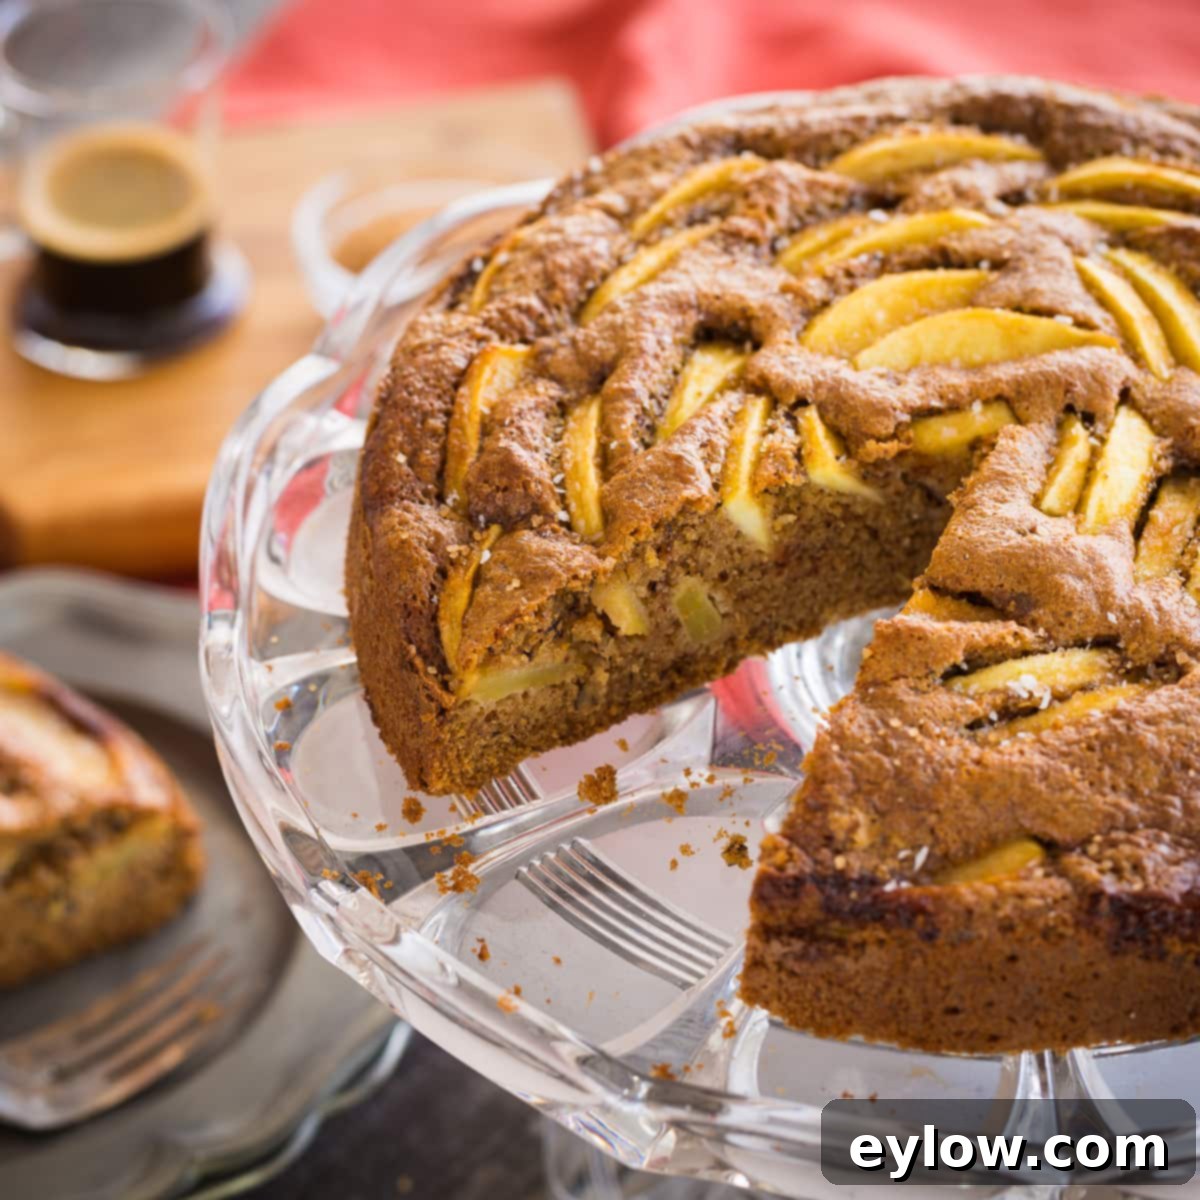
The Ultimate Gluten-Free & Dairy-Free Apple Cake: A Moist, Spiced, and Irresistible Recipe for All Seasons
Discover a delightful way to enjoy the crisp, sweet essence of apples any time of the year with this exquisite apple cake recipe. Far from ordinary, this particular cake is a masterpiece of flavor and texture, featuring tender slices of apples and crunchy chopped nuts nestled within a warmly spiced batter, infused with the comforting aroma of cinnamon. As it bakes, your kitchen will be filled with an irresistible scent that promises a truly special treat. What makes this recipe even more remarkable is that it’s completely gluten-free and dairy-free, yet so perfectly crafted that no one would ever suspect its dietary-friendly nature.
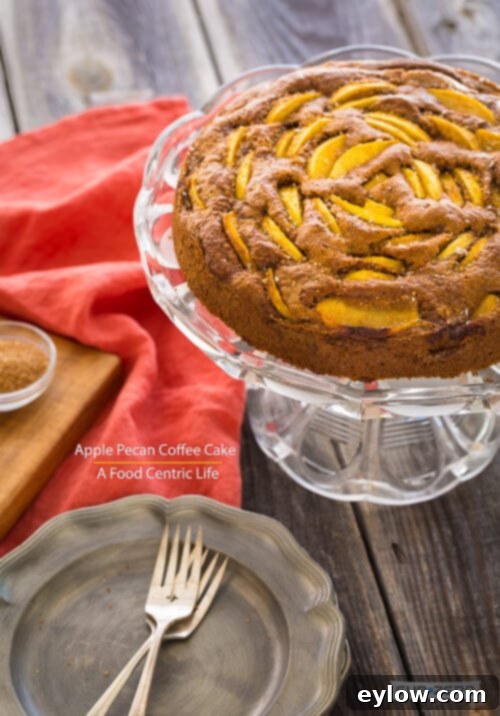
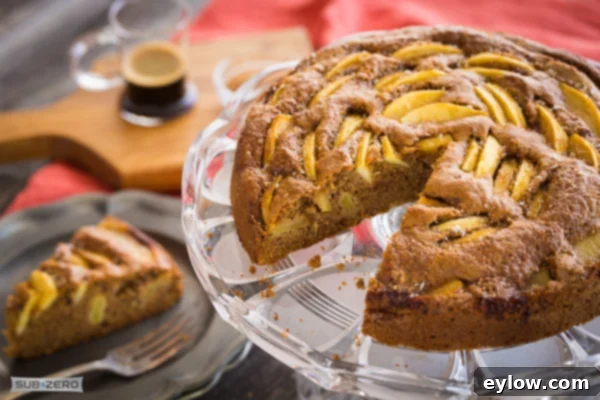
This incredibly moist apple cake quickly became a sensation among my friends, prompting me to share this culinary gem with you. Its crumb is exceptionally tender, and the baked apples, softened and sweetened with cinnamon, evoke the cozy feelings of autumn. It’s truly a versatile delight, perfect as an elegant dessert, a comforting afternoon snack, or even a guilt-free breakfast indulgence. The subtle blend of spices, combined with the natural sweetness of apples, creates a harmonious flavor profile that appeals to everyone. For more inventive serving ideas, be sure to check out the tips provided at the end of this article.
If you’re a fan of simple, delicious, one-pan cakes, you might also love this delightful fresh cherry cake, another easy recipe that delivers big on flavor with minimal effort.
Essential Ingredients for Your Gluten-Free Apple Cake
Crafting the perfect apple cake begins with selecting the right ingredients. For this recipe, I’ve experimented with both chopped and thinly sliced apples, and I’ve found that sliced apples tend to create a more visually appealing and texturally interesting cake, allowing their natural beauty to shine through. While cinnamon is the star spice here, a touch of softly whipped heavy cream makes an indulgent, dairy-free topping if you’re serving it as a luxurious dessert.
Here’s a comprehensive shopping list to get you started:
- Flour Blend: Look for an all-purpose gluten-free flour blend, such as Bob’s Red Mill 1:1 Baking Flour (the blue bag is a favorite for its consistent results in gluten-free baking). This ensures your cake has the perfect structure without any gluten.
- Almond Flour: This adds a wonderful tenderness and richness to the cake crumb, complementing the gluten-free blend beautifully. Bob’s Red Mill also offers a great almond flour option.
- Sweetener: A granular monk fruit blend is ideal for a reduced-sugar or low-carb diet. Alternatively, natural sugar can be used to achieve classic sweetness.
- Leavening Agents: Baking powder (always opt for aluminum-free for a cleaner taste) and baking soda are essential for a light and airy texture.
- Spices: Ground cinnamon is the heart of this cake’s flavor, providing warmth and comfort.
- Salt: A pinch of salt balances the sweetness and enhances all the other flavors.
- Healthy Fats: Olive oil or melted coconut oil provides moisture and a lovely richness while keeping the cake dairy-free.
- Brown Sugar (or alternative): Golden brown sugar or a similar unrefined option like Sucanat or coconut sugar adds a deeper, caramelized note.
- Eggs: Large eggs bind the ingredients together and contribute to the cake’s structure and richness.
- Vanilla: Pure vanilla extract or vanilla paste elevates the overall flavor. I highly recommend Tahitian Gold Co.’s vanilla for its exceptional quality.
- Milk: Unsweetened almond milk is perfect for maintaining the dairy-free profile, but regular dairy milk can be used if dietary restrictions aren’t a concern. For a homemade touch, try this homemade raw almond milk recipe.
- Nuts: Chopped pecans or walnuts add a delightful crunch and nutty flavor that pairs wonderfully with apples and cinnamon.
- Apples: Two large, firm, and flavorful apples are needed. Honeycrisp, Granny Smith, or Pink Lady are excellent choices for their balance of sweetness and tartness, and their ability to hold shape when baked.
Exact measurements for all ingredients can be found in the detailed recipe card below.
Expert Tips for Your Ingredients
Choosing and preparing your ingredients carefully can elevate your apple cake from good to truly extraordinary. Here are some detailed tips:
Sugar Choices for Every Preference: If you’re managing a low-carb or reduced-sugar diet, granular white or golden monk fruit blend, or Besti Brown Monk Fruit Sweetener with Allulose, is an excellent choice for replacing part or all of the natural sugar. Monk fruit provides sweetness without the added calories or glycemic impact. For those who prefer natural sweeteners, a good quality natural sugar works wonderfully.
Another fantastic natural sugar option is Sucanat, which stands for “Sugar Cane Natural.” It is a whole, unrefined cane sugar that retains all of the cane’s natural molasses, giving it a distinct, rich molasses flavor that is particularly delightful in baking and adds a deeper complexity to the cake. Similarly, unrefined raw coconut sugar is another great alternative, offering a caramel-like flavor and being a less processed option.
Spice it Up: While cinnamon is the classic and beloved spice for apple cake, don’t hesitate to experiment! Chinese Five Spice, with its unique blend of star anise, cloves, cinnamon, Sichuan pepper, and fennel seeds, can introduce an intriguing and exotic twist to your cake. You could also add a pinch of nutmeg, ground ginger, or allspice for an even richer, more complex flavor profile.
The Best Oil for Baking: For a moist and flavorful cake, the type of oil you use matters. Coconut oil is a fantastic alternative to olive oil, especially if you prefer its subtle tropical notes or firmer texture at room temperature. Always use high-quality oils. A crucial tip: avoid standard vegetable oils (like soybean, corn, or canola oil) at all costs. These oils are highly processed, often contain unhealthy trans fats, and can be detrimental to your health. It’s best to discard them from your pantry entirely.
A World of Apple Cakes: Exploring Cultural Varieties
Apple cake is more than just a dessert; it’s a culinary tradition celebrated across many cultures, often serving as a comforting snack or a festive dessert. Each cultural rendition brings its own delightful nuances and unique character to this beloved fruit-filled treat.
- Irish Apple Cake: Often a rustic, dense cake, sometimes enriched with oats and frequently served with a custard sauce or a dollop of fresh cream. It embodies simplicity and warmth.
- French Apple Cake (Gâteau aux Pommes): Typically more refined, these cakes often feature thin slices of apples arranged beautifully, sometimes in a buttery, custardy batter, creating a delicate and elegant dessert.
- German Apple Cake (Apfelkuchen) / Polish / Austrian: These varieties are incredibly diverse. German apple cakes can range from yeast-leavened cakes with a streusel topping (Apfelstreuselkuchen) to lighter sponge cakes with apple fillings. Polish and Austrian versions often share similarities, featuring rich batters, spice, and sometimes a hint of rum or brandy.
- Jewish Apple Cake: Distinctive for being made without any dairy products (to be “parve” and served with meat meals according to kosher laws), Jewish apple cakes are typically moist, dense, and rich, often using oil instead of butter and featuring generous layers of spiced apples.
While this recipe embraces a modern, gluten-free and dairy-free American-style apple cake, understanding these diverse traditions highlights the universal appeal and endless possibilities of baking with apples.
Choosing the Best Apples for Baking
The secret to a truly great apple cake lies in selecting the right apple varieties. For optimal results, always choose apples that are firm and crisp, as these will hold their shape beautifully during baking and won’t turn into mush. A good balance of sweet and tart is also crucial to prevent the cake from being overly sweet or too bland.
Here are some of the top recommendations for baking, with reasons why they excel:
- Honeycrisp: My personal go-to for this recipe. Honeycrisp apples are famously crisp, juicy, and have a wonderful sweet-tart flavor that brightens any baked good. They maintain their texture remarkably well.
- Granny Smith: A classic for baking, Granny Smiths are known for their tartness and firm flesh. Their acidity cuts through the sweetness of the cake, creating a perfectly balanced flavor. They also hold their shape exceptionally well.
- Pink Lady (Cripps Pink): These apples offer a delightful crunch and a lovely sweet-tart flavor with a hint of honey. They are excellent for baking as they don’t break down easily. Find more about them here.
- Jazz: A hybrid of Gala and Braeburn, Jazz apples are crisp, dense, and have a tangy-sweet flavor profile. They are also known for retaining their texture during cooking. Explore more about Jazz apples here.
For a deeper dive into apple varieties and their best uses, you can read more here. Experimenting with different varieties can lead to new favorite flavor combinations for your apple cakes!
Smart Apple Storage Tips for Maximum Freshness
Proper storage is key to keeping your apples fresh and crisp, and preventing them from prematurely ripening other produce. Apples naturally emit a plant hormone called ethylene gas, which is a powerful ripening agent. While beneficial for ripening some fruits, it can hasten the spoilage of ethylene-sensitive fruits and vegetables.
The Golden Rule for Apple Storage: Store apples separately from other produce. The ideal way to do this is to place your apples in a plastic bag (one with a few small holes for ventilation is best) and store them alone in your refrigerator’s crisper drawer. This contains the ethylene gas they release, protecting other vegetables like lettuce, berries, kale, green beans, and carrots from wilting or spoiling faster. Ideally, store your apples at around 30-35°F (-1 to 2°C) with high humidity, which mimics cellar conditions and significantly prolongs their freshness and crispness for several weeks.
Essential Baking Tools for Your Apple Cake
Having the right tools can make your baking experience smoother and more enjoyable. For this apple cake, a few key pieces of equipment are indispensable:
- 9-inch Springform Pan: This is a must-have for cakes like this, especially those with fruit arrangements on top, as it allows you to easily release the cake without flipping or damaging its delicate structure. Springform pans are widely available and not expensive; you can find them online, at specialty cooking stores, or even at general merchandise retailers like Target.
- Parchment Paper: Crucial for preventing sticking and ensuring an easy release. You’ll need to cut a round piece to fit the bottom of your springform pan. Many grocery stores and cooking shops now carry handy pre-cut parchment rounds, which are a real time-saver.
- Apple Corer Tool: While not strictly essential, an apple corer makes the task of removing the core much quicker and cleaner, preparing your apples perfectly for slicing.
- Mixing Bowls: You’ll need at least two medium to large mixing bowls for separating your dry and wet ingredients before combining them.
- Whisk and Spatula: A good whisk is vital for thoroughly combining your dry and wet ingredients separately, and a flexible rubber spatula is perfect for gently folding in the nuts and ensuring the batter is well-mixed without overworking it.
To Peel or Not to Peel Your Apples?
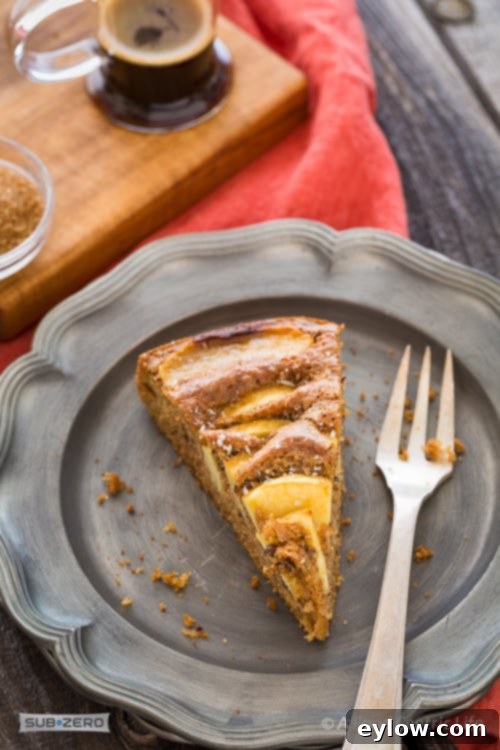
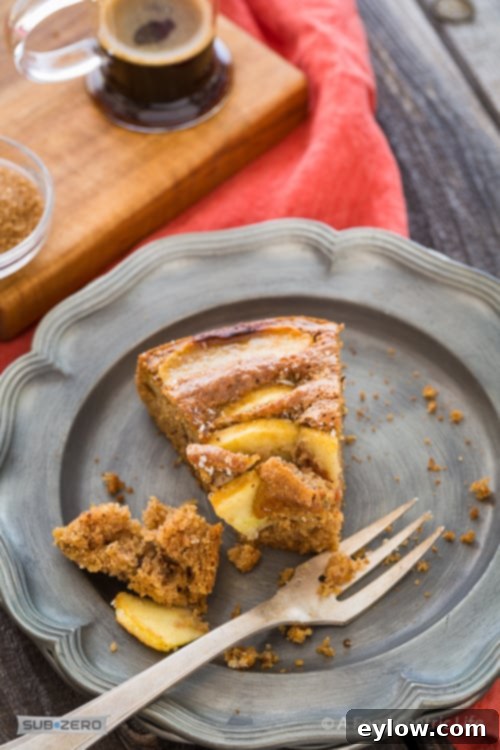
The question of whether to peel apples for baking is often debated, and I’ve tested this cake both ways to give you the best guidance. From a nutritional standpoint, leaving the skin on provides additional fiber and valuable nutrients, which is always a plus for health-conscious bakers. However, when it comes to aesthetics and a purely smooth texture, the cake without the peel often has a more refined appearance, as seen in the lead photo of this article.
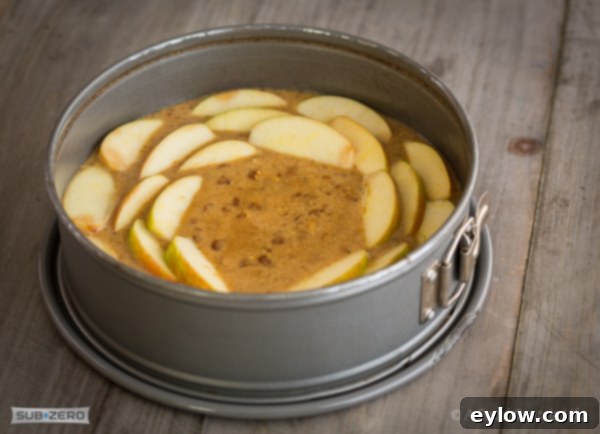
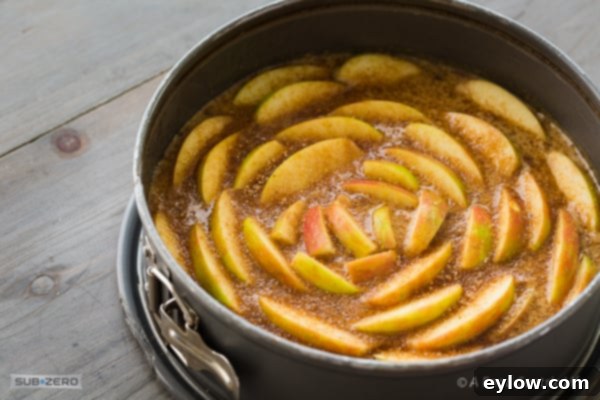
When the skin is left on, it can add a slightly rustic chewiness to the baked apples, and the color of the peels (especially from red apples) can create visual interest. The photo above demonstrates apples baked with their skins on, and also features an optional sprinkle of two teaspoons of extra, coarse brown sugar (like Demerara or Turbinado) over the top before baking. This sugar creates a beautiful, sparkly crust, adding a delightful textural contrast and an extra touch of sweetness. While visually appealing, this step is entirely optional if you are aiming to reduce the overall sugar content of the cake.
Ultimately, the choice to peel or not depends on your preference for texture and appearance. For a super smooth, melt-in-your-mouth apple experience, peel them. For added nutrition and a more rustic charm, leave them on!
Step-by-Step Baking Instructions for Your Perfect Apple Cake
Follow these detailed steps to create a truly irresistible gluten-free and dairy-free apple cake:
Step 1: Prepare Your Oven and Pan
Pre-heat your oven to 350°F (175°C). This ensures the oven is at the correct temperature for even baking. Prepare your 9-inch springform pan by lightly spraying the bottom and sides with a non-stick cooking spray. Cut a round of parchment paper to perfectly fit the bottom of the pan and place it inside. This combination of spray and parchment guarantees an effortless release of your beautiful cake.
Step 2: Mix the Dry Ingredients
In a medium-sized mixing bowl, combine all your dry ingredients: the gluten-free all-purpose flour blend, almond flour, baking powder, baking soda, cinnamon, and salt. Whisk them thoroughly until they are well combined and uniformly distributed. This step is crucial for ensuring even leavening and flavor throughout the cake.
Step 3: Combine the Wet Ingredients
In a separate, larger bowl or a large measuring cup, whisk together the wet ingredients: the olive oil (or melted coconut oil), chosen sugar (monk fruit blend or natural sugar), eggs, vanilla extract (or paste), and almond milk. Whisk vigorously until the mixture is smooth and well emulsified. This helps to create a uniform batter when combined with the dry ingredients.
Step 4: Form the Batter
Pour the wet ingredients into the bowl with the dry ingredients. Using a flexible spatula, stir gently until just combined and smooth. Be careful not to overmix, as this can lead to a tougher cake texture. Once combined, gently fold in the chopped pecans or walnuts by hand. Pour this thick batter into your prepared springform pan, spreading it evenly.
Step 5: Prepare and Arrange the Apples
Begin by trimming a thin slice off the top and bottom of each apple to create flat surfaces. This makes coring and slicing much easier and safer. Core the apples using an apple corer tool. Decide whether to peel them based on your preference (see “To Peel or Not to Peel” section above). Next, slice each apple into approximately 24 thin slices. An easy way to achieve this is to cut the apple into eight wedges, then slice each wedge into three equal, thin pieces. Arrange these apple slices in a beautiful circular, overlapping pattern on top of the batter, starting from the outside edge of the pan and working your way inwards. Slightly overlap the apple ends and gently tip the thinner bottom part of each slice a bit down into the batter. This technique not only helps anchor the apples but also allows you to fit more apples into the cake, ensuring a rich apple flavor in every bite. Refer to the photo above for a visual example of this arrangement. Continue until you reach the center. For the small center space, you may need to cut smaller apple pieces to fit them in neatly. You might not use all apple slices, depending on their size.
Step 6: Optional Topping (for sparkle)
If desired, sprinkle two teaspoons of Demerara or Turbinado sugar over the top of the arranged apples. This coarse sugar will create a lovely, sparkling crust during baking, adding an extra layer of texture and visual appeal. This step is optional if you’re mindful of sugar content.
Step 7: Bake the Cake
Place the springform pan in the pre-heated oven and bake for approximately 40-45 minutes. Baking times can vary depending on your specific oven, so it’s always good to keep an eye on it. The cake is done when its edges are golden brown and just beginning to pull away from the sides of the pan. To confirm doneness, insert a toothpick or a cake tester into the center of the cake; it should come out clean with only a few moist crumbs attached, indicating a perfectly baked, tender interior.
Step 8: Cool and Serve
Once baked, remove the cake from the oven and allow it to cool in the pan on a wire rack for about 15 minutes. This cooling period helps the cake to set. After 15 minutes, run a thin-bladed knife gently around the inside edge of the pan to ensure it’s completely free. Then, release the spring mechanism and carefully remove the side of the pan. You can serve the cake warm for a comforting treat, or let it cool completely on a wire rack to room temperature. If you plan to serve it later, wrap it well to maintain its freshness and store at room temperature.
Pro Tip: Achieving the perfect doneness is key! The visual cues (golden edges, pulling away from the pan) combined with the toothpick test (clean with moist crumbs) ensure your cake is beautifully baked through without being dry.
Delightful Ways to Serve Your Apple Cake
This versatile apple cake is delicious on its own, but here are some suggestions to elevate your serving experience:
- Classic Comfort: Serve a slice simply, allowing the cake’s flavors to shine.
- With Whipped Cream: A generous dollop of freshly whipped cream adds a touch of indulgence. For a dairy-free option, use coconut cream whipped to a soft peak. If using dairy, sweeten heavy whipping cream with a bit of sugar and a splash of vanilla extract (creating what’s known as Chantilly cream) and whip until stiff.
- A La Mode: For a decadent dessert, serve it warm with a scoop of your favorite vanilla bean ice cream or a scoop of dairy-free alternative ice cream. A drizzle of homemade caramel sauce can make it even more special.
- French Flair: Pair it with sweetened crème fraîche for a rich, tangy counterpoint that cuts through the cake’s sweetness beautifully.
- Breakfast or Brunch: Enjoy a slice with a cup of freshly brewed coffee or a soothing cup of spiced tea. It also pairs wonderfully with a side of fresh seasonal fruit or a dollop of Greek yogurt (or dairy-free yogurt alternative).
No matter how you choose to serve it, this apple cake is sure to impress and satisfy!
📖 Recipe
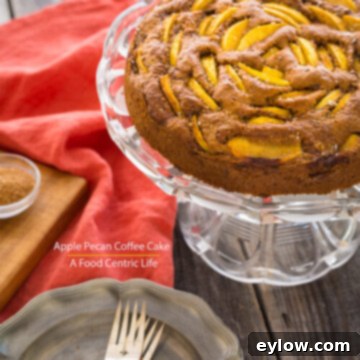
Gluten-Free Apple Cake
Sally Cameron
Pin Recipe
Equipment
-
9″ springform pan
-
Parchment paper
Ingredients
Dry Ingredients
- 1 cup all-purpose gluten-free flour blend 4 ½ ounces, I use Bob’s Red Mill
- ½ cup almond flour 1 ¾ ounces, Bob’s Red Mill
- 1 ½ teaspoons baking powder aluminum free
- 1 ½ teaspoons baking soda
- 1 teaspoon cinnamon
- ¼ teaspoon salt
Wet Ingredients
- ⅓ cup olive oil or coconut oil, melted or coconut oil, melted
- ⅓ cup sucanat or golden brown sugar
- 2 large eggs
- 1 teaspoon vanilla extract or vanilla paste
- ½ cup milk or almond milk
- ½ cup chopped pecans or walnuts 2 ¼ ounces
- 2 large Honeycrisp or Granny Smith apples
Optional Topping
- 2 teaspoons Demerara or Turbinado sugar
Instructions
-
Pre-heat oven to 350ºF (175°C). Cut a parchment round to fit the bottom of a 9-inch springform pan. Lightly spray the inside of the pan with non-stick spray, then carefully place the parchment round on the bottom.
Mix Dry Ingredients
-
In a medium bowl, whisk together all the dry ingredients: the all-purpose gluten-free flour blend, almond flour, baking powder, baking soda, cinnamon, and salt. Whisk well to ensure everything is evenly distributed.
Mix Wet Ingredients
-
In a large measuring cup or separate bowl, whisk together the wet ingredients: olive oil (or melted coconut oil), Sucanat (or golden brown sugar), eggs, vanilla extract (or paste), and almond milk until the mixture is smooth and well combined. Pour the wet ingredients into the bowl with the dry ingredients and stir well with a spatula until a smooth batter forms. Gently fold in the chopped nuts (pecans or walnuts). Pour the batter evenly into the prepared springform pan.
Slice Apples and Add to Batter
-
Trim a thin slice off of the top and bottom of the apples to create flat surfaces. Core the apples (an apple corer tool makes this much easier) and peel them if desired. Cut each apple into approximately 24 thin slices (an easy way is to cut the apple into eights, then slice each eighth into 3 equal pieces). Arrange the apple slices in a beautiful circular, overlapping pattern on top of the batter, starting at the outside edge of the pan and working your way inward. Slightly overlap the ends of the apple slices and tip the bottom (thinner end) of each slice gently down into the batter. This technique helps to secure the apples and allows you to fit more apples into the cake. Continue arranging until you reach the center of the pan. For the small center area, cut a slice of apple into smaller pieces and fit them in as best you can. You may not need all of the apple slices. If using, sprinkle the optional Demerara or Turbinado sugar evenly over the top of the arranged apples to give the cake a beautiful sparkle and a slight crunch after baking.
Bake the Cake
-
Bake the cake at 350ºF (175°C) for approximately 40-45 minutes. Baking time may vary slightly depending on your oven. The cake is done when the edges are golden brown and just beginning to pull away from the sides of the pan, and a toothpick or cake tester inserted into the center comes out clean with a few moist crumbs. Remove the cake from the oven and allow it to cool in the pan on a wire rack for 15 minutes. This helps the cake to set. After 15 minutes, carefully run a thin-bladed knife around the inside edge of the pan to ensure the cake is completely free, then release the spring and remove the side of the pan. Let the cake cool completely on a wire rack, or serve it warm for a comforting treat. If serving later after cooling, wrap the cake well in plastic wrap or foil and store at room temperature to maintain its moisture.
Notes
Nutrition
This post was sponsored by Sub-Zero Wolf.
