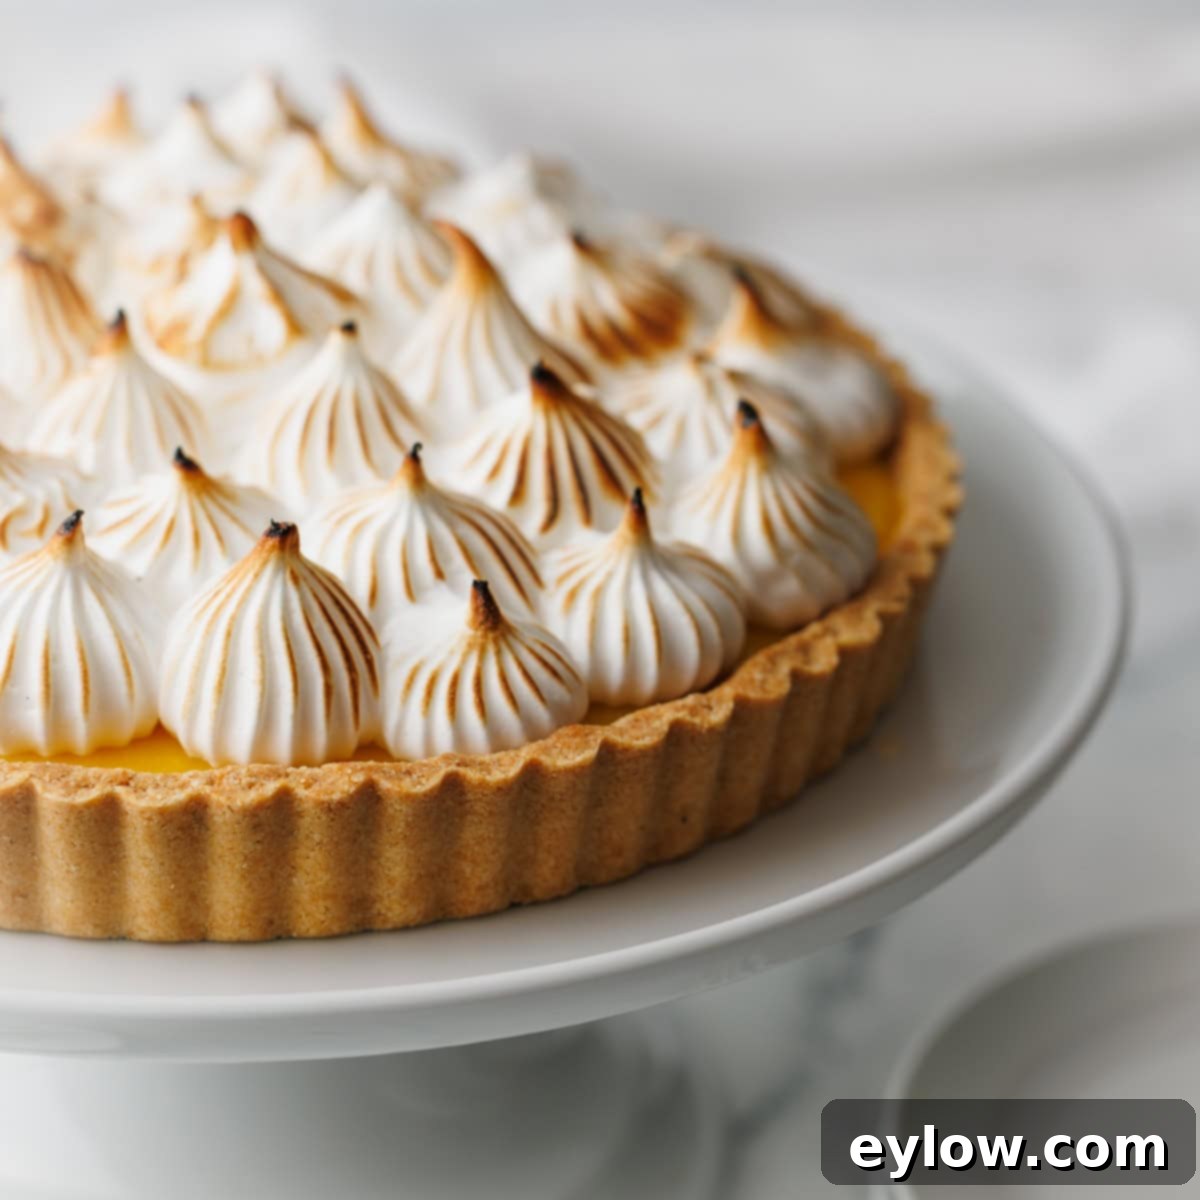
Irresistible Lemon Meringue Tart: The Ultimate Gluten-Free & Easy Recipe
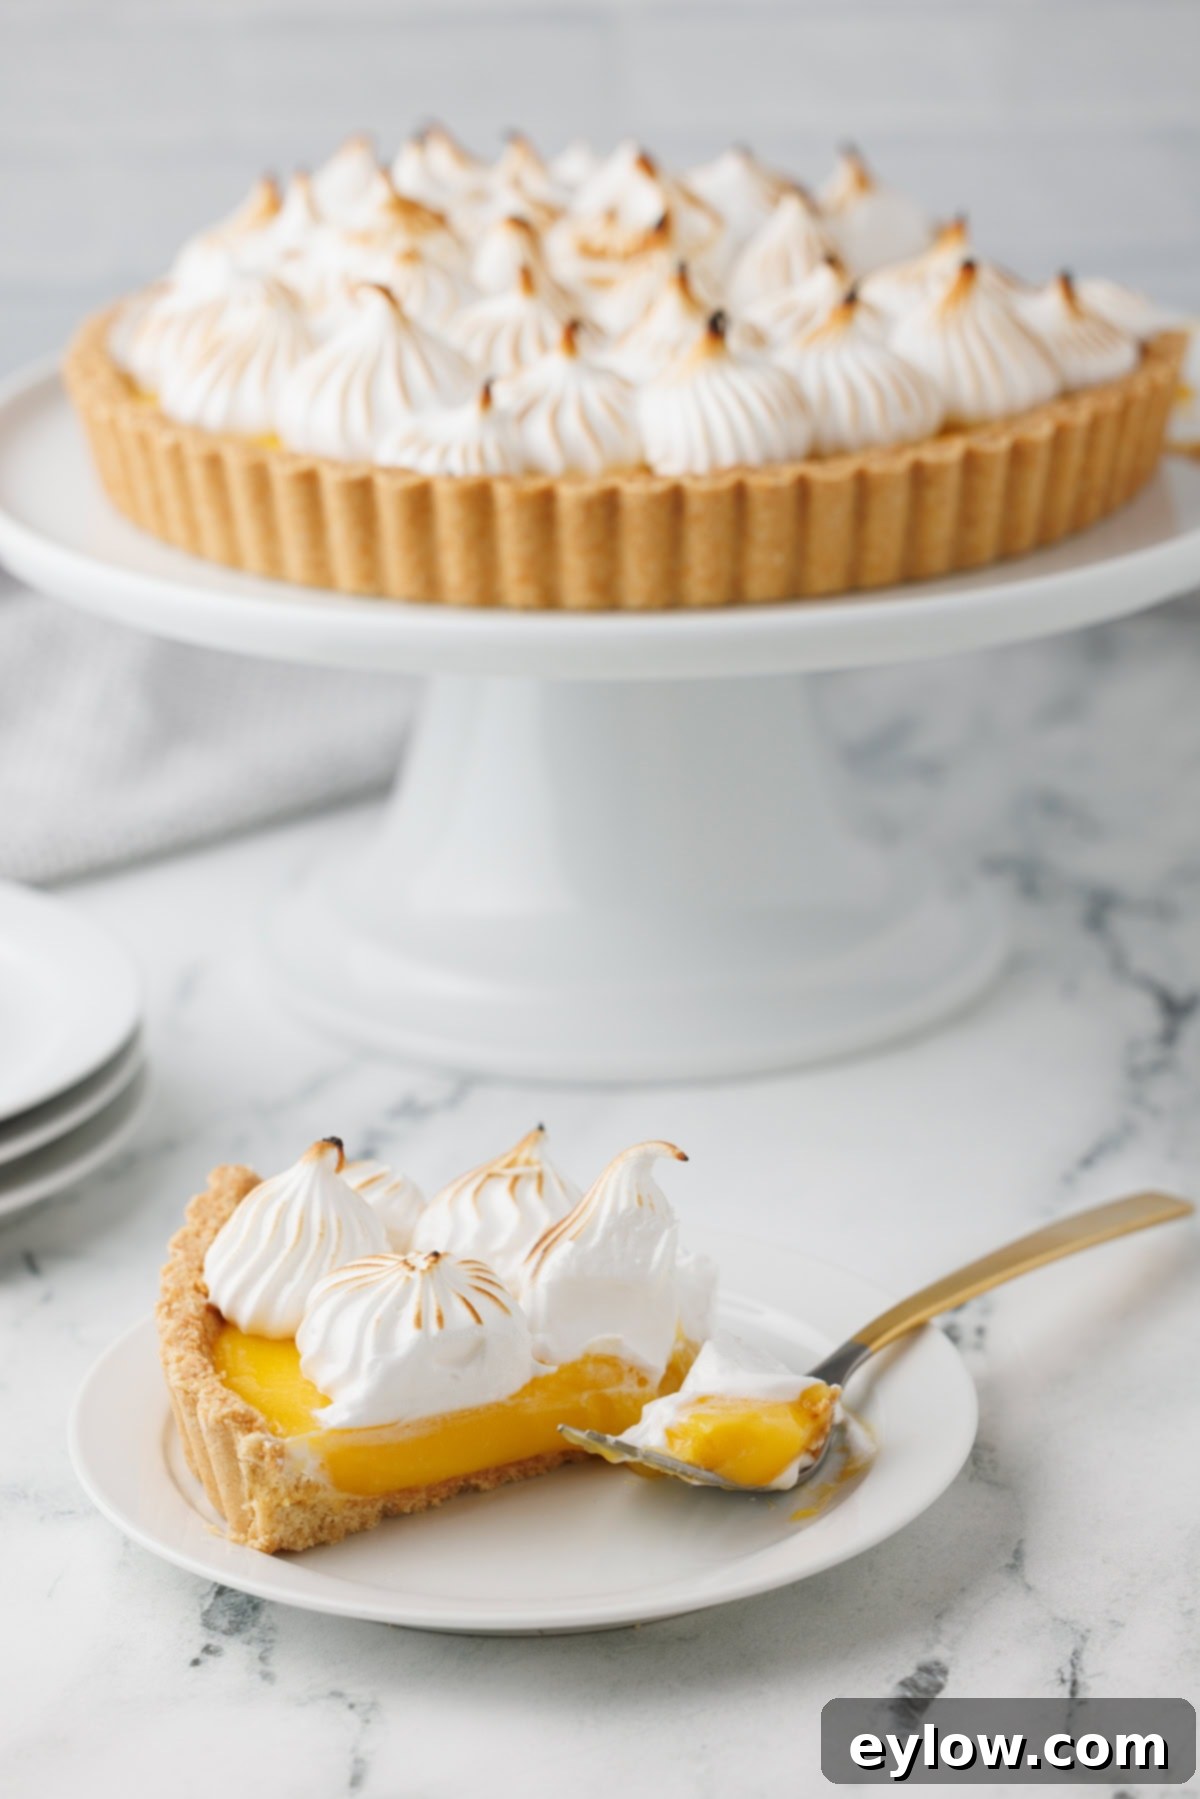
Prepare to be dazzled by this absolutely irresistible **lemon meringue tart**! It’s bright, boldly flavored, and guaranteed to impress even the most discerning palates – all without the need for a rolling pin. We achieve this effortlessly with a simple, press-in almond flour crust, which is naturally gluten-free, offering a wonderfully tender and buttery foundation. The filling is a symphony of sweet and tangy notes, crafted from a rich, smooth lemon curd that simply melts in your mouth. To crown this masterpiece, billowy swirls of luscious Italian meringue are piped on top, creating a stunning visual and textural contrast. This tart not only looks spectacular but slices cleanly and consistently earns rave reviews from the very first bite. While it requires a little attention to detail, the delightful outcome makes every step absolutely worth the effort, and I’m here to guide you through the entire process, ensuring your success.
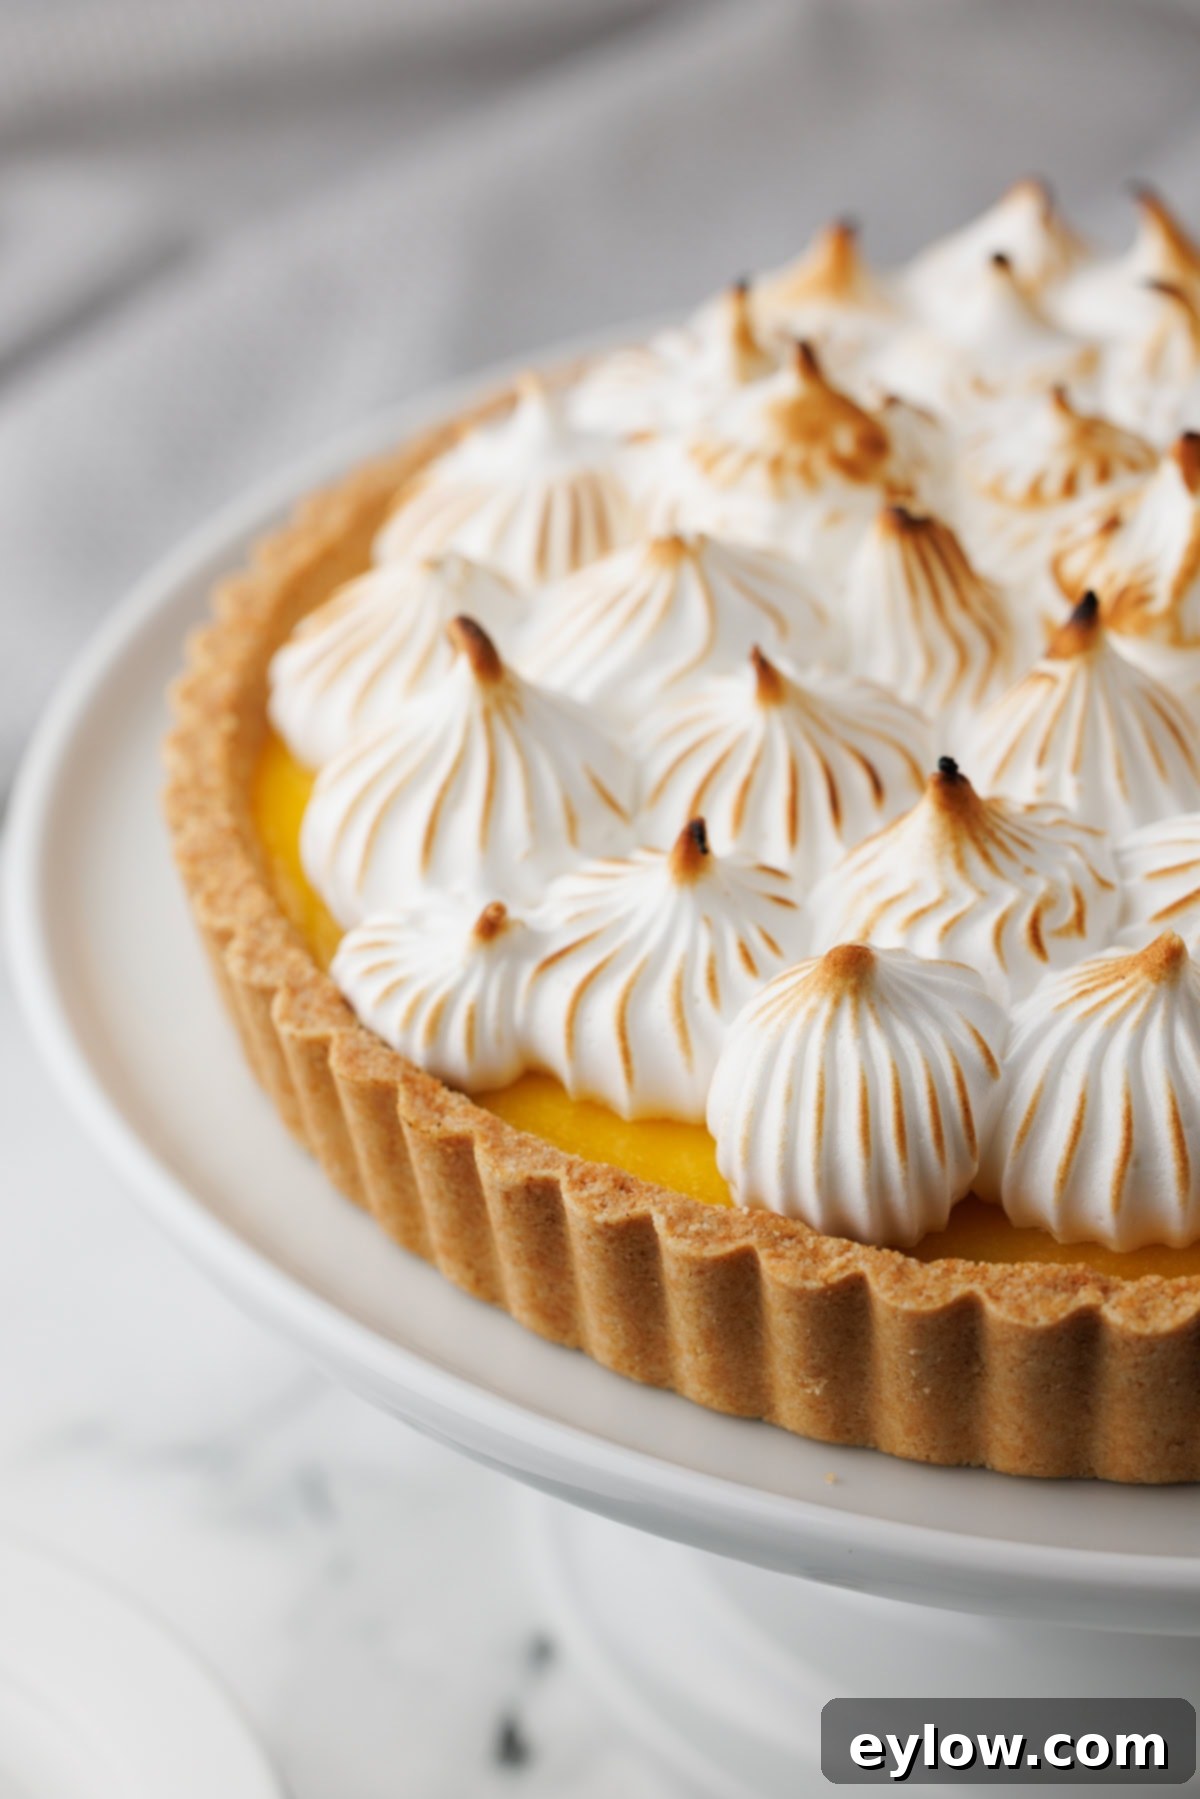
This exquisite lemon meringue tart is a true showstopper dessert, making it perfect for special occasions like holidays, elegant spring gatherings, or any time you wish to serve something with a serious “wow” factor. The vibrant lemon curd filling achieves a perfect sweet-tart balance, boasting a luxuriously rich and incredibly smooth texture that glides across your tongue. What’s more, the entire tart is naturally gluten-free, catering to various dietary needs without compromising on flavor or decadence. You have the flexibility to make it with regular granulated sugar for a classic taste, or opt for powdered allulose if you’re looking for a sugar-free and lower-carb alternative, allowing you to customize it to your preference.
Whether you’re an experienced baker or new to the world of tarts, this recipe provides clear, detailed instructions that simplify the process. From preparing the fuss-free almond-coconut crust to mastering the smooth lemon curd and perfecting the stable Italian meringue, you’ll gain confidence with each delicious layer. This dessert is not just a treat for the taste buds; it’s a feast for the eyes, promising a memorable culinary experience for you and your guests.
[feast_advanced_jump_to]
Why You’ll Love This Lemon Meringue Tart Recipe
There are countless reasons why this particular lemon meringue tart stands out and why it will quickly become one of your favorite desserts to bake and share. Its unique combination of flavors, textures, and ease of preparation makes it a truly exceptional treat.
- Bright, Balanced Lemon Flavor: This tart delivers an intensely bright lemon flavor that is perfectly balanced between sweet and tangy. The curd is crafted to highlight the natural zing of fresh lemons without being overly sour or cloyingly sweet, creating a refreshing taste sensation that invigorates the palate.
- Effortless Cookie-Style Crust: Forget the stress of traditional pastry dough. Our cookie-style crust is incredibly easy to make, requiring no rolling pin whatsoever. Simply press the almond and coconut flour mixture into your tart pan for a wonderfully tender, buttery, and naturally gluten-free base that’s both simple and delicious.
- Versatile Topping Options: While the star is undoubtedly the impressive Italian meringue, this recipe offers flexibility. You can top it with the elegant Italian meringue for that classic look and taste, or, if you’re short on time or prefer a lighter touch, simply use a dollop of lightly sweetened whipped cream for a equally delightful dessert.
- Ideal for Advance Preparation: To simplify your baking schedule, the tart crust can be prepared a day ahead. This allows you to break down the process into manageable steps, making holiday baking or party preparations much less stressful.
- Refined Elegance: This lemon meringue tart offers a more refined and elegant presentation compared to a traditional lemon meringue pie. Its sleek design and delicate meringue swirls elevate it to a sophisticated dessert, perfect for any upscale gathering or dinner party.
- Naturally Gluten-Free: With an almond and coconut flour crust, this entire tart is naturally gluten-free, making it an excellent option for those with dietary restrictions without sacrificing flavor or texture.
- Customizable Sweetness: Whether you prefer classic sugar or a sugar-free alternative, this recipe accommodates both, allowing you to tailor the sweetness to your dietary needs or preferences with ease.
If you’re simply craving that vibrant lemon flavor without committing to the full tart, here’s a link to my easy sugar-free lemon curd recipe. And for another delicious pairing, lemon curd is fantastic served alongside a slice of gluten-free pound cake. The possibilities for enjoying homemade lemon curd are endless!
Essential Lemon Meringue Tart Ingredients
Crafting this stunning lemon meringue tart involves three key components: the crisp, gluten-free crust, the luscious lemon curd filling, and the cloud-like Italian meringue. Each component uses specific ingredients that contribute to its overall success and deliciousness. Here’s a detailed look at what you’ll need for each layer.
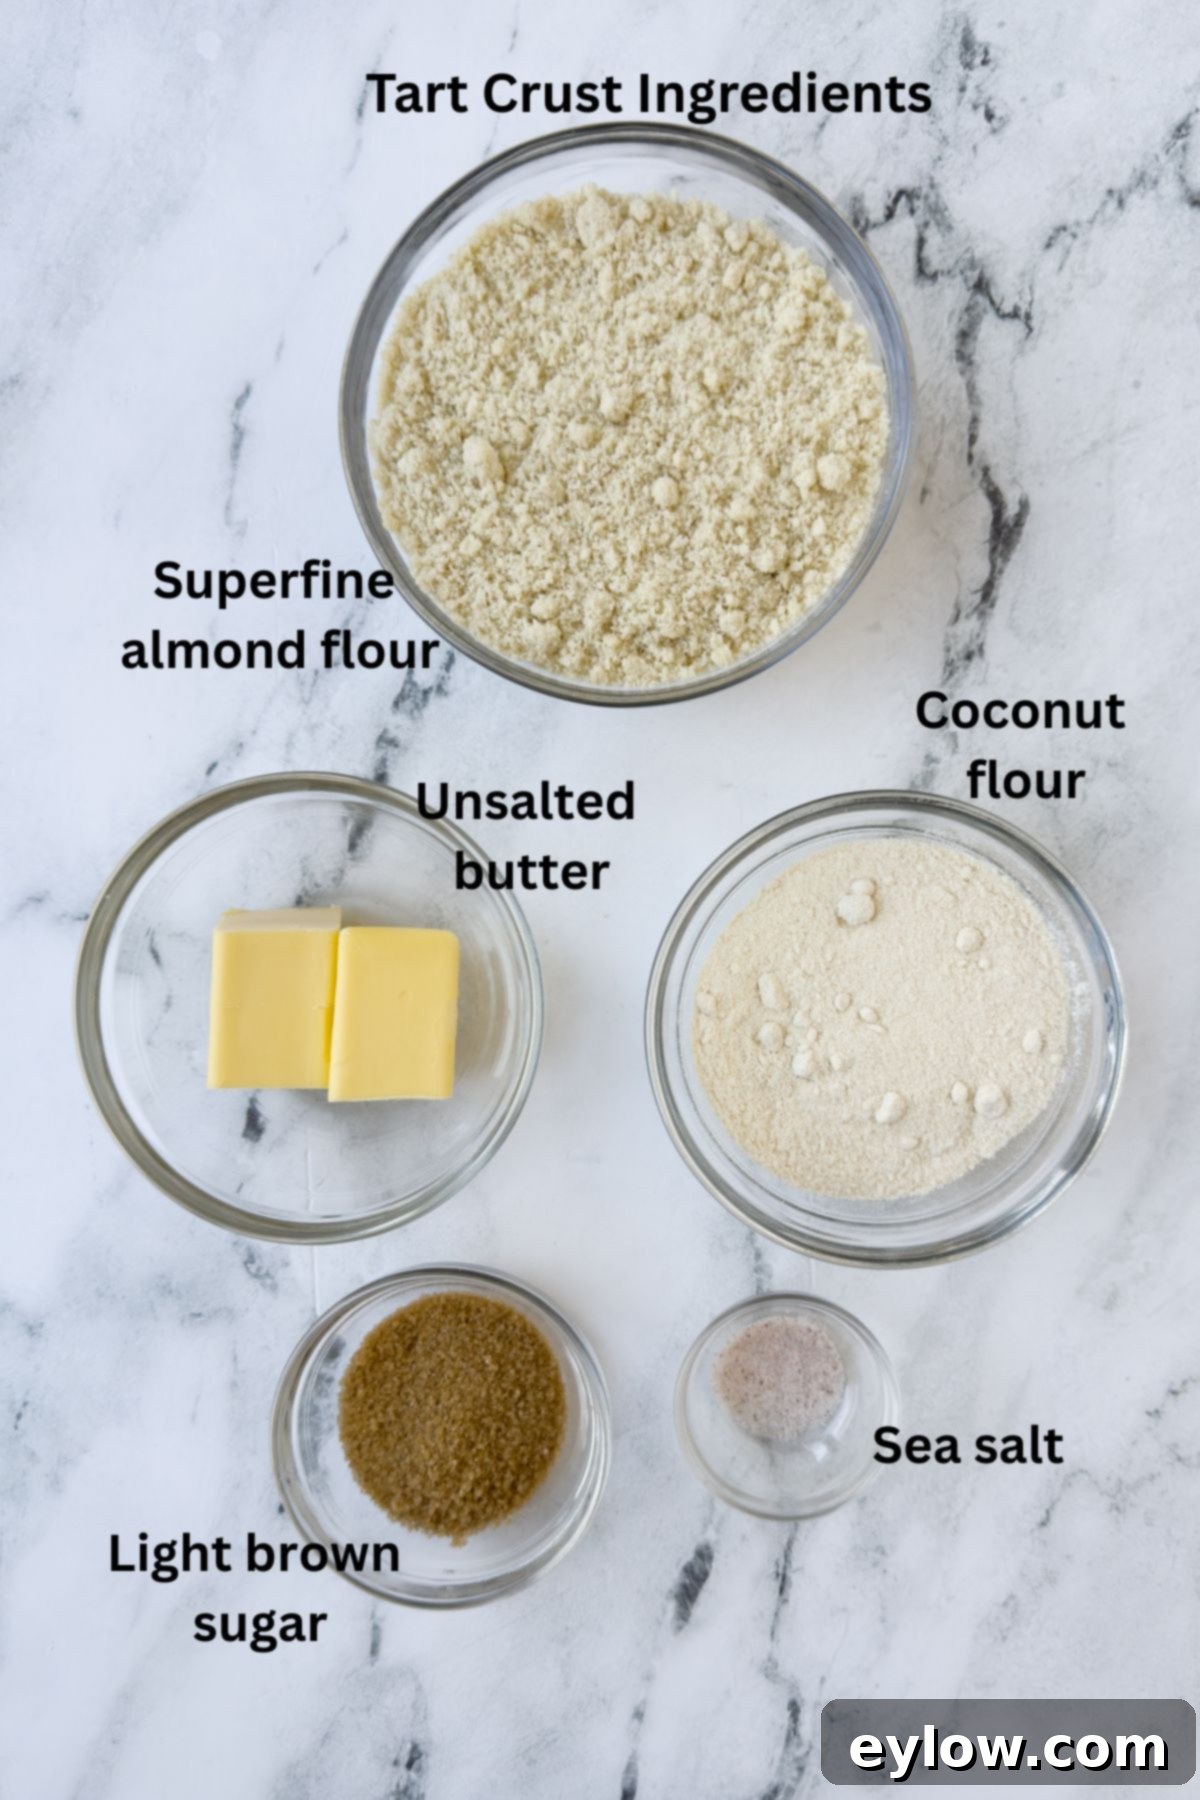
For the Easy & Gluten-Free Tart Crust
- Almond Flour: This is the hero ingredient for our naturally gluten-free crust. Superfine almond flour, made from blanched almonds, provides a tender, buttery texture that mimics traditional pastry without the gluten. It also contributes a subtle nutty flavor.
- Coconut Flour: A small amount of coconut flour is crucial for adding structure and absorbency to the crust, helping it bind together and achieve the perfect consistency. It works synergistically with almond flour to create a stable yet crumbly base.
- Sugar (Light Brown Sugar): Light brown sugar not only adds sweetness but also a subtle caramel note that complements the bright lemon filling beautifully. Its moisture content also helps in creating a cohesive dough.
- Unsalted Butter: Using unsalted butter allows you to control the overall saltiness of your crust, ensuring a balanced flavor. Melted butter helps bind the flours and sugar together, forming that easy-to-press-in dough.
- Fine Sea Salt: Just a touch of fine sea salt is essential to enhance and balance the flavors of the crust, preventing it from tasting flat and bringing out the sweetness of the brown sugar.
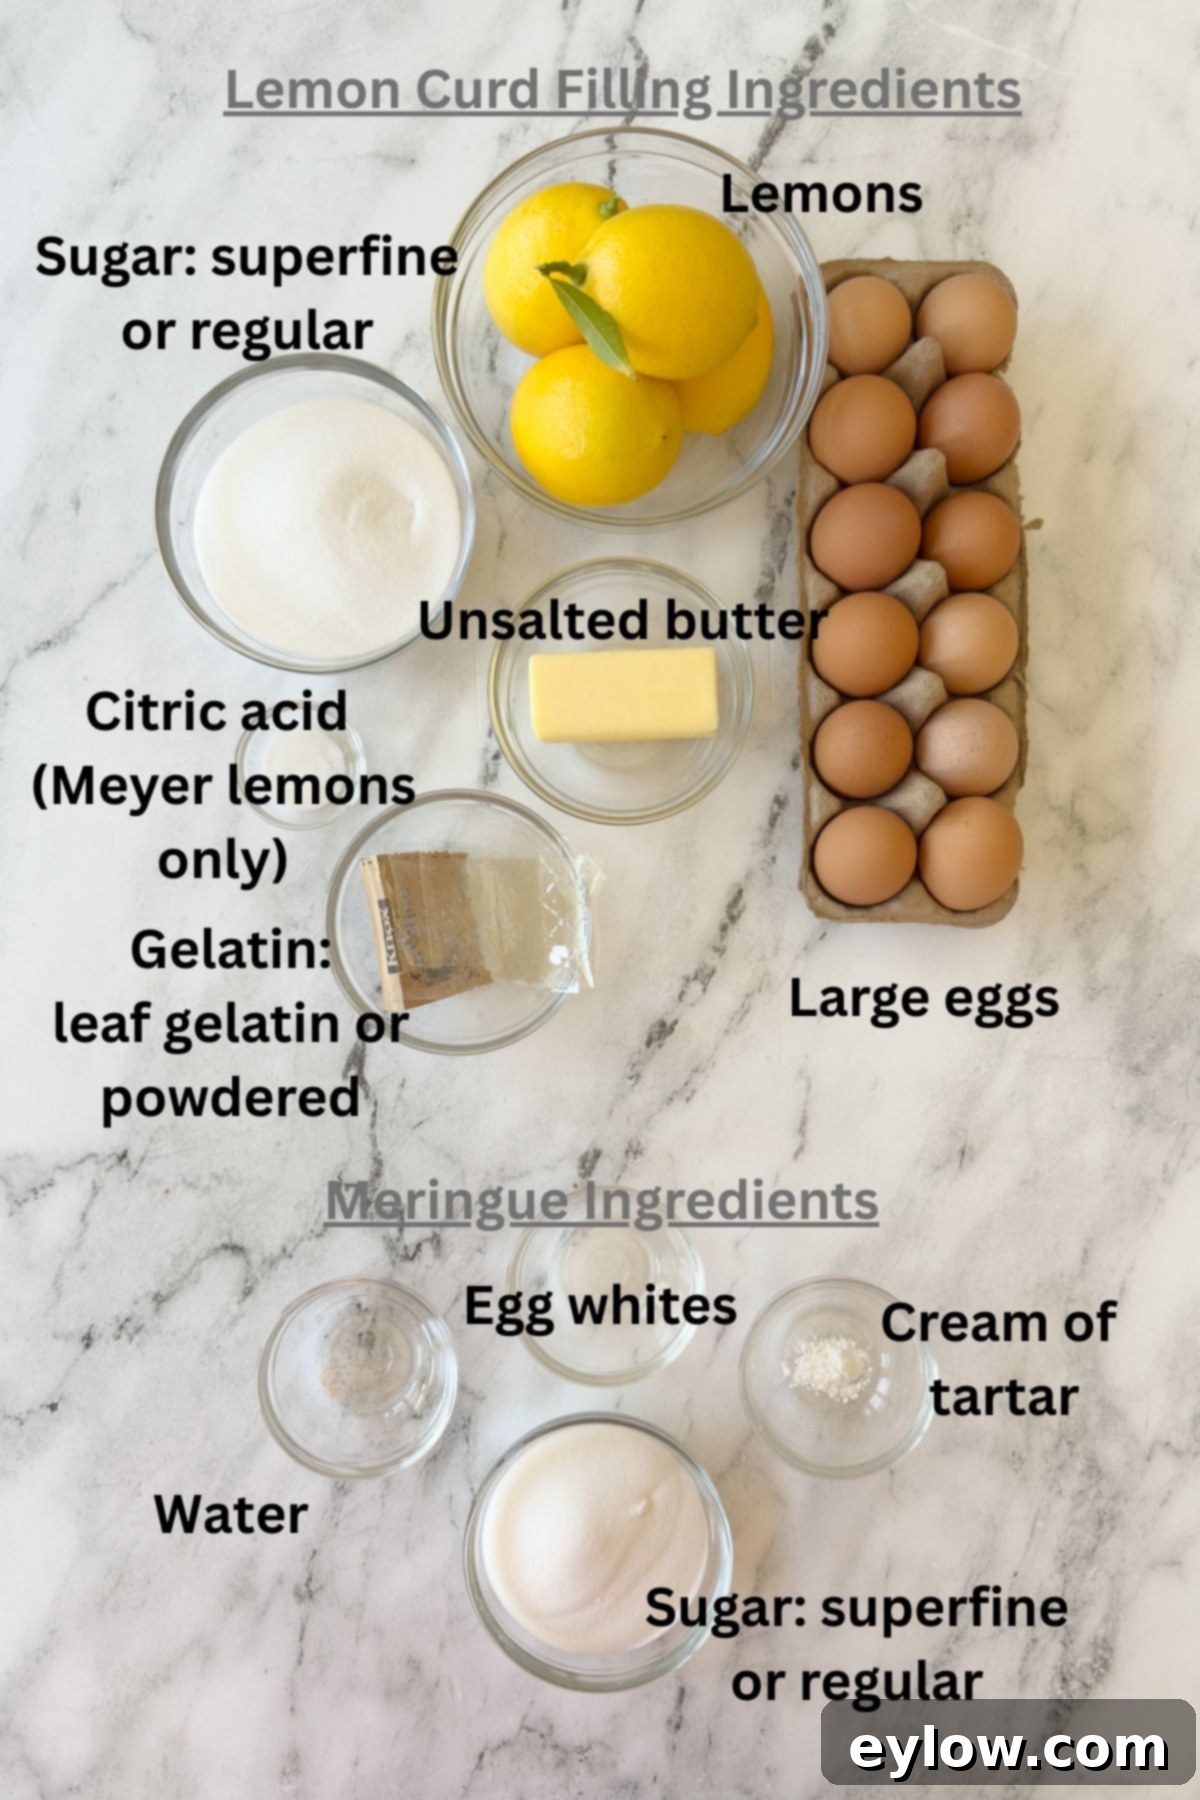
For the Tangy & Smooth Lemon Curd Filling
- Large Egg Yolks: We use a generous dozen large egg yolks for this lemon curd. These yolks are the secret to its incredible richness, vibrant yellow color, and luxuriously smooth, velvety texture. They also act as a natural thickener.
- Unsalted Butter: Again, unsalted butter is preferred for precise flavor control. It adds richness and a silken mouthfeel to the curd, contributing to its indulgent quality.
- Fresh Lemons (Regular or Meyer): The quality of your lemons directly impacts the flavor of your curd. Use fresh, ripe lemons for their aromatic zest and juice. Regular lemons provide a classic tartness, while Meyer lemons offer a slightly sweeter, more floral note.
- Sweetener (Sugar or Allulose): You have a choice here. Caster sugar (superfine sugar) or granulated sugar will yield a traditional, perfectly sweet-tart curd. For a sugar-free and lower-carb option, I recommend using powdered allulose, which behaves similarly to sugar in terms of texture but without the carbs.
- Gelatin (Leaf or Powdered): A small but mighty amount of gelatin is key for “insurance” – it helps the curd set beautifully, ensuring clean, perfect slices and a wonderfully firm yet still melt-in-your-mouth texture. I prefer leaf gelatin (170 bloom power) for its superior texture, but regular powdered gelatin works just as well.
- Citric Acid Powder: This ingredient is crucial only if you are using Meyer lemons, which are naturally lower in acidity compared to regular lemons. Adding citric acid helps to boost the acidity, which is necessary for the gelatin to set properly and for the curd to achieve its characteristic tangy flavor balance.
For more insights into using leaf gelatin and why I highly recommend it for achieving the best texture in delicate desserts, be sure to read the detailed note in my post on easy strawberry panna cotta.
For the Fluffy & Stable Italian Meringue Topping
- Egg Whites: Use the egg whites saved from separating the eggs for the lemon curd filling. Room temperature egg whites whip up with better volume and stability, creating a light and airy meringue.
- Sugar (Superfine or Granulated): Superfine sugar is ideal for meringue as it dissolves quickly, ensuring a smooth and stable meringue. However, regular granulated sugar can be used successfully as well; just ensure it’s fully dissolved in the syrup.
- Water: Used in combination with sugar to create a hot sugar syrup, which is the foundation of Italian meringue.
- Cream of Tartar: This acidic ingredient acts as a stabilizer for the egg whites, helping them whip up faster, achieve greater volume, and hold their shape more effectively, preventing the meringue from deflating.
- Sea Salt: A tiny pinch of sea salt is added to balance the sweetness of the meringue, enhancing its overall flavor profile and preventing it from being one-dimensional.
Chef’s Tip: Why Italian Meringue is Best for Tarts
Italian meringue is widely considered the most stable of the three main types of meringue (French, Swiss, and Italian). Its unique preparation method, involving hot sugar syrup poured into whipping egg whites, creates a robust and glossy meringue that holds its shape beautifully over time, making it perfect for topping tarts. Unlike French meringue, it doesn’t require baking to become stable, and it also torches exceptionally well, allowing you to achieve a beautiful, caramelized finish if desired. Its resilience ensures your tart stays picture-perfect longer.
If you’re a true lemon enthusiast and looking for more ways to incorporate its zesty flavor into your meals, you must try this easy blender lemon mint chicken marinade. It’s fantastic for grilling chicken and infuses it with incredible freshness!
Substitutions and Creative Variations
This lemon meringue tart recipe is quite flexible, allowing for minor adjustments or delightful variations to suit your taste preferences or dietary needs. Don’t be afraid to experiment a little to make it truly your own!
- Whipped Cream Topping (Time Saver): If you find yourself pressed for time, or simply prefer a different topping, you can easily transform this into a lemon curd tart. Simply skip the meringue step entirely and, once the lemon curd is chilled and set, top it with a generous amount of lightly sweetened whipped cream. It’s a quicker, equally delicious alternative that still offers a beautiful contrast to the tangy curd.
- Citrus Variations: While lemon is classic, you can experiment with other citrus fruits for the curd. Lime curd or even a grapefruit curd could offer interesting variations, though you might need to adjust the sugar and citric acid balance accordingly.
- Nut-Free Crust: For a nut-free option, you could explore a gluten-free oat flour crust or a traditional shortcrust pastry (though this would involve a rolling pin and would not be gluten-free unless specified).
- Flavoring the Meringue: A touch of vanilla extract or even a few drops of almond extract could be added to the Italian meringue for a subtle flavor enhancement, though it’s perfect as is.
Chef’s Tip: Almond Flour vs. Almond Meal – Know the Difference!
Understanding the distinction between almond flour and almond meal is crucial for achieving the desired texture in your baked goods, especially for delicate crusts like this one. **Almond flour** is produced from blanched almonds (meaning the skins have been removed) and is ground very finely. This fine texture results in baked goods with a smoother, more tender crumb and is ideal for recipes like tart crusts, cakes, and pastries where a delicate finish is desired. **Almond meal**, on the other hand, is typically made from whole almonds (with their skins left on) and has a much coarser, grainier texture. While it can be used for more rustic recipes, using almond meal in this tart crust could make it gritty and potentially affect how well it holds together, leading to a less refined result. Always opt for superfine almond flour for the best outcome.
Detailed Recipe Instructions
Creating this magnificent lemon meringue tart is a rewarding process, broken down into manageable stages: preparing the crust, making the lemon curd filling, and finally, crafting the Italian meringue. Each step is designed for clarity and success.
For even more detailed, step-by-step instructions with accompanying photos, especially for forming the crust, click here to see details for how to make the tart crust. You will need a 9-inch tart pan with a removable bottom, which is essential for easy serving and a beautiful presentation.
Step 1: Preparing the Almond Flour Tart Crust
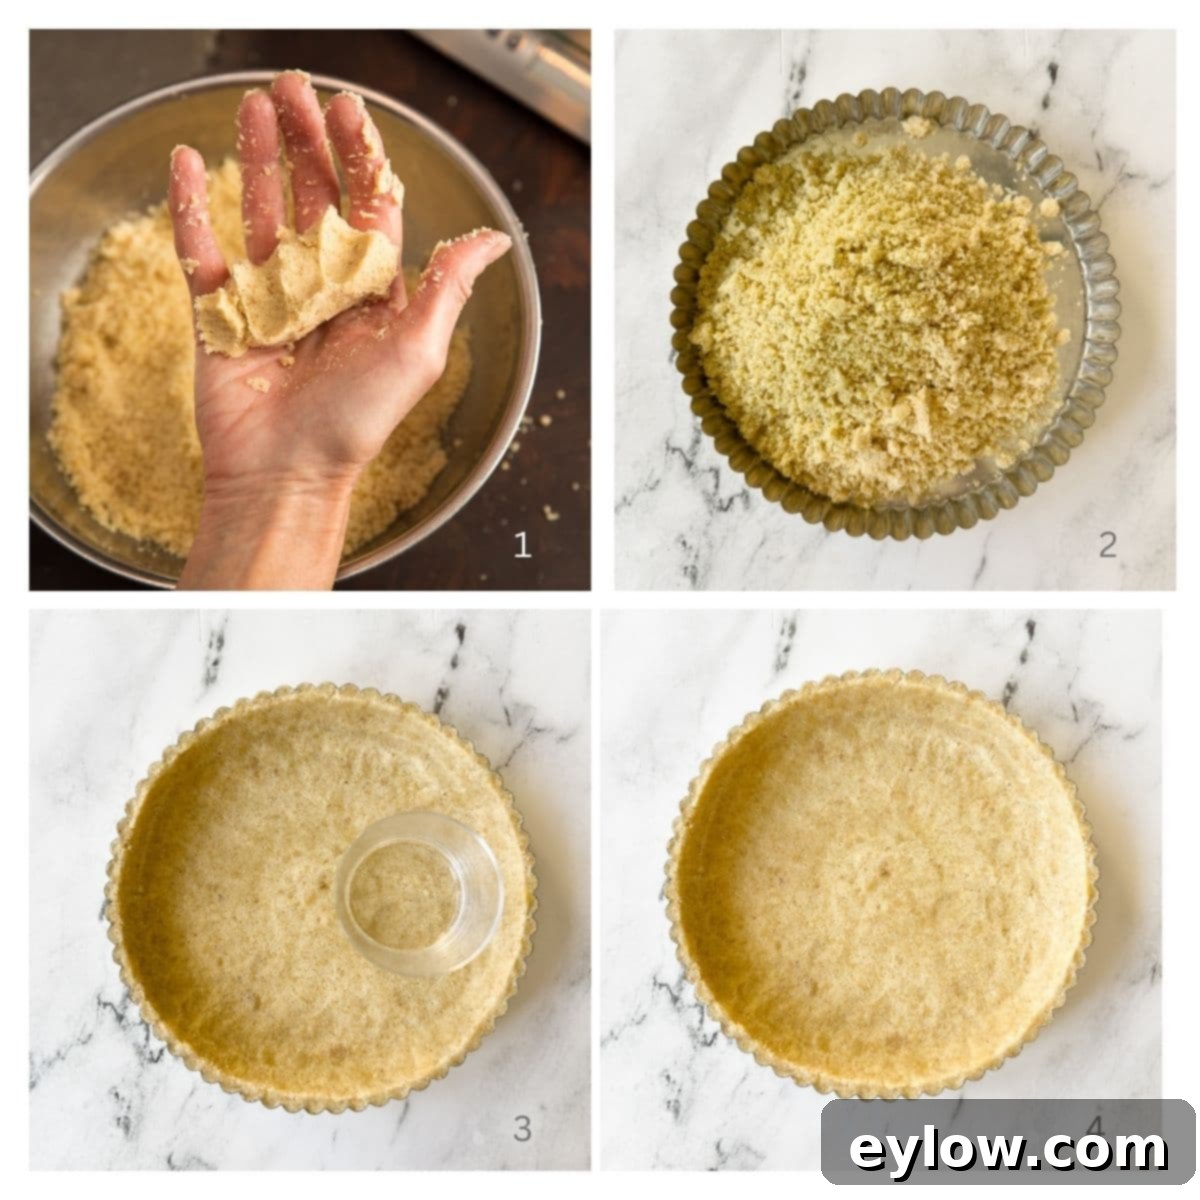
- Combine Ingredients: In a medium-sized mixing bowl, combine the almond flour, coconut flour, light brown sugar, melted unsalted butter, and sea salt. Use a fork to mix until the ingredients are well incorporated and start to hold together. Then, switch to your fingers and blend thoroughly, squeezing the mixture until it forms a cohesive, moist dough when pressed.
- Press into Tart Pan: Pour the entire crust mixture into your 9-inch tart pan with a removable bottom. Begin by distributing the mixture evenly across the bottom and up the sides.
- Form the Edge and Base: Using your fingers, firmly press the mixture to create a strong, even edge around the rim of the tart pan. Then, press the remaining mixture onto the bottom, ensuring it’s flat and evenly thick. This press-in method is incredibly forgiving and much easier than rolling out traditional dough.
- Bake and Cool: Bake the crust in a preheated oven at 350°F (177°C) for 15-17 minutes, or until it turns a light golden brown. Once baked, remove from the oven and allow it to cool completely on a wire rack before filling. You can also bake the crust a day ahead; simply wrap it tightly once cooled and store it at room temperature.
Step 2: Crafting the Silky Lemon Curd Filling
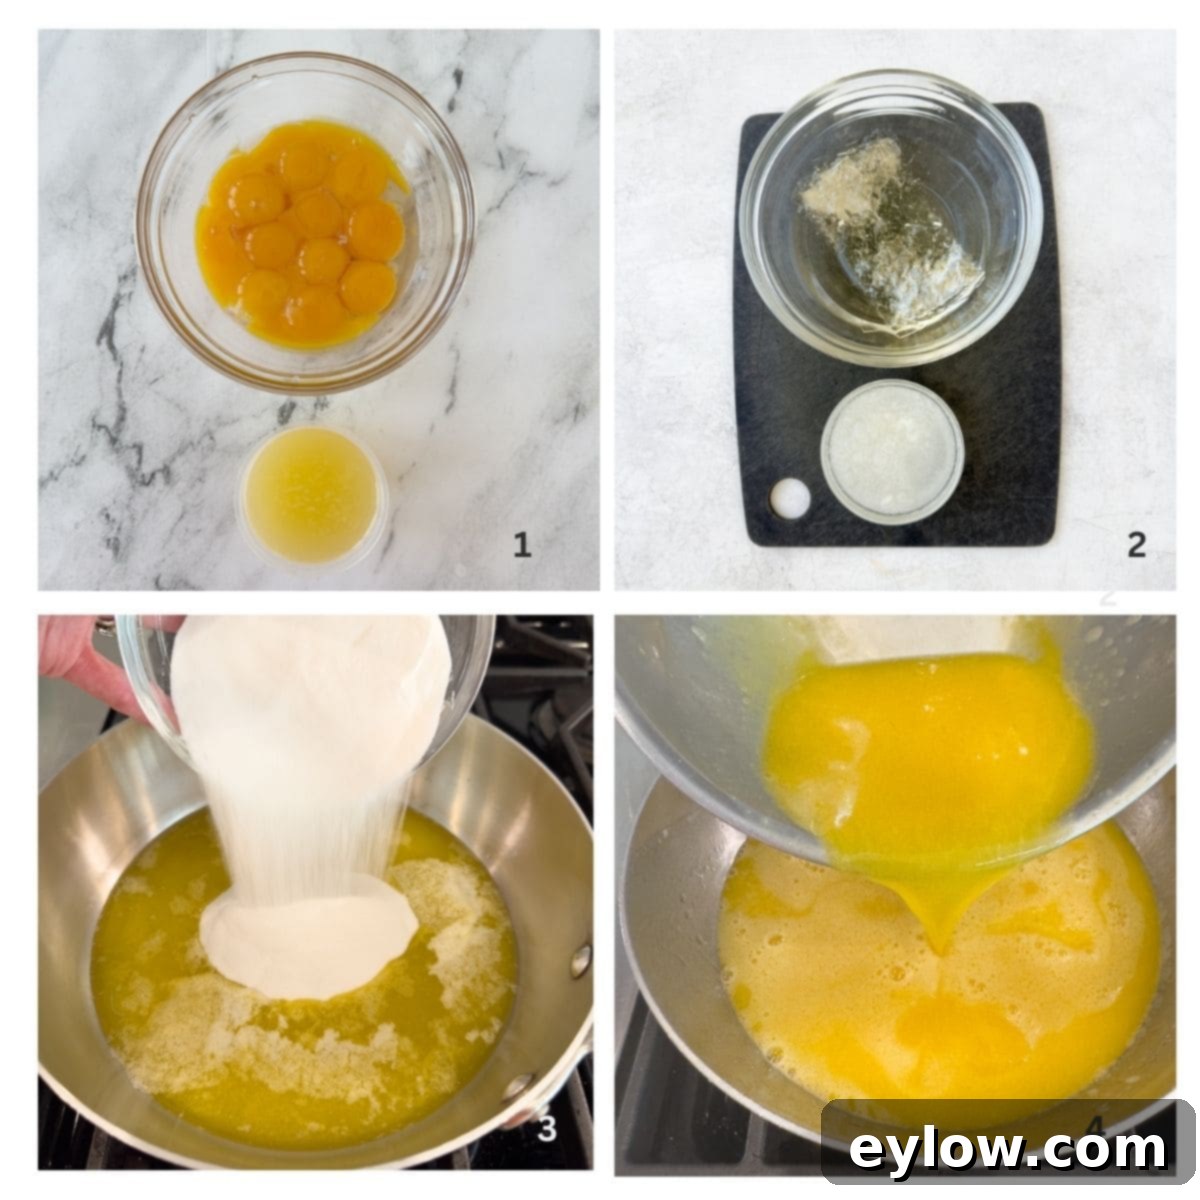
- Prepare Eggs and Lemons: Whisk the 12 egg yolks in a medium bowl until they are smooth and uniformly yellow. Juice the lemons, then strain the fresh lemon juice to remove any pulp or seeds, ensuring a perfectly smooth curd.
- Bloom Gelatin: Follow the recipe card details for blooming your chosen gelatin. For powdered gelatin, sprinkle it over 2 tablespoons of cold water in a small bowl and let it sit for 5-10 minutes until it swells and softens. For leaf gelatin, cut the sheets into smaller pieces, cover them with cold water, and let them soften.
- Melt Butter & Heat Lemon Mixture: In a 3-quart saucepan over medium-low heat, melt the unsalted butter. Add the strained lemon juice (and citric acid powder if you’re using Meyer lemons) and your chosen sweetener (sugar or allulose). Whisk continuously until the sugar dissolves and the mixture is smooth and hot, with small bubbles forming around the edges.
- Temper the Eggs: This is a crucial step to prevent the eggs from scrambling. While whisking the egg yolks continuously, slowly drizzle about half of the hot butter-lemon mixture into the yolks. This gradually brings the temperature of the yolks up without cooking them. Once tempered, pour the entire egg-lemon mixture back into the saucepan with the remaining hot liquid. Cook over medium-low heat, whisking constantly. You’ll feel it start to thicken, typically within 3-4 minutes, reaching a custard-like consistency. It should coat the back of a spoon.
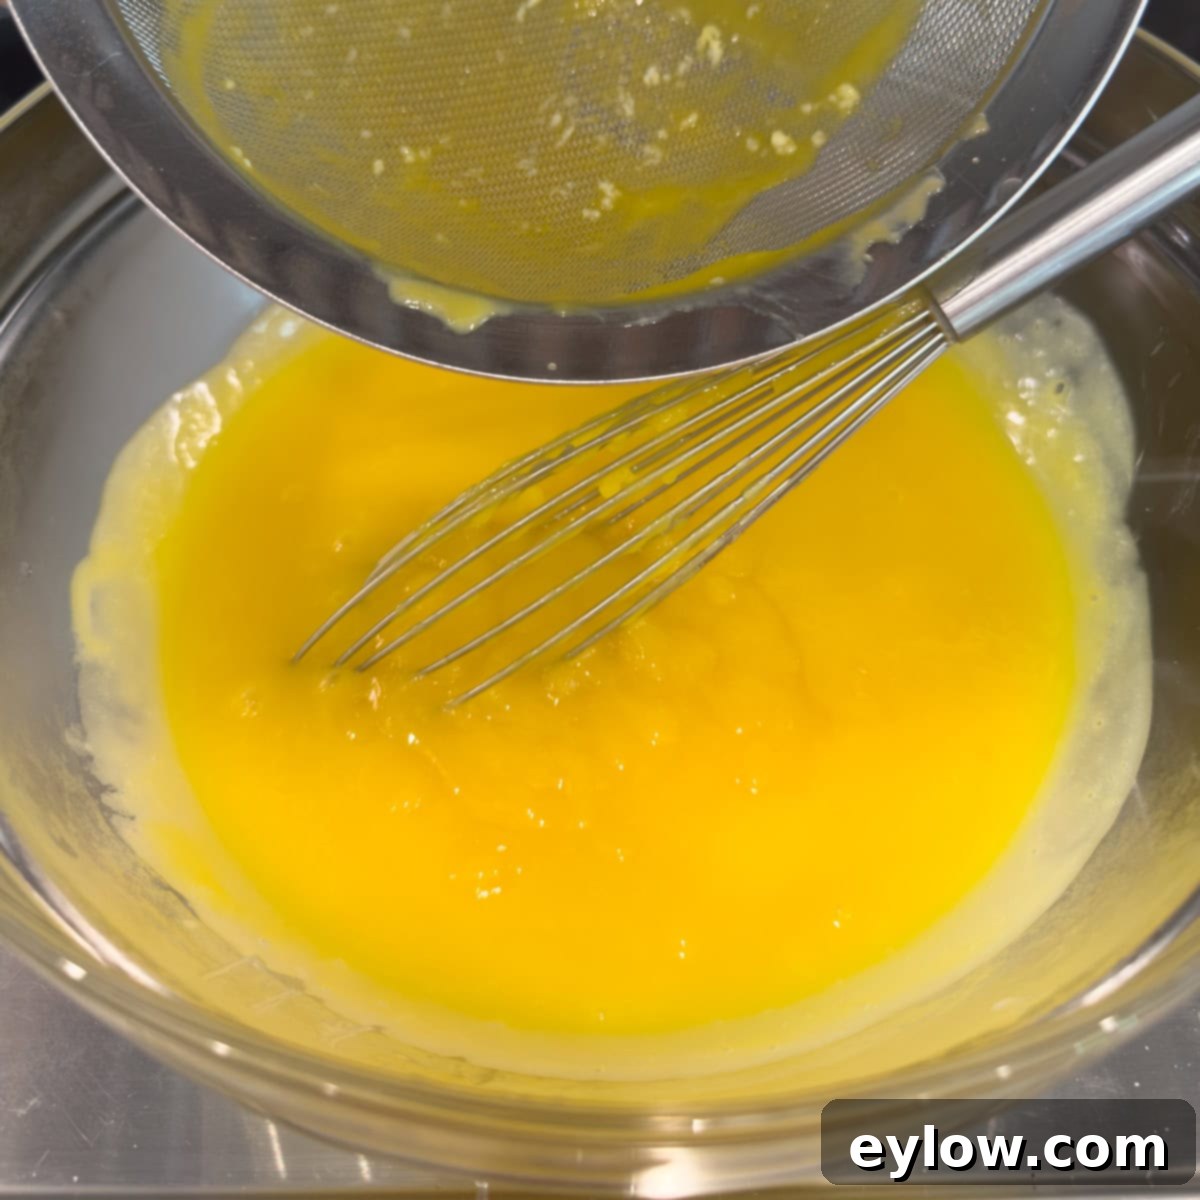
5. Strain and Add Gelatin: Immediately pour the hot lemon curd through a fine-mesh sieve into a clean bowl. This step catches any tiny cooked egg bits, ensuring your curd is perfectly smooth and silken. While the curd is still hot, add the bloomed gelatin (squeeze excess water from leaf gelatin before adding) and stir vigorously until it is completely dissolved and the curd is smooth.
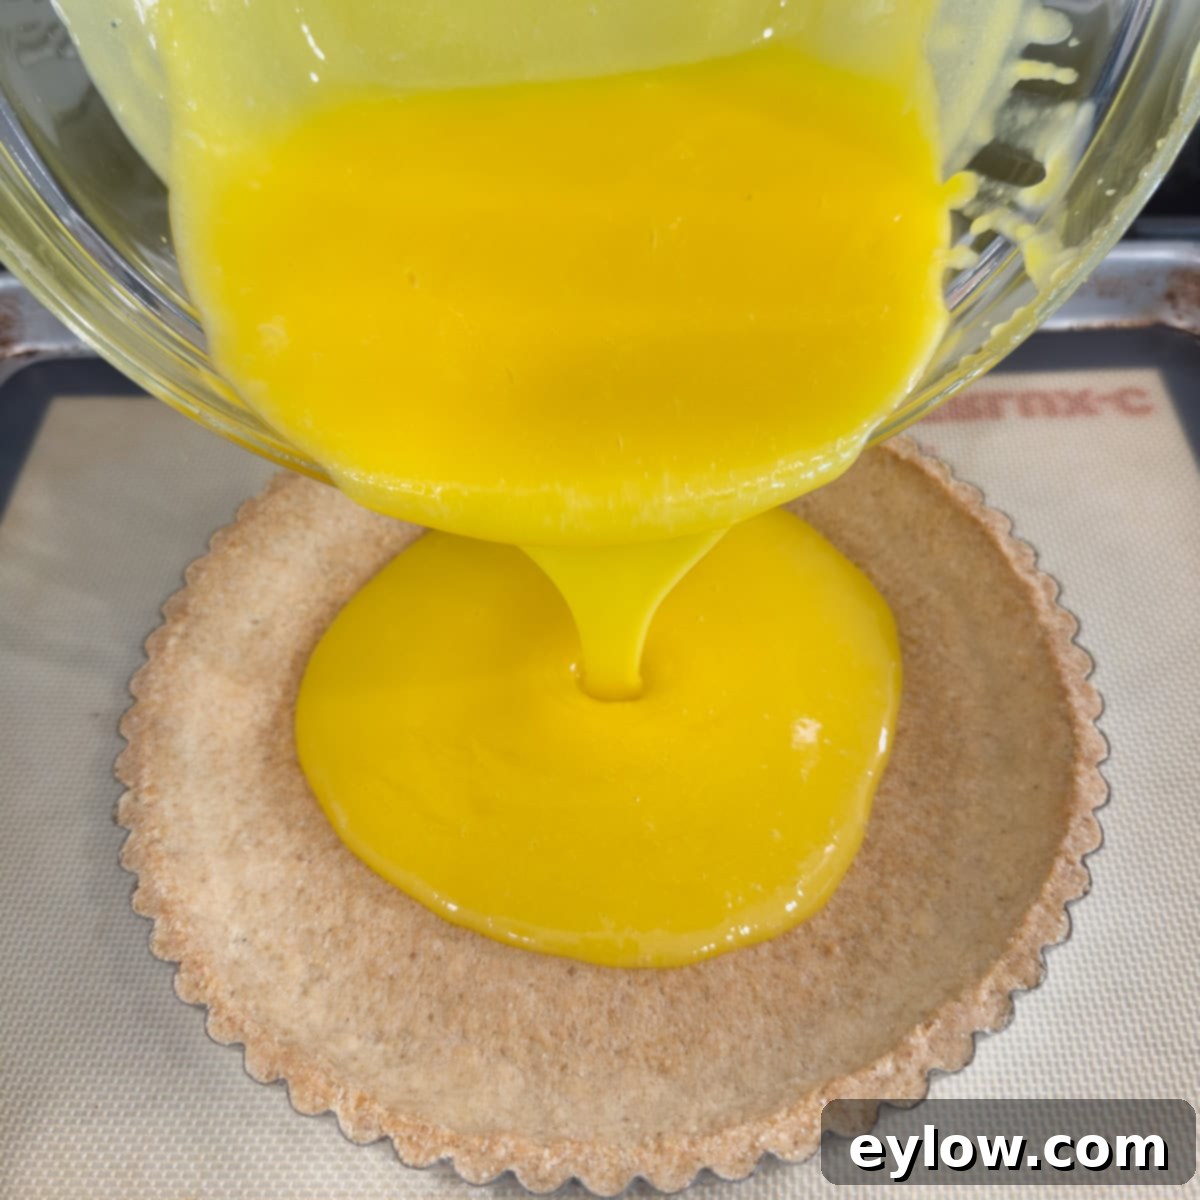
6. Cool and Fill: Allow the lemon curd to cool for 15-20 minutes at room temperature. This brief cooling period is important as it prevents the hot curd from softening the crust too much. Once slightly cooled, carefully pour the luscious lemon curd into your pre-baked tart shell and prepare it for its final bake.
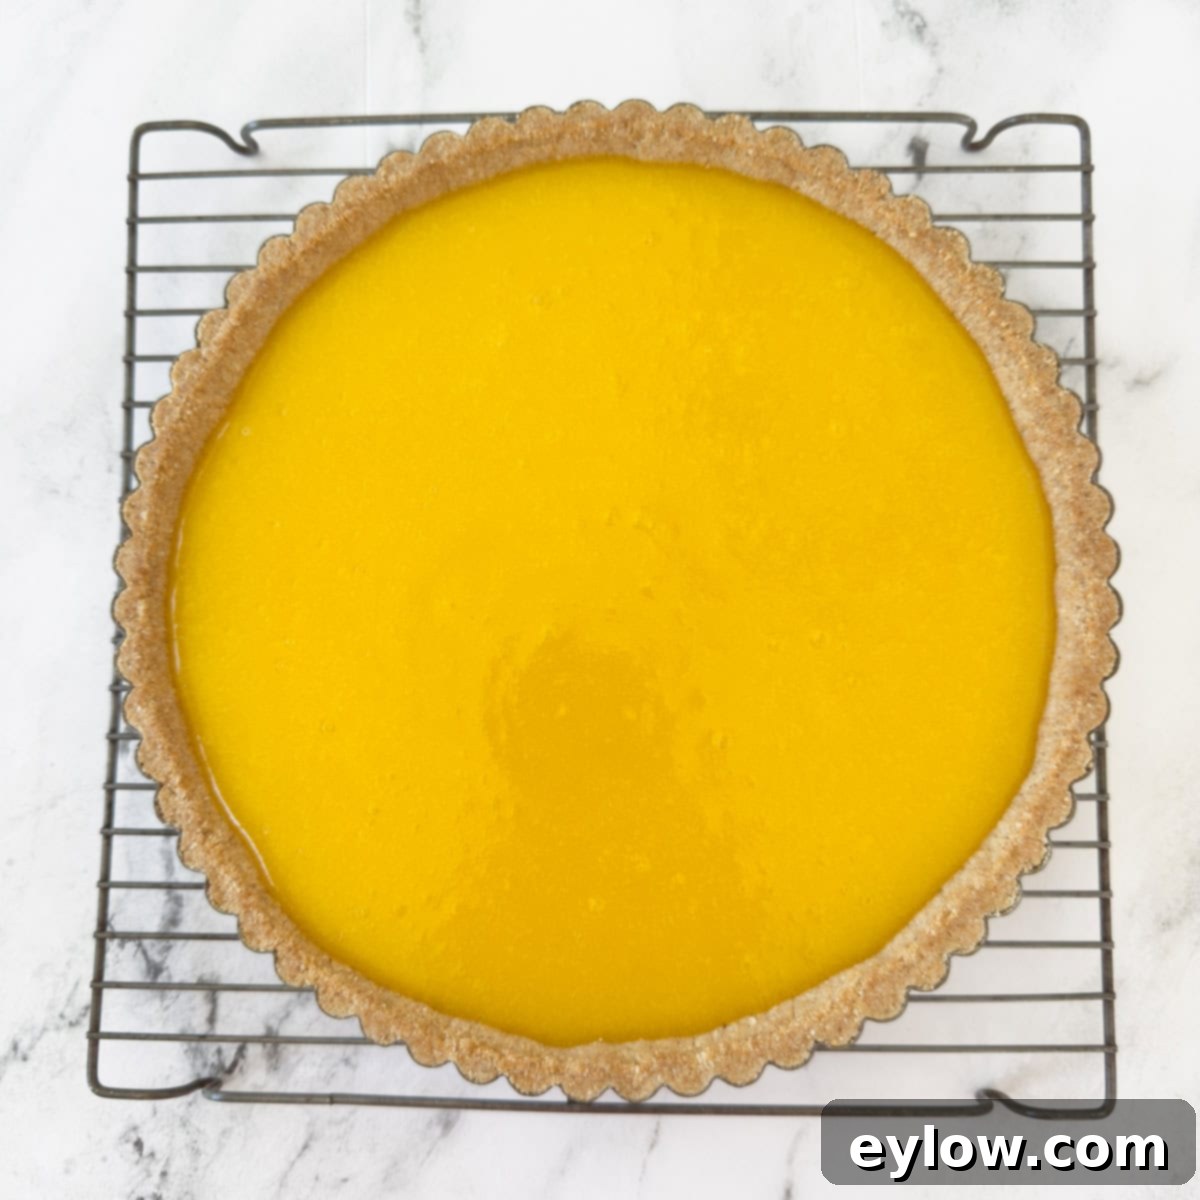
7. Final Bake and Chill: Bake the filled tart at 325°F (160°C) for an additional 15 minutes. Remove the baked tart from the oven. At this stage, the filling will still appear fairly fluid and jiggly; this is normal. Allow it to cool completely at room temperature for about 1 hour. It should feel cool to the touch before you transfer it to the refrigerator. Refrigerate the tart for at least 2 to 3 hours, or preferably overnight, to allow the gelatin to fully set, ensuring the cleanest, most perfect slices. The tart will be fully set with no jiggle when ready.
Step 3: Mastering the Italian Meringue Topping
Tool Tip: For perfect Italian meringue, an inexpensive digital candy thermometer is an invaluable tool. Precision in sugar syrup temperature is key!
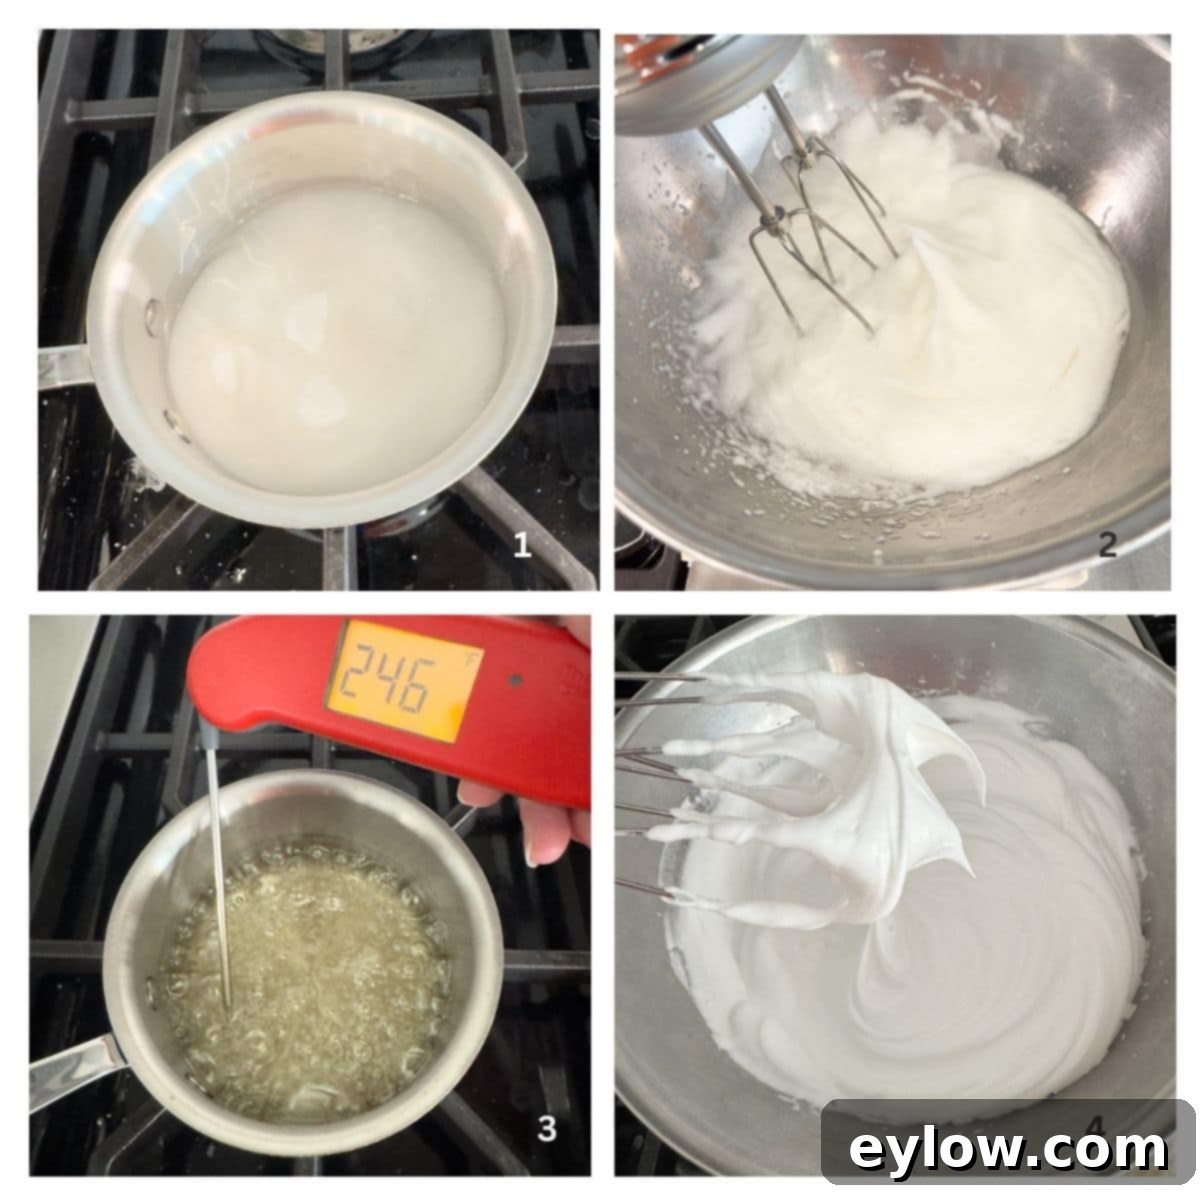
- Prepare Sugar Syrup: In a small, heavy-bottomed saucepan, combine the superfine sugar and water. Bring the mixture to a boil over medium-high heat. Resist the urge to stir the syrup once it starts boiling, as this can cause sugar crystals to form.
- Whip Egg Whites: In a very clean, dry mixing bowl (preferably metal or glass) of a stand mixer fitted with the whisk attachment, begin whipping the 3 large egg whites on medium speed until they become foamy. At this point, add the cream of tartar, then increase the speed to medium-high and continue whipping until soft peaks form. Soft peaks will hold their shape but gently curl over at the tip when the whisk is lifted.
- Cook Sugar Syrup to Temperature: Continue to cook the sugar syrup without stirring until it reaches a temperature of 246°F – 248°F (119°C – 120°C). This temperature is crucial for achieving a stable, firm Italian meringue.
- Combine Syrup and Meringue: Immediately remove the hot sugar syrup from the stove. With the mixer running on high speed, slowly and carefully pour the hot syrup in a thin, steady stream down the side of the mixing bowl (not directly onto the whisk) into the whipping egg whites. Continue whipping on high speed for 5-7 minutes, or until the meringue is glossy, forms stiff peaks, and the bowl feels cool to the touch. This process cools the meringue and develops its strong, stable structure.
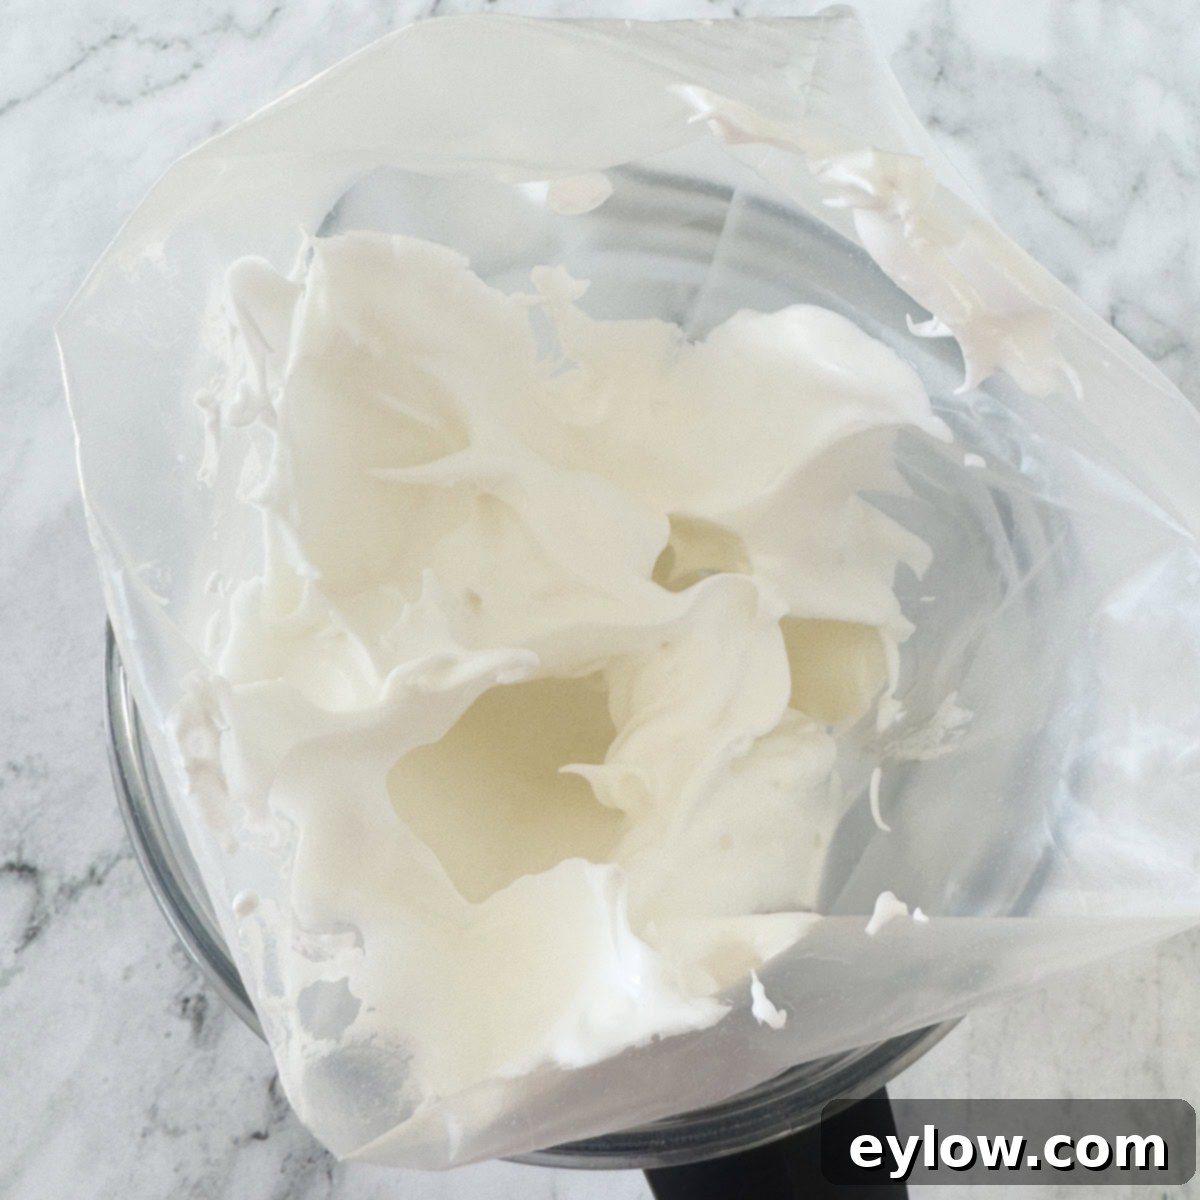
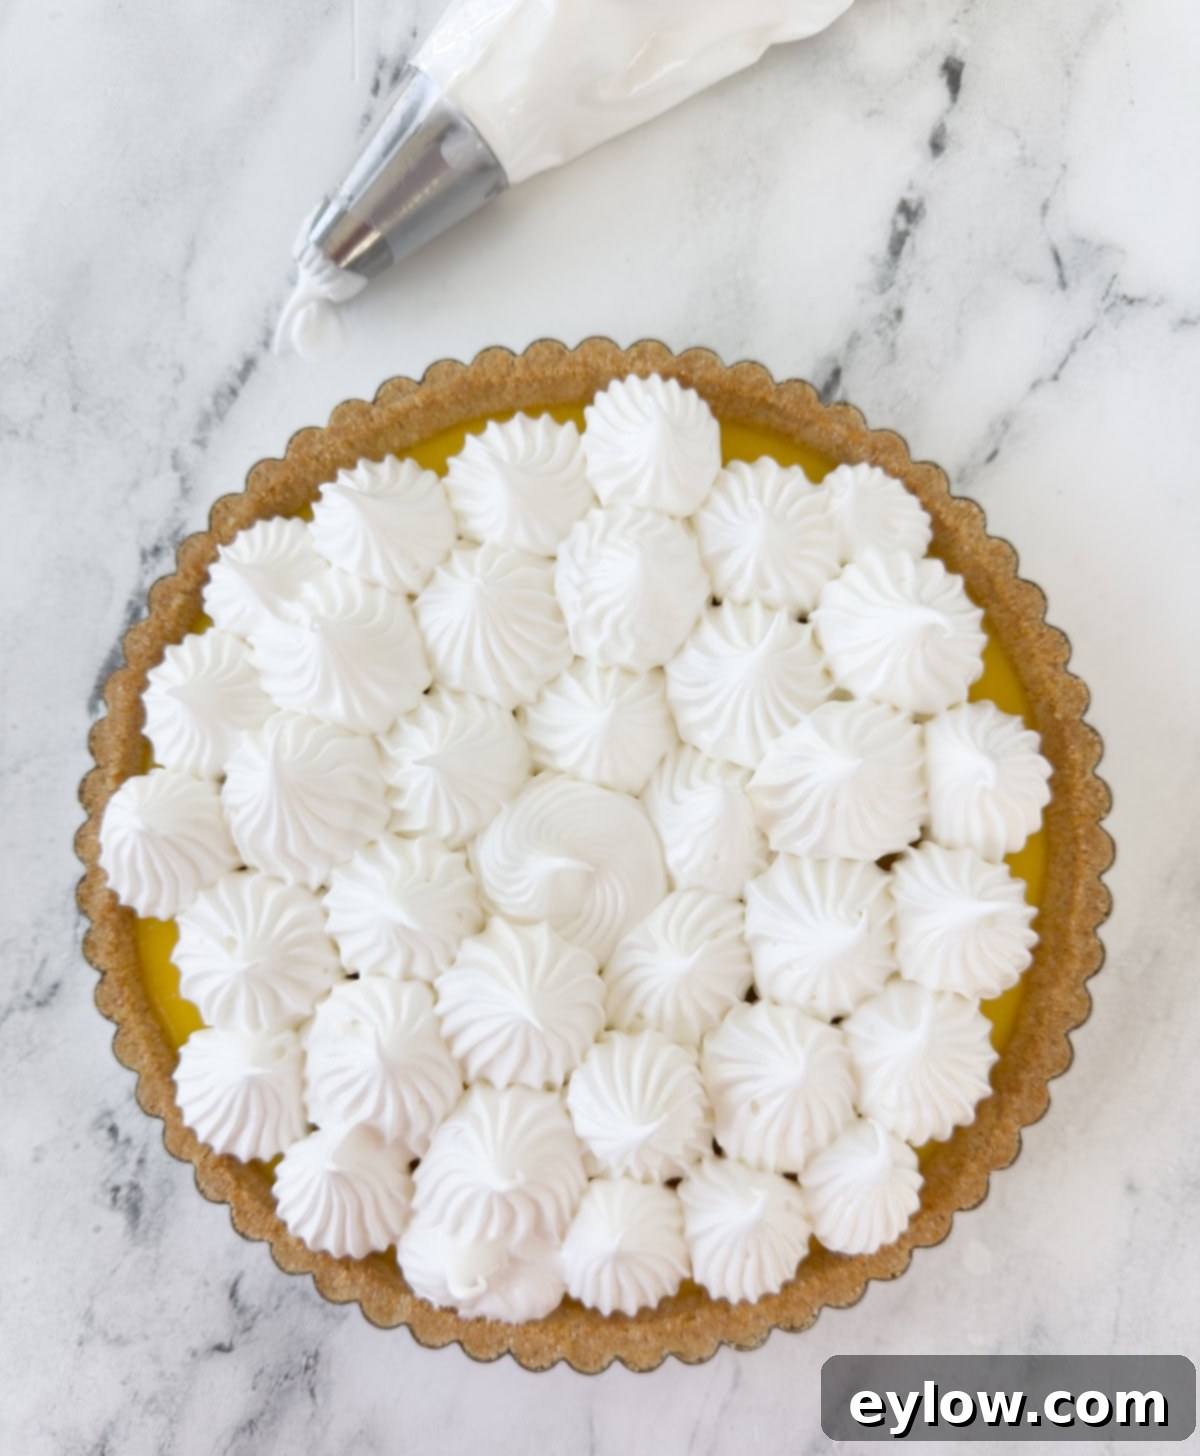
Pipe and Serve (or Torch): Once the Italian meringue is ready, scoop it into a piping bag fitted with your favorite star tip. Fold the top of the piping bag down to create a “collar,” which makes filling it much easier and less messy. Pipe decorative swirls or puffs onto the completely cooled and set lemon tart as creatively as you please. The tart is now ready to serve immediately, or you can refrigerate it for a few hours until needed. If you desire that classic golden-brown finish, use a kitchen torch to lightly toast the meringue peaks before serving. It’s truly delicious both ways, but torching adds an extra layer of visual appeal and a slightly caramelized flavor.
Chef’s Tip for Perfect Meringue Volume and Stability: Achieving a beautifully voluminous and stable meringue relies on a few critical factors. Always start with an impeccably clean and dry mixing bowl and beaters. Even the slightest trace of grease, oil, or residual egg yolk can contaminate the egg whites and prevent them from whipping up properly, resulting in a flat or unstable meringue. For best results, use a metal or glass bowl rather than plastic, as plastic can sometimes retain greasy residues. Additionally, while it’s easier to separate cold eggs, allow your egg whites to come to room temperature before whipping. Room temperature egg whites have a lower surface tension, allowing them to incorporate more air and whip to a significantly better volume and a more stable foam.
Serving Your Exquisite Lemon Meringue Tart
This lemon meringue tart is a true stand-alone dessert, elegant and flavorful enough to shine on its own. For the best experience, serve it slightly chilled from the refrigerator or at a cool room temperature. This allows the lemon curd to be perfectly set and refreshing, while the meringue remains light and airy.
If you wish to elevate its presentation or add a touch of extra freshness, consider these simple enhancements:
- Fresh Berries: A scattering of fresh raspberries, blueberries, or sliced strawberries around the base of the tart, or alongside individual slices, adds a burst of complementary fruitiness and vibrant color.
- Mint Sprigs: A delicate sprig of fresh mint placed artfully on top of a slice or near the whole tart provides a beautiful pop of green and a subtle aromatic lift.
- Citrus Zest: A light dusting of fresh lemon zest just before serving can intensify the lemon aroma and add an extra layer of visual appeal.
- Powdered Sugar: For a subtle, elegant touch, lightly dust the platter or plate with a sprinkle of powdered sugar.
The tart’s bright flavor and stunning appearance make it a fantastic conclusion to any meal, from a casual brunch to a formal dinner party. It’s also a delightful treat for afternoon tea or a celebratory dessert.
Lemon Meringue Tart Recipe FAQs
Here are some frequently asked questions about making and enjoying this delicious lemon meringue tart to help you perfect your baking and make the most of your dessert.
Absolutely! This tart is excellent for advance preparation, making it a stress-free option for entertaining. You can prepare just the almond flour crust or even the crust with the lemon curd filling a day ahead. Ensure the curd-filled tart is fully chilled and set in the refrigerator. However, I recommend preparing the Italian meringue topping on the day you plan to serve, as meringue is freshest and most stable immediately after it’s made.
For optimal freshness, flavor, and texture, this lemon meringue tart is best enjoyed within 1-2 days of assembly. While the lemon curd remains delicious, meringue tends to soften over time, especially when exposed to humidity. Store the tart covered (preferably loosely so the meringue doesn’t stick) in the refrigerator. Avoid humid environments, as moisture is the meringue’s arch-nemesis and will cause it to weep and lose its crispness quickly.
Italian meringue is the superior choice for this tart due to its inherent stability. It’s created by incorporating hot sugar syrup into whipping egg whites, which essentially cooks the egg whites, resulting in a very sturdy, glossy, and safe-to-eat meringue that doesn’t require baking to set. This stability allows it to hold its beautiful piped shape without deflating and makes it ideal for torching, giving you that delightful toasted marshmallow effect, unlike less stable meringues which might weep or collapse.
Certainly! If you’re looking to save time or prefer a different flavor profile, you can absolutely skip the meringue step. A wonderful alternative is to top the chilled lemon tart with a generous layer of lightly sweetened whipped cream. It’s a quick, easy, and equally delicious option that still provides a lovely contrast to the tangy lemon curd.
More Dessert Recipes for Lemon Lovers
We absolutely adore lemon here, and we know many of you do too! If you’re a true lemon lover and can’t get enough of its zesty, refreshing flavor, then you’ll definitely want to explore some of these other fantastic lemon dessert recipes. From light mousses to rich cakes, there’s a lemon treat for every craving.
- Easy Lemon Posset Recipe
- Super Moist Lemon Olive Oil Cake Recipe
- Homemade Lemon Custard Ice Cream
- Lemon Mousse (step by step)
Did You Make This Recipe? Share Your Experience!
We absolutely love hearing from you! If you’ve had the pleasure of making this delightful lemon meringue tart, please take a moment to share your experience by adding a comment below. Your feedback is incredibly valuable and helps not only us but also other readers who are considering trying out this recipe. We genuinely enjoy hearing your thoughts, tips, and success stories. And if you truly loved creating and tasting this tart, please consider giving it a 5-star rating! Your ratings and comments are a wonderful way to show your appreciation and help our community grow.
📖 Recipe
Lemon Meringue Tart
Sally Cameron
Pin Recipe
Equipment
-
1 9″ tart pan with removable bottom
-
sheet pan
-
Silpat silicone liner optional
-
Whisk
-
Piping bag with star tip optional
-
Butane torch head optional for torching meringue
-
Butane fuel optional for torching meringue
-
Candy thermometer or digital thermometer
-
Kitchen scale optional but highly recommended
Ingredients
Almond flour tart crust (directions link below)
- 1 ½ cups superfine almond flour 6 ounces Bobs Red Mill
- ½ cup coconut flour 2 ounces Bobs Red Mill
- 6 tablespoons unsalted butter melted
- 2 tablespoons light brown sugar
- ¼ teaspoon sea salt
Lemon curd tart filling (yield 2 cups)
- 12 large egg yolks save 3 whites for meringue
- ¼ pound unsalted butter 8 tablespoons
- 1 cup strained fresh lemon juice 4 large lemons
- 1 cup + 2 tablespoons superfine sugar or 1 ½ cups powdered allulose for sugar-free
- ½ teaspoon powdered citric acid if using Meyer lemons
- 2 ½ sheets leaf gelatin 170 bloom or regular gelatin powder, 1 packet
Italian meringue
- 3 large egg whites from the lemon curd, 90 grams of white.
- ¾ cup superfine sugar
- ¼ cup water
- ¼ teaspoon cream of tartar
- 1 pinch salt
Instructions
Make the tart crust (a day ahead if desired)
-
Pre-heat oven to 350° (177 C). In a medium bowl, mix almond flour, coconut flour, sugar and melted butter with a fork until blended, then blend until completely combined with your fingers. To test, squeeze a handful together. It should hold together and feel moist.
Dump all of the crust mix into the tart pan and begin to press in the crust starting with creating a strong edge and the bottom last. To see full tart directions and photos please follow the link at the bottom of the recipe.
Make the lemon curd filling
-
Separate your eggs, using 12 yolks for the filling and saving 3 egg whites for the meringue.
-
First bloom the gelatin. For powdered gelatin, add powder to 2 tablespoons of water, stir, and let bloom for 5-7 minutes in a small bowl. For leaf gelatin, cut the leaves in pieces and cover with cold water in a small bowl.
-
Melt butter in a 3 quart pan over medium low heat. Add the lemon juice (and citric acid if needed) and sugar or sifted allulose and whisk until smooth.
Whisk the yolks until smooth in a medium bowl. When the butter lemon blend is hot (small bubbles around the edges of the pan), slowly drizzle it into the egg yolks whisking continually until totally incorporated. This is called tempering, so the eggs don’t scramble.
-
Pour the entire mix back into the pan and cook over medium low heat, whisking continually, until you feel it thicken, 3-4 minutes. Pour the hot lemon curd through a fine sieve to catch any cooked egg bits and while hot, add the bloomed gelatin and mix until smooth.
Cool the lemon filling 20-30 minutes before pouring into the tart shell before baking. This protects the crust and ensures a smooth, even set during baking.
Bake and cool
-
Pre-heat the oven to 325°F (conventional). Place the tart shell on the baking sheet for stability, then pour lemon curd in and bake for 15 minutes at 325°F.
-
Remove tart from oven and carefully place on a wire rack to cool when you can handle it. Filing will be fairly fluid and jiggly, not set (until it cools).
-
Let tart cool at room temperature for about 1 hour. Refrigerate for 2 to 3 hours or overnight for the cleanest slices.
Make meringue, pipe, and torch (optional)
-
Whip meringues to soft peaks with a hand mixer on medium high speed, adding cream of tartar at the foamy point. Whip to soft peaks, so when you turn the beaters upside down the tip drops over.
-
Make the sugar syrup. Add sugar and water to a small pan. Bring to a boil and cook until sugar syrup reaches 246°F degrees for a stiff meringue, or 240°F – 242°F for a softer more marshmallow texture meringue.
-
When sugar syrup is to the right temperature, immediately remove it from the heat and slowly pour in into the side of the bowl of meringue while whipping on high speed. Whip on high speed as the meringue cools.
Continue whipping the meringue until glossy peaks form and to cool the meringue 5-7 minutes. Meringue is ready to use.
-
Fill a piping bag fitted with a star tip to pipe a decorative top or spoon and swirl meringue on top of the tart and arrange as you please.
The final step if desired is to carefully use a blow torch to brown the top. Use a low flame and move the torch across the meringue until you have enough browned meringue. Don’t rush this step. When done torching, it’s ready to serve.
-
Slicing trick – Use a long thin slicing knife and wipe it off on paper towels or a kitchen towel between each slice for clean slices.
Notes
Since this lemon meringue tart includes three components, the tart crust ingredients are listed here and in the recipe card. For the step-by-step instructions, click here to see how to make the almond flour tart crust.
Nutrition calculation note – As powdered allulose is not metabolized by the body, the carb numbers should be 31 grams per serving for all of the crust, filling and meringue.
