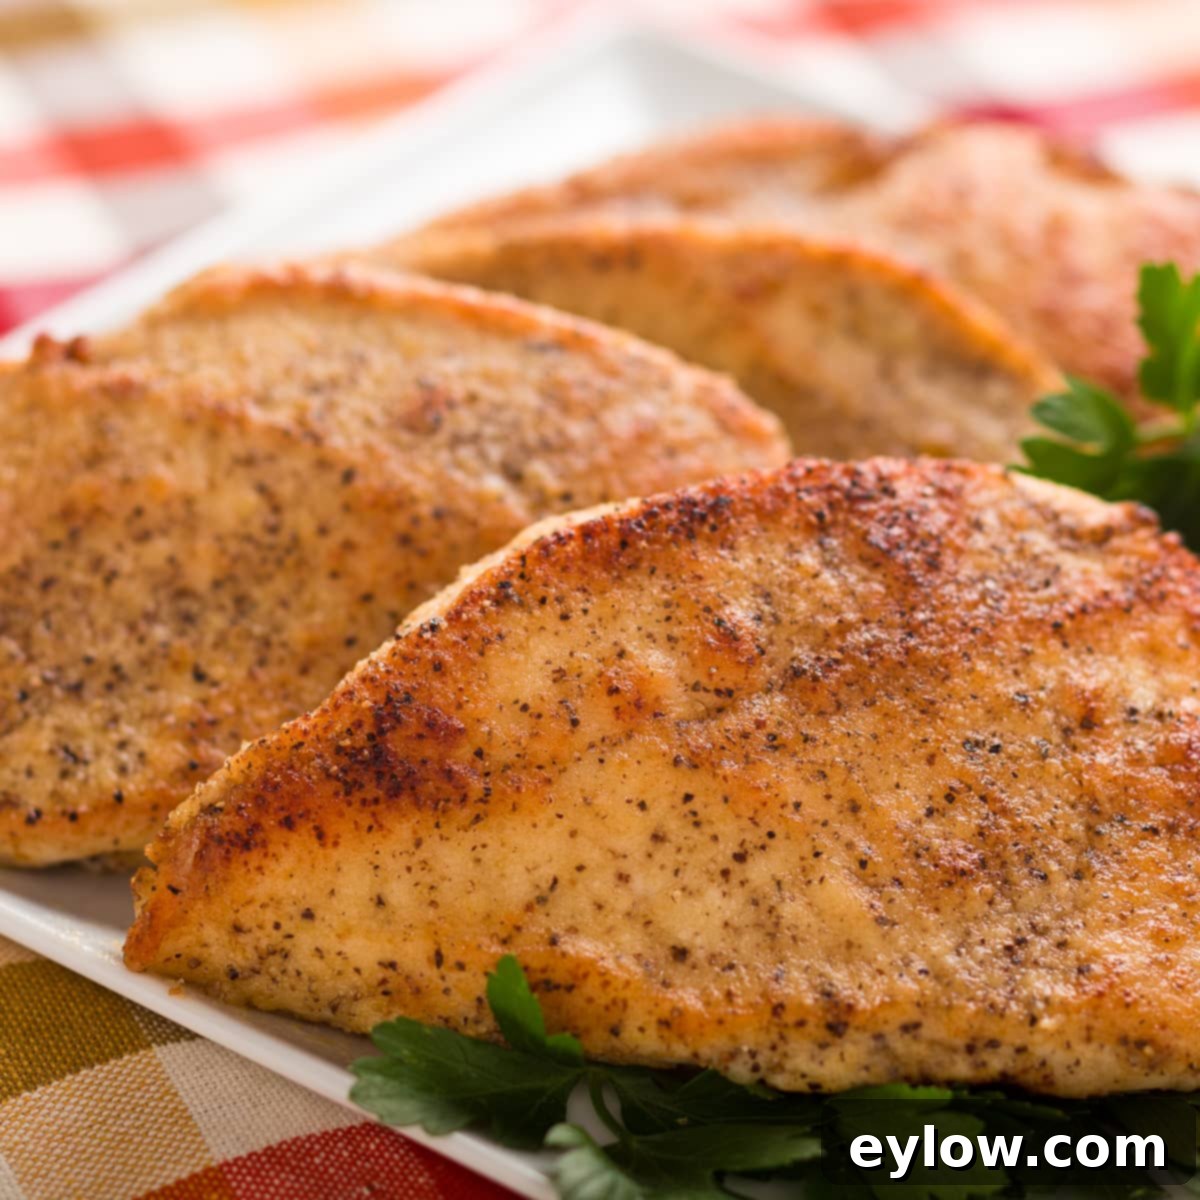
Golden Chicken Cutlets: Your Ultimate Guide to Quick, Crispy, and Versatile Dinners
Transforming simple boneless, skinless chicken breasts into irresistibly crisp, golden-brown chicken cutlets is a culinary secret every home cook should master. This straightforward technique allows you to create a delicious meal in mere minutes, making it an ideal solution for busy weeknights. Whether enjoyed plain with a squeeze of fresh lemon, smothered in a rich sauce, or incorporated into a more elaborate dish, these cutlets offer unparalleled versatility. They are not just for dinner; make a double batch, and you’ll have flavorful leftovers perfect for next day’s lunch – think gourmet sandwiches or vibrant salads. This comprehensive guide will walk you through everything you need to know, from perfectly slicing the chicken to exploring endless flavor variations, ensuring your homemade chicken cutlets are always a resounding success.
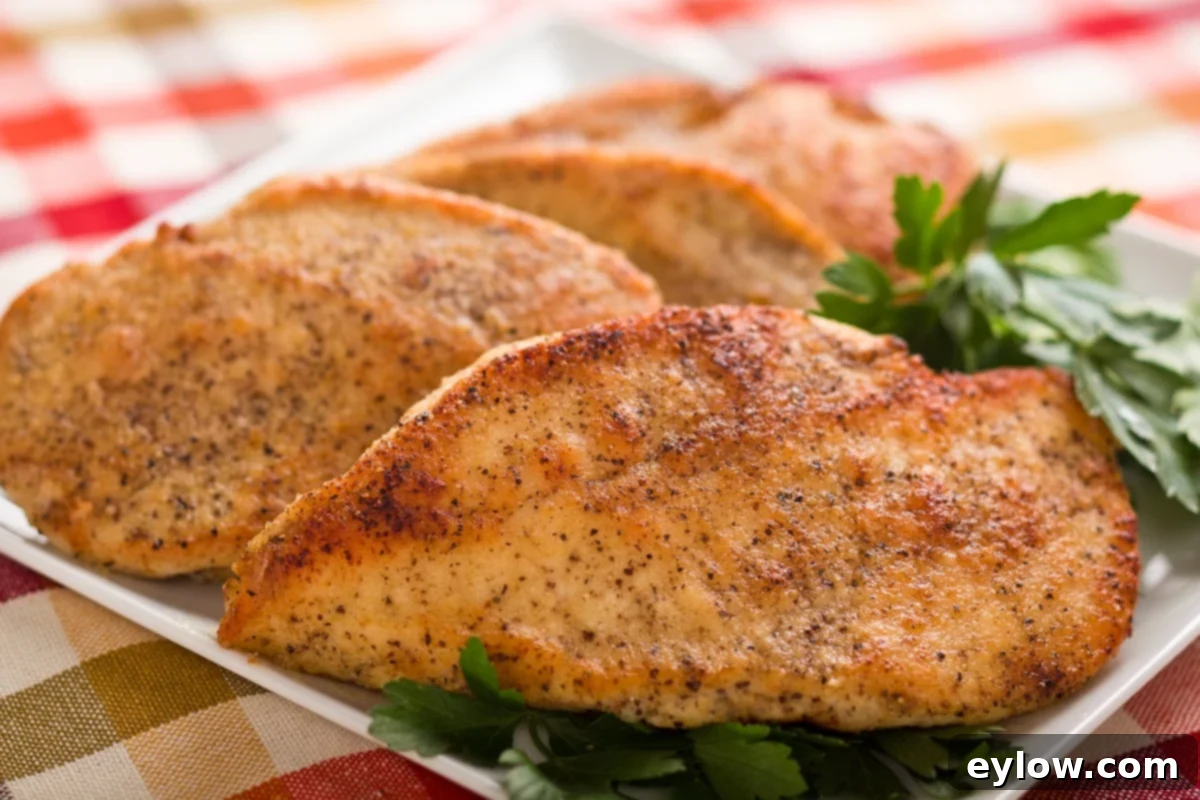
At its core, preparing chicken cutlets is more than just following a recipe; it’s mastering a fundamental cooking technique that unlocks a world of possibilities in your kitchen. By starting with boneless, skinless chicken breasts and expertly slicing them horizontally, you create thinner pieces that cook faster and more evenly, resulting in that desirable crispy exterior. The beauty lies in its inherent simplicity and adaptability – effortlessly conforming to your cravings and available ingredients. No fancy equipment or gourmet skills are required, just a sharp knife and a desire for delicious, speedy meals that satisfy everyone at the table.
How to Prepare Perfect Chicken Cutlets: Slicing Technique
Achieving uniformly cooked and tender chicken cutlets starts with proper preparation. While pre-sliced chicken cutlets are available, taking a few minutes to prepare them yourself ensures consistent thickness and often results in a more economical meal. This process is surprisingly easy and crucial for that quick-cooking, even texture you desire. Follow these steps for perfectly sliced boneless, skinless chicken breasts:
- Trim & Prep: Begin by placing your boneless, skinless chicken breasts on a clean cutting board. Carefully inspect and trim off any excess fat or detached chicken tenders. The tenders can be seasoned and cooked alongside your cutlets, as they are naturally thinner and will cook quickly.
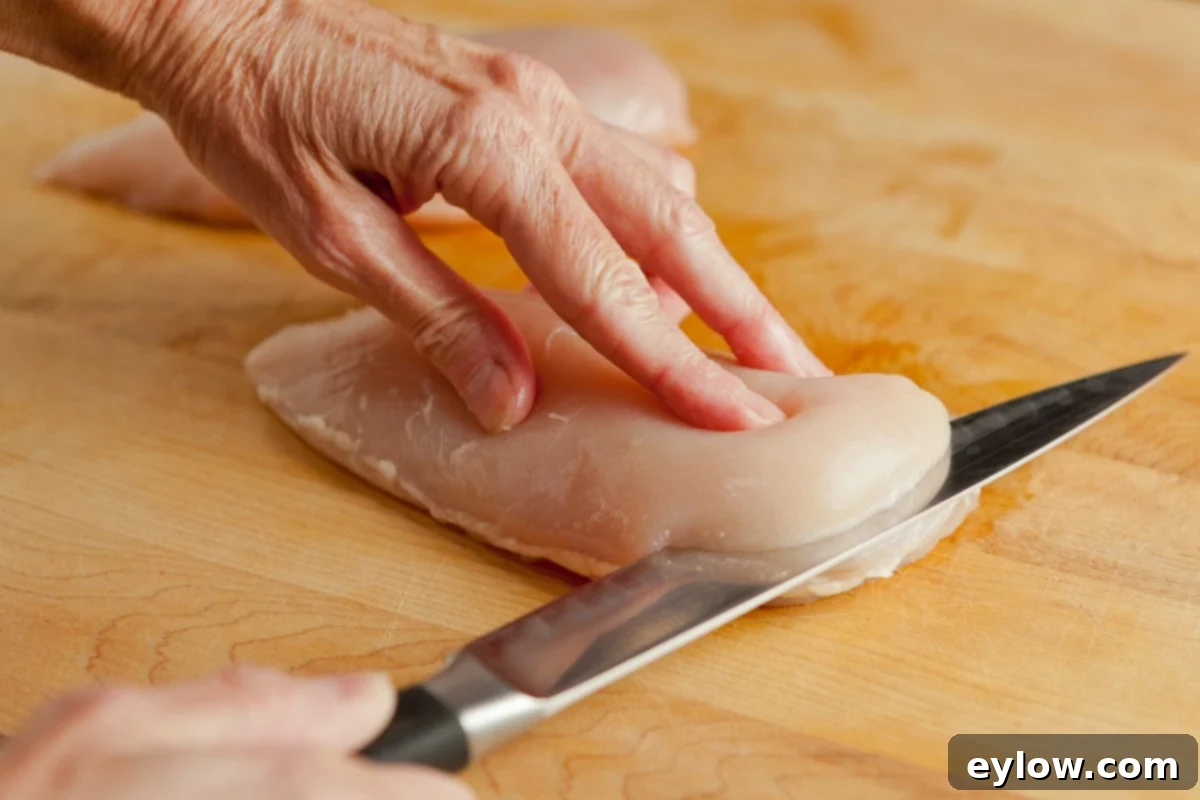
- Positioning for Stability: Orient the chicken breast with its rounded, smooth side facing up. This provides a stable and even surface for slicing. Place the palm of your non-dominant hand firmly but gently on top of the chicken breast, keeping your fingers curled slightly away from the knife’s path for safety.
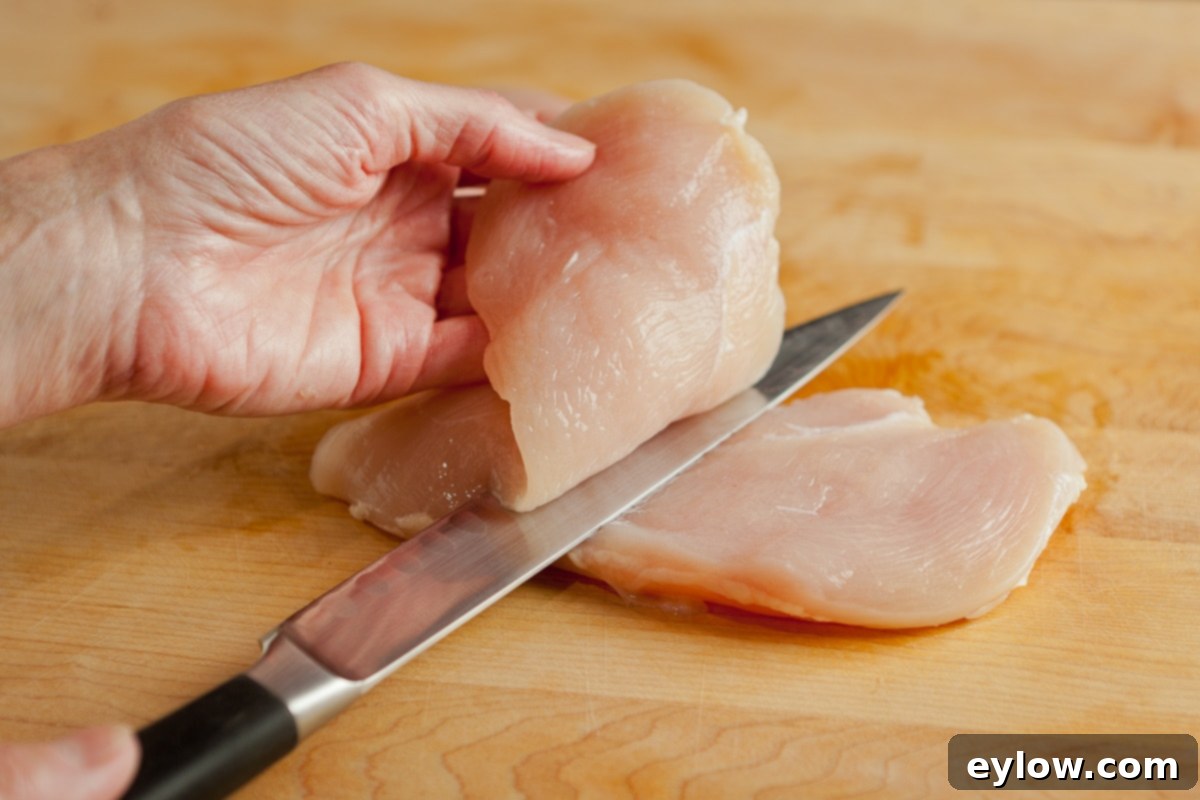
- The Precise Horizontal Slice: Using a very sharp, thin-bladed chef’s knife or a long carving knife, begin slicing the chicken breast in half horizontally. The critical aspect here is to keep your knife blade as parallel to the cutting board as possible throughout the entire cut. This technique ensures you create two equally thin pieces from one breast. If the chicken breast is particularly thick, you might find it helpful to make a small initial incision and then guide the knife through, gently wiggling it if necessary to maintain a smooth, even cut. Aim for cutlets approximately ¼ to ½ inch thick for optimal cooking time and texture.
- Why Slicing Matters: Slicing the chicken into thinner cutlets dramatically reduces cooking time and promotes more consistent cooking, preventing dry spots and ensuring every bite is tender and juicy. If your chicken breasts are already quite thin, you might choose to lightly pound them with a meat mallet between two pieces of plastic wrap instead of slicing, though slicing often yields a more uniform result suitable for pan-frying.
Seasoning for Infused Flavor
Chef’s Tip: Season the chicken directly for maximum flavor, not just the flour! This is a crucial step for infusing flavor deep into the meat itself. While the flour coating undeniably contributes to the textural experience, seasoning the chicken before flouring offers more control over the taste profile. After you’ve sliced your chicken into cutlets, generously season both sides with a robust blend of sea salt, freshly ground black pepper, and granulated garlic. Granulated garlic is often preferred over garlic powder for its superior flavor distribution and less tendency to clump. For an extra layer of complexity and aroma, consider incorporating a pinch of sweet or smoked paprika for color, a dash of onion powder, or a hint of dried Italian herbs like oregano or thyme. Don’t be shy with the seasoning; these thin cutlets benefit greatly from a well-flavored base.
Achieving a Perfectly Crispy Crust with the Right Flour
The signature thin, golden, and undeniably crispy crust is a hallmark of a perfectly cooked chicken cutlet, and it all begins with selecting and applying the correct flour. A light, even dusting of flour not only contributes to that appealing golden color and toasted flavor but also forms a crucial barrier that helps to keep the chicken moist and tender inside. You have several excellent options for flour, allowing you to tailor the recipe to your dietary needs and desired texture:
- White Whole Wheat Flour: This is an excellent choice for a classic, slightly nutty flavor and a reliably crisp finish. It offers a little more nutritional value than standard all-purpose flour without being too heavy.
- Gluten-Free Options: For those managing gluten sensitivities or celiac disease, Coconut flour or brown rice flour work wonderfully. Coconut flour can impart a subtle sweetness and a fine, delicate crisp texture, while brown rice flour offers a neutral taste and a satisfying crunch. A high-quality gluten-free all-purpose flour blend is also a convenient and effective choice.
- For Extra Crispness: To achieve an even lighter and shatteringly crisp coating, consider blending a small amount of cornstarch (approximately 1-2 tablespoons per ½ cup of your chosen flour) into your flour mixture. Cornstarch is renowned for its ability to create an incredibly delicate and crispy exterior.
To dust the cutlets effectively, place your seasoned chicken cutlets in a shallow dish or a Ziploc bag with the flour. Lightly coat both sides, ensuring they are evenly covered but critically, not caked. Gently shake off any excess flour – a thin, uniform layer is paramount to achieving a truly golden and crisp finish. Too much flour can lead to a gummy texture and prevent proper browning, resulting in a less appealing end product.

Perfecting the Pan-Frying Technique for Golden Chicken Cutlets
Cooking chicken cutlets is remarkably fast, but a precise technique is essential to ensure they are perfectly golden, crisp on the outside, and tender and juicy within. The method is simple, yet a few key details make all the difference for achieving consistently delicious results:
- Choose the Right Pan: A medium to large sauté pan or skillet (ideally 11-12 inches in diameter) with a heavy bottom is best. This type of pan ensures even heat distribution, which is crucial for uniform cooking and browning. Cast iron or stainless steel pans are excellent choices for achieving that desirable golden sear.
- Achieve Optimal Heat and Oil Temperature: Place your chosen pan over medium heat. Add your preferred cooking oil – coconut, olive, or avocado oil are all excellent, healthy options. For an extra layer of richness and superior browning, a combination of oil and unsalted butter is highly recommended. Heat the oil until it’s shimmering and just starting to show a few wisps of smoke (for oils with a higher smoke point) or the butter begins to bubble gently and the foam subsides. This visual cue indicates the pan is hot enough to create an instant sear and prevent the chicken from sticking.
- Cooking the First Side: Carefully place the floured chicken cutlets into the hot pan, presenting the “nicer” side (the side that will be face-up on the plate) down first for optimal presentation and browning. Avoid disturbing them once they are in the pan. Allow them to cook until they develop a beautiful, deep golden-brown crust. You’ll know they are nearly ready to flip when the edges of the cutlets start to turn opaque and white, indicating they are cooking through. This usually takes approximately 3-5 minutes, depending on the exact thickness of your cutlets and the intensity of your pan’s heat.
- The Flip and Finish: Using tongs, gently flip the cutlets to the second side. Continue to cook for another 1-3 minutes. Chicken cutlets cook very quickly due to their thinness, so constant vigilance is key to prevent overcooking. They are done when they feel firm to the touch, with just a slight springiness, and have reached an internal temperature of 165°F (74°C) when checked with an instant-read thermometer. Overcooking is the primary cause of dry chicken, so remove them promptly.
- Batch Cooking for Best Results: If you are preparing a larger quantity of chicken or if your pan is smaller, it is vital to avoid crowding the cutlets. Overcrowding significantly lowers the pan’s temperature, leading to steaming rather than searing, which results in a less crispy and often pale result. Cook the chicken in two or more batches if necessary, keeping the first batch warm on a plate tented loosely with aluminum foil while you cook the remainder.
- Brief Resting Period: Once cooked, transfer the golden chicken cutlets to a clean plate. While not as critical as for thicker cuts of meat, allowing them to rest for just a minute or two before serving helps the internal juices redistribute, ensuring maximum tenderness and succulence.
Endless Flavorful Creations: Transforming Your Crispy Chicken Cutlets
The true magic of mastering chicken cutlets lies in their incredible versatility. Once you’ve achieved that perfect golden-brown, crispy exterior and tender interior, these beauties become a blank canvas for a myriad of global flavors. Turn them into the dinner you truly desire with these inspiring variations, or use them as a springboard for your own culinary imagination and adventurous taste buds:
For Classic Italian Flavors
- Chicken Parmesan: A beloved Italian-American classic. Top your freshly cooked cutlets with a generous spoonful of your favorite marinara sauce, followed by a thick layer of shredded mozzarella and a sprinkle of grated Parmesan cheese. Broil briefly until the cheese is melted, bubbly, and slightly golden. Serve immediately with a side of pasta or a crisp green salad for a truly comforting and satisfying meal. For a detailed guide, try this Easy Chicken Parmesan recipe.
- Chicken Marsala: Elevate your cutlets into a sophisticated dish by preparing a rich mushroom and Marsala wine sauce. This classic is surprisingly quick to make using your pre-cooked cutlets as the foundation. Discover a recipe for Italian Chicken Marsala to guide your preparation.
- Creamy Basil Pesto Sauce: For a vibrant, fresh, and aromatic option, gently warm your classic basil pesto recipe in a small saucepan. Thin it slightly with a splash of milk, half-and-half, or even almond milk until it reaches a smooth, pourable consistency. Drizzle this fragrant sauce generously over the chicken cutlets and serve alongside roasted asparagus or crusty Italian bread.
- Lemon Herb Chicken Piccata: Finish the cooked cutlets with a zesty pan sauce made from white wine or chicken broth, a generous squeeze of fresh lemon juice, and a handful of fresh parsley and briny capers. The bright flavors perfectly complement the golden chicken.
For Vibrant Mexican Flavors
- Smothered with Cheese & Salsa: Immediately after cooking, transfer the warm cutlets to an oven-safe dish. Top them with a generous amount of shredded Monterey Jack or Colby cheese. Briefly melt under the broiler for a minute or two until the cheese is deliciously bubbly and slightly golden. Garnish with fresh avocado slices, a dollop of your favorite robust salsa, and a sprinkle of fresh cilantro. Serve alongside perfectly spiced black beans, creamy pinto beans, or flavorful Mexican rice.
- Dairy-Free Delight: If you’re opting for a dairy-free meal, simply skip the cheese and focus on an abundance of fresh, vibrant toppings. Pile on chunky guacamole, a generous spoonful of zesty tomatillo sauce or a bold homemade salsa verde, and finish with a refreshing squeeze of lime juice.
- Chicken Fajita-Style: Slice the cooked cutlets into thin strips, then toss them with sizzling sautéed bell peppers and onions that have been seasoned with authentic fajita spices. Serve these flavorful strips in warm tortillas with all your favorite fajita toppings like sour cream, more salsa, and extra avocado.
- Quick Chicken Tacos or Burrito Bowls: Dice the cooked cutlets, toss them with a taco seasoning blend, and serve in warm corn or flour tortillas with your preferred taco fixings, or create a vibrant burrito bowl over rice with beans, corn, and pico de gallo.
For Fresh Greek Flavors
- Greek Salad with Chicken: Arrange your perfectly golden chicken cutlets next to a generous and vibrant pile of fresh salad greens. Enhance the salad with classic Greek components such as juicy cherry tomatoes, crumbled feta cheese, briny Kalamata olives, thinly sliced red onion, and crisp chopped cucumbers. Dress this refreshing medley with a light, tangy lemon-oregano vinaigrette for a truly satisfying and light dinner or a substantial lunch. Complete the meal by serving with warm pita bread and a side of creamy homemade tzatziki sauce for dipping.
- Chicken Gyro Bowl: For a deconstructed gyro experience, slice the cooked cutlets into thin strips. Serve these over a bed of fluffy couscous or rice, topped with shredded crisp lettuce, diced tomatoes, thinly sliced red onions, and a generous drizzle of that cooling tzatziki sauce.
For Exciting Tropical Flavors
- Pineapple Mango Salsa: Elevate your chicken cutlets with a burst of sweet, tangy, and refreshing tropical flavors. Serve them generously topped with this cool and vibrant pineapple mango salsa. The bright, fruity notes of the salsa beautifully complement the savory chicken, creating a light and exotic meal perfect for warm weather.
- Coconut Lime Glaze: Create a simple yet exquisite glaze by whisking together some full-fat coconut milk, fresh lime juice, a touch of honey or brown sugar, and a hint of grated ginger. Briefly simmer this mixture to thicken it slightly, then brush generously over the freshly cooked cutlets. Serve with fluffy coconut rice and vibrant steamed green beans for a truly tropical culinary experience.
For Bold Asian-Inspired Flavors
- Teriyaki Chicken Cutlets: After cooking, brush the hot chicken cutlets with a homemade or good quality store-bought teriyaki sauce. Garnish with toasted sesame seeds and finely chopped green onions for added flavor and visual appeal. Serve with sticky rice and a quick stir-fry of your favorite vegetables for a delicious and speedy Asian-inspired meal.
- Spicy Peanut Sauce: Drizzle a rich, creamy, and subtly spicy peanut sauce over the cooked cutlets. This works exceptionally well when served with a side of quick-cooking ramen noodles tossed with a few vegetables or a crisp, refreshing cabbage slaw dressed with a sesame vinaigrette.
For Hearty American Comfort
- Chicken Fried Chicken (Lighter Version): While not truly deep-fried, you can effectively emulate the beloved flavors of chicken fried chicken by serving your crispy pan-fried cutlets with a simple, savory white gravy. Pair this comforting combination with creamy mashed potatoes and tender green beans for a truly classic American comfort food experience.
- BBQ Chicken Sandwiches: Take your cooked chicken cutlets to the next level by shredding them and tossing them generously with your favorite tangy barbecue sauce. Serve this flavorful mixture on toasted hamburger buns with a side of creamy coleslaw for quick, easy, and undeniably delicious BBQ chicken sandwiches.
The possibilities are genuinely endless. Whatever culinary direction you choose, embrace the opportunity to customize your chicken cutlets to perfectly suit your personal preferences and your family’s favorite tastes. These suggestions are merely starting points for your creative culinary journey.
Meal Prep & Leftover Brilliance with Chicken Cutlets
One of the often-overlooked yet incredibly valuable benefits of mastering golden chicken cutlets is their exceptional versatility beyond the immediate dinner plate. Preparing an extra batch of cutlets is a brilliantly smart move for efficient meal prepping throughout your week. Once cooked and thoroughly cooled, these tender and flavorful cutlets store beautifully in an airtight container in the refrigerator for up to 3-4 days, making them a fantastic grab-and-go option.
- Lunchbox Heroes: Utilize leftover cutlets to craft fantastic chicken sandwiches. Simply slice them and layer with your favorite sandwich fillings, such as lettuce, tomato, cheese, and a spread of choice.
- Superb Salad Toppers: Dice or thinly slice cold cutlets to effortlessly add a significant protein boost to any green salad, instantly transforming it into a complete, satisfying, and delicious lunch. Their crisp texture holds up surprisingly well, providing a pleasant contrast to fresh greens.
- Quick & Easy Wraps: Chop the cooked cutlets and combine them with creamy hummus, shredded crisp lettuce, diced tomatoes, and perhaps a sprinkle of your favorite herbs, all rolled up snugly in a soft tortilla for a speedy and healthy wrap.
- Versatile Bowls: Add sliced cutlets to grain bowls with quinoa or rice, roasted vegetables, and a flavorful dressing for a nutritious and convenient meal.
The inherent convenience of chicken cutlets for transport makes them an ideal component for work lunches, school lunchboxes, or a quick, healthy bite while you’re on the run. This proves that a little thoughtful effort upfront in the kitchen can save you a significant amount of time and stress later in your busy week.
Troubleshooting Common Chicken Cutlet Challenges
While preparing delicious chicken cutlets is generally straightforward, sometimes issues can arise. Knowing how to address these common problems will help you consistently achieve perfect results:
- Dry Chicken: This is almost invariably due to overcooking. Remember, chicken cutlets are thin and cook very rapidly. Keep a vigilant eye on them and remove them from the heat as soon as they reach an internal temperature of 165°F (74°C) as measured with an instant-read thermometer, or when they feel firm with a slight amount of give. Properly sliced thin cutlets typically cook in just a few minutes per side.
- Soggy or Pale Crust: A less-than-crispy crust can occur if the pan isn’t hot enough when the chicken is added (leading to steaming rather than searing), or if too many cutlets are crowded into the pan at once. Ensure your cooking oil is shimmering and visibly hot before adding the chicken, and always cook in smaller batches if necessary to maintain the pan’s high temperature. Additionally, make sure you shake off any excess flour from the cutlets before they hit the pan.
- Uneven Cooking: This problem often relates to unevenly sliced chicken breasts or an inadequately heated pan with cold spots. Strive for consistent thickness when slicing the chicken. If you suspect your pan has hot spots, gently rotate the cutlets slightly during the cooking process to ensure even browning and doneness.
- Sticking to the Pan: Insufficient oil, or not heating the pan and oil adequately before adding the chicken, can cause sticking. Ensure there’s a good, even layer of oil covering the bottom of the pan and that it is properly heated. A well-seasoned cast iron pan, or a good quality non-stick pan, can also help significantly in preventing sticking.
- Burnt Exterior, Raw Interior: This is a sign that your heat is too high. While you want a hot pan for crisping, excessive heat will burn the flour coating before the thin chicken has a chance to cook through. Reduce the heat slightly to medium and allow for slower, more even cooking.
📖 Recipe
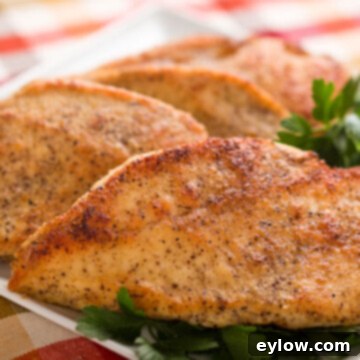
Golden Chicken Cutlets
Sally Cameron
Pin Recipe
Ingredients
- 1 ½ pounds boneless skinless chicken breast
- ¼ teaspoon ses salt pepper and granulated garlic
- ½ cup coconut flour or whole wheat flour or GF flour blend
- 2 tablespoons oil – coconut, olive, avocado or combination oil and unsalted butter
Instructions
-
Place the chicken breasts flat on your cutting surface with the rounded, smooth side facing up. Trim any tenders and set aside to cook with the cutlets. Place the palm of your hand gently but firmly on the chicken breast. Using a thin bladed, sharp knife (I use either a chef’s knife or a carving knife), slice the chicken breasts in equal halves horizontally, keeping your knife parallel to the cutting board.
-
Season both sides of the chicken with salt, pepper and granulated garlic. Sprinkle flour over the chicken and lightly coat both sides. Shake off excess.
-
Heat a large saute or fry pan (about 11″-12″) over medium heat. Add olive oil or oil/butter combination. When it’s shimmering or bubbling and hot, add chicken cutlets, nicer side down first. Allow the cutlets to cook until they are golden. You can tell when they are almost ready to turn as the edges start to get white (cooked). Turn the cutlets and cook another minute or two, depending on how thick the cutlets are. When done, they will feel firm to the touch but still give just a little. Remove from the heat, top with sauce of choice if using, and enjoy.
