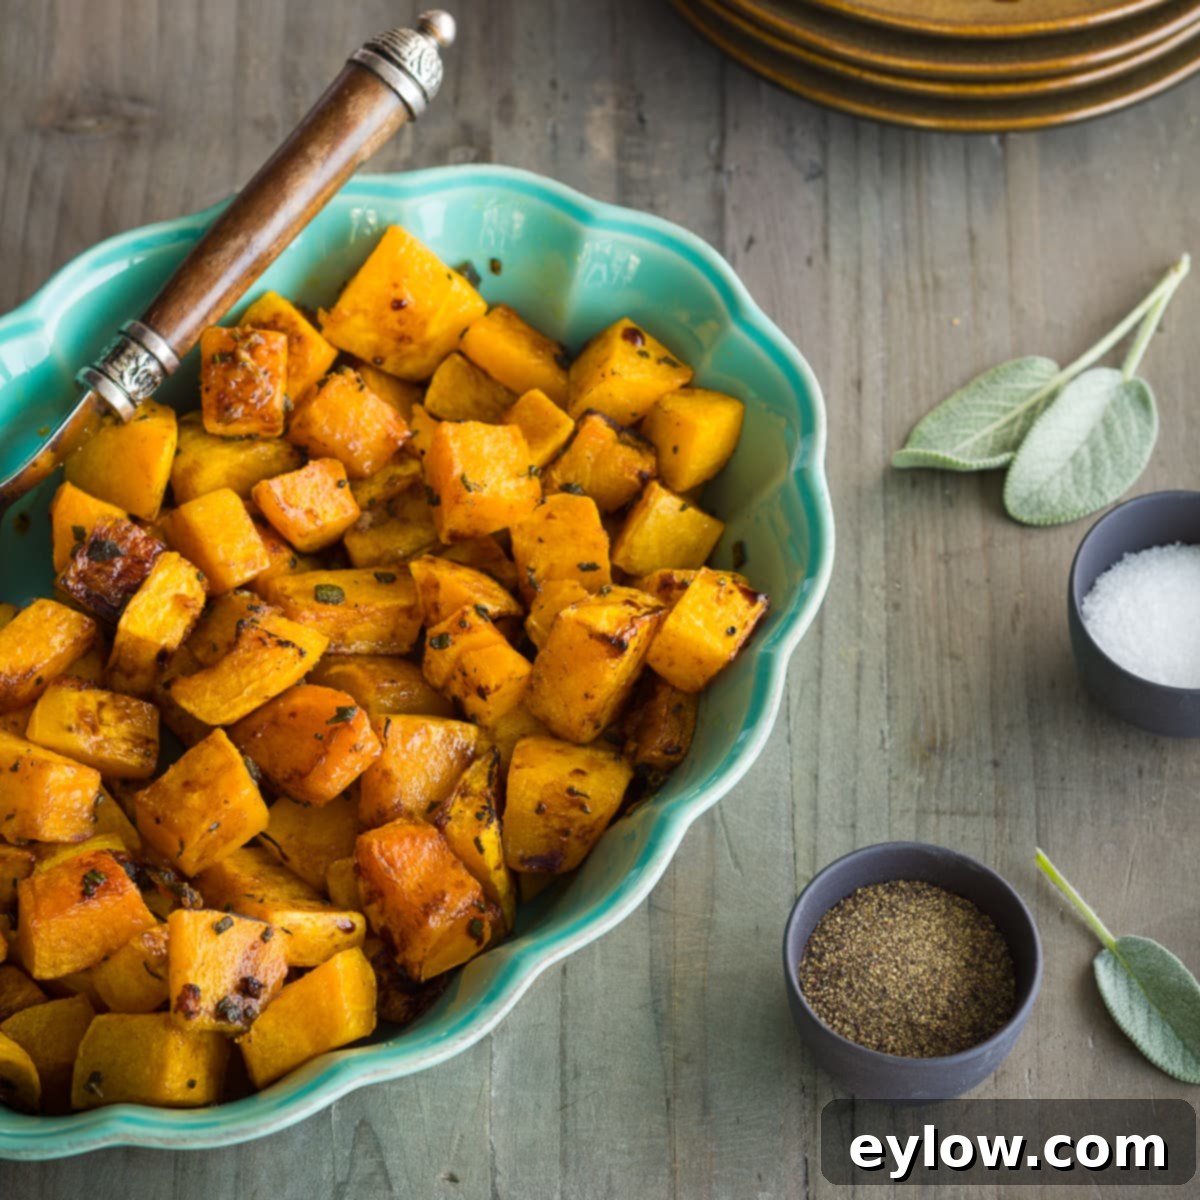
Roasted Butternut Squash: Your Essential Guide to a Delicious & Healthy Fall Side Dish
As the leaves begin to turn and the air grows crisp, nothing quite captures the essence of autumn like a warm, comforting side dish. Among the seasonal favorites, roasted butternut squash stands out as a true culinary gem. With its naturally sweet flavor and vibrant orange hue, it transforms into an incredibly tender and caramelized treat when roasted. Imagine peeling, dicing, and then simply tossing chunks of this versatile winter squash with quality olive oil, a blend of savory seasonings, and fresh sage leaves. Baked to perfection in the oven and finished with a delicate splash of balsamic vinegar, you’ll discover a truly wonderful flavor profile that perfectly complements any fall, winter, or holiday meal.
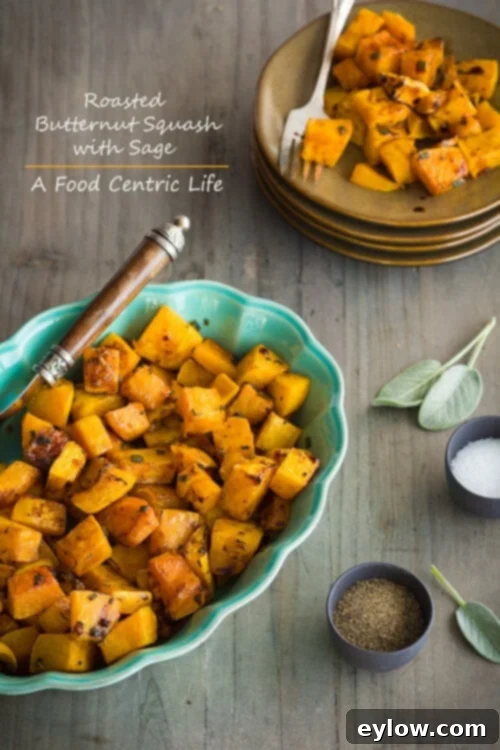
Preparing whole, natural foods simply is often the most rewarding way to eat – both for taste and health. Butternut squash is a prime example. This humble squash is a nutritional powerhouse, brimming with essential vitamins and minerals. It’s an outstanding source of Vitamin A, crucial for good vision and immune function, and Vitamin C, known for its antioxidant properties that protect against cell damage. You’ll also find a good amount of Vitamin B6, which supports brain health, along with dietary fiber, vital for digestive health and maintaining satiety. Furthermore, its rich, brilliant orange color is a clear indicator of its high antioxidant content, offering significant anti-inflammatory benefits that contribute to overall well-being. Incorporating this simple yet flavorful dish into your meal planning, especially during the colder months and festive holidays like Thanksgiving, is an excellent choice for a nutritious and delicious addition to your table.
Choosing and Storing Your Butternut Squash
Selecting the right butternut squash is the first step to a delicious roasted dish. Look for a squash that feels heavy for its size, indicating a good moisture content. The skin should be uniformly dull and hard, without any soft spots, bruises, or cuts. A deep, consistent tan color is also a sign of ripeness. Avoid any squash that has shiny skin or green patches, as these suggest it was picked too early. A healthy stem is another good indicator, although sometimes they are removed.
Once you’ve brought your perfect squash home, storing it correctly will ensure its longevity. Whole butternut squash can be stored in a cool, dark, and dry place for up to two to three months. Avoid refrigeration for whole squash, as this can actually shorten its shelf life. Once cut, however, the squash must be refrigerated. Store peeled and diced butternut squash in an airtight container in the refrigerator for up to 3-5 days. You can also freeze peeled and diced squash for longer storage (up to 6 months) – simply blanch the cubes first for a few minutes, then cool, pat dry, and freeze in a single layer on a baking sheet before transferring to a freezer-safe bag or container.
Essential Ingredients for Roasted Butternut Squash
For this delightful recipe, you’ll typically need one medium butternut squash, which usually weighs around 3 pounds. Butternut squash naturally possesses a lovely, subtle sweetness, making additional brown sugar unnecessary for most palates. However, if you desire a slightly sweeter profile, a wonderful option is to whisk a teaspoon or two of pure maple syrup or even honey into the olive oil before tossing it with the squash. This adds a delicate layer of sweetness that enhances its roasted flavor. For precise measurements and quantities, please refer to the detailed recipe card below.
- Medium Butternut Squash: Approximately 3 pounds for a generous side.
- Olive Oil or Avocado Oil: High-quality oil is key for flavor and achieving that perfect golden roast.
- Fresh Sage Leaves or Rosemary: These herbs pair beautifully with the sweetness of the squash, adding an earthy aroma. Feel free to use one or a mix of both, finely chopped.
- Granulated Garlic Powder: A convenient way to add garlic flavor evenly. Fresh minced garlic can also be used, but watch it carefully during roasting as it can burn faster.
- Kosher or Sea Salt and Freshly Ground Black Pepper: Basic seasonings that elevate all the other flavors.
Recommended Tools for Preparation
While the prospect of cutting up a butternut squash can sometimes feel daunting due to its unique shape and tough skin, having the right tools makes the process smooth and safe. Here’s what you’ll need to tackle this job with ease:
- Heavy, Sharp 9″-10″ Chef’s Knife: Essential for safely cutting through the dense flesh of the squash. A sharp knife is always safer than a dull one, requiring less force and reducing the risk of slipping.
- Sturdy Cutting Board: A large, stable cutting board provides ample space and prevents wobbling while you work.
- Sharp Vegetable Peeler: An inexpensive but effective Y-peeler is highly recommended. Its design makes peeling the butternut squash’s thick, sometimes awkward skin much easier and more efficient than a swivel peeler.
- Rimmed Baking Sheet: Crucial for roasting. The rim prevents the squash cubes and oils from spilling over, and a generously sized sheet ensures the squash can be spread in a single layer for optimal caramelization.
Step-by-Step Guide: How to Safely Cut a Butternut Squash
The distinctive, somewhat humorous shape of a butternut squash – often compared to a fat, squat bowling pin or a bell – can make it seem a bit intimidating to prepare. However, with a few simple steps and the right technique, you’ll be able to confidently cut it up and get it ready for roasting. This detailed guide will show you exactly how to transform a whole squash into perfectly sized cubes for a flavorful fall vegetable side dish that you and your family will undoubtedly love.
Before you even begin cutting, here’s a crucial safety tip to ensure your workspace is secure:
Pro-tip for Stability: To prevent your cutting board from sliding or moving unexpectedly on your kitchen counter, always place a small, damp kitchen towel (like a bar mop towel) underneath it. The slight dampness creates friction and anchors the board firmly in place. If you still experience movement, or for an even more reliable solution, consider investing in an anti-slip cutting board mat, which provides excellent grip.
Now, let’s get to the cutting:
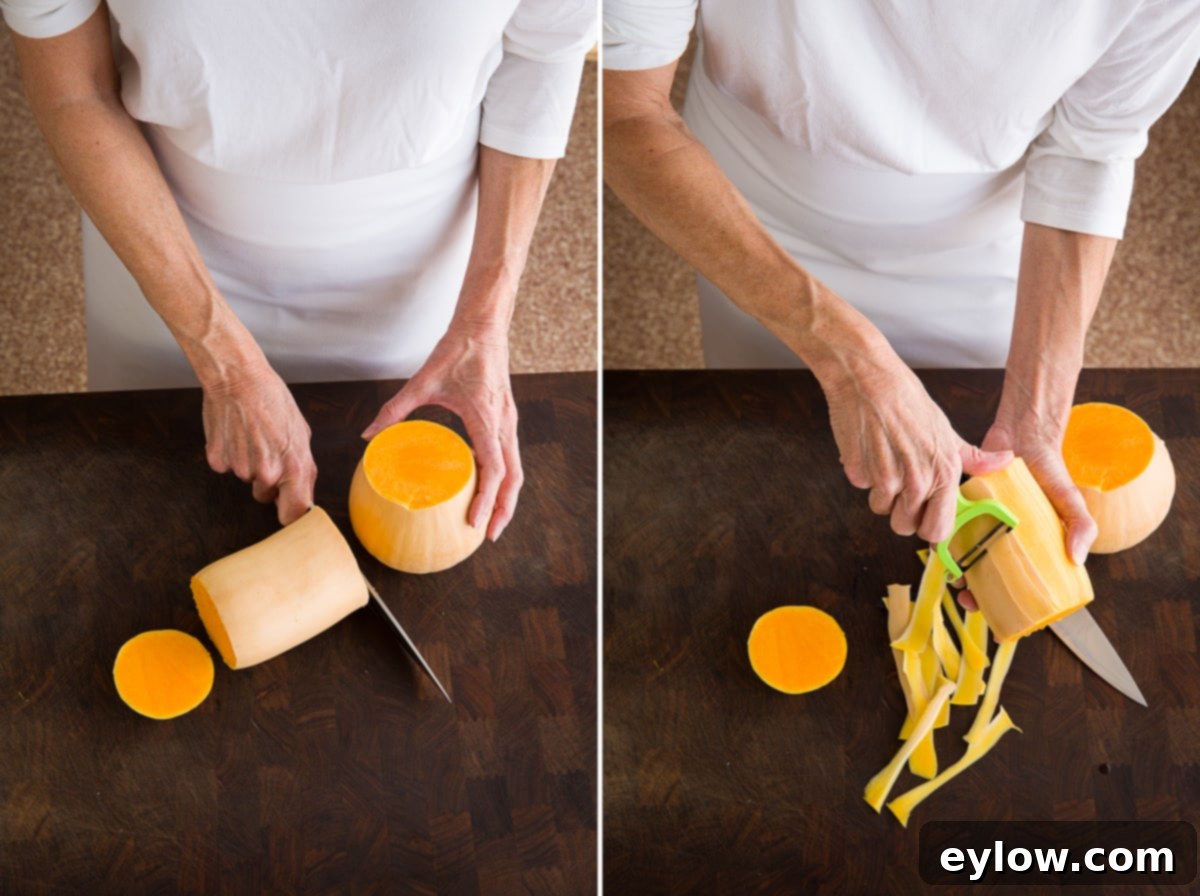
- Trim the Ends: Using your heavy, sharp chef’s knife, carefully cut a thin slice off both the top (stem end) and bottom (blossom end) of the squash. This creates flat, stable surfaces, making the squash much easier and safer to handle.
- Separate the Neck and Base: Lay the squash on your cutting board. Locate the point where the slender neck meets the wider, bulbous base. Carefully cut the squash across at this junction. You will now have two distinct sections: the solid neck and the seed-filled bulb.
Peeling the Butternut Squash
Once the squash is sectioned, the next step is to remove its tough outer skin. The most efficient and safest method for this is using a sharp vegetable peeler. If your peeler feels dull or requires excessive force, it’s likely time for a replacement. A sharp peeler will glide through the skin, making the task quick and easy.
- Peel the Neck: Stand the neck piece upright on one of its flat, cut ends. Using your Y-peeler, firmly and carefully peel the skin downwards, rotating the squash as you go until all the tough outer layer is removed.
- Peel the Bulb: Repeat the peeling process for the bulbous base. It might be easier to handle this section by cutting it in half lengthwise first, as described in the next step, before peeling.
Slicing and Chopping for Even Roasting
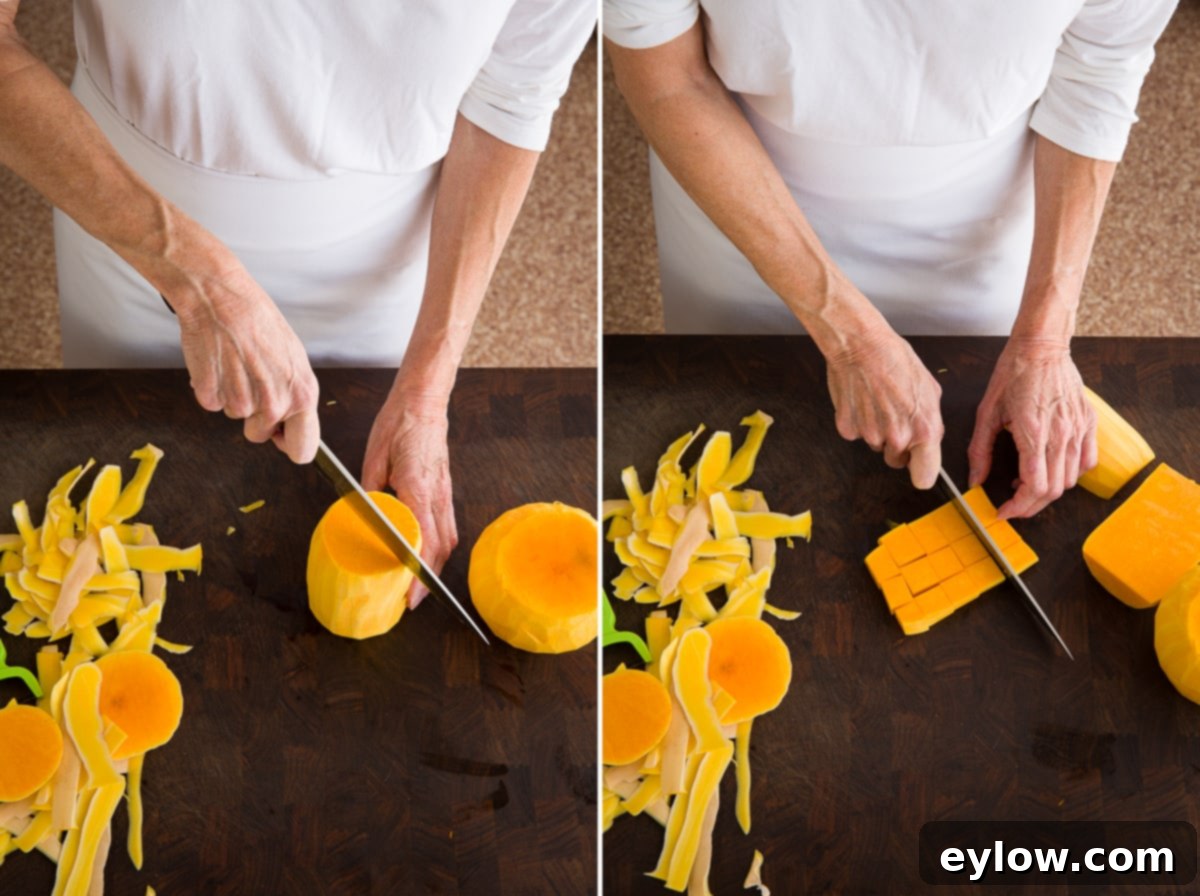
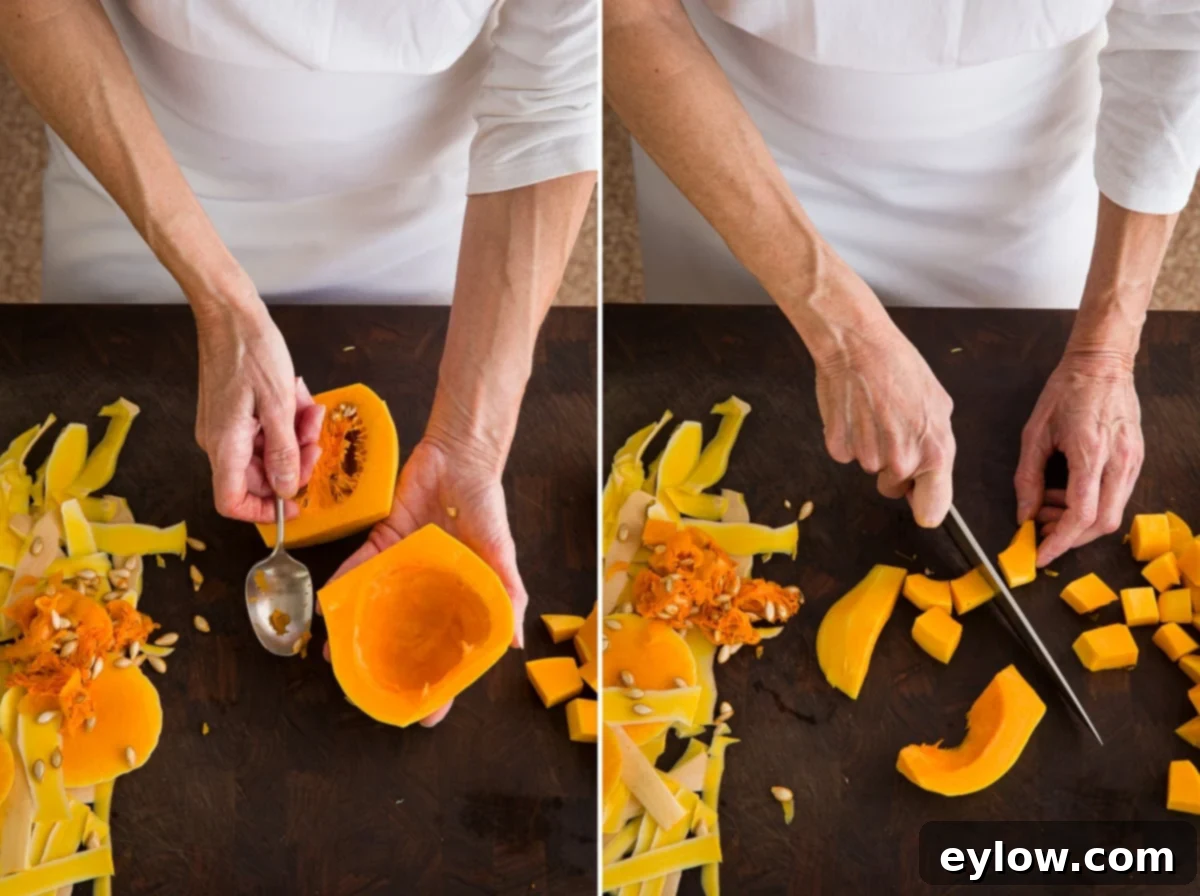
Achieving uniformly sized pieces is crucial for even roasting. If pieces are too varied in size, smaller ones will burn while larger ones remain undercooked. Aim for roughly 1-inch cubes.
- Process the Neck: Stand the peeled neck piece on one of its flat ends. Slice it into 1-inch thick rounds or “planks.” Then, lay these flat slices down on your cutting board and chop them into 1-inch cubes.
- Process the Bulb Base: Take the peeled bulb base and cut it in half lengthwise from top to bottom. With a sturdy spoon, neatly scoop out all the fibrous strands and seeds from the cavity. Discard the seeds. Once cleaned, place the cut sides down on your board and chop the bulb part into 1-inch cubes. Due to its curved shape, this section might be slightly more challenging to get perfect cubes, but do your best to keep them as uniform as possible.
Time-Saving Shortcut: Pre-Cut Butternut Squash
If you’re short on time or prefer to skip the peeling and chopping, many grocery stores offer pre-cut butternut squash cubes in packages within the produce department. This can be a fantastic time-saver, especially on busy weeknights or during holiday meal prep.
When choosing pre-cut squash, take a moment to inspect the package. Look for cubes that are roughly the same size to ensure they roast evenly. Also, check for freshness – the cubes should look vibrant and firm, not mushy or discolored. While slightly more expensive, this option significantly reduces prep time, allowing you to enjoy this delicious side dish with minimal effort.
The Roasting Process: Achieving Golden Perfection
With your butternut squash perfectly cubed, you’re now ready for the magic of roasting. Roasting is what brings out the incredible sweetness and tender texture of the squash, transforming it into a truly irresistible dish. Proper preparation before it goes into the oven is key.
- Prepare the Baking Sheet: To protect your squash from direct contact with the hot baking sheet and prevent sticking, it’s highly recommended to line your rimmed baking sheet (a half-sheet size works perfectly) with parchment paper. This also makes cleanup a breeze!
- Season and Toss: Place your butternut squash cubes into a large mixing bowl. Drizzle generously with olive oil (or avocado oil), then sprinkle with your fresh chopped sage leaves, granulated garlic powder, kosher or sea salt, and freshly ground black pepper. Use your hands or a large spoon to toss everything together thoroughly, ensuring each cube is evenly coated with the oil and seasonings. This even coating is vital for consistent flavor and browning.
- Spread and Roast: Pour the seasoned squash cubes onto your prepared rimmed baking sheet. Crucially, arrange them in a single layer. Overcrowding the pan will cause the squash to steam instead of roast, preventing it from achieving that desirable golden-brown caramelization. If you have too many cubes for a single layer, use a second baking sheet.
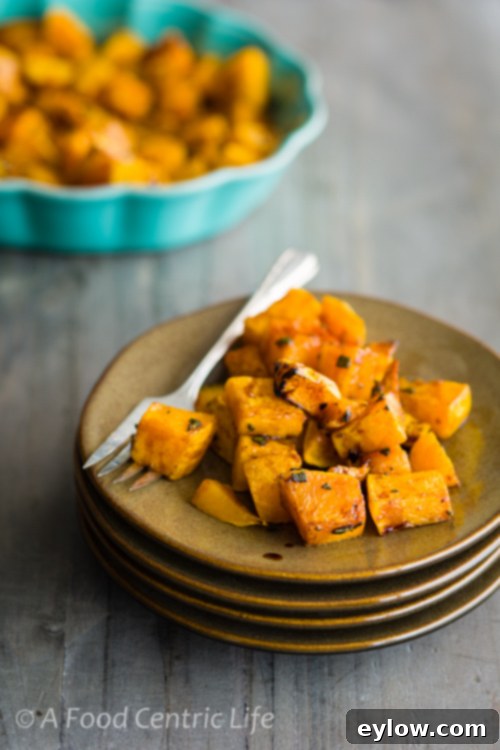
- Bake to Tenderness: Bake the squash in a preheated 400°F (200°C) oven for approximately 25 minutes. Roasting time can vary slightly depending on your oven and the exact size of your cubes. You’ll know they’re done when they are fork-tender when pierced with the tip of a paring knife and have developed beautiful golden-brown, slightly caramelized edges.
Exciting Flavor Variations
While the classic sage and garlic combination is undeniably delicious, butternut squash is incredibly versatile and lends itself beautifully to a variety of flavor profiles. Don’t be afraid to experiment!
- Sweet & Spicy: Add a pinch of cayenne pepper or red pepper flakes along with a drizzle of maple syrup for a delightful balance of sweet heat. A touch of cinnamon or nutmeg can also enhance the sweetness.
- Mediterranean Twist: Instead of sage, try fresh rosemary and oregano. After roasting, sprinkle with crumbled feta cheese and a squeeze of lemon juice.
- Herby Freshness: Experiment with other fresh herbs like thyme, parsley, or chives. Add them towards the end of roasting or as a fresh garnish.
- Smoky Kick: A dash of smoked paprika can add a wonderful depth and smoky aroma.
- Asian Inspired: Toss with a touch of soy sauce (or tamari), sesame oil, and ginger for a savory, umami-rich side. Garnish with toasted sesame seeds.
Serving Suggestions: Elevate Your Meal
Once your roasted butternut squash emerges from the oven, fragrant and perfectly caramelized, it’s ready to shine! For an extra layer of great flavor and a beautiful burnished color, consider sprinkling it with a little balsamic vinegar or maple syrup, if desired, just before serving. The acidity of the balsamic or the sweetness of the syrup provides a delightful contrast to the squash’s earthy notes.
This versatile side dish is incredibly adaptable and pairs wonderfully with a variety of main courses. Serve it hot, straight from the oven, alongside a succulent roast chicken, a festive roast turkey, or a tender pork tenderloin. Its rich flavors and vibrant color make it a fantastic companion to any protein.
Another fantastic way to enjoy roasted butternut squash is as a creamy puree. Simply transfer the hot roasted cubes into a food processor and pulse a few times until smooth. For an extra luxurious texture, you can add a splash of warm vegetable broth, milk, or cream while processing. This puree makes an elegant side, a base for a soup, or even a healthy baby food.
Creative Ways to Enjoy Leftovers
Don’t let any leftover roasted butternut squash go to waste! It’s just as delicious the next day and can be easily transformed into exciting new meals. Store any extra roasted squash in an airtight container in the refrigerator for 3-4 days.
- Breakfast Boost: Warm up the roasted cubed butternut squash and serve it alongside fluffy scrambled eggs for a hearty and nutritious breakfast.
- Winter Salad Upgrade: Add cold roasted squash cubes to a robust winter salad for added sweetness, texture, and nutritional value. It pairs beautifully with greens like kale or spinach, nuts, dried cranberries, and a vinaigrette dressing.
- Purée Power: If you’ve made a puree, warm it gently and top it with perfectly poached eggs and a side of crisp bacon for an indulgent yet healthy breakfast or brunch. What a fantastic way to start the day!
- Pasta Perfection: Toss leftover cubes with pasta, a little olive oil, garlic, spinach, and a sprinkle of Parmesan cheese for a quick and satisfying vegetarian meal.
- Soup Starter: Add any leftover roasted cubes to a vegetable broth base to quickly make a simple butternut squash soup.
Explore More Butternut Squash Recipe Ideas
Beyond roasting, butternut squash is incredibly versatile and can be the star of many other delicious dishes. Butternut squash soup, for example, is another perennial favorite, offering a creamy, comforting experience. If you love exploring different flavors, you might enjoy trying this curried butternut squash and carrot soup for an aromatic and warming meal, or perhaps this creamy butternut apple soup, which perfectly balances sweet and savory notes. These recipes offer fantastic ways to enjoy the unique flavor and nutritional benefits of this wonderful winter squash.
📖 Recipe

Classic Roasted Butternut Squash
Sally Cameron
Pin Recipe
Ingredients
- 1 medium butternut squash 3 pounds, peeled, seeded, and cut into 1-inch cubes
- 2 tablespoons olive oil or avocado oil
- 2 tablespoons fresh chopped sage leaves or fresh rosemary
- ½ teaspoon granulated garlic powder
- ½ teaspoon Kosher or sea salt
- ¼ teaspoon freshly ground black pepper
Optional Garnish
- 2 teaspoons Balsamic vinegar or maple syrup for drizzling
Instructions
Pre-heat Oven
-
Pre-heat your oven to 400°F (200°C). Line a large rimmed baking sheet with parchment paper for easy cleanup.
Prepare the Squash
-
Using a heavy, sharp chef’s knife, carefully slice a thin piece from both the top and bottom ends of the butternut squash to create flat, stable surfaces. Next, cut across the squash where the neck and the bulbous base meet, separating the two sections.Employing a sharp vegetable peeler (a Y-peeler is often easiest and safest), peel the tough outer skin from both the neck and bulb sections.For the neck portion, stand it upright on one flat end and slice it into 1-inch wide rounds or planks. Lay these flat on your cutting board, then chop them into uniform 1-inch cubes.For the bulb base, cut it in half lengthwise (top to bottom). With a spoon, cleanly scoop out all the fibrous seeds and discard them. Then, slice and dice the bulb portion into 1-inch cubes, aiming for as much uniformity as possible. See the post above for detailed photos of the cutting process.
Roast Squash and Finish
-
Place the prepared squash cubes into a large mixing bowl. Drizzle with olive oil, then add the fresh chopped sage, granulated garlic powder, salt, and pepper. Toss everything thoroughly with your hands or a spoon until all the cubes are evenly coated.
-
Spread the seasoned squash cubes onto the parchment-lined rimmed baking sheet in a single layer. Ensure the pan is not overcrowded; use a second sheet if necessary to prevent steaming.
-
Roast in the preheated oven for approximately 25 minutes, or until the cubes are tender when pierced with the tip of a sharp paring knife. The squash should be golden-brown and slightly caramelized at the edges.
-
When ready to serve, drizzle with Balsamic vinegar or maple syrup if desired for an extra burst of flavor and a beautiful sheen. Serve hot from the oven.
Notes
For a sweet and savory breakfast, warm up the cubed butternut squash with scrambled eggs or add it cold to a hearty winter salad for lunch.
If you purée the squash, warm it up and top with poached eggs and a side of crisp bacon for an elevated brunch.
For a touch of extra sweetness in the roasting process, stir 1-2 teaspoons of pure maple syrup or honey into the olive oil before tossing with the squash.
