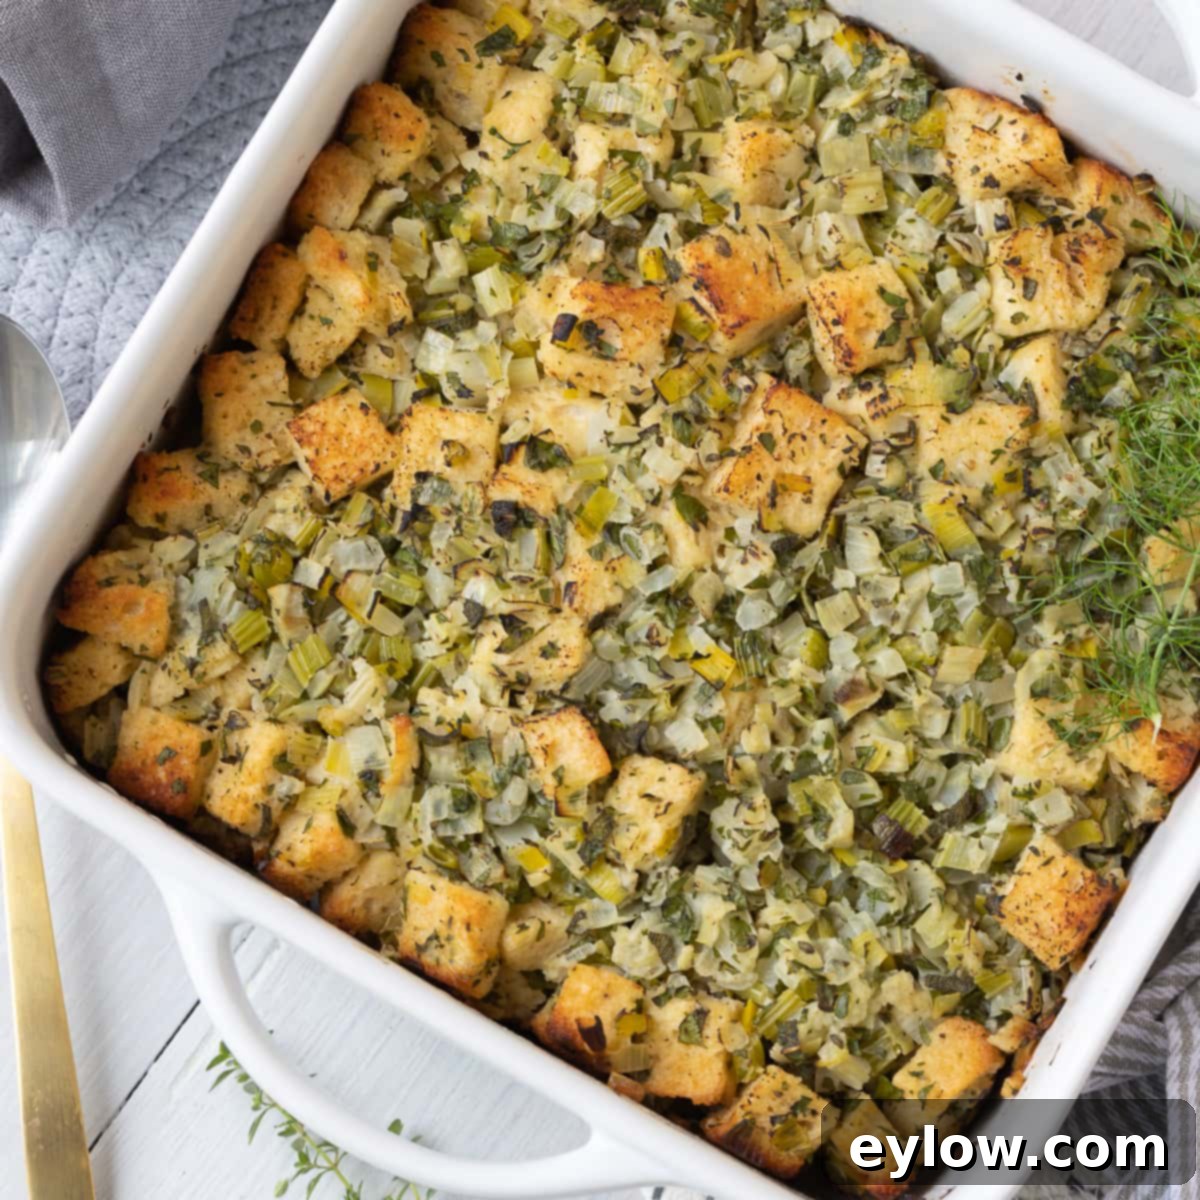
The Best Gluten-Free Thanksgiving Stuffing Recipe: Flavorful & Easy to Make
Thanksgiving just isn’t complete without a savory, golden-brown stuffing at the center of the table. For those managing gluten sensitivities, the holiday feast can sometimes feel daunting. But worry no more! This incredible gluten-free Thanksgiving stuffing recipe delivers all the classic flavors and comforting texture you crave, ensuring everyone can enjoy this beloved side dish without compromise. Forget the bland, boxed mixes loaded with unpronounceable ingredients; our homemade version uses high-quality gluten-free bread cubes, a vibrant medley of aromatic vegetables, rich broth or milk, fresh herbs, and a binding egg for a truly unforgettable experience. The best part? No one will *ever* guess it’s gluten-free. We’ll guide you step-by-step through the process, from drying your bread to achieving that perfect crispy top and moist, flavorful interior.
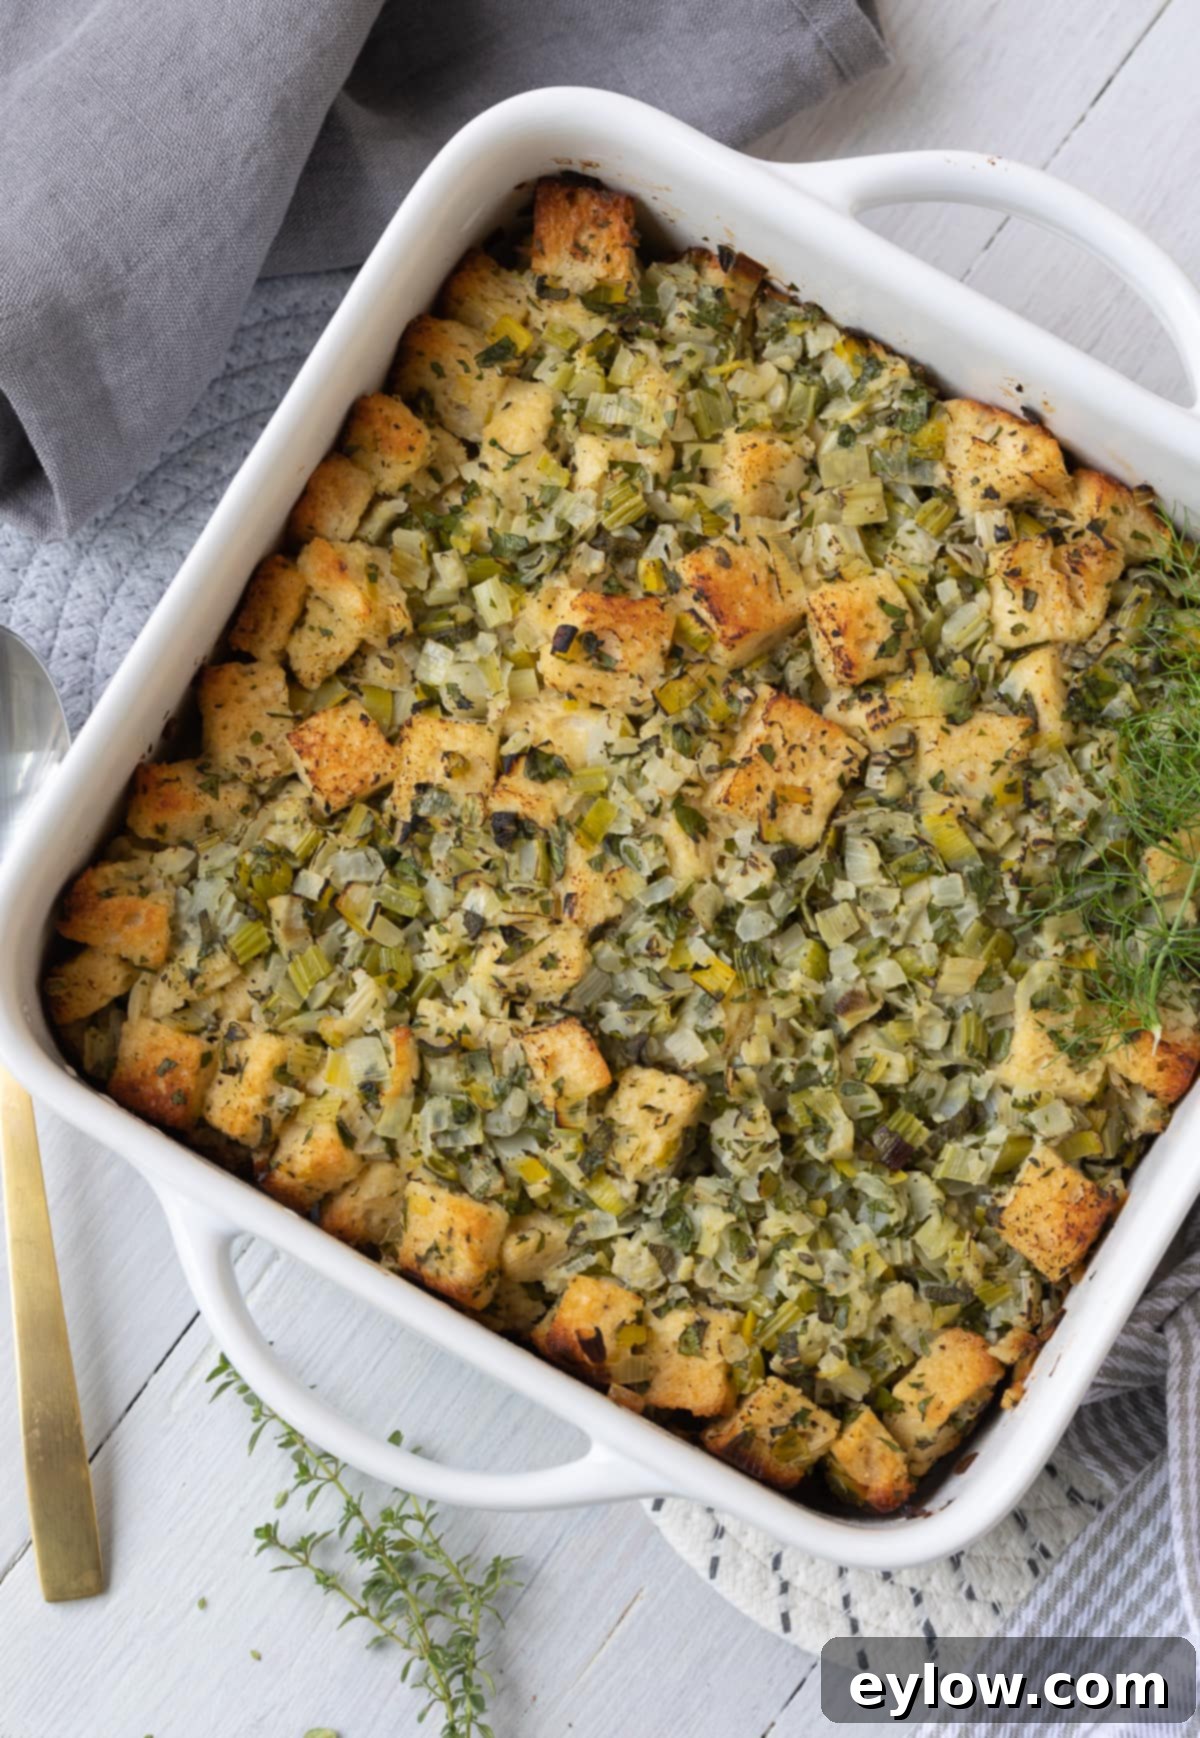
While many traditional recipes call for stuffing the turkey cavity, modern culinary wisdom, focusing on both faster turkey roasting and optimal food safety, highly recommends cooking your stuffing (or dressing, as some prefer to call it) separately. Rest assured, this method still yields an incredibly flavorful dish, absorbing all the wonderful aromas from the vegetables and herbs as it bakes to perfection. Our family’s original recipe, passed down through generations, utilized traditional wheat bread, but with the advancements in gluten-free baking, transitioning to a gluten-free version is seamless. With excellent quality gluten-free bread readily available, you’ll find that the flavor and texture are so authentic, no one will even suspect it’s free from gluten these days. This recipe is designed to be versatile, so whether you’re making it gluten-free or with regular bread, the results will be outstanding.
This comprehensive guide will equip you with all the knowledge and tips to create a holiday stuffing that will impress even the most discerning palates. From selecting the perfect gluten-free bread to mastering the art of drying bread cubes and incorporating a thoughtful blend of vegetables and herbs, you’ll find everything you need right here. Get ready to elevate your Thanksgiving table with a homemade stuffing that’s both safe for those with allergies and irresistibly delicious for everyone.
[feast_advanced_jump_to]
Why You’ll Love This Easy Gluten-Free Stuffing Recipe
This isn’t just another gluten-free recipe; it’s a culinary experience designed to bring joy and tradition back to your holiday table without any compromise on taste or texture. Here’s why this particular gluten-free Thanksgiving stuffing will become your new go-to:
- Unbeatable Flavor: This stuffing is packed with incredible taste, proving that gluten-free can be utterly delicious. The combination of fresh herbs, savory vegetables, and perfectly toasted bread creates a harmonious medley that will delight your taste buds.
- Secretly Gluten-Free: Seriously, no one will guess! The careful selection of ingredients and precise cooking method ensures a texture and flavor profile so close to traditional stuffing, your guests will be amazed. It’s perfect for inclusive holiday gatherings.
- Wholesome & Homemade: Ditch the highly processed, often unhealthy boxed or bagged stuffing mixes. Our recipe focuses on fresh, whole ingredients, allowing you to control exactly what goes into your dish. You’ll taste the difference that real, homemade quality makes.
- Food Safety First: By cooking the stuffing separately in a casserole dish, you eliminate concerns about undercooked stuffing that can occur when it’s baked inside a large turkey. This ensures a safer, more evenly cooked stuffing, giving you one less thing to worry about on a busy holiday.
- Beginner-Friendly: If you’re new to making stuffing from scratch, don’t fret! We’ve broken down every step with clear, concise instructions. From chopping vegetables to drying bread, you’ll feel confident and capable in the kitchen, even if it’s your first time.
Essential Ingredients for the Best Gluten-Free Stuffing
Whether you call it stuffing or dressing, the goal is the same: a moist, flavorful, and deeply satisfying side dish. I’ve meticulously detailed each ingredient to ensure anyone, regardless of their cooking experience, can master this recipe from scratch. The quality of your ingredients truly shines through, so let’s explore what makes this recipe exceptional.
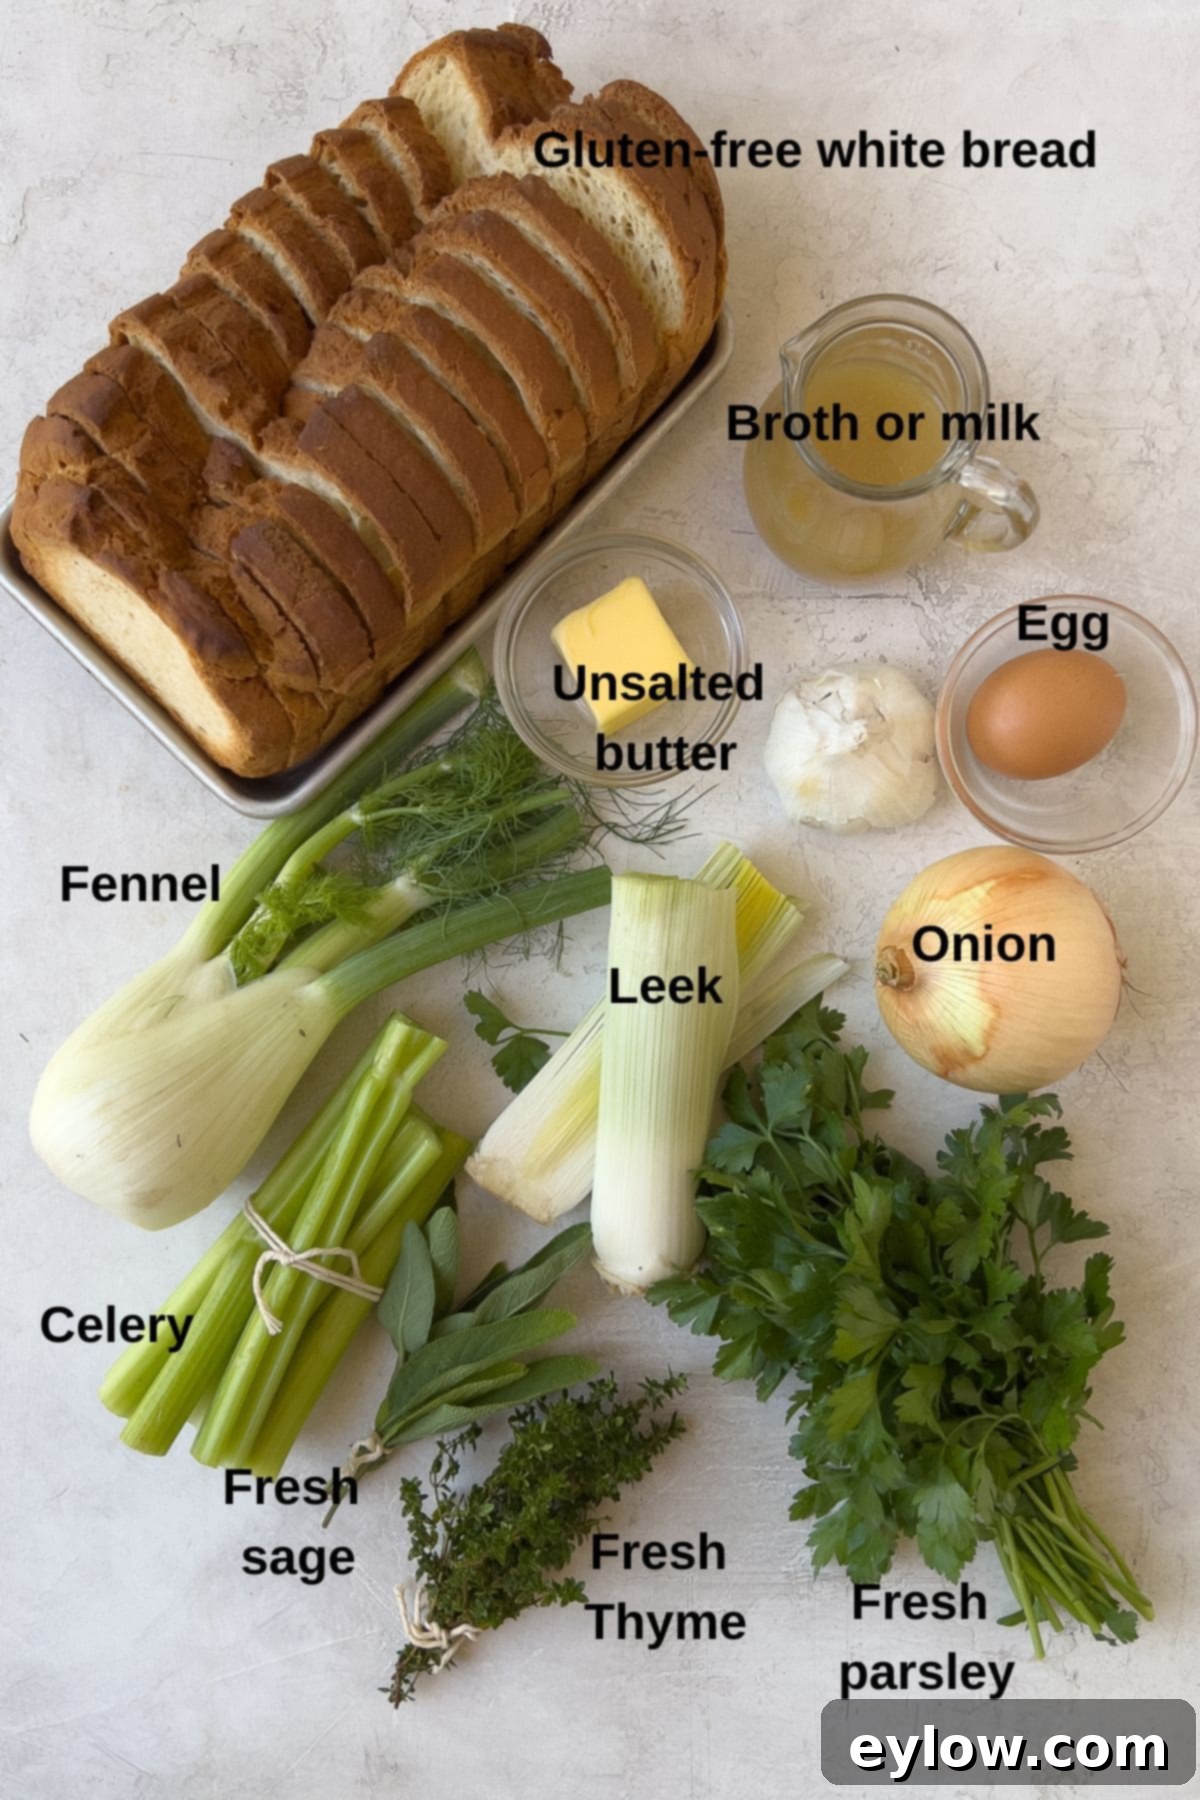
- Gluten-Free Bread: This is the star of your stuffing, so a high-quality fresh gluten-free bread is paramount. For outstanding results, I highly recommend bread from Canyon Bakehouse, particularly their Mountain White or Heritage Honey styles. These breads have a great texture that holds up well when dried and soaked with flavor. If Canyon Bakehouse isn’t available, choose the best gluten-free sandwich bread you can find. Gluten-free sourdough also works beautifully, adding a subtle tanginess. Avoid overly crumbly or dense GF breads; you want one that will yield good cubes and absorb liquid without turning to mush.
- Leek: A close relative to onions and garlic, leek adds a sophisticated layer of mild, sweet, and slightly earthy oniony flavor to the stuffing. It’s less pungent than a regular onion, offering a more delicate touch. Remember to use only the white and light green parts, as the tough dark green tops can be fibrous. (However, save them for homemade vegetable broth!)
- Fennel: Don’t be intimidated by fennel! When cooked, it transforms, offering a wonderfully delicate and lightly sweet anise (licorice) flavor that is truly unique and delicious. Trust me, it elevates the entire dish, adding a depth that distinguishes this stuffing.
- Celery: A foundational aromatic in countless recipes, celery provides essential savory notes and a pleasing textural crunch that softens beautifully during baking. It’s a non-negotiable ingredient for classic stuffing flavor.
- Onion: Use sweet, yellow, or brown onions – all work well to provide a robust, essential onion flavor and crucial moisture to the stuffing. They caramelize slightly as they cook, adding another layer of sweetness and depth.
- Garlic: Fresh garlic cloves are key here. Chopping them finely ensures their pungent, aromatic notes are evenly distributed, infusing the entire dish with irresistible fragrance and taste. Skip the pre-minced jarred garlic for this recipe; fresh makes a significant difference.
- Fat: For richness and to sauté the vegetables, you have a few excellent choices: unsalted butter, ghee, or olive oil. A combination of olive oil and butter can be particularly nice, offering both depth of flavor and a slightly higher smoke point. Please avoid neutral vegetable oils, as they lack the flavor contribution needed for this dish.
- Liquid: The liquid is crucial for moisturizing the bread and infusing flavor. You can use dairy milk (whole or 2%), a plant-based milk (like almond or oat for a dairy-free option), or savory broths such as chicken, bone broth, or even homemade turkey broth. The broth options will lend a deeper, more umami flavor, perfect for a holiday meal.
- Egg: A large, beaten egg acts as a binder, helping the stuffing hold together, and contributes to a rich, moist interior. It also adds a subtle richness that enhances the overall mouthfeel of the dish.
- Herbs: Herbs are vital for the classic holiday flavor profile. You can use fresh herbs, dried, or a thoughtful combination.
- Parsley (Italian parsley): Essential for a fresh, bright “garden” flavor and herbal balance. Chop it finely to distribute its vibrant taste.
- Thyme: A quintessential stuffing herb, thyme’s earthy, slightly floral notes are a must-have.
- Sage: The robust, peppery, and slightly minty flavor of sage is iconic in Thanksgiving dishes and perfectly complements the other ingredients.
When using dried herbs, remember to use approximately ⅓ the amount of fresh herbs, as their flavor is more concentrated. If you prefer a pre-mixed poultry seasoning, that can work, but I highly recommend adding a little fresh parsley to brighten the flavor.
For precise measurements of all ingredients, including salt and freshly ground black pepper, please refer to the detailed recipe card below. If you’re not familiar with preparing leek and fennel, don’t worry – I’ve included helpful photos further down to guide you through the prepping process.
Chef’s Tip: As you gather your ingredients for this spectacular stuffing, consider picking up some turkey pieces (like wings or necks) to make a batch of homemade turkey broth. This deeply flavorful broth is not only excellent for this gluten-free Thanksgiving stuffing, but also makes an unbeatable base for your Thanksgiving gravy and can be frozen for future soups and side dishes throughout the year. It’s a simple step that adds immense flavor to your holiday cooking!
Delicious Substitutions & Creative Variations
One of the beauties of a classic stuffing recipe is its versatility. While our core recipe is fantastic as is, you can easily customize it to suit different tastes, dietary needs, or simply to add a unique twist. Here are some popular substitutions and variations:
- Add Protein: For a heartier stuffing, incorporate about 8-12 ounces of finely chopped or crumbled cooked sausage (pork, turkey, or chicken sausage all work well). Brown the sausage separately before adding it to the cooked vegetables. This adds a wonderful savory depth.
- Cheesy Indulgence: If you’re a cheese lover, grated Parmesan cheese is a fantastic addition. You can either mix it into the stuffing mixture before baking for a subtle cheesy note, or sprinkle it generously over the top during the last 10-15 minutes of baking to create a crispy, golden-brown crust.
- Traditional Wheat Bread Option: This recipe is incredibly adaptable! If you don’t require it to be gluten-free, simply use a good quality day-old wheat sandwich bread instead of gluten-free bread. The cooking process remains exactly the same, yielding equally delicious results.
- Vegan Friendly: To make this recipe completely vegan, substitute dairy milk with a rich vegetable broth or an unsweetened plant-based milk like almond or oat milk.
- Dairy-Free Option: If you need to avoid dairy, simply opt for olive oil, ghee, or a high-quality vegan butter such as Miyoko’s Creamery (which I highly recommend for its excellent flavor and texture). Use vegetable or plant-based milk in place of dairy milk.
- Egg-Free Option: The egg helps with binding and richness, but it’s not strictly essential. For an egg-free or vegan version, you can simply omit the egg. The stuffing will still be incredibly flavorful and moist, though it might be slightly more crumbly.
If you’re planning an entire gluten-free or dairy-free Thanksgiving menu, be sure to explore more ideas with our comprehensive Thanksgiving recipe roundup, designed to help you create a delicious and inclusive feast for everyone.
Step-by-Step Guide: How to Make Gluten-Free Stuffing
Creating this delicious gluten-free Thanksgiving stuffing from scratch is a rewarding process, and it’s surprisingly easy when broken down into manageable steps. The key to a truly great stuffing lies in the details, starting with perfectly dried bread. Making your own dried bread cubes is far superior to any pre-packaged gluten-free stuffing mix, providing better texture and flavor absorption. Let’s get cooking!
Preparation Phase: Drying the Bread
Why dry the bread? Drying the bread is a critical first step. Fresh bread is too soft and will absorb liquid quickly, leading to a soggy stuffing. By drying the bread cubes, you create a structure that can soak up all the wonderful savory liquids and rich flavors from the vegetables and broth without falling apart. This ensures your stuffing has a delightful texture and holds together beautifully.
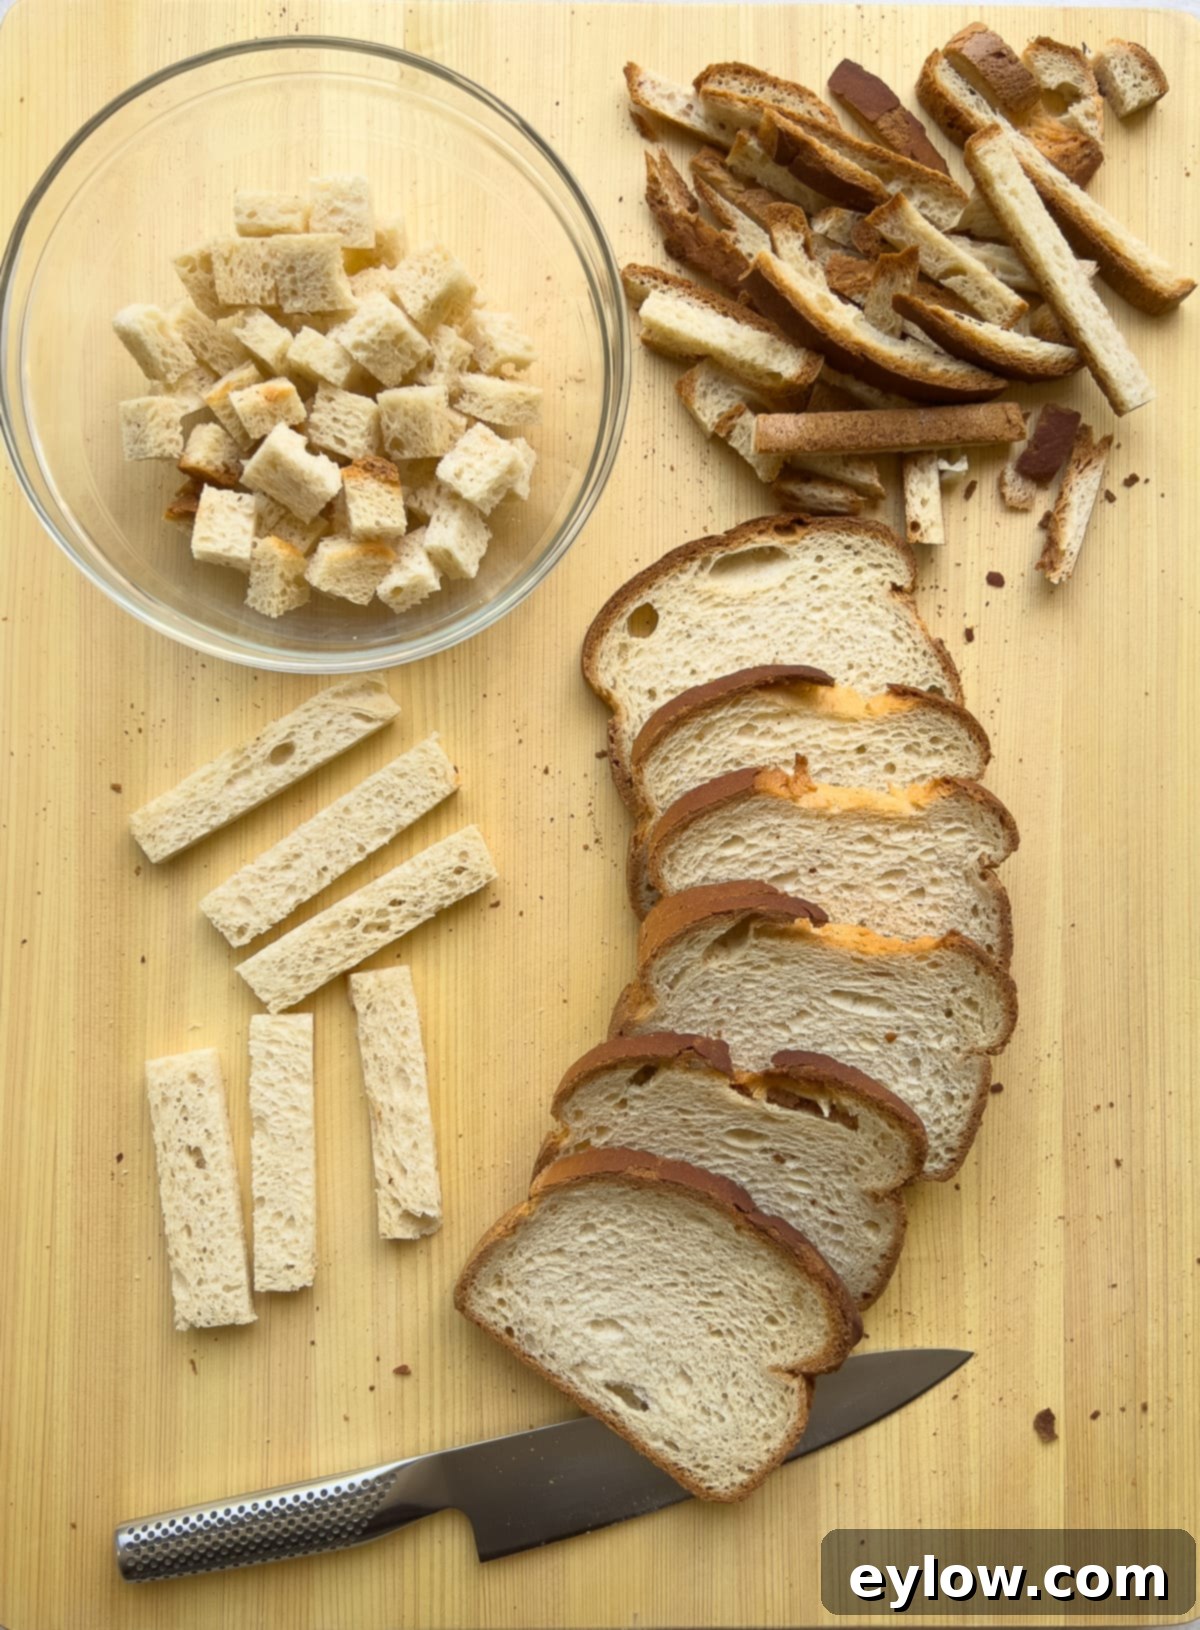
Step 1: Start by cutting then drying the bread cubes. You have two convenient methods for drying: leaving them on the counter overnight or baking them briefly in the oven. Both methods work perfectly, so choose what best fits your schedule. (Detailed instructions for each method are provided further below).
Cooking Phase: Sautéing Aromatics & Combining
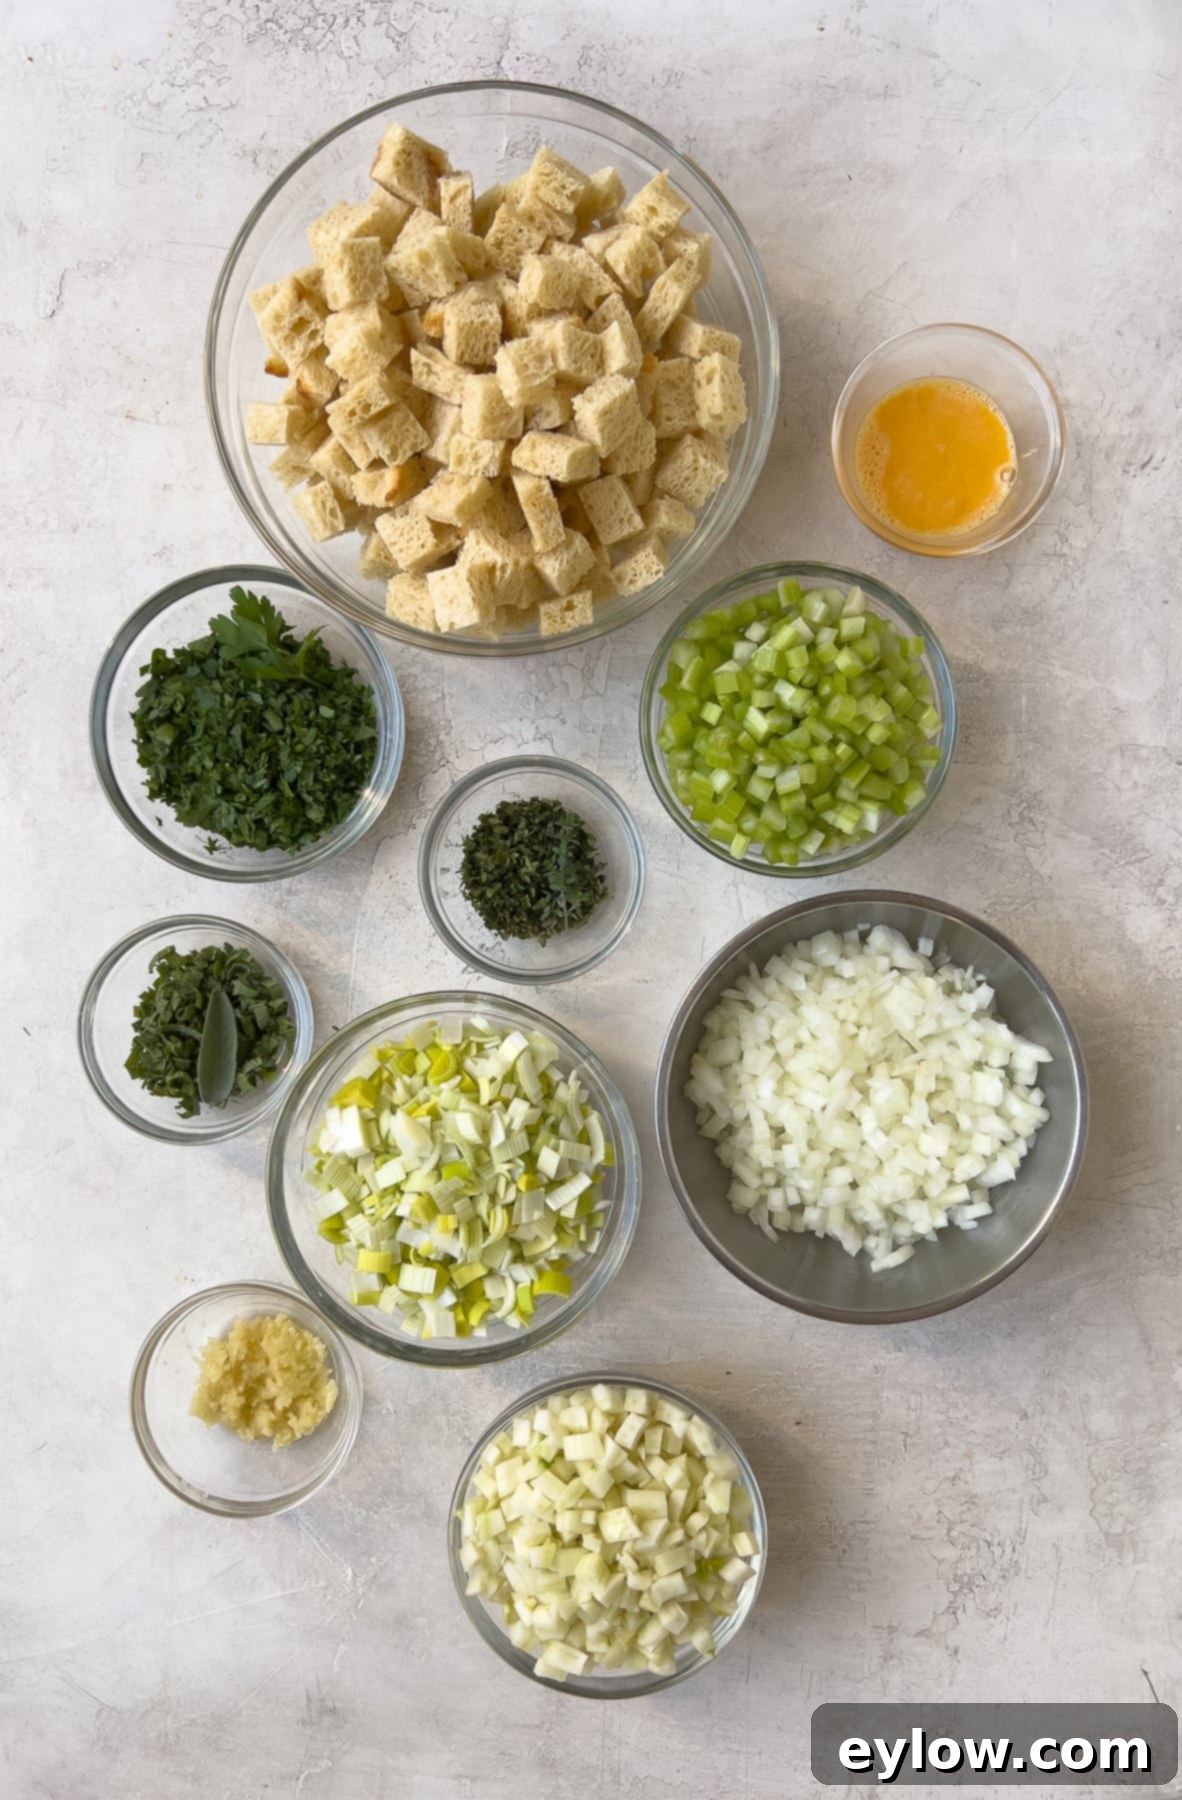
Step 2: Prepare your vegetables with precision. Thoroughly chop all the aromatics: onion, leek, fennel, and celery. Consistent, small dice ensure even cooking and distribution of flavor. For a more detailed visual guide on how to properly chop leek and fennel, refer to the photos and instructions below.
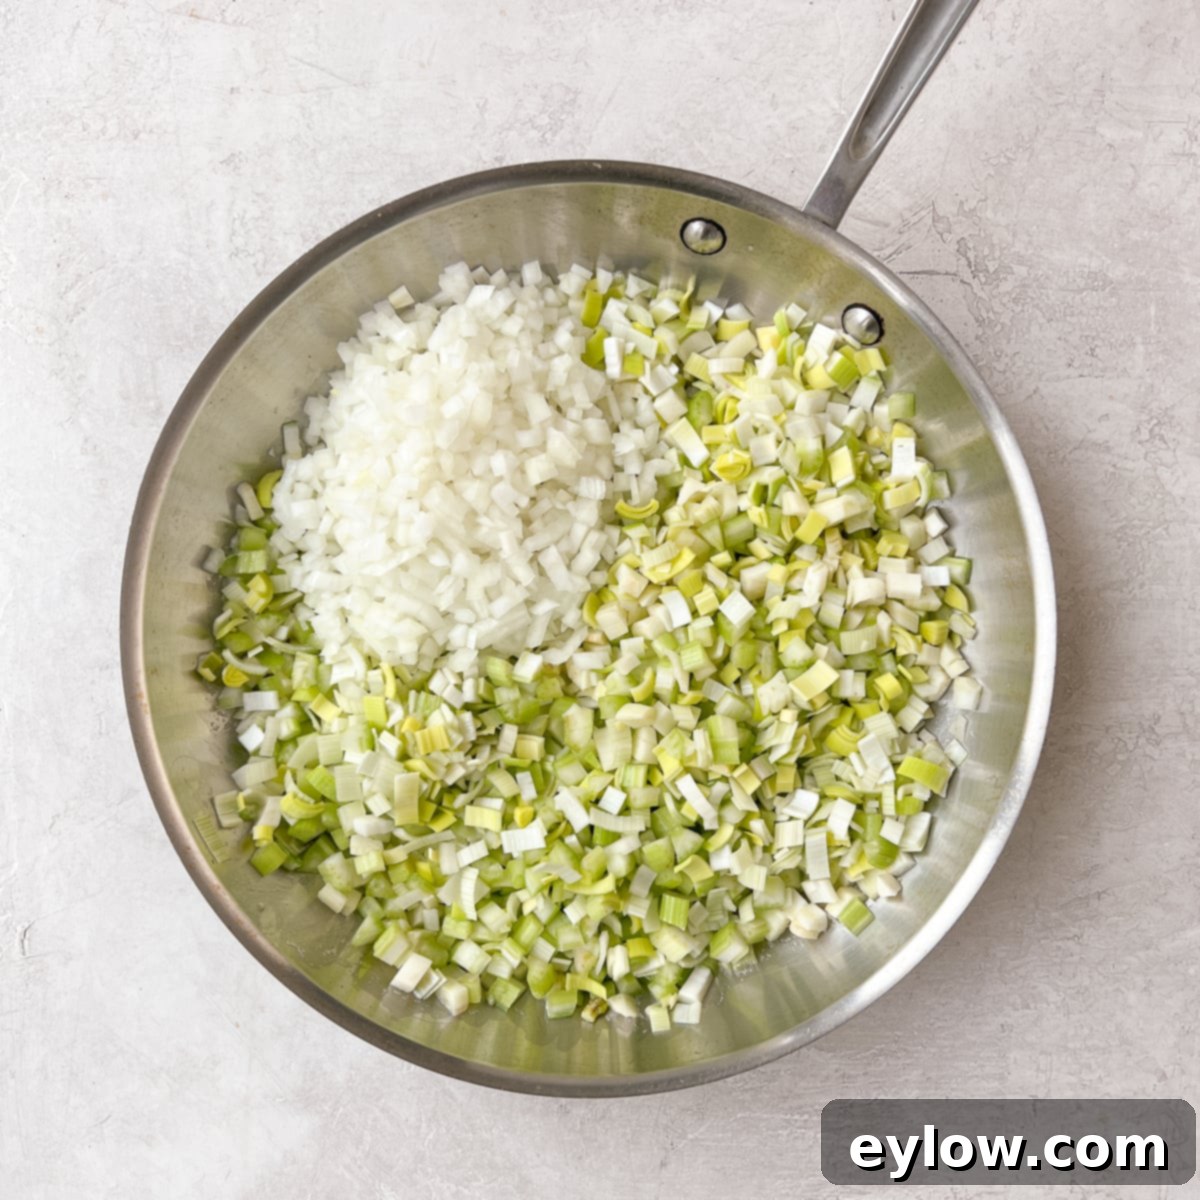
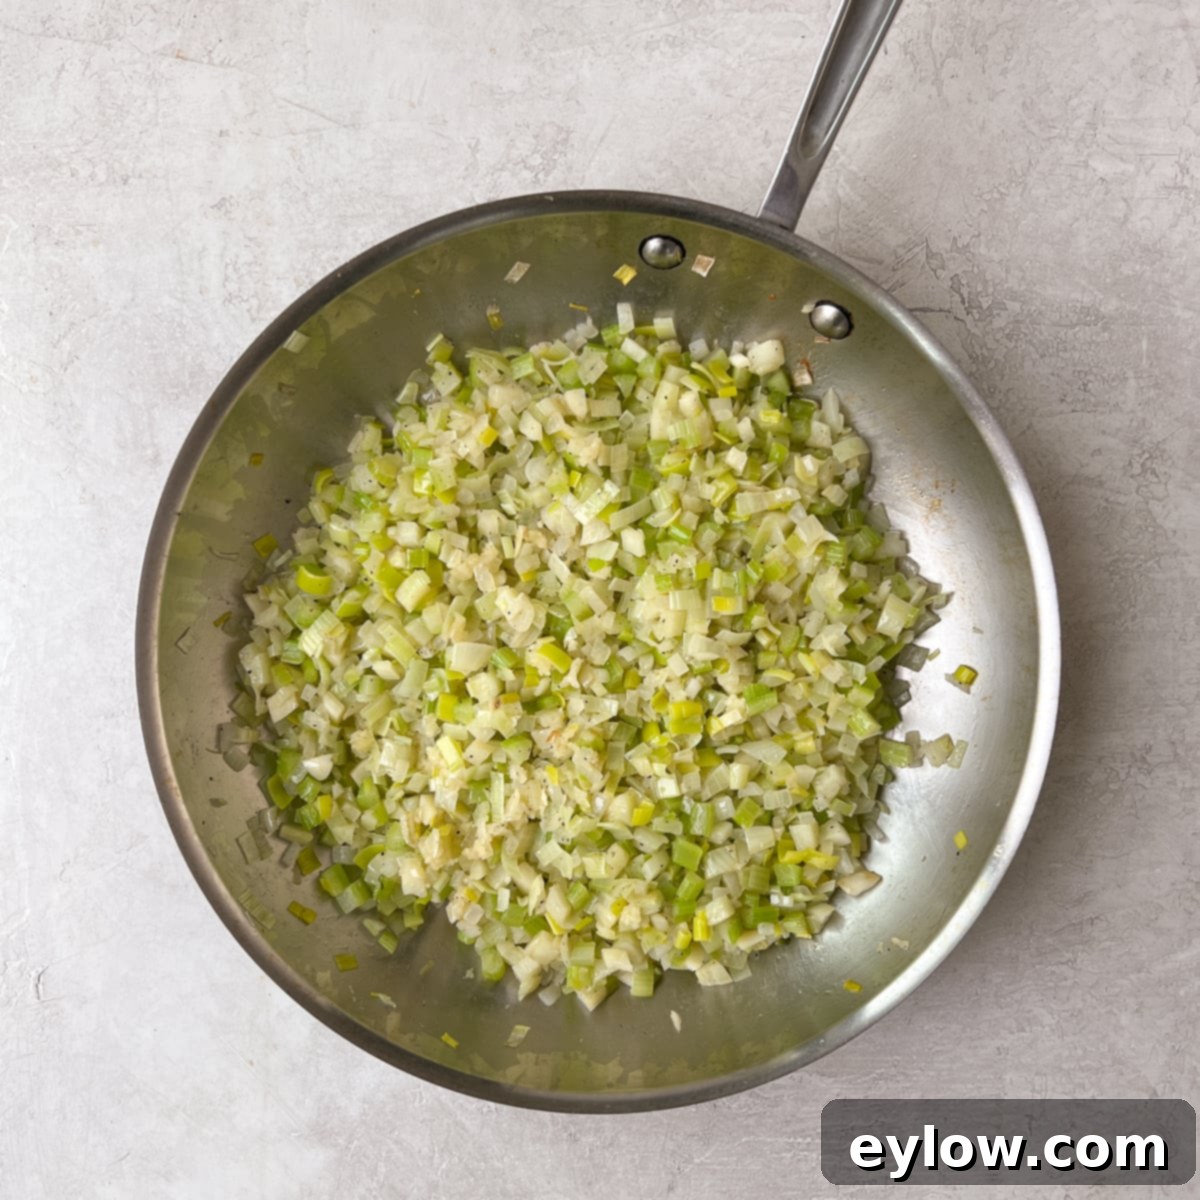
Step 3: Cook the vegetables until tender and fragrant. In a large skillet or fry pan, melt your chosen fat (butter, ghee, or olive oil) over medium heat. Add the chopped onion, leek, fennel, and celery. Sauté them, stirring occasionally, until they are beautifully soft, translucent, and just beginning to turn golden, but still moist – this usually takes about 12-15 minutes. Stir in the minced fresh garlic during the last minute of cooking to ensure its flavor is prominent without burning. This step builds the foundational savory flavor of your stuffing.
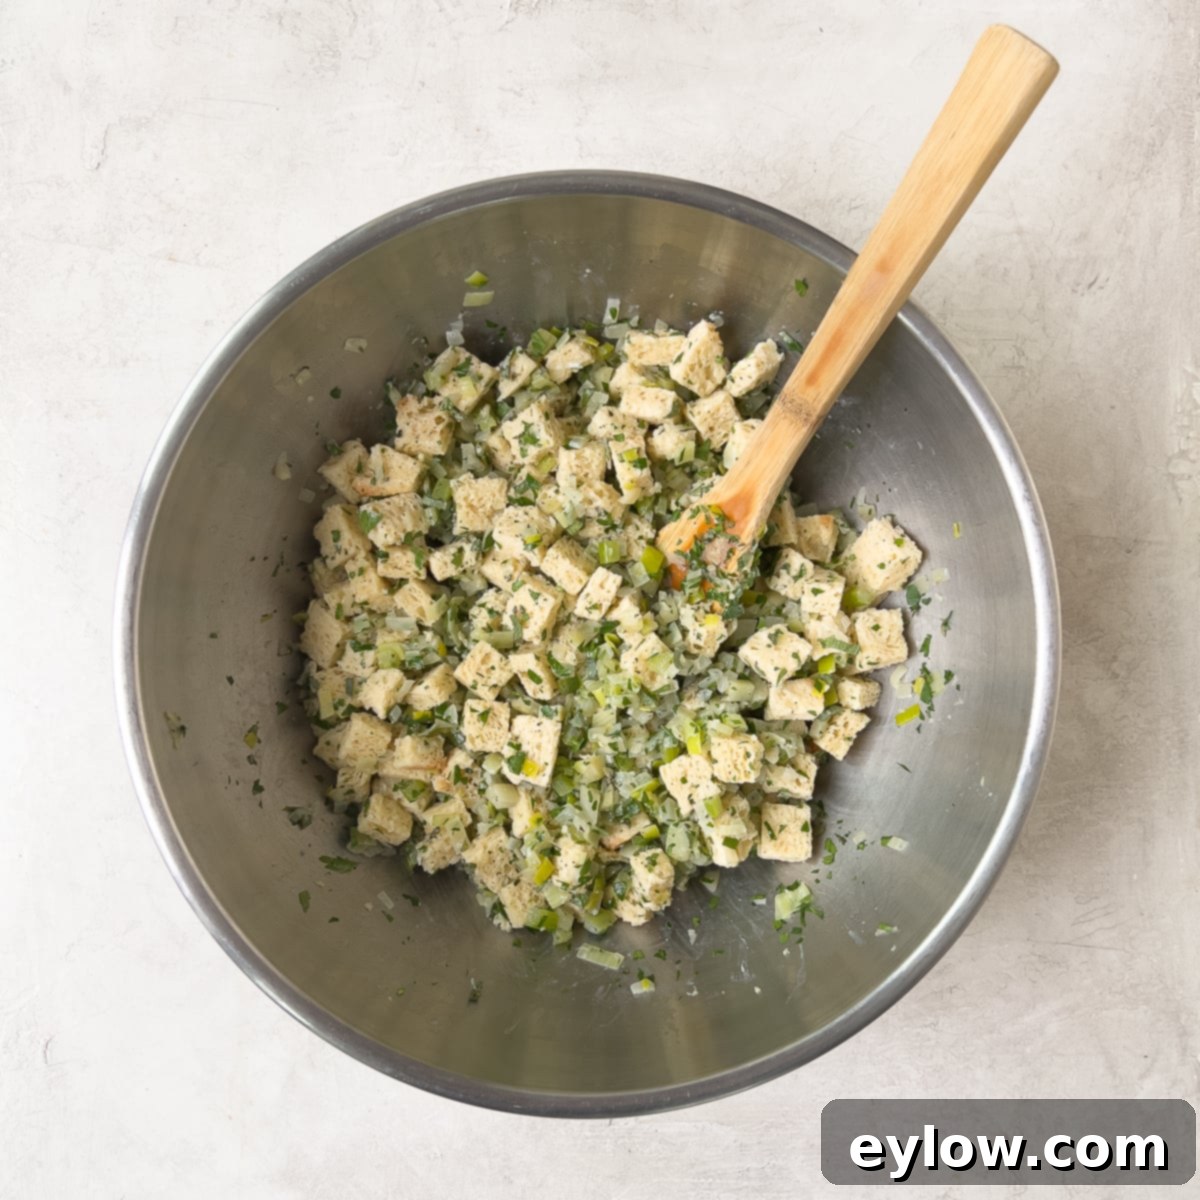
Step 4: Combine all the stuffing components. Transfer the sautéed vegetables into a generously sized mixing bowl. Add your prepared dried bread cubes and stir gently to combine. In a separate small bowl, whisk together the chosen liquid (milk or broth) and the beaten egg until well combined. Pour this liquid mixture over the bread and vegetables. Add the fresh or dried herbs, along with salt and ground black pepper. Gently fold all the ingredients together until the bread cubes are evenly moistened. The mixture should be moist but not soggy, and it should hold its shape when lightly squeezed. Adjust seasoning to taste, adding more salt or pepper if desired.
Baking Phase: Achieving Perfection
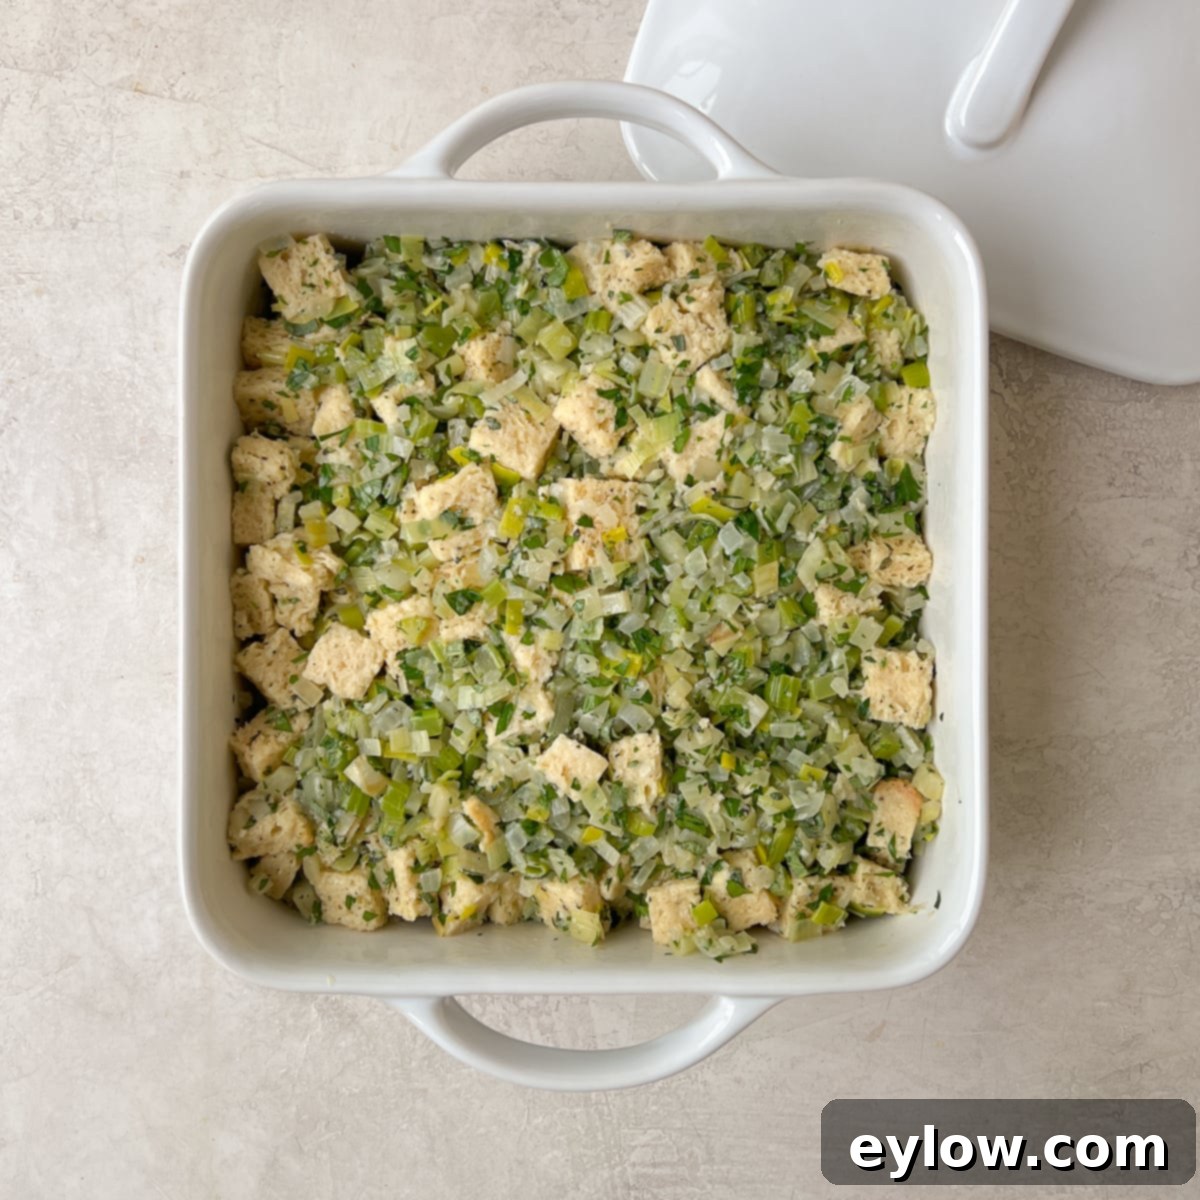
Step 5: Bake the stuffing to a golden finish. Lightly oil or butter a suitable baking dish (a 9″x9″ casserole for a single recipe, or 9″x13″ for a doubled batch). Spoon the prepared stuffing mixture evenly into the dish. Cover the dish tightly with aluminum foil. This helps to steam the stuffing and keep it moist during the initial baking phase. Bake in a preheated 350°F (175°C) oven on the center rack for 30 minutes. After 30 minutes, remove the foil and continue baking for another 15-20 minutes, or until the top is beautifully golden brown and crispy. If you decided to add cheese, this is the perfect time to sprinkle freshly grated Parmesan over the top before the final browning. Remove from the oven, let it rest for a few minutes, then serve and enjoy this comforting holiday classic.
Drying Gluten-Free Bread for Stuffing: Two Essential Methods
Achieving the perfect texture in your stuffing starts with properly dried bread. This prevents a soggy outcome and allows the bread to soak up all the delicious flavors. Here are two reliable methods for drying your gluten-free bread cubes, making them ideal for stuffing:
Initial Bread Preparation
First, always begin by preparing your bread cubes. Lay slices of your gluten-free bread out on a clean cutting board. For a smoother texture, you can trim off the crusts and discard them (or save them for breadcrumbs). Next, slice the bread into ¾-inch strips, and then cut these strips crosswise to create uniform ¾-inch bread cubes. Consistency in size is important for even drying and baking.
Method 1: The Counter Top Drying Method (Passive)
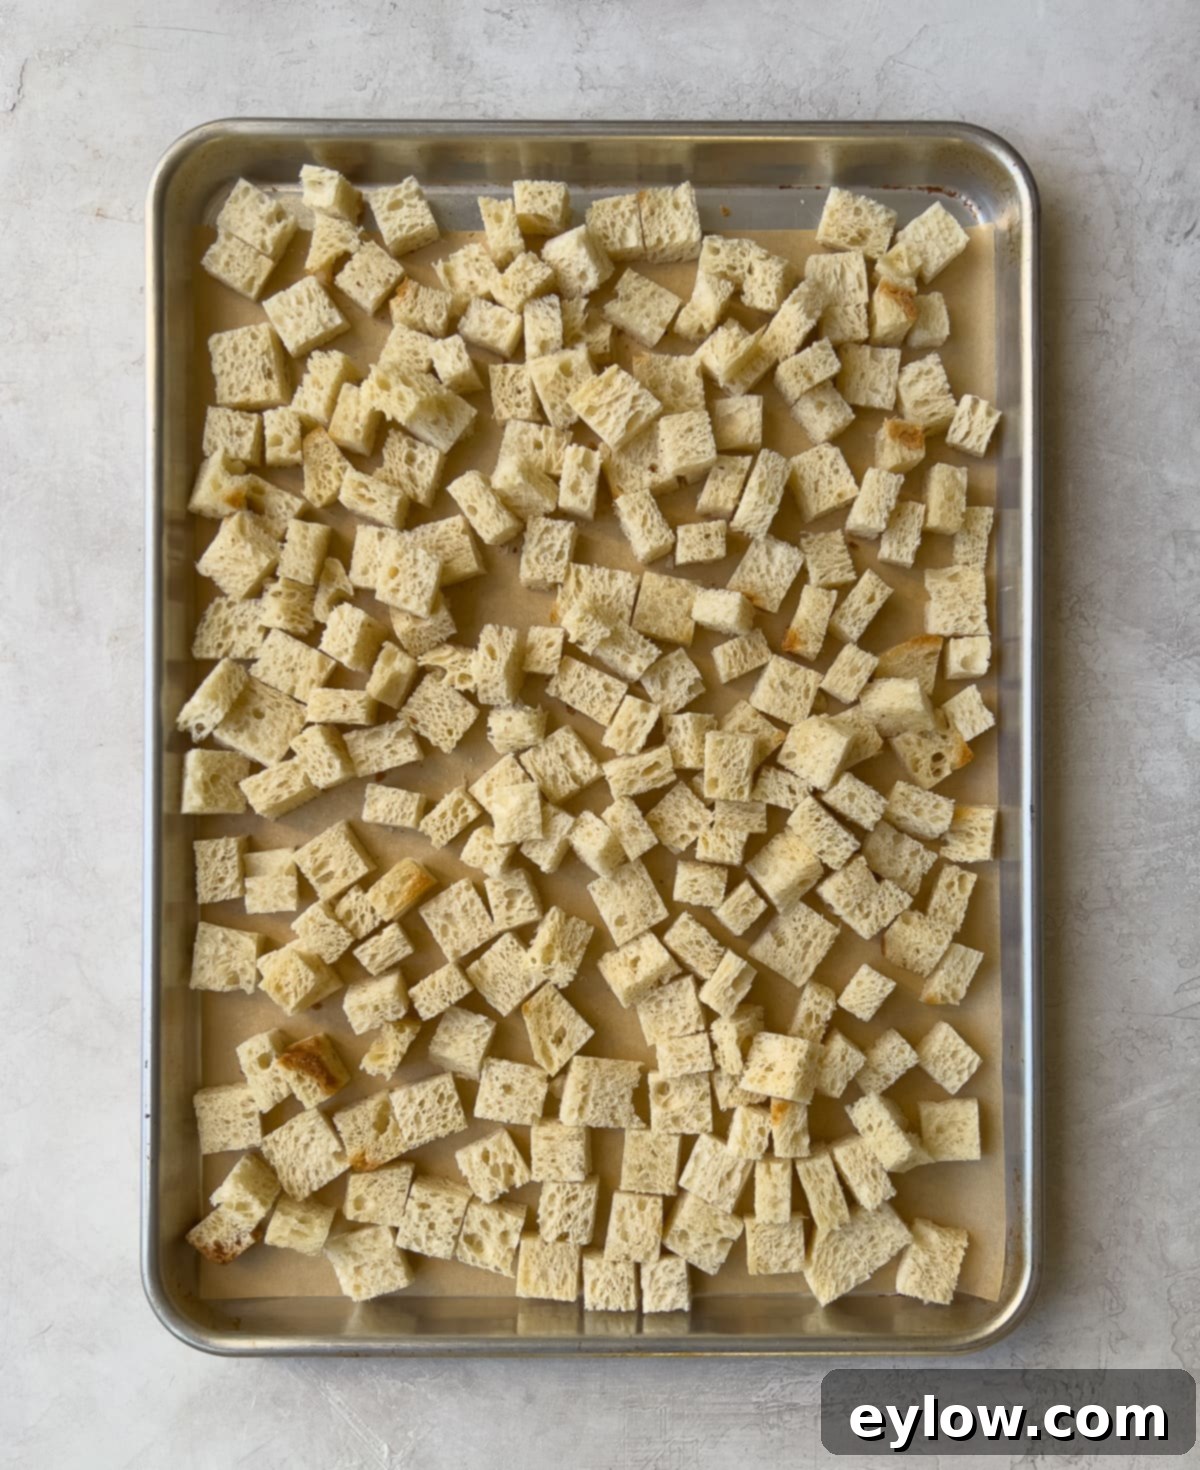
This method requires minimal effort but more time, making it perfect for preparing a few days in advance. Once your bread cubes are cut, spread them out in a single layer on one or more rimmed baking sheets. Ensure they are not crowded; good air circulation is crucial for even drying. Allow the cubes to stand uncovered at room temperature for at least 24 hours, or even up to 48 hours, until they feel firm and dry to the touch. This method gently removes moisture, resulting in perfectly receptive bread for your stuffing. Once thoroughly dry, you can transfer the cubes to an airtight container or a plastic zip-top bag and store them at room temperature for several days until you’re ready to proceed with your stuffing recipe.
Method 2: The Oven Drying Method (Active)
If you’re short on time or prefer a more active drying process, the oven method is quick and efficient. Preheat your oven to a low 225°F (105°C). Spread the cut bread cubes in a single layer on a large rimmed baking sheet. Bake the cubes for approximately 35-40 minutes, or until they are firm, slightly golden, and dry. They will become even crisper as they cool completely on the baking sheet. Once cooled, store them in an airtight container or plastic zip bag at room temperature until you’re ready to assemble your delicious stuffing. This method is excellent for same-day preparation or when you need dry bread cubes quickly.
Mastering Vegetable Prep for Flavorful Stuffing
The aromatic foundation of this stuffing is what truly sets it apart. While traditional recipes often rely solely on onion and celery, incorporating fennel, leek, and fresh garlic elevates the flavor profile significantly, adding layers of depth and interesting texture. If you’re new to preparing leeks or fennel bulbs, don’t worry – I’ll walk you through it with easy-to-follow instructions and accompanying photos.
How to Properly Chop Leeks
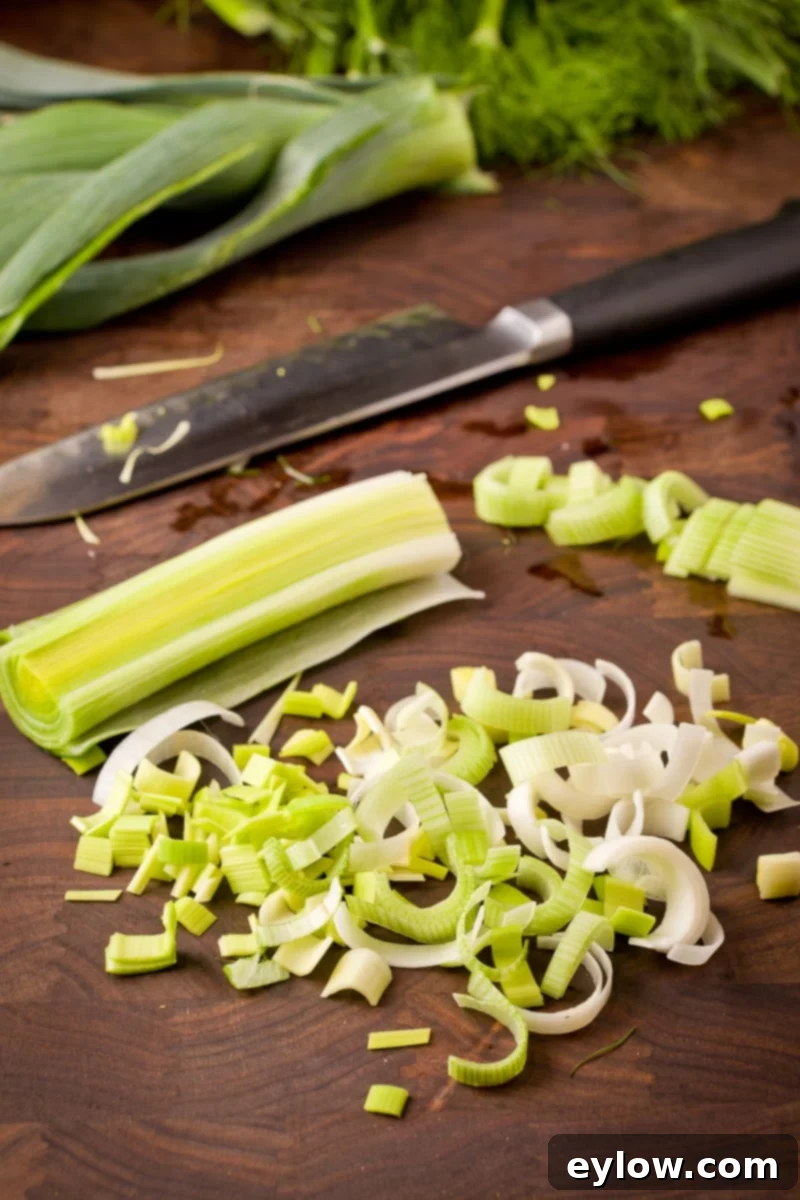
Leeks are beautiful but can harbor dirt, so proper cleaning is essential. To begin, trim off the tough, dark green top portion of the leek and discard it (or save it for making vegetable stock/broth later). Next, trim off the root end. You should be left with the white and light green parts, which are the most tender and flavorful. Slice this reserved part of the leek in half lengthwise. Hold the leek halves under cold running water, fanning out the layers slightly, to thoroughly dislodge any sand or grit trapped within. Once clean, place the leek flat side down on your cutting board and chop it crosswise into thin strips or delicate half-moons. This ensures uniform pieces that cook evenly and integrate perfectly into your stuffing.
How to Easily Chop Fennel
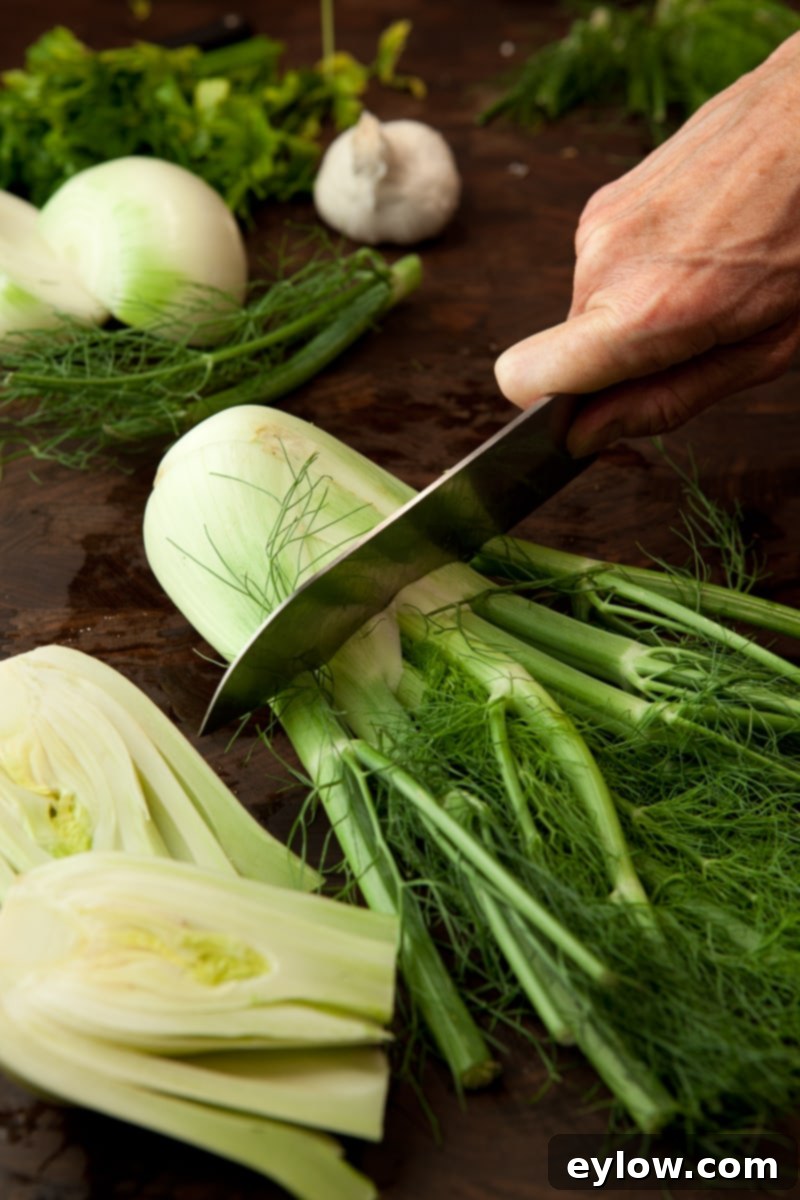
Fennel adds a unique, sweet anise flavor that truly makes this stuffing special. Start by chopping off the celery-like stalks from the top of the fennel bulb (refer to the photo for guidance). You can discard these stalks or use them for green juices if you wish. The feathery, fluffy fronds that resemble dill are edible and beautiful – save them for a fresh garnish or to add to salads, as they have a lovely delicate flavor. Next, trim a thin slice off the very bottom of the fennel bulb. Examine the bulb: if the outer layers are white and clean without any brown spots, you can proceed. Cut the entire bulb in half from top to bottom. Then, slice each half into long, thin strips, and finally, cut these strips crosswise into a small, consistent dice. If your fennel bulb has any brown spots on the outer layer, simply use a vegetable peeler to remove the blemishes. While some recipes suggest trimming out the triangular core, it’s generally unnecessary for stuffing, especially with smaller bulbs, as it softens completely during cooking. For the garlic, simply peel the cloves and chop them very finely to ensure a potent burst of flavor in every bite.
Essential Kitchen Tools for Stuffing Success
Having the right tools can make preparing your gluten-free Thanksgiving stuffing a breeze. These are the key pieces of equipment you’ll need to ensure a smooth cooking process and perfect results:
- A Large Sauté or Fry Pan (12-inch or larger): This is crucial for properly sautéing your vegetables. A spacious pan allows the vegetables to spread out in a single layer, ensuring they sauté and soften rather than steam. If your pan is too small, you might need to cook the vegetables in batches to prevent overcrowding, which can lead to a less flavorful result. For doubling the recipe, consider a 6-quart sauté pan or simply cook in two batches.
- Rimmed Baking Sheet(s): Essential for drying your bread cubes evenly, whether using the countertop or oven method. A “half sheet” size (approximately 18×13 inches) is versatile and highly recommended. Invest in heavy-duty ones, like this one or a highly-rated brand, as flimsy ones tend to warp in high heat.
- Large Mixing Bowl: You’ll need a generously sized mixing bowl to comfortably combine the dried bread cubes, sautéed vegetables, liquid, and herbs. Ensure it’s large enough to allow for thorough mixing without spilling.
- Casserole Baking Dish: A medium-sized casserole dish (9×9 inches for a single recipe, or 9×13 inches for a doubled recipe) is needed for baking the stuffing. Glass or ceramic dishes are excellent for even heat distribution and presentation.
Smart Make-Ahead Tips for a Stress-Free Thanksgiving
Thanksgiving is all about enjoying time with loved ones, not being overwhelmed in the kitchen. This gluten-free stuffing recipe is perfect for advance preparation, allowing you to spread out the work and reduce stress on the big day. Here’s how you can get a head start:
- Prepare and Dry Bread Cubes: This is a fantastic task to tackle a few days (up to 4) ahead of time. Cut and dry your bread cubes using either the countertop or oven method. Once completely dry, store them in an airtight container or a large zip-top bag at room temperature. This significantly cuts down on same-day prep.
- Chop Vegetables in Advance: Clean and finely chop your leek, fennel, celery, onion, and garlic a day or two before you plan to assemble the stuffing. Store the chopped vegetables together in an airtight container in the refrigerator. This allows the flavors to meld slightly and makes the sautéing step much faster.
- Organize Your Baking Dish: Pull out your casserole dish a day or two before. You can even place a sticky note in it that says “stuffing” to remind you which dish it’s for, helping you stay organized when the kitchen gets busy.
- Homemade Broth: If you’re using vegetable broth, consider making it homemade a week or two in advance. Homemade broth is almost always superior to store-bought, offering a richer, deeper flavor. Make a large batch and freeze it until needed.
- Assemble Ahead & Refrigerate: You can fully assemble the stuffing mixture (combining dried bread, sautéed vegetables, liquid, and herbs) in the morning of Thanksgiving. Transfer it to your buttered casserole dish, cover it tightly with plastic wrap, and refrigerate. About an hour before you plan to bake, remove it from the refrigerator to allow it to come closer to room temperature for more even baking. Then, follow the baking instructions, keeping it hot until serving time.
Chef’s Tip: Here’s another BIG make-ahead tip that can transform your entire Thanksgiving turkey: if you’ve never dry-brined a turkey, you are missing out on incredibly moist and flavorful results! It’s surprisingly easy and makes a huge difference. Read my step-by-step guide on How to Dry Brine a Turkey. Plan to start this process on the Sunday or Monday of Thanksgiving week to maximize its benefits.
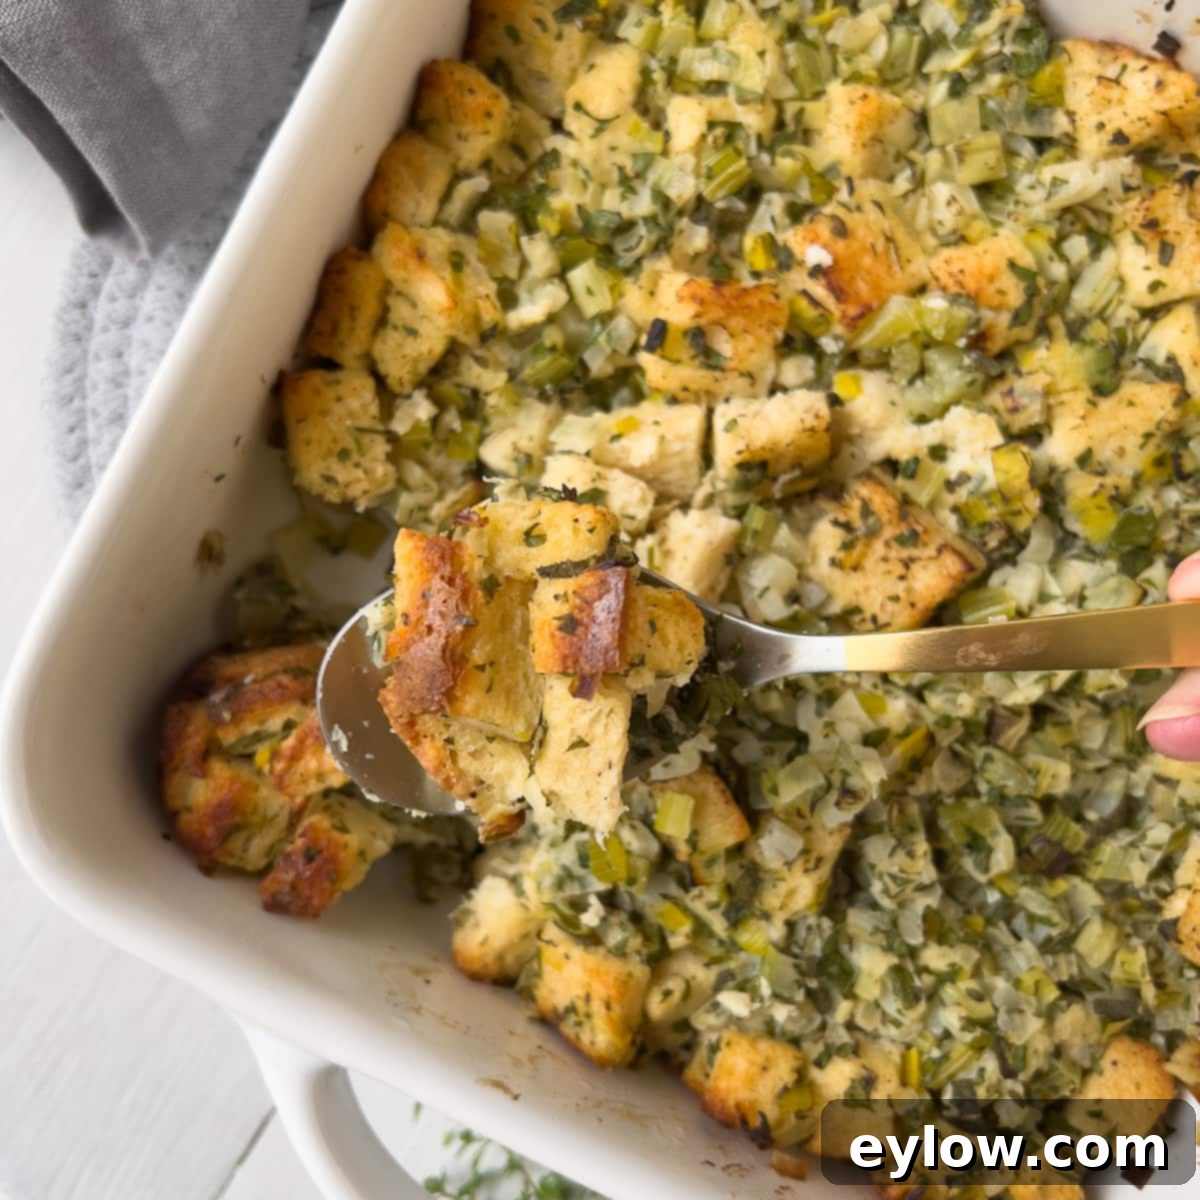
Perfect Pairings: What to Serve with Your Stuffing
This classic gluten-free stuffing is more than just a Thanksgiving side; it’s a versatile dish that complements a wide array of main courses. While it’s truly spectacular alongside your glorious holiday bird, it also pairs beautifully with other roasted meats throughout the year. Here are some fantastic side dishes that will complete your festive meal:
- Creamy Mashed Sweet Potatoes with Rosemary: The earthy sweetness of mashed sweet potatoes, brightened with rosemary, provides a wonderful contrast to the savory stuffing.
- Sour Cream Mashed Gold Potatoes: For those who prefer a more traditional potato, these fluffy, tangy mashed gold potatoes offer a rich and comforting accompaniment.
- Crisp Baby Green Beans with Garlic: A vibrant green vegetable like these perfectly cooked green beans adds freshness and a hint of garlic, cutting through the richness of the other dishes.
- Easy No-Cook Cranberry Sauce: The tart sweetness of cranberry sauce is a quintessential Thanksgiving pairing, offering a refreshing counterpoint to the savory stuffing and turkey.
- Sautéed Lemon Thyme Brussels Sprouts: Made stove-top, these flavorful Brussels sprouts with bright lemon and fragrant thyme add a delicious, slightly bitter edge that balances the meal.
- For a delightful twist, consider trying my homemade gluten-free cornbread stuffing with cranberries, offering a different texture and flavor profile.
For even more Thanksgiving side dish inspiration, explore our dedicated holiday recipes category page or delve into this comprehensive recipe roundup post featuring 25 Gluten-Free and Dairy-Free Thanksgiving Sides, ensuring your entire feast is inclusive and delicious.
Enjoying Leftovers
Leftover Thanksgiving stuffing is often just as coveted as the main meal! It’s absolutely delicious, especially for breakfast the next morning, paired with fried or scrambled eggs. The savory flavors are a perfect start to a relaxed post-holiday day. Stuffing can be stored safely in an airtight container in the refrigerator for 3-4 days. In my experience, it never lasts long enough to consider freezing!
Reheating Tips
To reheat leftover stuffing, transfer it to an oven-safe dish, cover it with aluminum foil, and bake in a 350°F (175°C) oven until it’s heated through and reaches an internal temperature of 165°F (74°C). The exact time will depend on how cold it is coming out of the refrigerator, but generally, start with 30 minutes. For faster reheating, allow the dish to sit at room temperature for about an hour before placing it in the oven.
Common Questions About Thanksgiving Stuffing
Traditional stuffing, or dressing, is fundamentally made from bread (often day-old to prevent sogginess), a medley of aromatic vegetables like onions and celery (and sometimes carrots), and a generous blend of savory herbs such as sage, thyme, and parsley. These ingredients are moistened with a liquid, typically broth or milk, and sometimes an egg acts as a binder, then baked until golden and fragrant.
Several factors contribute to exceptional stuffing. Firstly, using a diverse mix of fresh, aromatic vegetables like leeks, fennel, and garlic alongside onions and celery adds complex layers of flavor. Secondly, generous amounts of fresh herbs are crucial; they provide brightness and depth. Thirdly, a good quality bread, properly dried, ensures the right texture and excellent absorption of all the delicious liquids. Finally, some people enhance their stuffing with additions like cooked sausage, dried fruits (cranberries, figs), or fresh seasonal fruits (apples, pears). While I opt to keep my recipe fruit-free, these are popular variations you can certainly try.
For added flavor and moisture without actually “stuffing” the turkey (which, as mentioned, can pose food safety challenges and uneven cooking), I like to loosely fill the turkey cavity with aromatics. This typically includes roughly chopped onion, carrot, and celery, several whole garlic cloves (lightly crushed), and a generous handful of fresh herbs like thyme and sage. This infuses the turkey with incredible flavor from the inside out. For more in-depth guidance on preparing your turkey, refer to my post on How to Dry Brine a Turkey. Always cook your main stuffing or dressing separately in a casserole dish as this recipe directs.
Absolutely! This recipe is ideal for make-ahead preparation. You can dry the bread cubes several days in advance, chop all your vegetables a day or two prior, and even fully assemble the stuffing mixture in your baking dish the morning of Thanksgiving. Just cover it tightly and refrigerate. Remember to let it come to room temperature for about an hour before baking for the best results.
More Terrific Fall Recipes for Your Table
As we eagerly anticipate the grand Thanksgiving feast, don’t forget that delicious meals are still needed in the weeks leading up to the holiday! Here are some easy and comforting fall recipes to keep in your culinary arsenal, perfect for cozy evenings and getting into the spirit of the season:
- Hearty Butternut Carrot Soup
- Baked Turkey Meatballs
- Creamy Sour Cream Pork Chops Recipe
- Perfect Roast Split Chicken Breast
⭐️ Did You Make This Recipe? We’d Love to Hear From You!
If you’ve had the pleasure of making this delightful gluten-free Thanksgiving stuffing, please take a moment to add your comment below. Your feedback is incredibly valuable, and I truly enjoy hearing about your experiences and any personalized twists you might have added. If you absolutely loved it and it brought joy to your table, please consider giving it a 5-star rating! Your ratings genuinely help other readers discover and trust this recipe. Should you encounter any issues or have questions, don’t hesitate to reach out in the comments – I’m here to help you figure it out and ensure your stuffing turns out perfectly.
📖 Recipe
Classic Gluten Free Thanksgiving Stuffing
Sally Cameron
Pin Recipe
Equipment
-
Large saute or fry pan (12″)
-
Medium casserole baking dish 9×9 for single or 9x 13 for double recipe
-
Large mixing bowl
Ingredients
- 1 ½ pound loaf gluten-free white bread I buy Canyon Bakehouse Heritage White
- 1 small leek light green and white part only
- 1 medium fennel bulb trimmed and chopped small
- 3 large celery ribs chopped small
- 1 medium onion chopped small
- 2-3 large garlic cloves chopped fine
- 3 tablespoons olive oil or unsalted butter or plant-based butter
- ½-3/4 cup milk (dairy or plant) or broth chicken, turkey, or vegetable
- 1 large egg, beaten optional (skip for egg-free)
- ½ cup finely chopped fresh parsley ½ bundle
- 1 tablespoon fresh chopped thyme leaves or 1 teaspoon dried thyme
- 1 tablespoon fresh chopped sage leaves or ¾ teaspoon dried
- ½ teaspoon sea salt
- ¼ teaspoon ground black pepper
Instructions
Cut bread cubes
-
To prepare your bread for stuffing, discard the heels of the gluten-free bread loaf. Carefully trim off the crusts from the remaining slices and set them aside (you can discard them or save them for future use as breadcrumbs). Then, slice each piece of bread into uniform ¾-inch strips, and subsequently cut these strips into consistent ¾-inch cubes. This uniformity is crucial for even drying and baking.
Oven drying bread cubes (do ahead)
-
To dry bread cubes efficiently, pre-heat your oven to a low 225°F (105°C). Spread the cut bread cubes in a single layer on a rimmed baking sheet, ideally lined with parchment paper or aluminum foil to prevent sticking. Bake for approximately 45-50 minutes, or until the cubes feel firm and dry. Once baked, allow them to cool completely on the counter; they will become even crisper as they cool. Store the dried cubes in an airtight container or a large zip-top bag at room temperature until you are ready to prepare your stuffing. This can be done several days in advance.
Counter drying bread cubes (do ahead)
-
For a passive drying method, arrange your freshly cut bread cubes in a single layer on one or more rimmed baking sheets. Ensure they are well-spaced for adequate air circulation. Leave them uncovered at room temperature for at least 24 hours (or up to 48 hours) to dry thoroughly. This gentle drying process yields perfectly textured bread for stuffing. Once dry, transfer the cubes to a zip-top plastic bag or an airtight container, where they can be stored at room temperature for up to 4 days until you are ready to use them.
Prep the Vegetables
-
To prepare the leek, first trim off the tough, dark green top and the root end, reserving only the white and light green parts. Discard the dark green top (or save for stock). Slice the reserved leek in half lengthwise, then thoroughly rinse it under cold running water, separating the layers slightly to ensure all trapped sand or dirt is removed. Once clean, slice the leek crosswise into thin half circles or fine chops.
-
For the fennel, trim the stalks off the top and a thin slice off the bottom of the bulb. You can save the delicate fluffy fronds for a garnish if desired. Cut the bulb in half from top to bottom. Then, slice the halves into long, thin strips, and cut these strips crosswise into a small, consistent dice. For the celery and onion, dice them small and uniformly. These vegetables can be prepped a day ahead, combined in an airtight container, and refrigerated until you are ready to cook.
Cook the Vegetables & Assemble Stuffing
-
When you are ready to finish preparing the stuffing, preheat your oven to 350°F (175°C). Heat a large (12-inch) skillet, sauté pan, or frying pan over medium heat. Add the olive oil, unsalted butter, or plant-based butter (or a combination) to the pan and allow it to melt and shimmer. Add the chopped leek, fennel, celery, and onion to the hot fat. Cook, stirring occasionally, for 12-13 minutes, until the vegetables are tender, translucent, and slightly softened but still moist. Stir in the finely chopped garlic during the last minute of cooking. If your pan is too small to hold all the vegetables comfortably, cook them in two separate batches to avoid overcrowding and ensure they sauté properly.
-
Once cooked, transfer the sautéed vegetables into a large mixing bowl. Add the dried bread cubes, the finely chopped fresh herbs (parsley, thyme, sage), and the measured sea salt and ground black pepper. In a separate small bowl, whisk together the ½ cup to ¾ cup of milk or broth and the beaten large egg until well combined. Pour this liquid mixture over the bread and vegetables in the large mixing bowl. Gently fold all the ingredients together until the bread cubes are evenly moistened. The mixture should be moist and hold together when gently squeezed, but not be soggy. If it appears too dry, gradually add a little more milk or broth, one tablespoon at a time, until the desired consistency is achieved. Taste the mixture and adjust seasoning with additional salt and pepper if necessary, ensuring a perfectly balanced flavor.
Assemble and Bake the Stuffing
-
Lightly oil or butter a medium-sized casserole or baking dish (such as a 9″x9″ pan). Spoon the thoroughly mixed stuffing mixture evenly into the prepared dish. Cover the dish tightly with aluminum foil. Bake in the preheated 350°F (175°C) oven, on the center rack, for approximately 30 minutes. This initial covered baking helps to keep the stuffing moist and flavorful. After 30 minutes, remove the foil and continue baking for an additional 15-20 minutes, or until the top of the stuffing is beautifully golden brown and lightly crispy. Serve this delicious, comforting stuffing immediately and enjoy its exquisite flavors.
-
Should you have any glorious leftovers, they will keep wonderfully in an airtight container in the refrigerator for up to 4 days, ready to be enjoyed again.
Notes
To significantly save time on Thanksgiving Day, start by drying your bread cubes 1-2 days prior using either the oven or countertop method described above. Then, on Thanksgiving morning, you can fully assemble the stuffing mixture in your baking dish, cover it tightly, and refrigerate it. Before baking, remember to remove the dish from the refrigerator and let it sit at room temperature for approximately an hour. This ensures more even baking and a better final texture. Plan to bake it about 2 hours before your desired serving time.
Dietary Substitutions for Everyone:
- For Vegetarians: Easily adapt this recipe by using a savory vegetable broth or unsweetened plant-based milk (like almond or oat) in place of chicken/turkey broth or dairy milk. The remaining ingredients are naturally vegetarian.
- For Vegans: To make this stuffing fully vegan, substitute dairy milk with unsweetened almond milk or oat milk. Use olive oil or a high-quality plant-based butter (such as Miyoko’s Creamery) instead of dairy butter. Additionally, skip the egg; the stuffing will still be delicious and hold together well, though it might be slightly more crumbly.
- Bread Choice: This versatile recipe works beautifully for both gluten-free bread (as specified) and traditional wheat bread, allowing you to cater to different dietary needs within the same framework.
- This recipe is naturally low risk for individuals managing histamine intolerance, making it a thoughtful choice for those with specific dietary sensitivities.
Scaling for a Crowd (More than 8 people):
If you’re hosting a larger gathering, simply double the recipe to serve more guests. When doubling, you’ll need a larger cooking vessel for the vegetables, such as a 6-quart sauté pan, or you can cook the vegetables in two separate batches. For baking, use a larger 9″x13″ casserole dish to accommodate the increased volume of stuffing.
