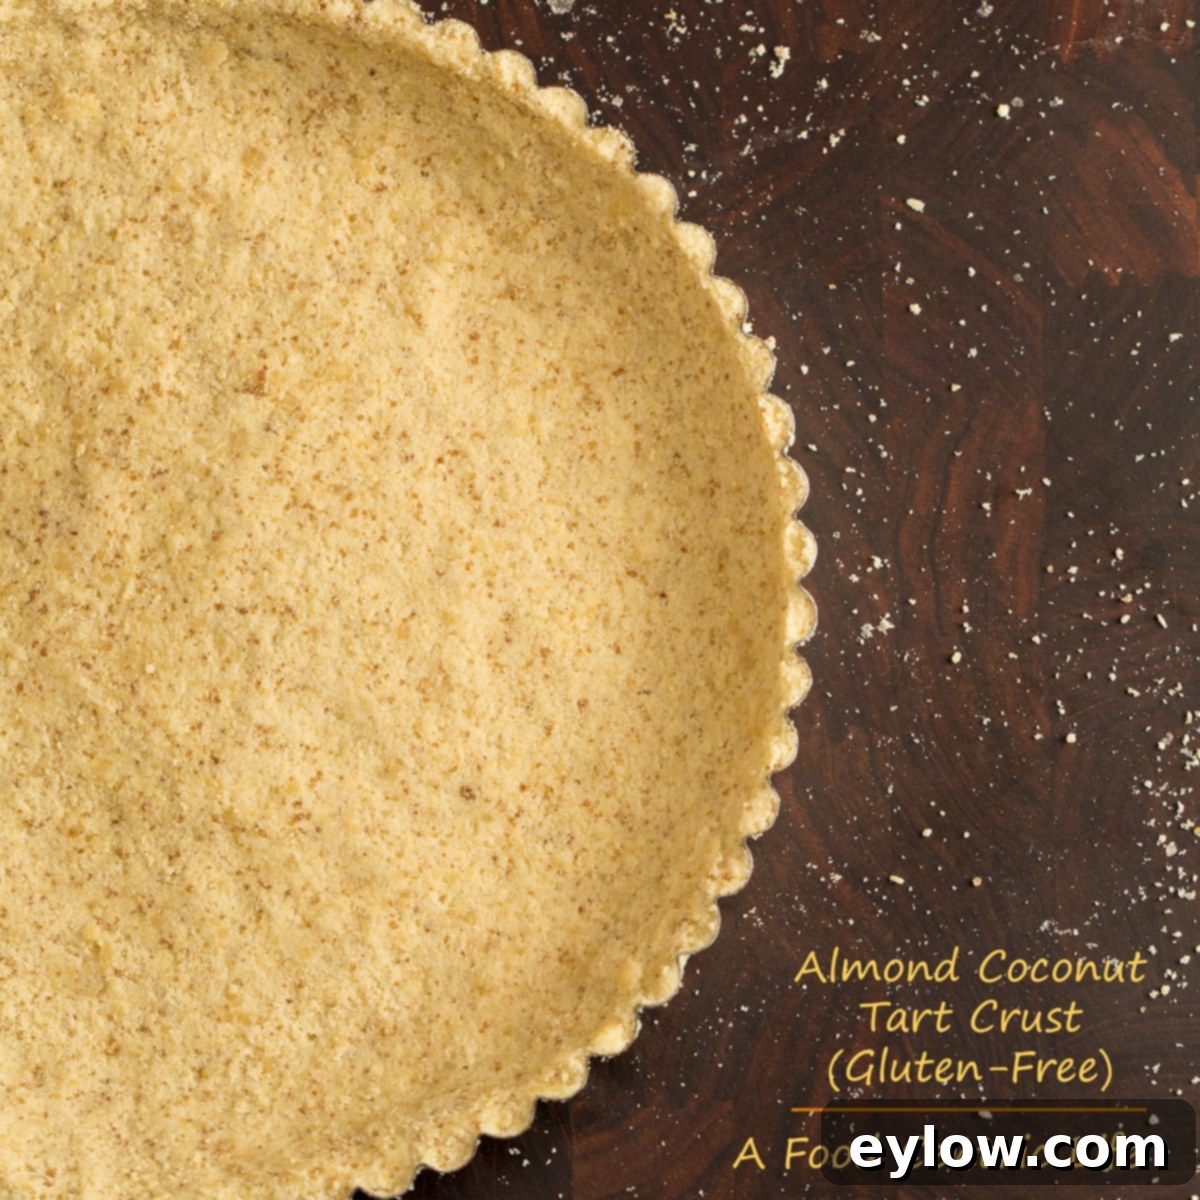
Effortless Gluten-Free Tart Crust: A Simple Almond & Coconut Flour Press-In Recipe
Discover the ultimate recipe for a truly versatile and incredibly easy-to-make gluten-free tart crust. This exceptional press-in crust eliminates the fuss and intimidation often associated with traditional pastry making, making it perfect for both novice bakers and seasoned enthusiasts. Crafted from a wholesome blend of almond flour and coconut flour, along with a touch of butter and natural sweetness, this crust is not only naturally gluten-free but also entirely grain-free. Its robust yet tender texture provides the ideal foundation for an endless array of fillings – from the rich creaminess of a spiced pumpkin tart, the decadent luxury of a chocolate ganache, to the sophisticated tang of a savory goat cheese and tomato creation.
Forget the stress of rolling out delicate pastry dough or worrying about a soggy bottom. With this innovative recipe, you simply press the mixture directly into your tart pan using your fingers, bake until golden, and then fill. This “no-roll” method saves significant time and effort, making homemade tarts an accessible delight for any occasion. Prepare it a day in advance to streamline your baking process, allowing you to focus on your exquisite fillings when the time comes. This recipe proves that creating a beautiful, delicious, and diet-friendly tart crust can truly be effortless.
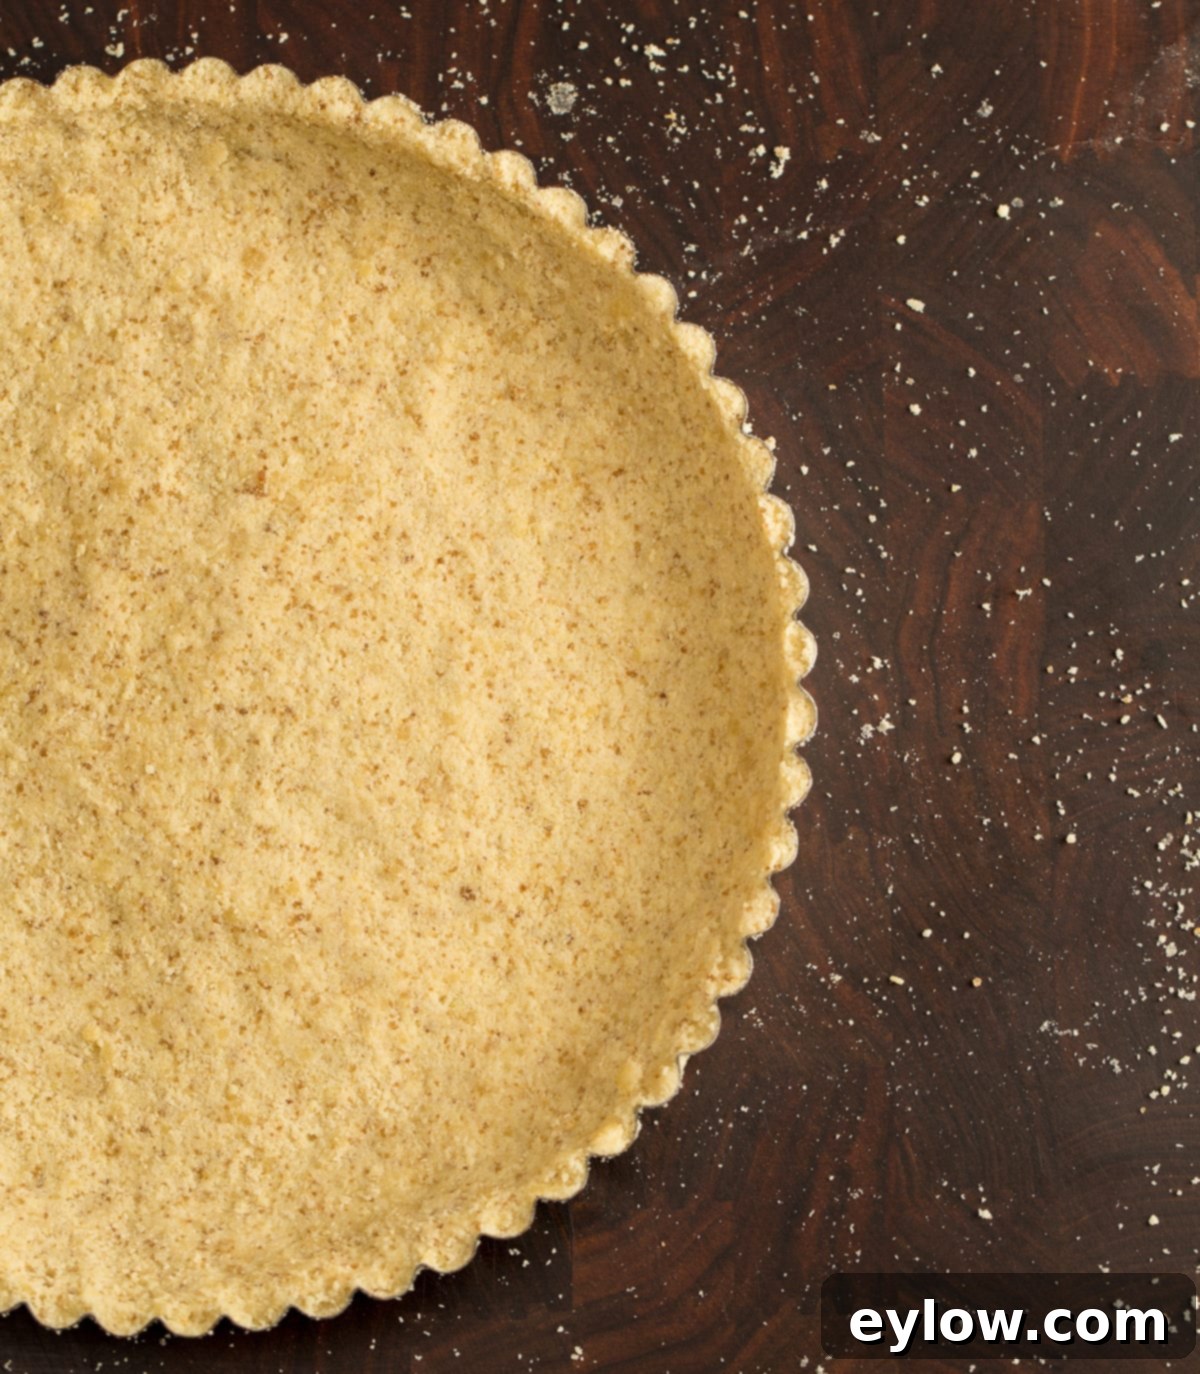
If you’ve ever shied away from making homemade tarts due to complicated pastry recipes, this press-in crust will be a game-changer. It’s designed for simplicity and incredible results, yielding a crumbly, cookie-like texture that holds up beautifully to various fillings. Unlike traditional wheat-based crusts, this gluten-free and grain-free alternative is packed with healthy fats and fiber from the almond and coconut flours, making it a more nourishing option without compromising on taste or structural integrity. You’ll spend about 15 minutes assembling this delightful crust, followed by a short baking time, leaving you with more time to perfect your fillings.
The unique combination of almond flour and coconut flour is the secret to this crust’s success. Almond flour provides a rich, buttery flavor and tender crumb, while coconut flour adds essential structure and absorbency, ensuring the crust doesn’t become too fragile. This harmonious blend creates a perfect gluten-free tart base that’s ideal for a variety of festive occasions. Imagine serving a luxurious spiced pumpkin tart during Thanksgiving, a rich, dark chocolate tart for Christmas celebrations, or a vibrant fruit tart for a spring gathering. Its adaptability also extends to savory dishes, providing a delicious contrast to fillings like a creamy quiche or a flavorful vegetable tart.
Essential Ingredients for Your Gluten-Free Tart Crust
Crafting the perfect gluten-free and grain-free tart crust relies on a thoughtful selection of ingredients, each playing a crucial role in achieving that ideal tender, yet stable, texture and delightful flavor. Here’s a closer look at the key components:
- Almond Flour: The Foundation of Tenderness
As a naturally gluten-free and grain-free alternative to traditional wheat flour, almond flour is the backbone of this recipe. Made from finely ground blanched almonds, it’s not only a powerhouse of healthy fats, protein, and fiber but also imparts a wonderfully tender, almost buttery texture to the crust. Its fine consistency helps create a smooth dough that’s easy to press into the pan, contributing to a rich, subtly nutty flavor that complements both sweet and savory fillings. Ensure you use blanched, super-fine almond flour for the best results, avoiding almond meal which can result in a coarser crust. - Coconut Flour: The Structural Secret
Coconut flour is a highly absorbent, gluten-free, and low-carb flour derived from dried coconut meat. Its unique properties are essential for adding structure and binding the crust together without making it overly dense. A little goes a long way with coconut flour, as it absorbs a significant amount of moisture. This characteristic is particularly beneficial in gluten-free baking, preventing the crust from becoming too crumbly while providing a firm base. It also lends a subtle, delicate sweetness and tropical note that enhances the overall flavor profile. - Sugar: Sweetness and Golden Hue
Light brown sugar is our preferred choice for this tart crust. It not only provides a pleasant, subtle caramel-like sweetness but also contributes to the beautiful golden-brown color of the baked crust. The molasses content in brown sugar helps keep the crust slightly more tender. If you prefer, natural granulated sugar can be used as a substitute, offering a cleaner sweetness. The small amount used here perfectly balances the flavors without making the crust overtly sweet, allowing your filling to shine. - Unsalted Butter: Richness and Binding
For superior flavor control and a rich, melt-in-your-mouth texture, unsalted butter is indispensable. When melted, it acts as the primary binding agent, bringing the flours together to form a cohesive dough that’s easy to press and holds its shape during baking. Using unsalted butter allows you to precisely control the salt content of your crust, ensuring it perfectly complements your chosen filling. If only salted butter is available, you might consider slightly reducing the added salt in the recipe. - Fine Sea Salt: The Flavor Enhancer
Never underestimate the power of salt in baking! A small amount of fine sea salt doesn’t just make the crust taste salty; it actually enhances and balances all the other flavors, particularly the sweetness of the sugar and the nuttiness of the flours. It also brings out the best in whatever filling you choose. Skipping the salt can leave your crust tasting flat and one-dimensional, so be sure to include it for a truly well-rounded and delicious base.
Customizing Your Tart Crust: Substitutions and Flavor Variations
One of the best aspects of this gluten-free tart crust recipe is its inherent adaptability. Whether you have dietary restrictions or simply wish to explore different flavor profiles, there are simple adjustments you can make to suit your needs and creative whims.
- Vegan or Dairy-Free Tart Crust: To transform this recipe into a completely plant-based or dairy-free option, the key substitution lies with the butter. It’s essential to use a high-quality plant-based butter that comes in stick form, rather than a tub. Stick-form vegan butters typically have a higher fat content and a firmer consistency, mimicking the behavior of dairy butter more closely when melted and baked. Brands like Miyoko’s Kitchen (as linked in the original content) or Earth Balance sticks are excellent choices, providing the necessary richness and binding properties without any dairy. Avoid tub margarines or spreads, as their higher water content can alter the crust’s texture and lead to a less desirable result.
- For a Savory Tart Crust: This recipe is incredibly versatile and can easily pivot from sweet to savory. If you’re envisioning a savory tart – perhaps a quiche, a vegetable tart, or a cheese-based filling – you’ll need to make a few specific adjustments to the crust itself. The primary change involves eliminating the sugar entirely. While a touch of sweetness can sometimes complement savory flavors, for a truly savory crust, it’s best left out. Additionally, incorporating an egg yolk into the mixture can enhance the richness and binding, providing a slightly sturdier base that stands up well to heartier savory fillings. For detailed instructions and inspiration, including ideal adjustments and flavor additions like fresh basil, refer to my specific post on the Cherry Tomato Tart recipe. You might also consider adding a pinch of garlic powder, onion powder, or a dried herb blend (like Italian seasoning) to the dry ingredients for an extra layer of savory depth.
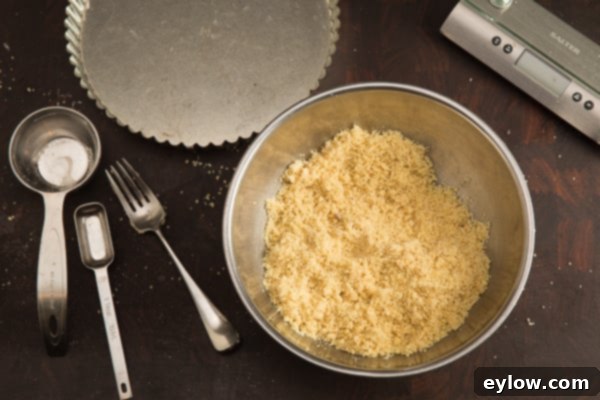
Essential Tools for a Perfect Tart Crust
While this press-in tart crust is remarkably simple to prepare, having the right tools on hand can significantly enhance your baking experience and ensure a flawless result. These specific items are recommended to help you achieve a beautifully baked, evenly cooked crust every time.
- 9 ½″ Light Metal Tart Pan with a Removable Bottom: This is a non-negotiable item for any tart enthusiast. The removable bottom is a game-changer, allowing you to easily release the delicate baked tart from the pan without damaging its perfectly formed edges. A light-colored metal pan is preferred over dark-colored pans because it promotes more even baking and prevents the crust from over-browning or burning on the bottom. Darker pans absorb more heat, which can lead to an overly crisp or even burnt base. Ensure your pan is 9.5 inches in diameter for the quantities in this recipe, allowing for the ideal crust thickness.
- Heavy-Duty Half-Sheet Rimmed Baking Sheets (13″x 18″): Don’t underestimate the importance of a good baking sheet. A half-sheet pan, typically measuring 13×18 inches, is crucial for two main reasons. Firstly, its raised rim prevents any spills or drips from your tart filling from reaching the bottom of your oven, keeping things clean. Secondly, and perhaps more importantly for baking, a heavy-duty sheet ensures even heat distribution, which is key for a consistently baked crust. Cheap, flimsy baking sheets are prone to warping in high heat, leading to uneven baking and potential hazards in the oven. Invest in high-quality, heavy-gauge aluminum baking sheets; they’ll last a lifetime and make a noticeable difference in your baking results. You can find reliable options online from Amazon or at specialty kitchen stores.
- Silicone Liner (e.g., Silpat): While optional, a silicone baking mat placed on your baking sheet offers several advantages. It provides a non-slip surface, preventing your tart pan from sliding around as you transfer it to and from the oven. More importantly, it creates a gentle buffer between the metal baking sheet and the bottom of your tart pan, protecting the crust from direct, intense heat and helping to prevent over-browning. This is especially useful for delicate gluten-free crusts. Brands like Silpat are widely available on Amazon and at most cooking supply stores, and they are a worthwhile investment for consistent baking performance.
Step-by-Step Instructions: Crafting Your Easy Press-In Tart Crust
Creating this gluten-free tart crust is a straightforward and enjoyable process that requires minimal effort. Follow these simple steps to ensure a perfectly golden and flavorful base for your next culinary masterpiece. Remember, the key to a beautiful crust is a bit of patience and attention to detail, especially during the forming stage.
Step 1: Combine the Dry Ingredients
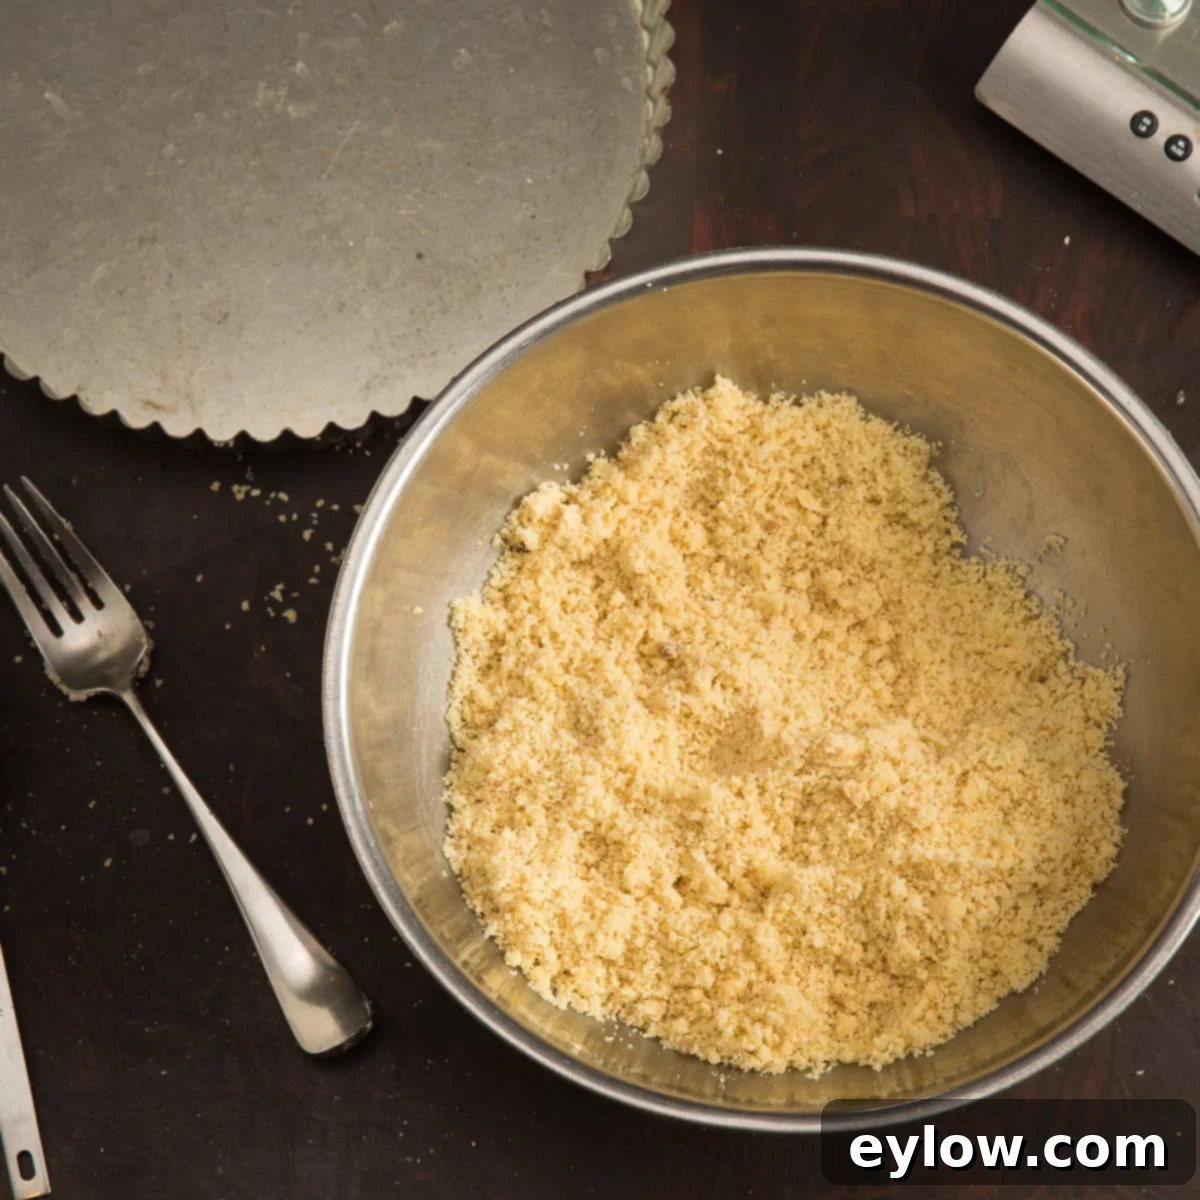
Begin by preheating your oven to 350°F (177°C) to ensure it’s ready when your crust is formed. In a medium-sized mixing bowl, combine the almond flour, coconut flour, light brown sugar (or granulated sugar), and salt. Use a fork to thoroughly mix these dry ingredients together. It’s important to achieve a uniform blend, breaking up any clumps of brown sugar or flour, to ensure even distribution of flavor and texture throughout the crust. This initial mixing prepares the base for the fat to be incorporated seamlessly.
Step 2: Incorporate Melted Butter and Test Consistency
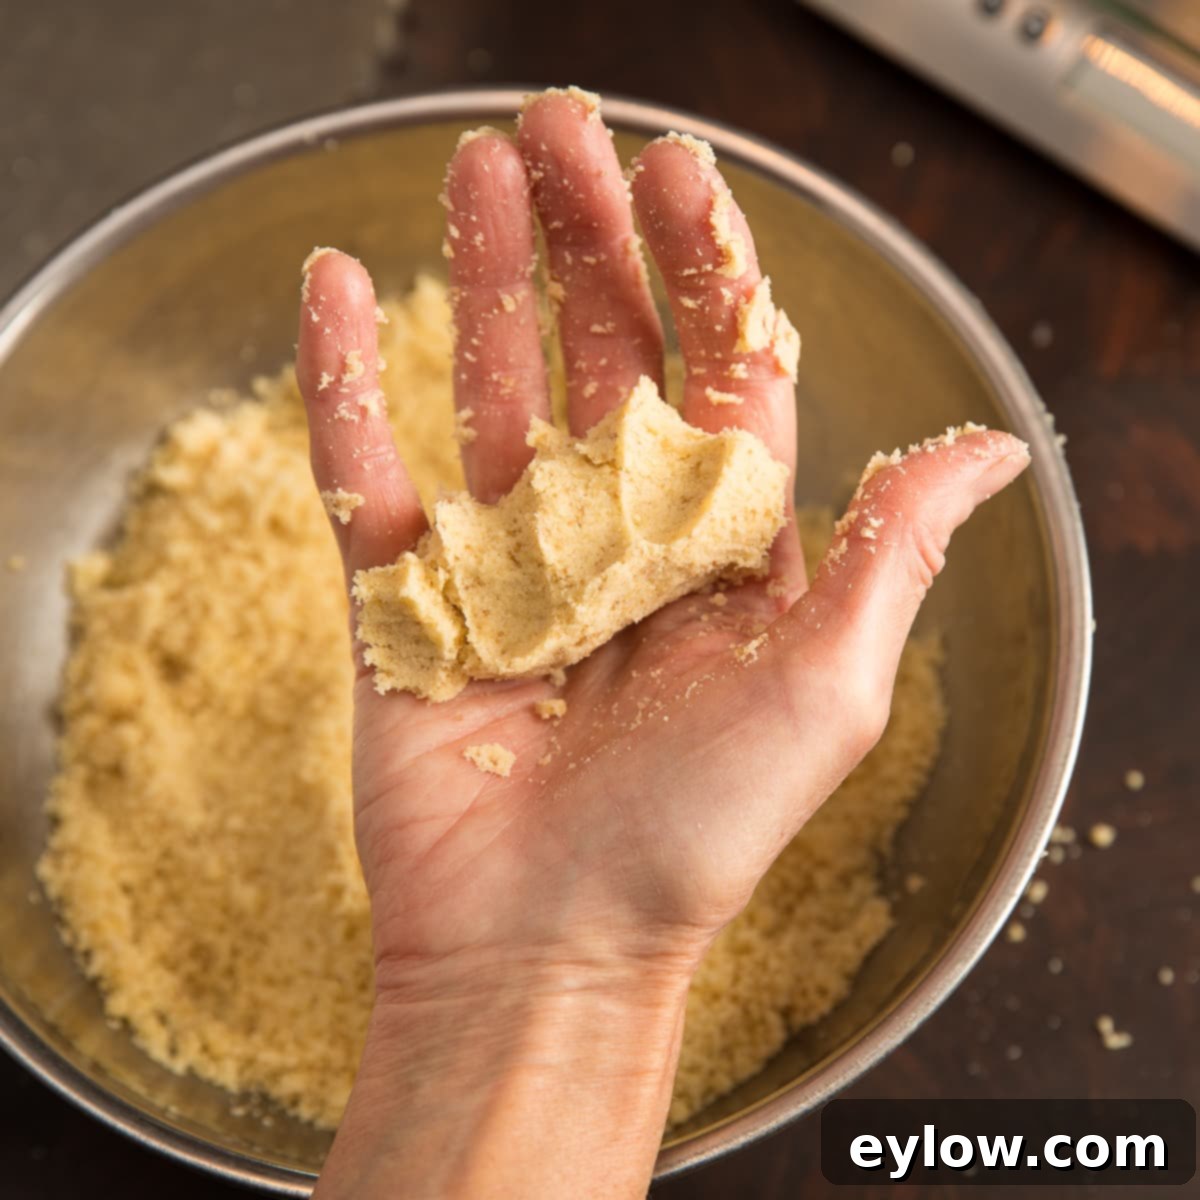
Once your dry ingredients are well combined, pour in the melted unsalted butter. Continue mixing with a fork until the butter is evenly distributed and the mixture begins to resemble coarse, moist crumbs. At this point, switch to using your fingers to fully combine the ingredients; this ensures you break up any remaining dry spots and properly coat all the flour with butter. To test for the correct consistency, squeeze a handful of the mixture together. It should hold its shape firmly, similar to a moist sandcastle, as shown in the accompanying photo. The crust mix should feel distinctly moist and pliable. If it feels too dry or crumbles easily, add a tiny bit more melted butter (start with ½ teaspoon at a time) and mix again until the desired consistency is achieved. This step is crucial for a crust that will press beautifully and hold its shape.
Step 3: Expertly Form the Tart Shell (The Press-In Method)
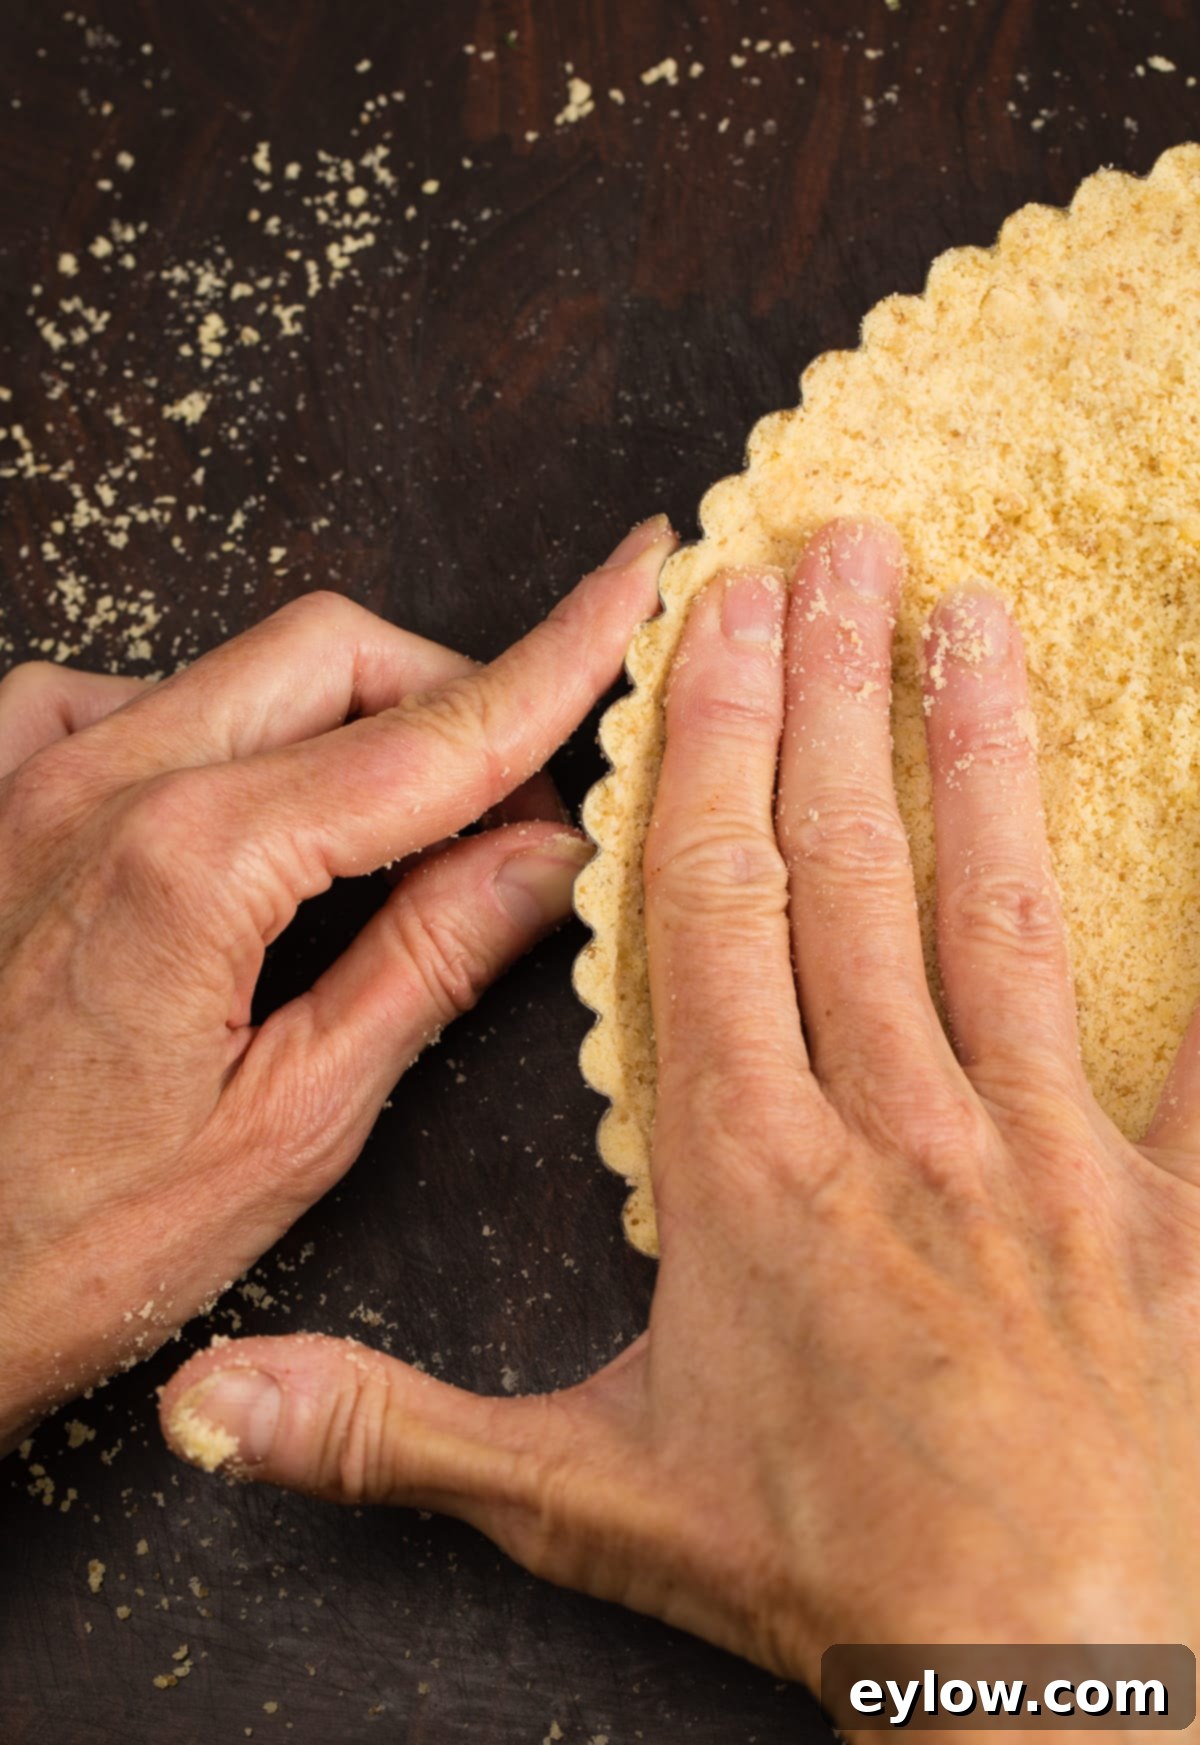
This is where the magic of the press-in crust truly shines, and it’s worth taking your time. While it might take about 12-15 minutes to assemble perfectly, the effort will result in a sturdy and elegant tart shell. Pour the prepared crust mixture into your 9.5-inch tart pan with a removable bottom. Start by distributing the mixture somewhat evenly across the bottom and sides. Your primary focus should be on building a strong, even edge first, as this provides the structural integrity for your tart.
Using your fingers and thumbs, firmly push and pinch the crust mix against the sides of the tart pan, working your way around the entire circumference. Gradually build up the edge in layers, ensuring it’s of consistent thickness and height. This takes a little patience; don’t rush it. A well-formed, sturdy edge is vital not only for aesthetic appeal but also for preventing crumbling when you slice and serve your finished tart. Keep working the mixture, pressing firmly until you’re satisfied with the integrity of the sides.
Once the edges are perfectly formed and robust, use the remaining crust mixture to create a firm and even base for the bottom of the tart pan. Press it down firmly with your fingers, ensuring there are no gaps or thin spots. For an exceptionally flat and smooth bottom, you can use the bottom of a clean, flat-bottomed glass to gently press the crust mixture evenly into place. Remember, there’s no need to poke holes in this crust as it’s designed to bake without excessive puffing.
Step 4: Blind Bake and Cool Your Tart Crust
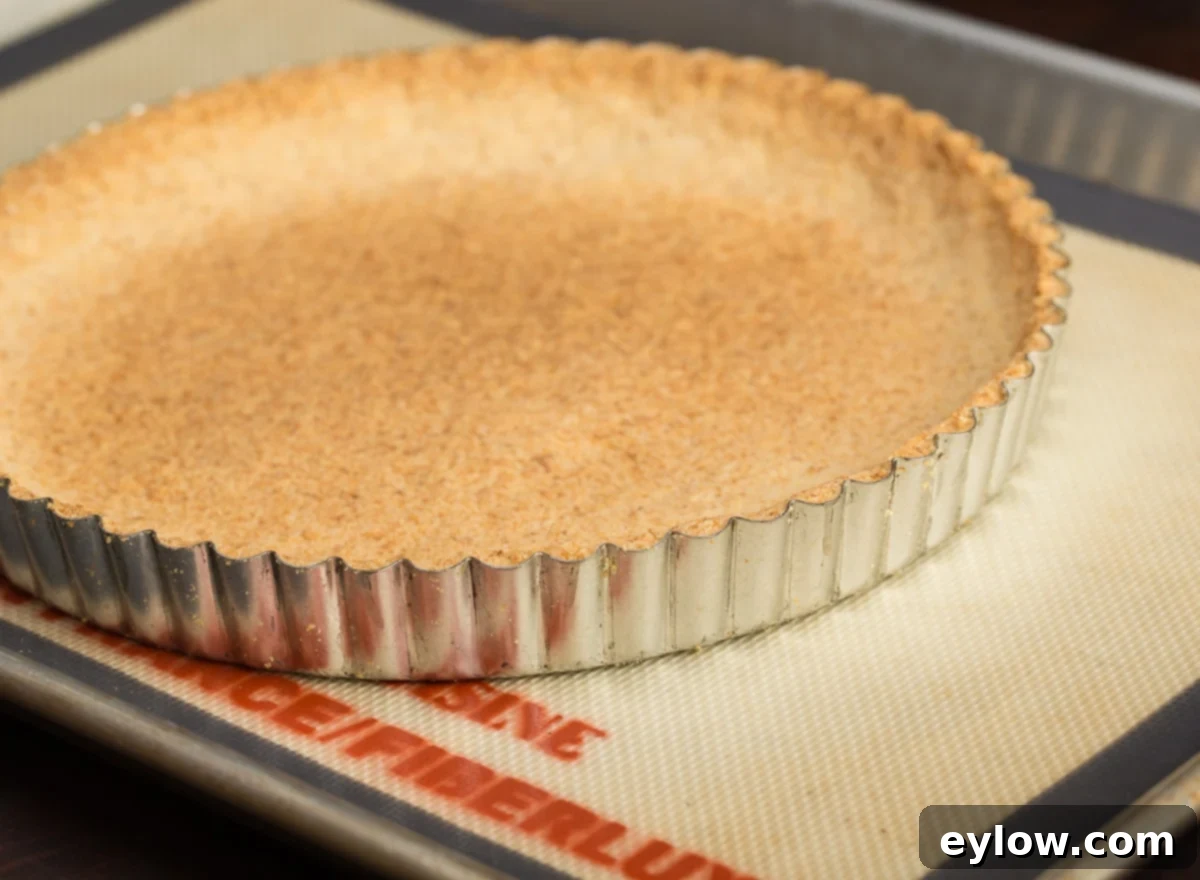
Before baking, place the tart pan (with its formed crust) onto a rimmed half-sheet baking pan. This provides crucial support, makes it easier to transfer the tart in and out of the oven, and catches any potential drips, although with this crust, drips are unlikely. Bake the tart crust in your preheated 350°F (177°C) oven for approximately 14-17 minutes. Baking times can vary slightly depending on your specific oven, so monitor the crust closely. You are looking for a beautiful light golden-brown color, indicating it’s perfectly cooked through and lightly crisp.
Once baked, carefully remove the tart pan from the oven and let it cool completely on a wire rack before attempting to fill it. Cooling is essential as it allows the crust to firm up and prevents it from becoming soggy when a wet filling is added. If your chosen tart filling requires a second bake (such as my spiced pumpkin tart), this initial blind bake ensures a crisp base. For no-bake fillings, cooling is even more critical to maintain the crust’s integrity.
Make-Ahead Tips for Convenient Baking
One of the many advantages of this easy gluten-free tart crust is its suitability for make-ahead preparation, significantly reducing stress on your baking day. Whether you’re planning for a holiday meal or simply prepping for a busy week, you can get a head start on your tart creation.
After successfully baking and cooling your tart crust, it can be stored at room temperature for up to one day. Simply leave the crust in its tart pan (the pan provides structural support) and wrap it tightly with plastic wrap to protect it from air and moisture. This method helps maintain its crisp texture. If you need to store it for a longer period, the baked and cooled crust can be gently removed from the pan, wrapped tightly in plastic wrap, then in aluminum foil, and stored in the refrigerator for up to 3-4 days. For even longer storage, the wrapped, baked crust can be frozen for up to 1 month. Thaw it at room temperature before filling and baking (if needed) or serving with a no-bake filling. You can even freeze the unbaked crust in the pan, wrapped well, for future use; simply bake from frozen, adding a few extra minutes to the baking time.
Delightful Serving Suggestions for Your Versatile Tart Crust
The beauty of this gluten-free tart crust lies in its incredible versatility, providing a perfect foundation for a myriad of sweet and savory fillings. Once you’ve mastered the crust, the possibilities for creating show-stopping tarts are truly endless. Here are some of my favorite tart filling recipes that pair beautifully with this almond and coconut flour base, offering something for every palate and occasion:
- Cherry Tomato Tart: A wonderful savory option, this tart combines the sweetness of cherry tomatoes with fresh herbs like basil, often complemented by creamy goat cheese or mozzarella. It’s perfect for brunch, a light lunch, or as an appetizer. The sturdy crust holds up beautifully to the juicy tomatoes and rich cheese.
- Chocolate Hazelnut Tart: Indulge in pure decadence with a rich, velvety chocolate hazelnut filling. This tart is a true crowd-pleaser for any celebration, offering deep chocolate flavors balanced by the nutty notes of roasted hazelnuts. The crisp, slightly sweet crust provides a delightful textural contrast to the smooth filling.
- Spiced Pumpkin Tart: A quintessential autumnal dessert, perfect for Thanksgiving or any fall gathering. This tart features a creamy, warmly spiced pumpkin filling that’s both comforting and elegant. The gluten-free crust provides a robust, flavorful base that complements the traditional fall spices beautifully.
- Lemon Meringue Tart: Brighten any day with the zesty tang of a classic lemon meringue tart. The vibrant lemon curd filling, topped with fluffy, toasted meringue, is a refreshing dessert that truly pops against the subtle sweetness of this almond and coconut crust. It’s a delightful choice for spring and summer entertaining.
- Seasonal Fruit Tarts: Beyond these specific recipes, consider filling your tart crust with seasonal fruits. A simple pastry cream topped with fresh berries, sliced peaches, or kiwi makes for a stunning and healthy dessert. A glaze or a dusting of powdered sugar adds the perfect finishing touch.
- Quiches and Savory Custards: For savory applications, this crust is an excellent base for quiches. Think spinach and feta, Lorraine (bacon and cheese), or mushroom and Gruyere. The robust structure can handle a creamy egg custard filling without becoming soggy.
Frequently Asked Questions About This Gluten-Free Tart Crust
Here are answers to some common questions that arise when baking with this almond and coconut flour tart crust, helping you achieve perfect results every time.
Yes, absolutely. Blind baking, or pre-baking, the tart crust before adding your chosen filling is a critical step for almost all tart recipes, especially with gluten-free versions. This process ensures that the crust cooks through completely, becoming golden and crisp. It creates a barrier that prevents the crust from absorbing moisture from a wet filling (like custard or fruit fillings), which would otherwise lead to a soggy bottom – a common baking disappointment. Blind baking is essential whether your filling requires a second bake in the oven or if it’s a no-bake filling that will simply be chilled. It guarantees a perfectly textured base that holds its shape and contributes to the overall delightful experience of your tart.
Yes, this tart crust can easily be adapted to be dairy-free or vegan. The key is to substitute the unsalted dairy butter with a high-quality plant-based butter. It is crucial to use a stick-form plant-based butter, not one that comes in a tub or is labeled as a spread. Stick butters typically have a higher fat content and similar structural properties to dairy butter, which is essential for the crust to come together correctly and bake with the desired texture. Tub margarines or soft spreads often contain more water and less fat, which can result in a crust that is too wet, crumbly, or does not hold its shape. Look for European-style plant-based butters for optimal results.
There isn’t a single “best” gluten-free flour for tart crusts, as the ideal choice depends on the desired texture and whether it’s a roll-out or press-in style. However, for a press-in tart crust like this one, a blend of gluten-free flours is often superior to a single-flour approach. Our recipe specifically utilizes a blend of almond flour and coconut flour, chosen for their complementary attributes. Almond flour contributes healthy fats and proteins, resulting in a tender, rich, and slightly nutty flavor. Coconut flour, being highly absorbent, provides essential structure and helps bind the crust together, preventing it from becoming too crumbly. This combination yields a balanced crust that is both flavorful and structurally sound, offering a cookie-like texture perfect for a wide variety of fillings. For different styles of crusts, other blends incorporating starches (like tapioca or cornstarch) or other gluten-free flours (like oat or brown rice) might be used, but for this easy press-in method, almond and coconut flour are ideal.
Absolutely! This crust is very freezer-friendly, allowing for even more convenience. For a baked crust, ensure it’s completely cooled, then wrap it tightly in plastic wrap and then in aluminum foil. It can be frozen for up to 1 month. Thaw at room temperature before filling. If you wish to freeze the unbaked crust, form it in the pan as per instructions, then wrap it securely with plastic wrap and foil. It can also be frozen for up to 1 month. When ready to bake, you can bake it directly from frozen, adding an additional 5-10 minutes to the baking time, or until golden brown. Freezing is a fantastic way to prep ahead for future baking needs.
⭐️Did You Make This Recipe?
If you make this tart crust, please comment and let me know how you liked it and how it worked for you. If you loved it, please give it a 5-star rating! Your feedback truly helps other readers, and I always enjoy hearing from you.
📖 Recipe
Gluten-Free Tart Crust (Grain-Free Too)
Sally Cameron
Pin Recipe
Equipment
-
9 ½” removable bottom tart pan (light colored)
-
Silpat or other non-slip liner optional
-
Half sheet size rimmed baking sheet
Ingredients
- 1 ½ cups almond flour 6 ounces
- ½ cup coconut flour 2 ounces
- 2 tablespoons light brown sugar or natural granulated sugar
- 6 tablespoons unsalted butter, melted or plant-based butter
- ¼ teaspoon salt
Instructions
Prepare the Crust Mixture
-
Preheat your oven to 350°F (177°C). In a medium mixing bowl, combine the almond flour, coconut flour, sugar, and salt with a fork. Pour in the melted butter and mix until evenly blended, then use your fingers to ensure the mixture is completely combined and feels moist. Squeeze a handful; it should hold its shape.
Form the Tart Shell
-
Pour the crust mixture into your 9.5-inch tart pan. Begin by pressing the mixture firmly against the sides to build a strong, even edge with your fingers and thumbs. Take your time, building it in layers if necessary.
-
Once the edge is formed, press the remaining mixture firmly into the bottom of the pan to create an even base. A flat-bottomed glass can assist in firming the base. Place the tart pan onto a rimmed baking sheet (with a silicone liner if using).
Bake and Cool
-
Blind bake the tart crust for 14-17 minutes, or until it achieves a light golden-brown color. Baking time may vary. Remove from oven and let it cool completely on a wire rack before filling as desired.
