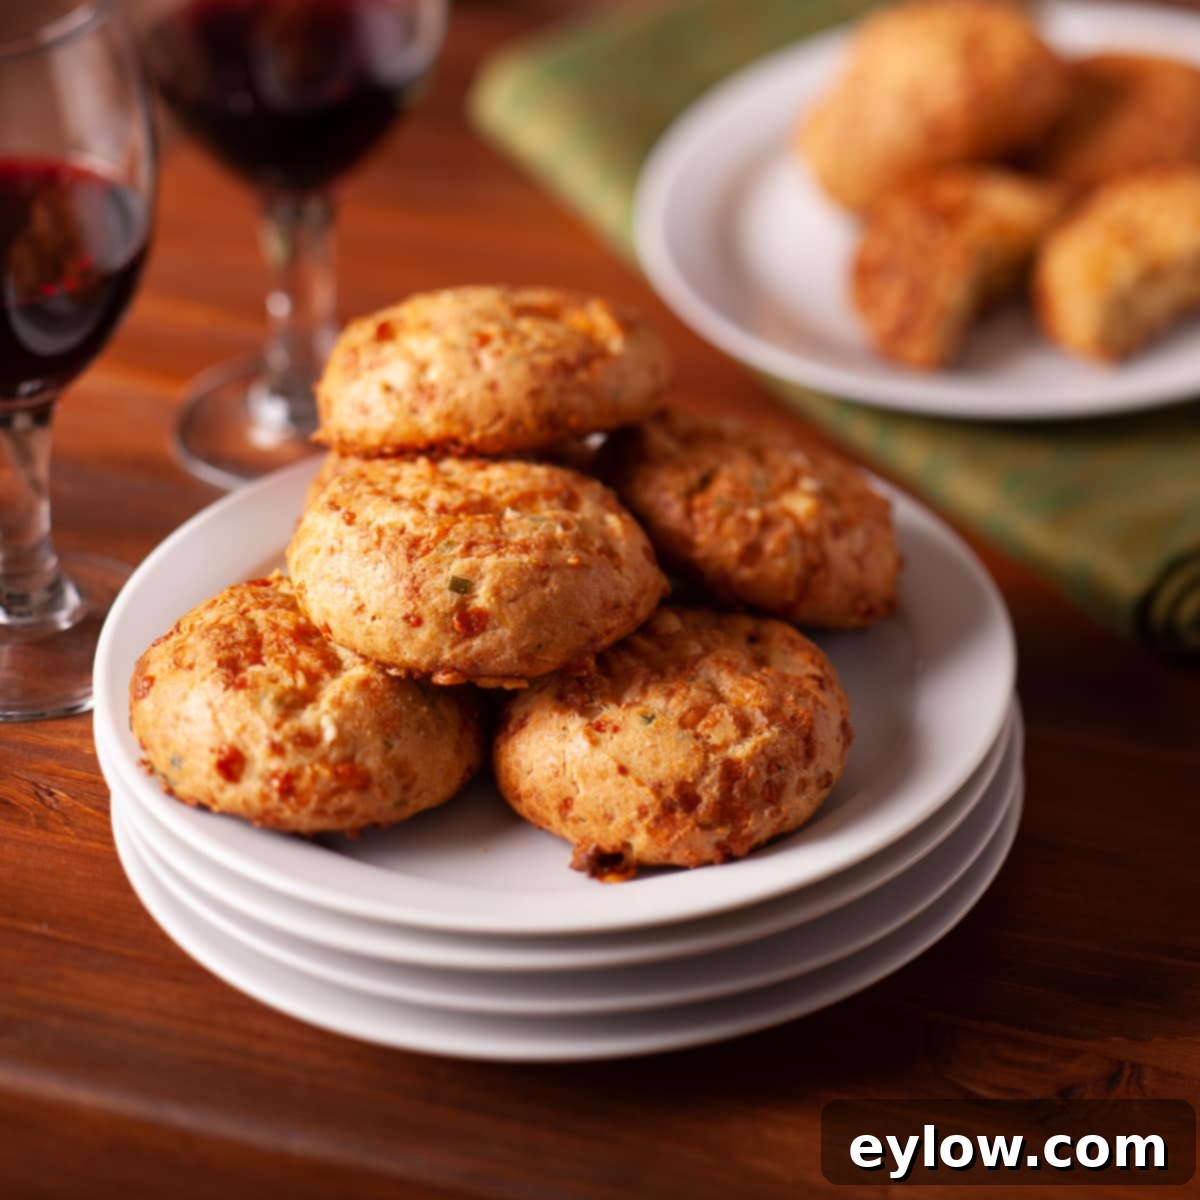
Fluffy French Cheese Puffs (Gougères): An Easy Pâte à Choux Recipe for Elegant Entertaining
French Cheese Puffs, known as Gougères (goo-zhare), are a culinary delight that embodies elegance and simplicity. These light, airy, and irresistibly cheesy morsels are a staple of French entertaining, perfect for a sophisticated cocktail hour or a casual gathering. At their heart lies the classic pâte à choux dough – the same versatile base used for beloved sweet treats like cream puffs and profiteroles. Despite their fancy appearance, making these savory puffs is surprisingly straightforward, proving that gourmet flavors can be achieved in your home kitchen with ease.
Traditionally, Gougères are crafted with rich Gruyère cheese, offering a nutty and deeply savory profile. However, this recipe embraces customization, often utilizing finely grated Parmesan for a sharper, more piquant flavor, complemented by a delicate sprinkle of fresh chives for a touch of soft oniony freshness and vibrant color. Whether you serve them warm, straight from the oven, allowing their enticing aroma to fill your home, or pair them with a perfectly chilled glass of wine, these French cheese puffs are guaranteed crowd-pleasers. Their adaptability extends to dietary needs too; they can be made with either traditional all-purpose wheat flour or a gluten-free blend, ensuring everyone can enjoy these delightful bites.
Do you recall the excitement and slight trepidation of attempting a new technique or recipe for the first time? I vividly remember my inaugural adventure into making Gougères. The process of the pastry dough coming together felt peculiar and almost magical, yet the end result was nothing short of beautiful – a true triumph! And my love for them has only deepened since. While pâte à choux sometimes carries a reputation for being finicky, please don’t let that deter you. With a few simple steps and a little confidence, you’ll discover it’s genuinely not difficult at all to create these impressive French cheese puffs.
Why You’ll Adore This Gougères Recipe
There’s something uniquely satisfying about baking, and even more so when the results are as impressive and versatile as Gougères. This recipe stands out for several compelling reasons, making it a favorite in many kitchens and at countless gatherings.
- French Cheese Puffs are Fun and Rewarding to Make: The process of transforming a simple mixture of butter, milk, flour, and eggs into a light, airy dough that puffs up beautifully in the oven is genuinely fascinating. It feels like a culinary magic trick, and the aroma filling your kitchen as they bake is pure bliss. It’s a hands-on experience that leaves you with a profound sense of accomplishment.
- Savory Versatility, with a Sweet Potential: While this recipe focuses on the classic savory Gougères, the underlying pâte à choux dough is incredibly adaptable. Once mastered, you can easily pivot to sweet variations by omitting the cheese and herbs, adding a touch of sugar, and filling them with luscious pastry cream, whipped cream, or chocolate ganache for cream puffs or éclairs. This fundamental dough opens up a world of baking possibilities!
- They Freeze Beautifully for Future Enjoyment: Planning ahead for parties or simply want to have a gourmet snack on hand? Gougères are perfect for freezing! You can either freeze the unbaked dough or freeze the baked puffs, allowing for quick reheating whenever a craving strikes or unexpected guests arrive. This make-ahead capability is a true lifesaver for busy hosts and hostesses.
- Delicious, Whether Gluten-Free or Not: This recipe has been thoroughly tested and proven to deliver outstanding results using both traditional wheat flour and gluten-free flour blends. This inclusivity means that everyone, regardless of dietary restrictions, can indulge in these delightful French cheese puffs without compromising on flavor or texture. Both versions are equally delicious, light, and airy, ensuring no one misses out on this exquisite appetizer.
Essential Ingredients for Perfect Gougères
Creating exquisite Gougères relies on a few high-quality, foundational ingredients. Each component plays a crucial role in achieving the desired light texture and rich, savory flavor of these French cheese puffs. Understanding why specific ingredients are chosen can elevate your baking experience.
- Butter: For the best flavor and to precisely manage the salt content of your Gougères, always opt for unsalted butter. I personally favor high-butterfat, European-style butter, as its richer flavor and lower water content contribute to a more tender and flavorful pastry.
- Milk: Whole milk is preferred for this recipe because its fat content adds richness and tenderness to the pâte à choux dough. While low-fat milk can be used as a substitute, it may result in a slightly less rich texture. For a crisper puff, some chefs even opt for water instead of milk, which yields a lighter, more ethereal result.
- Flour: This recipe is wonderfully adaptable. I’ve achieved fantastic results using both conventional all-purpose wheat flour and various gluten-free flour blends. When using wheat flour, the gluten development provides structure. For gluten-free versions, a well-balanced blend is key to mimic the texture and rise.
- Eggs: Standard large eggs are what you need for this recipe. Eggs are vital for binding the dough, adding richness, and creating the steam that causes the Gougères to puff up and become hollow inside. They also contribute significantly to the final structure and golden color.
- Cheese: While Gruyère cheese is the traditional choice for authentic Gougères, I often use finely grated Parmesan cheese. Parmesan offers a wonderfully salty, umami-rich flavor that creates incredibly delicious Parmesan puffs. You can also experiment with other hard, flavorful cheeses.
- Herbs: Tiny chopped fresh green chives are a delightful addition, providing a subtle, soft oniony flavor and a beautiful fleck of green color. They enhance the savory notes of the cheese without overpowering it. While you can certainly skip them, they add a lovely aromatic dimension. Other fresh herbs like finely chopped thyme or parsley also work wonderfully.
For precise measurements and quantities, along with detailed instructions, please refer to the comprehensive recipe card located at the bottom of this article. This will guide you through each step to ensure your Gougères turn out perfectly.
Creative Substitutions and Flavorful Variations for Your Gougères
The beauty of Gougères lies not only in their delightful simplicity but also in their incredible versatility. Once you’ve mastered the basic pâte à choux, you can easily customize these French cheese puffs to suit your taste preferences or whatever ingredients you have on hand. Here are some inspiring ideas to get you started:
- Experiment with Different Herbs: Beyond chives, a variety of fresh herbs can add unique aromatic notes. Finely chopped Italian parsley offers a fresh, slightly peppery flavor, while fresh chopped thyme lends an earthy, savory depth. Rosemary can add a pungent, piney aroma, and dill brings a bright, herbaceous quality, especially lovely with a milder cheese.
- Change the Cheese for New Flavor Profiles: While Gruyère remains the French classic and Parmesan is a fantastic alternative, don’t be afraid to explore! For robust cheddar cheese puffs, use a sharp cheddar. Comté cheese provides a nutty, slightly sweet profile similar to Gruyère. Emmental is another excellent Swiss cheese option that melts beautifully. For a touch of spice, consider a finely grated pepper jack or a pinch of cayenne pepper mixed into the dough. Smoked Gouda can offer a wonderfully rich, smoky twist. The key is to use hard or semi-hard cheeses that grate finely and have distinct flavors.
- Adjust the Liquid Base: If you’re out of milk, or simply prefer a slightly crisper Gougère, you can easily skip the milk and use water instead. The dough will still come together beautifully, though the final puff might be a touch lighter in texture and less rich in flavor. For an extra layer of savory depth, consider using chicken or vegetable broth instead of milk or water, which can particularly enhance the umami notes of the cheese.
- Add a Hint of Spice: For those who enjoy a little kick, stir in a pinch of cayenne pepper or smoked paprika along with the flour. This adds a subtle warmth that complements the cheese wonderfully.
- Mini Gougères for Appetizers: For party perfect bite-sized snacks, use a smaller disher or a piping bag with a small round tip to create mini Gougères. These cook faster and are ideal for elegant presentations.
Chef’s testing notes: I meticulously tested three primary types of flour to ensure the recipe’s reliability and versatility across different dietary needs and preferences. My tests included organic white whole wheat flour, which provides a wholesome, slightly nutty flavor without the heaviness of traditional whole wheat; organic whole wheat pastry flour, a soft wheat flour with lower gluten content that yields a more tender and delicate baked good; and a popular gluten-free blend called Cup4Cup flour, known for its excellent performance in replacing traditional wheat flour. All three flour types produced fantastic Gougères, demonstrating the robustness of this pâte à choux recipe. Additionally, I’ve developed and included a specific homemade gluten-free blend in the recipe notes, offering another excellent option for gluten-free bakers.
Mastering the Art of Gougères: Step-by-Step
The journey to creating these delightful French cheese puffs begins with mastering choux pastry, formally known as pâte à choux (pronounced “pot-ah-shoo”). This seemingly complex dough is actually quite forgiving and incredibly satisfying to make. Here’s a detailed breakdown of the process:
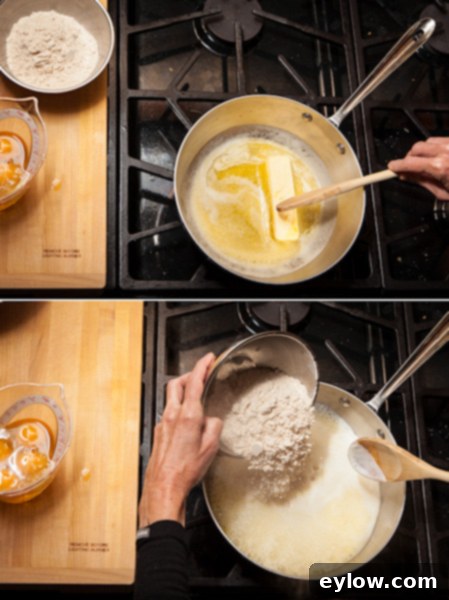
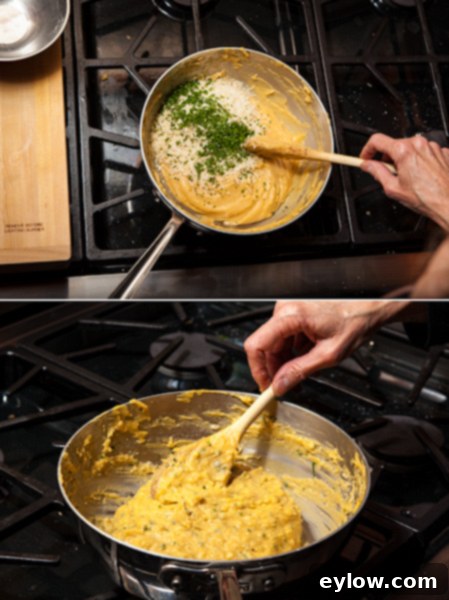
First, you’ll prepare what’s called the “panade.” In a sturdy saucepan, combine your milk and butter and bring them to a vigorous boil over medium-high heat. The key here is a full, rolling boil—this ensures the butter is completely melted and the liquid is hot enough to properly hydrate the flour. Once boiling, quickly dump all the flour and salt into the pan at once. Immediately reduce the heat to medium-low and stir vigorously with a wooden spoon. This isn’t a gentle stir; you need to beat and fold the mixture energetically. The goal is to cook out the excess moisture from the flour, creating a thick dough that pulls away cleanly from the sides and bottom of the pan, forming a thin film. This process usually takes about 1 to 2 minutes and is crucial for the dough’s structure.
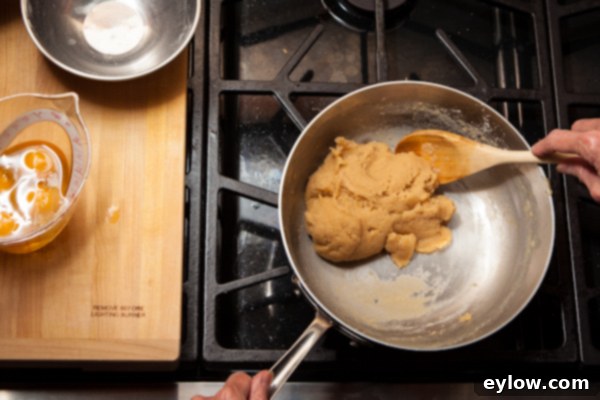
Once the panade is formed, transfer the dough to a medium bowl and let it cool for about two minutes, stirring occasionally. This slight cooling period is essential; it prevents the eggs you’re about to add from scrambling. Now comes the truly magical part: incorporating the eggs. Add the eggs one at a time, beating vigorously after each addition until it is completely incorporated. At first, the dough will look quite odd—curdled, slippery, and like a disorganized mess. You might even wonder if it will ever come together. However, with continued enthusiastic stirring, you’ll witness a remarkable transformation. Suddenly, the dough will smooth out, becoming a cohesive, glossy, and thick pastry that holds its shape and falls slowly from the spoon. This is the emulsification happening, and it’s a beautiful moment in baking.
Finally, gently fold in your finely grated cheese and chopped chives. Stir just enough to ensure they are evenly distributed throughout the dough. You’ll now have a thick, fragrant, and savory dough, perfectly ready to be portioned out and baked into golden, puffy Gougères.
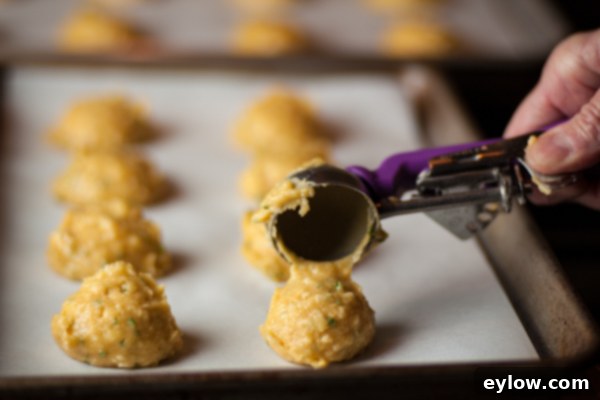
In the past, I’ve used piping bags for more uniform shapes or simply dropped dollops of dough with spoons. However, for consistent size and ease, I now predominantly use what’s professionally known as a disher.
Chef’s tool tip: Whether you call them dishers (the professional term for measuring scoops) or cookie scoops, this is an indispensable tool in my kitchen. I own five or six different sizes, each serving various tasks from portioning cookie dough to scooping muffins. They are incredibly useful for maintaining portion control and ensuring consistent sizing of ingredients, which is especially important for even baking. For making small Gougères that are perfect for appetizers, I rely on a #40 disher, which measures approximately 1 ½ inches across. If you’re aiming for truly bite-sized puffs, ideal for a delicate cocktail presentation, the #60 disher is the perfect choice, delivering even smaller, more delicate morsels. This tool ensures all your Gougères bake uniformly and look professionally made.
Special Considerations for Gluten-Free Gougères
For those following a gluten-free diet, rest assured that delicious Gougères are entirely achievable! My extensive testing for gluten-free versions involved a popular pre-made blend, specifically Cup4Cup gluten-free flour. The dough’s appearance and consistency during formation might look slightly different from its wheat-based counterpart, perhaps a little stickier or less smooth initially, but the overall process remains the same. And the fantastic news? The Gougères came out beautifully!
After three successful test batches, I’ve fine-tuned the recipe for optimal gluten-free results. Here are the key adjustments from the standard recipe:
- Flour Substitution: Substitute ½ cup (which equates to approximately 72 grams when measured by weight, for greater accuracy) of your chosen gluten-free flour blend, like Cup4Cup, for the wheat flour called for in the original recipe.
- Oven Temperature Adjustment: Crucially, turn your oven down to 350°F (175°C) when baking with gluten-free flours. Gluten-free doughs often benefit from a slightly lower temperature to allow for thorough baking without over-browning.
- Baking Time: Bake until the Gougères are just golden brown. The exact timing can vary significantly depending on your specific oven, as temperatures can fluctuate, so vigilant observation is recommended. It’s better to bake them a little longer until they are firm and crisp, rather than underbaking them and risking a deflated or soggy interior.
It’s worth noting that other reputable brands like Bob’s Red Mill and King Arthur Flour also offer excellent gluten-free flour blends that are widely available and perform well in this type of recipe. While my gluten-free batches did not puff up quite as dramatically as the wheat Gougères, their flavor was absolutely terrific. They retain that wonderful cheesy, airy quality that makes Gougères so beloved and will undoubtedly be appreciated by anyone adhering to a gluten-free diet.
My last and most successful gluten-free batch took approximately 20-25 minutes in the oven. They emerged beautifully golden on the outside, perfectly cooked through, and had a delightfully tender, just-a-tiny-bit-moist interior, which is ideal for Gougères.
Craft Your Own Custom Gluten-Free Flour Blend
For the ultimate control over your gluten-free baking, or if you prefer to avoid pre-made blends, crafting your own homemade gluten-free flour mix for Gougères is a fantastic option. My proprietary blend combines several different flours, each contributing unique properties to achieve a texture and flavor profile that closely mimics traditional wheat flour. This custom mix includes brown rice flour, sweet rice flour, and quinoa flour, balanced with cornstarch and tapioca flour. The precise quantities for each component can be found in the detailed recipe card notes.
To ensure the utmost accuracy and the best possible results when blending your own flours, a digital scale is an indispensable tool. Measuring by weight (grams) is far more consistent than measuring by volume (cups) for gluten-free flours, where density can vary significantly. When weighing your ingredients, make excellent use of the tare feature on your scale – it makes the process faster and incredibly efficient, allowing you to add each flour directly into the same bowl without recalibrating. Simply whisk all the flours together thoroughly until they are uniformly blended, ensuring even distribution throughout the mix.
I typically use Bob’s Red Mill flours for my blend due to their consistent quality and availability. This recipe for the homemade blend yields enough flour for several batches of Gougères, making it a convenient option for regular gluten-free baking. Once prepared, store your custom flour blend in an airtight container, clearly labeled with the contents and date, to maintain its freshness and potency for future baking adventures. This way, you’ll always have a reliable, high-performing gluten-free mix ready for your next batch of perfect Gougères.
Serving & Storing Your Delicious Gougères
Gougères are incredibly versatile, making them a perfect addition to a variety of occasions. Their savory, cheesy flavor and delicate texture make them an ideal companion to many dishes and beverages. Here are some enhanced serving and storage suggestions:
- The Ultimate Cocktail Hour Nibble: Gougères shine brightest during cocktail hour. Serve them warm alongside a crisp white wine, such as a dry Sauvignon Blanc or a Chablis, whose acidity cuts beautifully through the richness of the cheese. A sparkling wine like Champagne or Prosecco is also a fantastic pairing, with its bubbles complementing the light and airy texture of the puffs. For red wine enthusiasts, a light-bodied Pinot Noir from Burgundy (the birthplace of Gougères!) would be an excellent match.
- Customizable Sizes: Feel free to adjust the size of your Gougères. Make them truly bite-sized for delicate appetizers that guests can easily pick up, or opt for slightly larger puffs that offer a more substantial snack.
- Elevated Entertaining with Filled Gougères: For catered parties or a more sophisticated presentation, consider slicing larger Gougères in half horizontally once cooled. You can then fill them with a variety of savory concoctions. Popular fillings include herbed cream cheese, smoked salmon spread with dill, a light chicken or tuna salad, or even a mushroom duxelles for a vegetarian option. This transforms them into elegant mini sandwiches or canapés.
- Make-Ahead & Storage: One of the best qualities of Gougères is their ability to be prepared in advance.
- Counter Storage: Once baked and completely cooled, Gougères can be stored at room temperature in an airtight container for up to 2-3 days. They might lose a bit of their crispness, but the flavor will still be delightful.
- Reheating: To revive their crisp texture and warm them through, simply pop them into a preheated oven at 300°F (150°C) for 5-10 minutes. This is perfect for serving day-old Gougères as if they were freshly baked.
- Freezing for Long-Term Enjoyment: Gougères are freezer-friendly, allowing you to always have a gourmet snack at your fingertips:
- Freezing Baked Gougères: After baking, let the Gougères cool completely. Then, arrange them in a single layer on a sheet tray and freeze until solid (this prevents them from sticking together). Once frozen, transfer the Gougères to a freezer-safe zip-top bag or airtight container. Label and date the bag. They can be stored in the freezer for up to 2-3 months. Reheat directly from frozen in a 350°F (175°C) oven for about 10-15 minutes, or until warmed through and crisp.
- Freezing Unbaked Dough: You can also prepare the pâte à choux dough and pipe or scoop it onto a parchment-lined baking sheet. Freeze these unbaked dough portions until solid. Once solid, transfer to a freezer bag. When ready to bake, place the frozen dough onto a parchment-lined baking sheet and bake as directed, adding a few extra minutes to the baking time, until golden and puffed.
For another terrific cocktail nibble that perfectly complements the savory notes of Gougères, be sure to try these sweet and spicy roasted maple cashews. They offer a delightful contrast and make for a truly memorable appetizer spread!
📖 Recipe
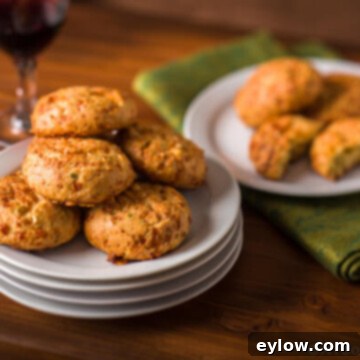
French Cheese Puffs (Gougeres)
Sally Cameron
Pin Recipe
Equipment
-
Baking sheet
-
Baking parchment
-
#40 disher (looks like an ice cream scooper with a spring handle) optional or piping bag
Ingredients
- 2 ounces unsalted butter
- ½ cup milk
- ½ cup gluten-free flour blend or white whole wheat flour
- 1 pinch sea salt
- 2 large eggs
- 2 ounces finely grated Parmesan cheese plus extra to top if desired
- 1 tablespoon finely chopped chives
Instructions
-
Ensure all your ingredients are measured and tools are at hand before you begin, as this recipe comes together quickly. Preheat your oven to 400°F (200°C) for wheat flour or 350°F (175°C) for gluten-free flours. Line a rimmed baking sheet with baking parchment paper to prevent sticking and ensure easy cleanup.
-
In a medium saucepan, melt the unsalted butter over low heat. Once the butter is completely melted, add the milk. Increase the heat to high and bring the mixture to a full, rolling boil. As soon as it reaches a vigorous boil, immediately dump in all the flour and sea salt at once. Reduce the heat to medium-low and vigorously stir, beat, and fold the mixture with a sturdy wooden spoon. Continue stirring like mad until the dough forms a cohesive ball and pulls away cleanly from the sides and bottom of the pan, forming a thin film, usually within 1-2 minutes. Transfer the hot dough to a medium bowl and allow it to cool for 2 minutes, stirring occasionally to release some heat.
-
Add the eggs, one at a time, to the dough in the bowl. After each egg addition, stir vigorously and beat the mixture until the egg is completely incorporated and the dough comes back together smoothly. Initially, the dough will look like a curdled, slimy mess, but it will magically transform. Persistence is key—keep stirring until it forms a smooth, glossy pastry dough. Finally, stir in the finely grated Parmesan cheese and chopped chives until evenly distributed.
-
Using a #40 disher (cookie scoop), a piping bag fitted with a plain round tip, or simply a tablespoon, drop uniform portions of the pastry dough onto your parchment-lined baking sheet. If desired, sprinkle a little extra Parmesan cheese on top of each puff for an extra cheesy crust. Bake for 20-25 minutes, or until the Gougères are beautifully puffed and golden brown. Keep a close eye on them, checking early, as oven temperatures and baking times can vary. Allow the puffs to stand for a few minutes on the baking sheet after removal from the oven before serving. Serve immediately for the best warm, airy experience, or cool completely and store in an airtight container. Gougères can be prepared a day ahead and served at room temperature, or gently warmed in the oven for a few minutes to refresh their texture.
Notes
Flour Options:
I’ve made Gougères successfully with various flours including organic white whole wheat flour, organic whole wheat pastry flour, and a gluten-free flour blend (such as Cup4Cup), or my homemade gluten-free blend (see the detailed note below for instructions). For optimal results in baking, I always prefer to use organic flours. Regardless of your flour choice, you will definitely need baking parchment paper for this recipe to ensure your Gougères don’t stick and puff up properly.
Homemade GF Flour Blend
If you prefer to blend your own gluten-free flour for Gougères, here is my carefully developed recipe. For precise measurements, which are critical in gluten-free baking, you will absolutely need a digital scale. Accurately weigh out the following ingredients: 40 grams of brown rice flour, 35 grams of sweet rice flour, 25 grams of quinoa flour, 20 grams of cornstarch, and 24 grams of tapioca flour.
Whisk all these flours together thoroughly until they are perfectly blended. You can easily do this all in one bowl using the tare feature on your digital scale, making the process quick and efficient. I have found Bob’s Red Mill flours to be excellent for this blend. This recipe yields enough flour mix for several batches of Gougères.
Once prepared, store the remaining flour blend in an airtight container, clearly labeled and dated, for future baking. When using this blend in the Gougères recipe, you will need approximately 72 grams of this homemade blend to substitute for the whole wheat pastry flour or the pre-made gluten-free flour blend specified in the main ingredient list.
